2012 HONDA CR-V ECO mode
[x] Cancel search: ECO modePage 114 of 361

113
uuOperating the Switches Around the Steering WheeluLight Switches
Controls
Automatic lighting control can be used when
the ignition switch is in ON (w.
When you turn the light switch to AUTO, the
headlights and other exterior lights will switch
on and off automatically depending on the
ambient brightness.
uYou can change the auto light sensitivity
setting.
2 Customized Features P. 84
The headlights, all other exterior lights, and the instrument panel lights turn off
within 15 seconds after you remove the key and close the driver's door.
uYou can change the headlight auto off timer setting.
2 Customized Features P. 84
If you turn the ignition switch to LOCK
(0 with the headlight switch on, but do not
open the door, the lights turn off after 10 minutes (3 minutes, if the switch is in the AUTO position).
The lights turn on again when you unlock or open the driver's door. If you unlock
the door, but do not open it within 15 seconds, the lights go off. If you open the
driver's door, you will hear a lights on reminder chime.
■Automatic Lighting Control *1Automatic Lighting Control
*
We recommend that you turn on the lights manually
when driving at night, in a dense fog, or in dark areas
such as long tunnels or parking facilities.
The light sensor is in the location shown below.
Do not cover this light sensor with anything;
otherwise, the automatic lighting system may not
work properly.
Adjust the auto light sensitivity as follows:
SettingThe exterior lights come on
when the ambient light is at
MAXHIGHMIDLOWMIN
Light Sensor
Bright
Dark
■Automatic Lighting Off Feature
* Not available on all models
Page 116 of 361

115
uuOperating the Switches Around the Steering WheeluWipers and Washers
Continued
Controls
Wipers and WashersThe windshield wipers and washers can be
used when the ignition switch is in ON
(w.
■ MIST
The wipers run at high speed until you release
the lever.
■ Wiper switch (OFF, INT, LO, HI)
Change the wiper switch setting according to
the amount of rain.
■ Adjusting the delay *
Turn the adjustment ring to adjust the wiper
delay. ■ Washer
Sprays while you pull the lever toward you.
When you release the lever, the wipers make
two or three more sweeps before stopping.
■Front Wiper/Washer1Wipers and Washers
NOTICEDo not use the wipers when the windshield is dry.
The windshield will get scratched, or the rubber
blades will get damaged.
NOTICEIn cold weather, the blades may freeze to the
windshield, becoming stuck.
Operating the wipers in this condition may damage
the wipers. Use the defroster to warm the
windshield, then turn the wipers on.
Turn the washers off if no washer fluid comes out.
The pump may get damaged.
If the vehicle speeds up while the wipers are
operating intermittently, the length of the wipe
interval shortens. When the vehicle starts moving, the
wipers make a single sweep.
When the vehicle speeds up, the wiper operation’s
shortest delay setting ( ) and the LO setting become
the same.
Models with intermittent time adjustment ring
Intermittent Time
Adjustment Ring *
MIST
INT : Low speed with
intermittent
OFF
LO : Low speed wipe
HI : High speed wipe
Pull to use
washer.
Long delay
Short delay
* Not available on all models
Page 120 of 361

119
uuOperating the Switches Around the Steering WheeluECON Button
Controls
ECON ButtonThe ECON button turns the ECON mode on
and off.
The ECON mode helps you improve your fuel
economy by adjusting the performance of the
engine, transmission, air conditioning system,
and cruise control.
Adjusting the Steering Wheel
The steering wheel height and distance from your body can be adjusted so that you
can comfortably grip the steering wheel in an appropriate driving posture. 1.Pull the steering wheel adjustment lever up.
uThe steering wheel adjustment lever is
under the steering column.
2. Move the steering wheel up or down, and
in or out.
uMake sure you can see the instrument
panel gauges and indicators.
3. Push the steering wheel adjustment lever
down to lock the steering wheel in position.
uAfter adjusting the position, make sure
you have securely locked the steering
wheel in place by trying to move it up,
down, in, and out.
1Adjusting the Steering Wheel
Make any steering wheel adjustments before you
start driving.
3WARNING
Adjusting the steering wheel position while
driving may cause you to lose control of the
vehicle and be seriously injured in a crash.
Adjust the steering wheel only when the
vehicle is stopped.To adjust
To lockLever
Page 123 of 361

122
Controls
Adjusting the Seats
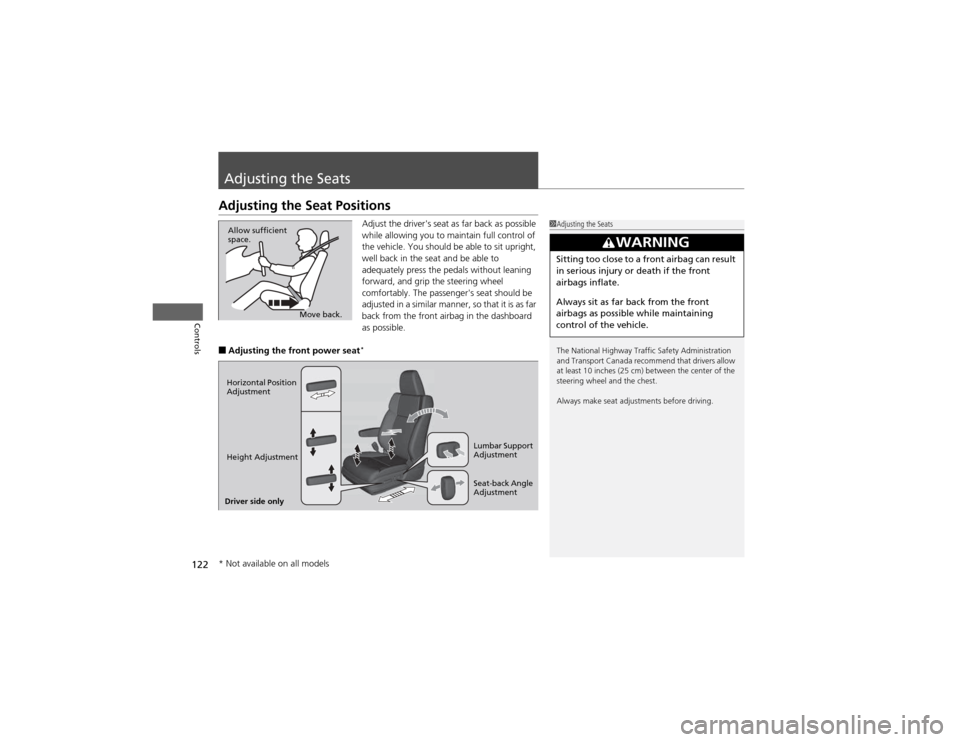
Adjusting the Seat PositionsAdjust the driver's seat as far back as possible
while allowing you to maintain full control of
the vehicle. You should be able to sit upright,
well back in the seat and be able to
adequately press the pedals without leaning
forward, and grip the steering wheel
comfortably. The passenger's seat should be
adjusted in a similar manner, so that it is as far
back from the front airbag in the dashboard as possible.
■ Adjusting the front power seat *
1Adjusting the Seats
The National Highway Traffic Safety Administration
and Transport Canada recommend that drivers allow
at least 10 inches (25 cm) between the center of the
steering wheel and the chest.
Always make seat adjustments before driving.
3WARNING
Sitting too close to a front airbag can result
in serious injury or death if the front
airbags inflate.
Always sit as far back from the front
airbags as possible while maintaining
control of the vehicle.
Move back.
Allow sufficient
space.
Horizontal Position
Adjustment
Height Adjustment
Seat-back Angle
Adjustment
Driver side only Lumbar Support
Adjustment
* Not available on all models
Page 145 of 361

uuHeating and Cooling System*uUsing Vents, Heating and A/C
144
Controls
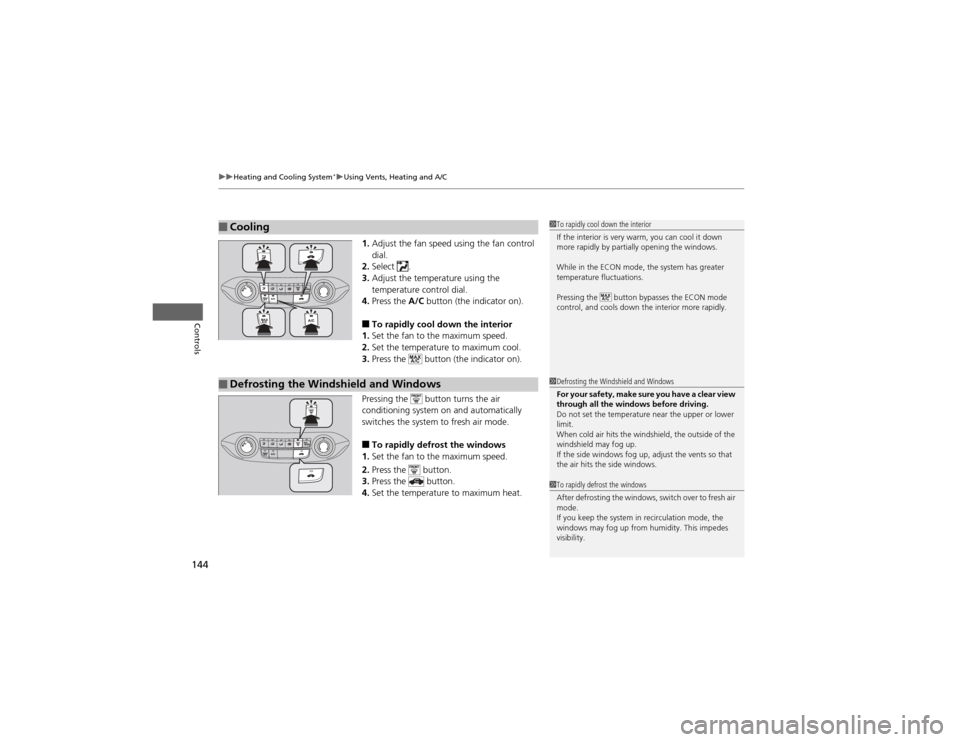
1. Adjust the fan speed using the fan control dial.
2. Select .
3. Adjust the temperature using the
temperature control dial.
4. Press the A/C button (the indicator on).
■ To rapidly cool down the interior
1. Set the fan to the maximum speed.
2. Set the temperature to maximum cool.
3. Press the button (the indicator on).
Pressing the button turns the air
conditioning system on and automatically
switches the system to fresh air mode. ■ To rapidly defrost the windows
1. Set the fan to the maximum speed.
2. Press the button.
3. Press the button.
4. Set the temperature to maximum heat.
■Cooling1To rapidly cool down the interior
If the interior is very warm, you can cool it down
more rapidly by partially opening the windows.
While in the ECON mode, the system has greater
temperature fluctuations.
Pressing the button bypasses the ECON mode
control, and cools down the interior more rapidly.
■Defrosting the Windshield and Windows1Defrosting the Windshield and Windows
For your safety, make sure you have a clear view
through all the windows before driving.
Do not set the temperature near the upper or lower
limit.
When cold air hits the windshield, the outside of the windshield may fog up.
If the side windows fog up, adjust the vents so that
the air hits the side windows.
1To rapidly defrost the windows
After defrosting the windows, switch over to fresh air
mode.
If you keep the system in recirculation mode, the
windows may fog up from humidity. This impedes
visibility.
Page 146 of 361

145
Continued
Controls
Climate Control System *
Using Automatic Climate Control
The automatic climate control system maintains the interior temperature you select.
The system also selects the proper mix of heated or cooled air that will as quickly as
possible, raise or lower the interior temperature to your preference.
Use the system when the engine is running. 1.
Press the AUTO button.
2. Adjust the interior temperature using the driver's side or passenger's side control dial.
3. Press the button to cancel.
■ Switching between the recirculation and fresh air modes
Press the button and switch the mode depending on environmental conditions.
Recirculation Mode (indicat or on) : Recirculates air from the vehicle’s interior
through the system.
Fresh Air Mode (indicator off): Maintains outside ventilation. Keep the system in
fresh air mode in normal situations.
1Using Automatic Climate Control
If any buttons are pressed while using the climate
control system in AUTO, the function of the button
that was pressed will take priority.
The AUTO indicator will go off, but functions
unrelated to the button that was pressed will be
controlled automatically.
To prevent cold air from blowing in from outside, the
fan may not start immediately when the AUTO
button is pressed.
Once you have set the desired temperature, do not
use the temperature control switches more than necessary.
Doing so may delay the time it takes to reach the set
temperature.
If the interior is very warm, you can cool it down
more rapidly by partially opening the windows,
turning the system on AUTO, and setting the
temperature to low. Change the fresh mode to
recirculation mode until the temperature cools down.
When you set the temperature to the lower or upper
limit, Lo or Hi is displayed.
Pressing the button switches the climate
control system between on and off. When turned on,
the system returns to your last selection.
While in the ECON mode, the system has greater
temperature fluctuations.
Floor and
defroster vents
Floor vents
Dashboard and
floor vents
Dashboard vents
AUTO Button
Driver's Side
Temperature
Control Dial Passenger's Side
Temperature
Control Dial
/ (Fan Control) Buttons
(Recirculation) Button
A/C (Air Conditioning) Button
* Not available on all models
Page 152 of 361

151
uuAudio SystemuUSB Adapter Cable
Features
USB Adapter Cable1.Unclip the USB connector and loosen the
adapter cable.
2. Install the iPod ® dock connector or the USB
flash drive to the USB connector.
Auxiliary Input Jack *
Use the jack to connect standard audio devices. 1.Open the AUX cover.
2. Connect a standard audio device to the
input jack using a 1/8 inch (3.5 mm) stereo
miniplug.
uThe audio system automatically switches
to the AUX mode.
1USB Adapter Cable
• Do not leave the iPod ® or USB flash drive in the
vehicle. Direct sunlight and high temperatures may damage it.
• Do not use an extension cable with the USB
adapter cable.
• Do not connect the iPod ®
or USB flash drive using a
hub.
• Do not use a device such as a card reader or hard
disk drive, as the device or your files may be damaged.
• We recommend backing up your data before using
the device in your vehicle.
• Displayed messages may vary depending on the
device model and software version.
If the audio system does not recognize the iPod ®, try
reconnecting it a few times or reboot the device. To
reboot, follow the manufacturer's instructions provided with the iPod ® or visit www.apple.com/
ipod .
1Auxiliary Input Jack *
To switch the mode, press any of the audio mode
buttons. You can return to the AUX mode by
pressing the AUX button.
You cannot use the auxiliary input jack if you replace
the audio system.
State or local laws may limit the circumstances in
which you can launch or control your attached audio device.
* Not available on all models
Page 153 of 361

152
uuAudio SystemuAudio Antenna
Features
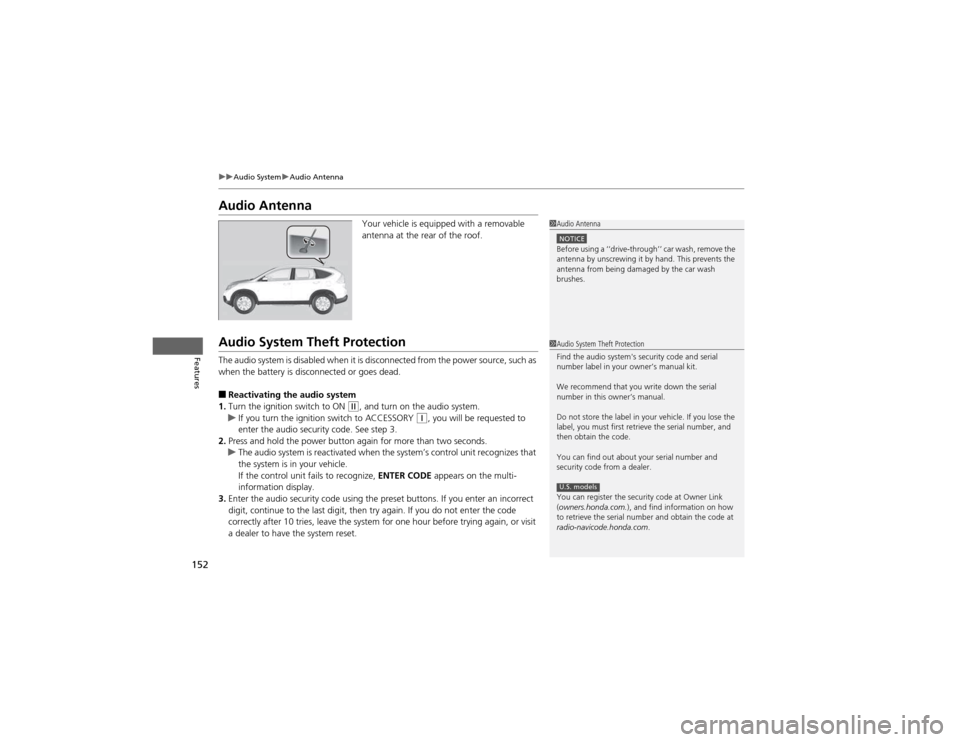
Audio AntennaYour vehicle is equipped with a removable
antenna at the rear of the roof.
Audio System Theft Protection
The audio system is disabled when it is disconnected from the power source, such as
when the battery is disconnected or goes dead. ■Reactivating the audio system
1. Turn the ignition switch to ON
(w , and turn on the audio system.uIf you turn the ignition switch to ACCESSORY (q, you will be requested to
enter the audio security code. See step 3.
2. Press and hold the power button again for more than two seconds.
uThe audio system is reactivated when the system’s control unit recognizes that
the system is in your vehicle.
If the control unit fails to recognize, ENTER CODE appears on the multi-
information display.
3. Enter the audio security code using the preset buttons. If you enter an incorrect
digit, continue to the last digit, then try again. If you do not enter the code
correctly after 10 tries, leave the system for one hour before trying again, or visit
a dealer to have the system reset.
1Audio Antenna
NOTICEBefore using a ‘‘drive-through’’ car wash, remove the
antenna by unscrewing it by hand. This prevents the
antenna from being damaged by the car wash brushes.
1Audio System Theft Protection
Find the audio system's security code and serial
number label in your owner’s manual kit.
We recommend that you write down the serial
number in this owner’s manual.
Do not store the label in your vehicle. If you lose the
label, you must first retrieve the serial number, and
then obtain the code.
You can find out about your serial number and
security code from a dealer.
You can register the security code at Owner Link (owners.honda.com. ), and find information on how
to retrieve the serial number and obtain the code at
radio-navicode.honda.com .
U.S. models