Page 22 of 345
21
Quick Reference Guide
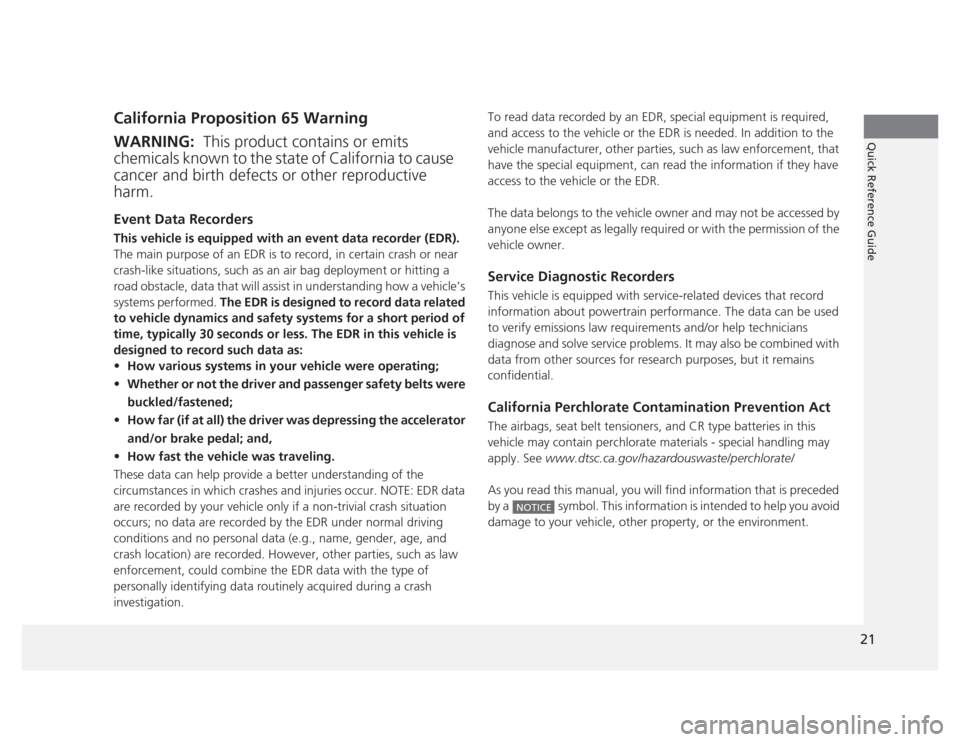
California Proposition 65 Warning Event Data Recorders
This vehicle is equipped with an event data recorder (EDR).
The main purpose of an EDR is to record, in certain crash or near
crash-like situations, such as an air bag deployment or hitting a
road obstacle, data that will assist in understanding how a vehicle’s
systems performed. The EDR is designed to record data related
to vehicle dynamics and safety systems for a short period of
time, typically 30 seconds or less. The EDR in this vehicle is
designed to record such data as: • How various systems in your vehicle were operating;
• Whether or not the driver and passenger safety belts were
buckled/fastened;
• How far (if at all) the driver was depressing the accelerator
and/or brake pedal; and,
• How fast the vehicle was traveling.
These data can help provide a better understanding of the
circumstances in which crashes and injuries occur. NOTE: EDR data
are recorded by your vehicle only if a non-trivial crash situation
occurs; no data are recorded by the EDR under normal driving
conditions and no personal data (e.g., name, gender, age, and
crash location) are recorded. However, other parties, such as law
enforcement, could combine the EDR data with the type of
personally identifying data routinely acquired during a crash
investigation.
WARNING: This product contains or emits
chemicals known to the state of California to cause
cancer and birth defects or other reproductive harm.
To read data recorded by an EDR, special equipment is required,
and access to the vehicle or the EDR is needed. In addition to the
vehicle manufacturer, other parties, such as law enforcement, that
have the special equipment, can read the information if they have
access to the vehicle or the EDR.
The data belongs to the vehicle owner and may not be accessed by
anyone else except as legally required or with the permission of the
vehicle owner.
Service Diagnostic Recorders
This vehicle is equipped with service-related devices that record
information about powertrain performance. The data can be used
to verify emissions law requirements and/or help technicians
diagnose and solve service problems. It may also be combined with
data from other sources for research purposes, but it remains
confidential.
California Perchlorate Contamination Prevention Act
The airbags, seat belt tensioners, and CR type batteries in this
vehicle may contain perchlorate materials - special handling may apply. See www.dtsc.ca.gov/hazardouswaste/perchlorate/
As you read this manual, you will find information that is preceded
by a symbol. This information is intended to help you avoid
damage to your vehicle, other property, or the environment.
NOTICE
Page 67 of 345

66
Instrument Panel
Indicators
IndicatorNameOn/BlinkingExplanationMessage*
Parking Brake and Brake
System Indicator
●
Comes on for a few seconds when
you turn the ignition switch to ON
(w , then goes off.
● Comes on when the parking brake
is applied, and goes off when it is released.
● Comes on when the brake fluid
level is low.
● Comes on if there is a problem
with the brake system.
● The beeper sounds and the
indicator comes on if you drive
with the parking brake not fully released.
●
Comes on while driving - Make sure
the parking brake is released. Check the
brake fluid level. 2What to do when the indicator
comes on P. 315
● Comes on along with the ABS
indicator - Have the vehicle checked by a
dealer. 2If the Brake System Indicator Comes On P. 315
Low Oil Pressure
Indicator
●
Comes on when you turn the
ignition switch to ON
(w , and goes
off when the engine starts.
● Comes on when the engine oil
pressure is low.
● Comes on while driving - Immediately
stop in a safe place. 2If the Low Oil Pressure Indicator
Comes On P. 313
U.S.
Canada
* Not available on all models
Page 70 of 345

69
uuIndicatorsu
Continued
Instrument Panel
IndicatorNameOn/BlinkingExplanationMessage*
ABS (Anti-lock
Brake System)
Indicator
●
Comes on for a few seconds when
you turn the ignition switch to ON
(w , then goes off.
● If it comes on at any other time, there
is a problem with the ABS.
● Stays on constantly - Have the
vehicle checked by a dealer. With this
indicator on, your vehicle still has
normal braking ability but no anti-lock
function. 2ABS (Anti-lock Brake System)
P. 231
Supplemental
Restraint System
Indicator
● Comes on for a few seconds when
you turn the ignition switch to ON
(w , then goes off.
● Comes on if a problem with any of
the following is detected:-Supplemental restraint system
- Side airbag system
- Side curtain airbag system
- Seat belt tensioner
●
Stays on constantly or does not
come on at all - Have the vehicle
checked by a dealer.
High Temperature
Indicator
● Comes on for a few seconds when
you turn the ignition switch to ON
(w , then goes off.
● Blinks when the engine coolant
temperature goes up, and stays on if
the temperature continues to rise.
● Blinks while driving - Drive slowly to
prevent overheating.
● Stays on while driving - Immediately
stop in a safe place and allow the
engine to cool. 2Overheating P. 311
* Not available on all models
Page 106 of 345
105
uuLocking and Unlocking the DoorsuAuto Door Locking/Unlocking*
Controls
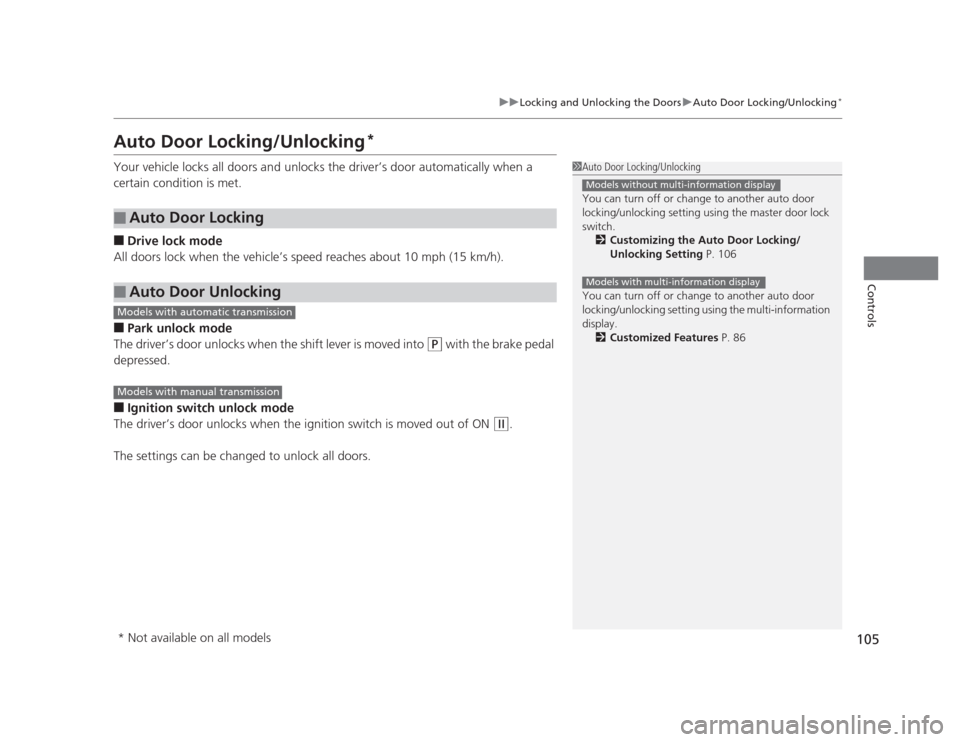
Auto Door Locking/Unlocking *
Your vehicle locks all doors and unlo cks the driver’s door automatically when a
certain condition is met. ■ Drive lock mode
All doors lock when the vehicle’s speed reaches about 10 mph (15 km/h). ■ Park unlock mode
The driver’s door unlocks when the shift lever is moved into
(P with the brake pedal
depressed.
■ Ignition switch unlock mode
The driver’s door unlocks when the ignition switch is moved out of ON
(w .
The settings can be changed to unlock all doors.
■Auto Door Locking
■Auto Door Unlocking
1Auto Door Locking/Unlocking
You can turn off or change to another auto door
locking/unlocking setting using the master door lock
switch. 2 Customizing the Auto Door Locking/
Unlocking Setting P. 106
You can turn off or change to another auto door
locking/unlocking setting using the multi-information
display. 2 Customized Features P. 86
Models without multi-information display
Models with multi-information display
Models with automatic transmission
Models with manual transmission
* Not available on all models
Page 107 of 345
106
uuLocking and Unlocking the DoorsuCustomizing the Auto Door Locking/Unlocking Setting*
Controls
Customizing the Auto
Door Locking/Unlocking Setting *
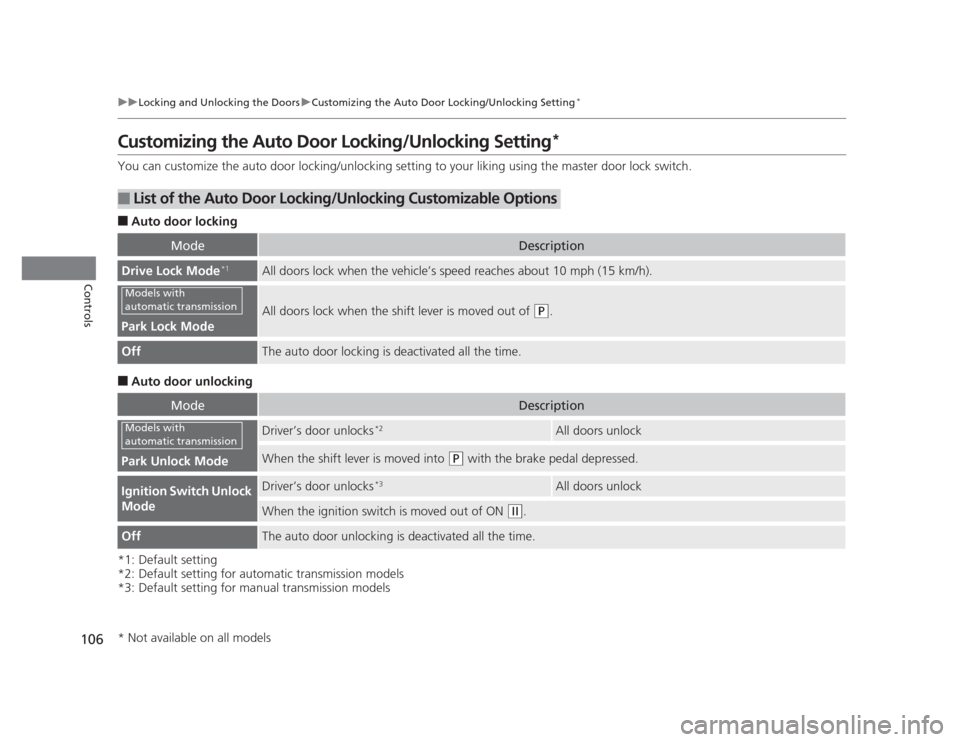
You can customize the auto door locking/unlocking setting to your liking using the master door lock switch. ■ Auto door locking
■ Auto door unlocking
*1: Default setting
*2: Default setting for automatic transmission models
*3: Default setting for manual transmission models
■List of the Auto Door Locking/Unlocking Customizable Options
ModeDescription
Drive Lock Mode *1All doors lock when the vehicle’s speed reaches about 10 mph (15 km/h).
Park Lock Mode
All doors lock when the shift lever is moved out of (P
.
OffThe auto door locking is deactivated all the time.
ModeDescription
Park Unlock Mode
Driver’s door unlocks *2All doors unlock
When the shift lever is moved into (P
with the brake pedal depressed.
Ignition Switch Unlock
ModeDriver’s door unlocks *3All doors unlock
When the ignition switch is moved out of ON (w
.
OffThe auto door unlocking is deactivated all the time.
Models with
automatic transmission
Models with
automatic transmission
* Not available on all models
Page 108 of 345
107
uuLocking and Unlocking the DoorsuCustomizing the Auto Door Locking/Unlocking Setting*
Continued
Controls
*1: Default setting
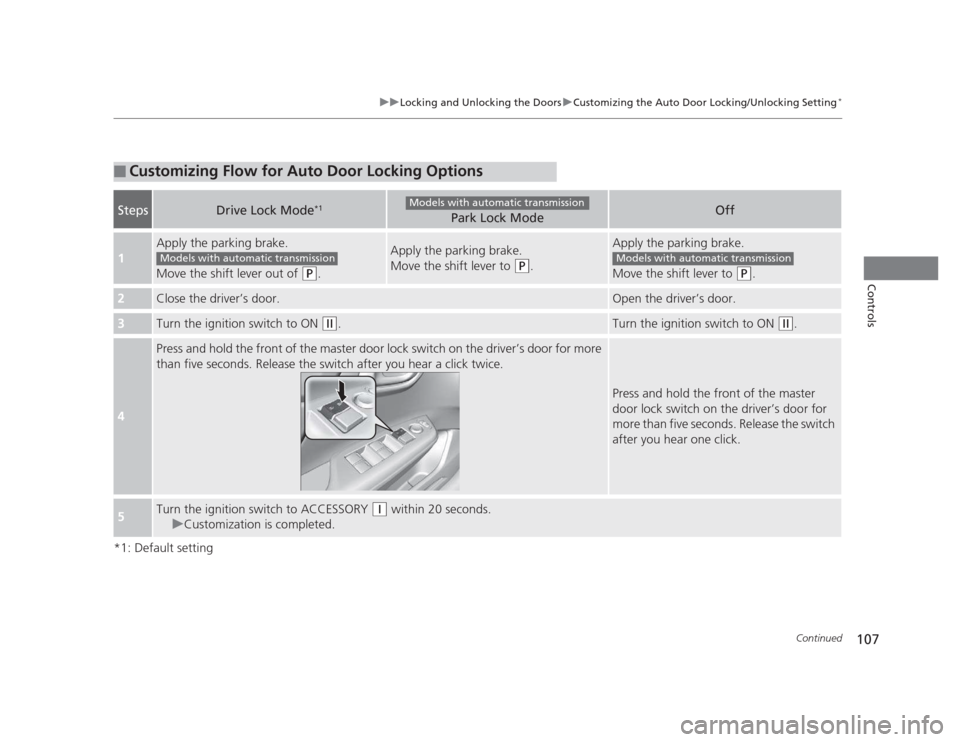
■Customizing Flow for Auto Door Locking Options
StepsDrive Lock Mode*1Park Lock ModeOff
1
Apply the parking brake.
Move the shift lever out of
(P
.
Apply the parking brake.
Move the shift lever to
(P.
Apply the parking brake.
Move the shift lever to
(P .
2Close the driver’s door.Open the driver’s door.
3Turn the ignition switch to ON (w.Turn the ignition switch to ON (w.
4
Press and hold the front of the master door lock switch on the driver’s door for more
than five seconds. Release the switch after you hear a click twice.
Press and hold the front of the master
door lock switch on the driver’s door for
more than five seconds. Release the switch
after you hear one click.
5Turn the ignition switch to ACCESSORY (q within 20 seconds.
uCustomization is completed.
Models with automatic transmission
Models with automatic transmissionModels with automatic transmission
Page 109 of 345
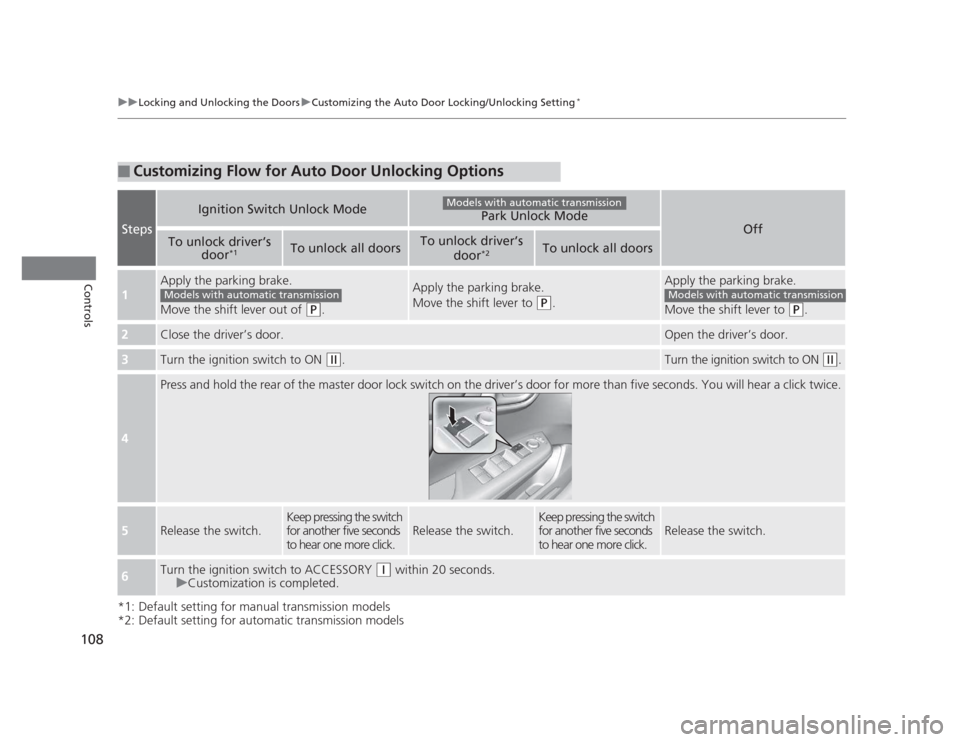
108
uuLocking and Unlocking the DoorsuCustomizing the Auto Door Locking/Unlocking Setting*
Controls
*1: Default setting for manual transmission models
*2: Default setting for automatic transmission models
■Customizing Flow for Auto Door Unlocking Options
Steps
Ignition Switch Unlock ModePark Unlock Mode
Off
To unlock driver’s
door*1To unlock all doorsTo unlock driver’s
door*2To unlock all doors
1
Apply the parking brake.
Move the shift lever out of
(P
.
Apply the parking brake.
Move the shift lever to
(P.
Apply the parking brake.
Move the shift lever to
(P.
2Close the driver’s door.Open the driver’s door.
3Turn the ignition switch to ON (w .Turn the ignition switch to ON (w.
4
Press and hold the rear of the master door lock switch on the driver’s door for more than five seconds. You will hear a click t wice.
5Release the switch.
Keep pressing the switch
for another five seconds
to hear one more click.
Release the switch.
Keep pressing the switch
for another five seconds
to hear one more click.
Release the switch.
6Turn the ignition switch to ACCESSORY (q within 20 seconds.
uCustomization is completed.
Models with automatic transmission
Models with automatic transmissionModels with automatic transmission
Page 121 of 345
120
uuOperating the Switches Around the Steering WheeluFog Lights*
Controls
Fog Lights *
When the low beam headlights are on, turn
the fog light switch on to use the fog lights.
Daytime Running Lights
The high beam headlights come on slightly dimmer than normal when the following
conditions have been met:•The ignition switch is in ON
(w .
• The headlight switch is off, or in .
• The parking brake is released.
The lights remain on even if you set the parking brake. Turning off the ignition
switch will turn off the daytime running lights.
The high beam headlights return to the origin al brightness once the headlight
switch is turned on.
1Fog Lights
When the fog lights are on, the indicator in the
instrument panel will be on.
They go off when the headlights turn off, or when
the daytime running lights are on. 2 Fog Light Indicator *
P. 73
Fog Light Switch
* Not available on all models