2012 GMC SIERRA 1500 ignition
[x] Cancel search: ignitionPage 327 of 556
Black plate (51,1)GMC Sierra Owner Manual - 2012 - CRC - 11/15/11
Driving and Operating 9-51
Notice:Shifting the transmission
into gear before the requested
mode indicator light has stopped
flashing could damage the
transfer case. To help avoid
damaging the vehicle, always wait
for the mode indicator lights to
stop flashing before shifting the
transmission into gear.
It is typical for the vehicle to exhibit
significant engagement noise and
bump when shifting between
Four-Wheel Drive Low and
Four-Wheel Drive High ranges or
from N (Neutral) with the engine
running.
If the knob is turned to the
Four-Wheel Drive Low position
when the vehicle is in gear and/or
moving more than 5 km/h (3 mph),
the Four-Wheel Drive Low indicator
light will flash for 30 seconds
and not complete the shift. After
30 seconds the transfer case
will shift to Four-Wheel Drive
High mode. Shifting Out of Four-Wheel
Drive Low
To shift from Four-Wheel Drive Low
to Four-Wheel Drive High, AUTO or
Two-Wheel Drive High, the vehicle
must be stopped or moving less
than 5 km/h (3 mph) with the
transmission in N (Neutral) and
the ignition in ON/RUN. The
preferred method for shifting
out of Four-Wheel Drive Low
is to have the vehicle moving
1.6 to 3.2 km/h (1 to 2 mph). Turn the
knob to the Four-Wheel Drive High,
AUTO or Two-Wheel Drive High
position. You must wait for the
Four-Wheel Drive High, AUTO or
Two-Wheel Drive High indicator light
to stop flashing and remain on
before shifting the transmission
into gear.
Notice:
Shifting the transmission
into gear before the requested
mode indicator light has stopped
flashing could damage the
transfer case. To help avoid damaging the vehicle, always wait
for the mode indicator lights to
stop flashing before shifting the
transmission into gear.
It is typical for the vehicle to exhibit
significant engagement noise
and bump when shifting between
Four-Wheel Drive Low and
Four-Wheel Drive High ranges or
from N (Neutral) with the engine
running.
If the knob is turned to the
Four-Wheel Drive High, AUTO,
or Two-Wheel Drive High switch
position when the vehicle is
in gear and/or moving more than
5 km/h (3 mph), the Four-Wheel
Drive High, AUTO or Two-Wheel
Drive High indicator light will flash
for 30 seconds but will not complete
the shift.
Page 328 of 556
Black plate (52,1)GMC Sierra Owner Manual - 2012 - CRC - 11/15/11
9-52 Driving and Operating
Shifting into Neutral
To shift the transfer case to
N (Neutral) do the following:
1. Make sure the vehicle is parkedso that it will not roll.
2. Set the parking brake and apply the regular brake pedal. See
Parking Brake on page 9‑54 for
more information.
3. Start the vehicle or turn the ignition in ON/RUN.
4. Put the transmission in N (Neutral).
5. Shift the transfer case to Two-Wheel Drive High.
6. Turn the transfer case dial clockwise to N (Neutral) until it
stops and hold it there until
the N (Neutral) light starts
blinking. This will take at least
10 seconds. Then slowly release
the dial to the four low position.
The N (Neutral) light will come
on when the transfer case shift
to N (Neutral) is complete. 7. If the engine is running, make
sure that the transfer case is in
N (Neutral) by shifting the
transmission to R (Reverse) for
one second, then shift the
transmission to D (Drive) for
one second.
8. Turn the ignition to ACC/ ACCESSORY, which will turn
the engine off.
9. Place the transmission shift lever in P (Park).
10. Release the parking brake prior to moving the vehicle.
11. Turn the ignition to LOCK/OFF.
Shifting Out of Neutral
To shift out of N (Neutral) do the
following:
1. Set the parking brake and apply the regular brake pedal.
2. Turn the ignition to ON/RUN with the engine off, and shift the
transmission to N (Neutral). 3. Turn the transfer case dial
to Two-Wheel Drive High,
Four-Wheel Drive High,
or AUTO.
After the transfer case has
shifted out of N (Neutral), the
N (Neutral) light will go out.
4. Release the parking brake prior to moving the vehicle.
Notice: Shifting the transmission
into gear before the requested
mode indicator light has stopped
flashing could damage the
transfer case. To help avoid
damaging the vehicle, always wait
for the mode indicator lights to
stop flashing before shifting the
transmission into gear.
5. Start the engine and shift the transmission to the desired
position.
Page 330 of 556
Black plate (54,1)GMC Sierra Owner Manual - 2012 - CRC - 11/15/11
9-54 Driving and Operating
Parking Brake
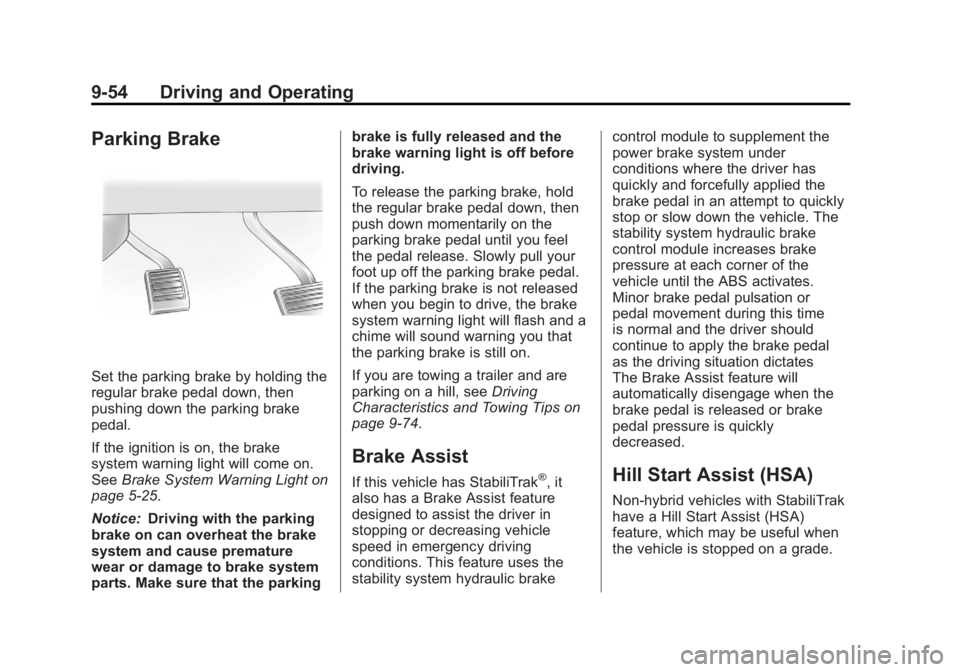
Set the parking brake by holding the
regular brake pedal down, then
pushing down the parking brake
pedal.
If the ignition is on, the brake
system warning light will come on.
SeeBrake System Warning Light on
page 5‑25.
Notice: Driving with the parking
brake on can overheat the brake
system and cause premature
wear or damage to brake system
parts. Make sure that the parking brake is fully released and the
brake warning light is off before
driving.
To release the parking brake, hold
the regular brake pedal down, then
push down momentarily on the
parking brake pedal until you feel
the pedal release. Slowly pull your
foot up off the parking brake pedal.
If the parking brake is not released
when you begin to drive, the brake
system warning light will flash and a
chime will sound warning you that
the parking brake is still on.
If you are towing a trailer and are
parking on a hill, see
Driving
Characteristics and Towing Tips on
page 9‑74.
Brake Assist
If this vehicle has StabiliTrak®, it
also has a Brake Assist feature
designed to assist the driver in
stopping or decreasing vehicle
speed in emergency driving
conditions. This feature uses the
stability system hydraulic brake control module to supplement the
power brake system under
conditions where the driver has
quickly and forcefully applied the
brake pedal in an attempt to quickly
stop or slow down the vehicle. The
stability system hydraulic brake
control module increases brake
pressure at each corner of the
vehicle until the ABS activates.
Minor brake pedal pulsation or
pedal movement during this time
is normal and the driver should
continue to apply the brake pedal
as the driving situation dictates
The Brake Assist feature will
automatically disengage when the
brake pedal is released or brake
pedal pressure is quickly
decreased.Hill Start Assist (HSA)
Non‐hybrid vehicles with StabiliTrak
have a Hill Start Assist (HSA)
feature, which may be useful when
the vehicle is stopped on a grade.
Page 336 of 556
Black plate (60,1)GMC Sierra Owner Manual - 2012 - CRC - 11/15/11
9-60 Driving and Operating
Reducing Speed While Using
Cruise Control
If the cruise control system is
already activated,
.Press and hold the SET–button
on the steering wheel until the
desired lower speed is reached,
then release it.
.To slow down in small amounts,
press the SET– button on the
steering wheel briefly. Each time
this is done, the vehicle goes
about 1.6 km/h (1 mph) slower.
Passing Another Vehicle While
Using Cruise Control
Use the accelerator pedal to
increase the vehicle speed. When
you take your foot off the pedal,
the vehicle will slow down to the
previous set cruise speed.
Using Cruise Control on Hills
How well the cruise control works
on hills depends on the vehicle
speed, the load, and the steepness
of the hills. When going up steep hills, pressing the accelerator pedal
may be necessary to maintain
vehicle speed.
While going downhill:
.Vehicles with a four speed
automatic transmission may
need to have the brakes applied
or the transmission shifted
to a lower gear to keep the
speed down.
.Vehicles with a six speed
automatic transmission have a
Cruise Grade Braking feature
that may automatically shift to a
lower gear to keep the speed
down. It may be necessary to
apply the brake or manually
shift the transmission to a lower
gear. The vehicle may shift to a
higher gear when grade braking
assistance is no longer required.
Cruise Grade Braking is not
available while in Range
Selection Mode. This feature is
active when the exhaust brake
is enabled (if equipped). See
"Range Selection Mode" under
Manual Mode on page 9‑38.
When the brakes are manually
applied the cruise control is
disengaged.
Ending Cruise Control
There are three ways to end cruise
control:.To disengage cruise control;
step lightly on the brake pedal.
.Press[on the steering wheel.
.To turn off the cruise control,
press
Ion the steering wheel.
Erasing Speed Memory
The cruise control set speed
is erased from memory by
pressing
Ior if the ignition is
turned off.
Page 376 of 556
Black plate (100,1)GMC Sierra Owner Manual - 2012 - CRC - 11/15/11
9-100 Driving and Operating
If the vehicle’s brake, antilock brake,
or StabiliTrak systems are not
functioning properly, the ITBC
system may not be fully functional
or may not function at all. Make
sure all of these systems are
fully operational to ensure full
functionality of the ITBC system.
The ITBC system is powered
through the vehicle's electrical
system. Turning the ignition off will
also turn off the ITBC system. The
ITBC system is fully functional
only when the ignition is in ON or
in RUN.
The ITBC system can only be used
with trailers with electric brakes.{WARNING
Connecting a trailer that is not
compatible with the ITBC system
may result in reduced or complete
loss of trailer braking. There
may be an increase in stopping
distance or trailer instability which
could result in personal injury or
damage to the vehicle, trailer,
or other property. An aftermarket
controller may be available for
use with trailers with surge, air,
or electric‐over‐hydraulic trailer
brake systems. To determine the
type of brakes on the trailer and
the availability of controllers,
check with your trailer
manufacturer or dealer.When trailering, make sure of the
following:.The ITBC system is used only
with trailers that are equipped
with electric brakes.
.All applicable local and federal
laws and regulations are
followed.
.All electrical and mechanical
connections to the trailer are
made correctly.
.The trailer
’s brakes are in proper
working condition.
.The trailer and vehicle are
properly loaded for the towing
condition.
The ITBC system is a
factory-installed item. Out-of-factory
installation of this system should not
be attempted. GM is not responsible
for warranty or performance of the
system resulting from out-of-factory
installation.
Page 380 of 556
Black plate (104,1)GMC Sierra Owner Manual - 2012 - CRC - 11/15/11
9-104 Driving and Operating
7. Re-adjust Trailer Gain any timevehicle loading, trailer loading or
road surface conditions change
or if trailer wheel lock-up is
noticed at any time while towing.
Other ITBC-Related DIC Messages
In addition to displaying TRAILER
GAIN and TRAILER OUTPUT
through the DIC, trailer connection
and ITBC system status are
displayed on the DIC.
TRAILER CONNECTED: This
message will be briefly displayed
when a trailer with electric brakes is
first connected to the vehicle. This
message will automatically turn off
in about 10 seconds. The driver can
also acknowledge this message
before it automatically turns off.
CHECK TRAILER WIRING: This
message will be displayed if:
1. The ITBC system first determines connection to a
trailer with electric brakes and
then the trailer harness becomes
disconnected from the vehicle. If the disconnect occurs while
the vehicle is stationary, this
message will automatically turn
off in about 30 seconds. This
message will also turn off if
the driver acknowledges this
message or if the trailer harness
is re-connected.
If the disconnect occurs while
the vehicle is moving, this
message will continue until
the ignition is turned off. This
message will also turn off if
the driver acknowledges this
message or if the trailer harness
is re-connected.
2. There is an electrical fault in the wiring to the electric trailer
brakes. This message will
continue as long as there is
an electrical fault in the trailer
wiring. This message will
also turn off if the driver
acknowledges this message. To determine if the electrical fault
is on the vehicle side or trailer
side of the trailer wiring harness
connection, do the following:
1. Disconnect the trailer wiring
harness from the vehicle.
2. Turn the ignition off.
3. Wait 10 seconds, then turn the ignition back to RUN.
4. If the CHECK TRAILER WIRING message re-appears, the
electrical fault is on the
vehicle side.
If the CHECK TRAILER WIRING
message only re-appears when
connecting the trailer wiring
harness to the vehicle, the
electrical fault is on the
trailer side.
SERVICE TRAILER BRAKE
SYSTEM: This message will be
displayed when there is a problem
with the ITBC system. If this
message persists over multiple
ignition cycles, there is a problem
with the ITBC system. Take the
Page 381 of 556
Black plate (105,1)GMC Sierra Owner Manual - 2012 - CRC - 11/15/11
Driving and Operating 9-105
vehicle to an authorized GM dealer
to have the ITBC system diagnosed
and repaired.
If either the CHECK TRAILER
WIRING or SERVICE TRAILER
BRAKE SYSTEM message is
displayed while driving the vehicle,
power is no longer available to
the trailer brakes. When traffic
conditions allow, carefully pull the
vehicle over to the side of the road
and turn the ignition off. Check the
wiring connection to the trailer and
turn the ignition back on. If either of
these messages continues, either
the vehicle or trailer needs service.
An authorized GM dealer may
be able to diagnose and repair
problems with the trailer. However,
any diagnosis and repair of the
trailer is not covered under the
vehicle warranty. Please contact
your trailer dealer for assistance
with trailer repairs and trailer
warranty information.Trailer Sway
Control (TSC)
Non-hybrid vehicles with StabiliTrak
have a Trailer Sway Control (TSC)
feature. If the vehicle is towing a
trailer and the system detects
that the trailer is swaying, the
vehicle brakes are applied without
the driver pressing the brake
pedal. If the vehicle is equipped with
the Integrated Trailer Brake Control
(ITBC) system, StabiliTrak may also
apply the trailer brakes. The TCS/
StabiliTrak warning light will flash on
the instrument panel cluster to notify
the driver to reduce speed. If the
trailer continues to sway, StabiliTrak
will reduce engine torque to help
slow the vehicle. SeeStabiliTrak
®
System on page 9‑55 for more
information.
Adding non‐dealer accessories can
affect the vehicle performance. See
Accessories and Modifications on
page 10‑3 for more information.
Conversions and
Add-Ons
Add-On Electrical
Equipment
Notice:Do not add anything
electrical to the vehicle unless
you check with your dealer first.
Some electrical equipment can
damage the vehicle and the
damage would not be covered
by the vehicle's warranty. Some
add-on electrical equipment can
keep other components from
working as they should.
Add-on equipment can drain the
vehicle's 12‐volt battery, even if the
vehicle is not operating.
The vehicle has an airbag system.
Before attempting to add anything
electrical to the vehicle, see
Servicing the Airbag-Equipped
Vehicle on page 3‑36 andAdding
Equipment to the Airbag-Equipped
Vehicle on page 3‑37.
Page 387 of 556
Black plate (1,1)GMC Sierra Owner Manual - 2012 - CRC - 11/15/11
Vehicle Care 10-1
Vehicle Care
General Information
General Information . . . . . . . . . . 10-2
California Proposition65 Warning . . . . . . . . . . . . . . . . . 10-3
California Perchlorate Materials Requirements . . . . 10-3
Accessories and Modifications . . . . . . . . . . . . . . . 10-3
Vehicle Checks
Doing Your OwnService Work . . . . . . . . . . . . . . . 10-4
Hood . . . . . . . . . . . . . . . . . . . . . . . . 10-5
Engine Compartment Overview . . . . . . . . . . . . . . . . . . . 10-6
Engine Oil . . . . . . . . . . . . . . . . . . . 10-7
Engine Oil Life System . . . . . 10-10
Automatic Transmission Fluid (4-Speed Transmission) . . . 10-11
Automatic Transmission Fluid (6-Speed
Transmission) . . . . . . . . . . . . . 10-14
Engine Air Cleaner/Filter . . . . 10-17
Cooling System . . . . . . . . . . . . 10-18
Engine Coolant . . . . . . . . . . . . . 10-19
Engine Overheating . . . . . . . . 10-22 Overheated Engine
Protection
Operating Mode . . . . . . . . . . . 10-24
Engine Fan . . . . . . . . . . . . . . . . . 10-24
Power Steering Fluid . . . . . . . 10-25
Washer Fluid . . . . . . . . . . . . . . . 10-26
Brakes . . . . . . . . . . . . . . . . . . . . . 10-27
Brake Fluid . . . . . . . . . . . . . . . . . 10-28
Battery . . . . . . . . . . . . . . . . . . . . . 10-30
Four-Wheel Drive . . . . . . . . . . . 10-30
Front Axle . . . . . . . . . . . . . . . . . . 10-31
Rear Axle . . . . . . . . . . . . . . . . . . 10-32
Noise Control System . . . . . . 10-34
Starter Switch Check . . . . . . . 10-35
Automatic Transmission Shift Lock Control Function
Check . . . . . . . . . . . . . . . . . . . . . 10-35
Ignition Transmission Lock Check . . . . . . . . . . . . . . . . . . . . . 10-35
Park Brake and P (Park) Mechanism Check . . . . . . . . 10-36
Wiper Blade Replacement . . . . . . . . . . . . . . 10-36
Glass Replacement . . . . . . . . 10-37
Headlamp Aiming
Headlamp Aiming . . . . . . . . . . 10-37
Bulb Replacement
Bulb Replacement . . . . . . . . . . 10-39
Halogen Bulbs . . . . . . . . . . . . . . 10-39
Headlamps, Front Turn Signal, Sidemarker, and
Parking Lamps . . . . . . . . . . . . 10-39
Pick-Up Box Identification and Fender Marker
Lamps . . . . . . . . . . . . . . . . . . . . 10-40
Taillamps (Chassis Cab Models) . . . . . . . . . . . . . . . . . . . 10-40
Taillamps, Turn Signal, Stoplamps, and Back-Up
Lamps . . . . . . . . . . . . . . . . . . . . 10-41
Center High-Mounted Stoplamp (CHMSL) and
Cargo Lamp . . . . . . . . . . . . . . 10-42
License Plate Lamp . . . . . . . . 10-42
Replacement Bulbs . . . . . . . . . 10-43
Electrical System
Electrical System Overload . . . . . . . . . . . . . . . . . . 10-43
Fuses and Circuit Breakers . . . . . . . . . . . . . . . . . . 10-44
Engine Compartment Fuse Block . . . . . . . . . . . . . . . . . . . . . 10-44
Instrument Panel Fuse Block . . . . . . . . . . . . . . . . . . . . . 10-48