Page 261 of 454

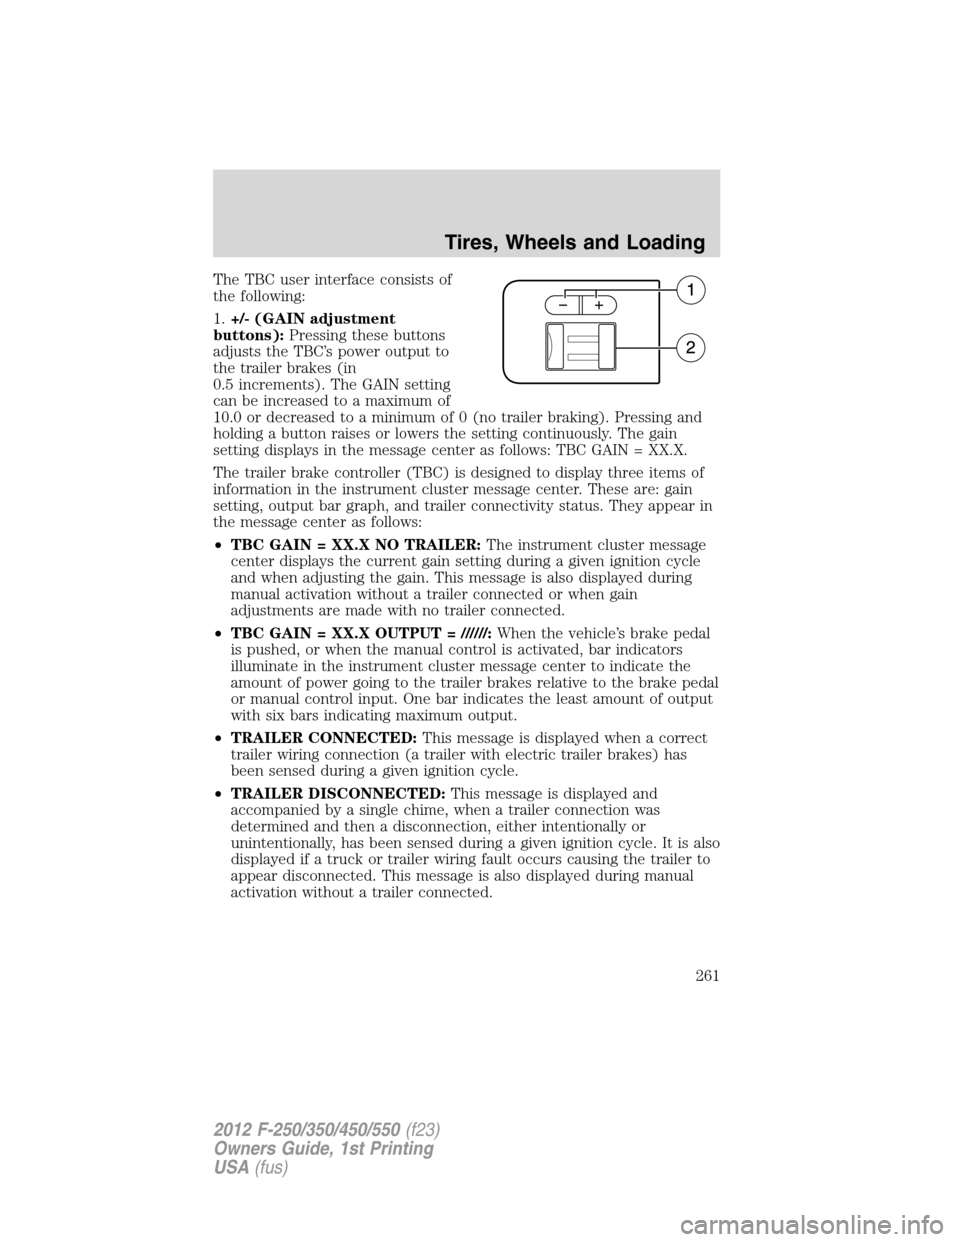
The TBC user interface consists of
the following:
1.+/- (GAIN adjustment
buttons):Pressing these buttons
adjusts the TBC’s power output to
the trailer brakes (in
0.5 increments). The GAIN setting
can be increased to a maximum of
10.0 or decreased to a minimum of 0 (no trailer braking). Pressing and
holding a button raises or lowers the setting continuously. The gain
setting displays in the message center as follows: TBC GAIN = XX.X.
The trailer brake controller (TBC) is designed to display three items of
information in the instrument cluster message center. These are: gain
setting, output bar graph, and trailer connectivity status. They appear in
the message center as follows:
•TBC GAIN = XX.X NO TRAILER:The instrument cluster message
center displays the current gain setting during a given ignition cycle
and when adjusting the gain. This message is also displayed during
manual activation without a trailer connected or when gain
adjustments are made with no trailer connected.
•TBC GAIN = XX.X OUTPUT = //////:When the vehicle’s brake pedal
is pushed, or when the manual control is activated, bar indicators
illuminate in the instrument cluster message center to indicate the
amount of power going to the trailer brakes relative to the brake pedal
or manual control input. One bar indicates the least amount of output
with six bars indicating maximum output.
•TRAILER CONNECTED:This message is displayed when a correct
trailer wiring connection (a trailer with electric trailer brakes) has
been sensed during a given ignition cycle.
•TRAILER DISCONNECTED:This message is displayed and
accompanied by a single chime, when a trailer connection was
determined and then a disconnection, either intentionally or
unintentionally, has been sensed during a given ignition cycle. It is also
displayed if a truck or trailer wiring fault occurs causing the trailer to
appear disconnected. This message is also displayed during manual
activation without a trailer connected.
Tires, Wheels and Loading
261
2012 F-250/350/450/550(f23)
Owners Guide, 1st Printing
USA(fus)
Page 262 of 454

2.Manual control lever:Slide the control lever to the left to activate
power to the trailer’s electric brakes independent of the tow vehicle’s
brakes (see the followingProcedure for adjusting GAINsection for
instructions on proper use of this feature). If the manual control is
activated while the brake is also applied, the greater of the two inputs
determines the power sent to the trailer brakes.
•Stop lamps:Activating the TBC manual control lever illuminates both
the trailer brake lamps and the tow vehicle brake lamps except the
center high-mount stop lamp (presuming proper trailer electrical
connection). Pressing the vehicle brake pedal also illuminates both
trailer and vehicle brake lamps.
Procedure for adjusting GAIN:
The GAIN setting is used to set the TBC for the specific towing
condition and should be changed as towing conditions change. Changes
to towing conditions include trailer load, vehicle load, road conditions
and weather.
The GAIN should be set to provide the maximum trailer braking
assistance while ensuring the trailer wheels do not lock when braking;
locked trailer wheels may lead to trailer instability.
Note:This should only be performed in a traffic-free environment at
speeds of approximately 20–25 mph (30–40 km/h).
1. Make sure the trailer brakes are in good working condition,
functioning normally and properly adjusted. See your trailer dealer if
necessary.
2. Hook up the trailer and make the electrical connections according to
the trailer manufacturer’s instructions.
3. When a trailer with electric brakes is plugged in, theTRAILER
CONNECTEDmessage displays in the instrument cluster message
center.
4. Use the GAIN adjustment (+/-) buttons to increase or decrease the
GAIN setting to the desired starting point. A GAIN setting of 6.0 is a
good starting point for heavier loads.
5. In a traffic-free environment, tow the trailer on a dry, level surface at
a speed of 20–25 mph (30–40 km/h) and squeeze the manual control
lever completely.
Tires, Wheels and Loading
262
2012 F-250/350/450/550(f23)
Owners Guide, 1st Printing
USA(fus)
Page 297 of 454

M (Manual) without Overdrive
With the gearshift lever in M (Manual), the driver can change gears up
or down as desired. This is called SelectShift Automatic™ transmission
(SST) mode. By moving the gearshift lever from drive position D
(Overdrive) to M (Manual) you now have control of selecting the gear
you desire using buttons on the shift lever.
To return to normal D (Overdrive) position, move the shift lever back
fromMtoD.
•The transmission will operate in gears one through six.
2 (Second)
Use 2 (Second) to start-up on slippery roads or to provide additional
engine braking on downgrades.
1 (First)
•Provides maximum engine braking.
•Allows upshifts by moving gearshift lever.
•The transmission will not downshift into 1 (First) at high speeds; it
will downshift to a lower gear and then shift into 1 (First) when the
vehicle reaches slower speeds.
Forced downshifts
•Allowed in D (Overdrive).
•Press the accelerator to the floor.
•Allows transmission to select an appropriate gear.
Understanding your SelectShift Automatic™ transmission (SST)
gearshift lever
This vehicle is equipped with a SelectShift Automatic™ transmission
(SST) gearshift lever. The SST is an automatic transmission with the
ability for the driver to change gears up or down (without a clutch) as
desired.
Driving
297
2012 F-250/350/450/550(f23)
Owners Guide, 1st Printing
USA(fus)
Page 298 of 454

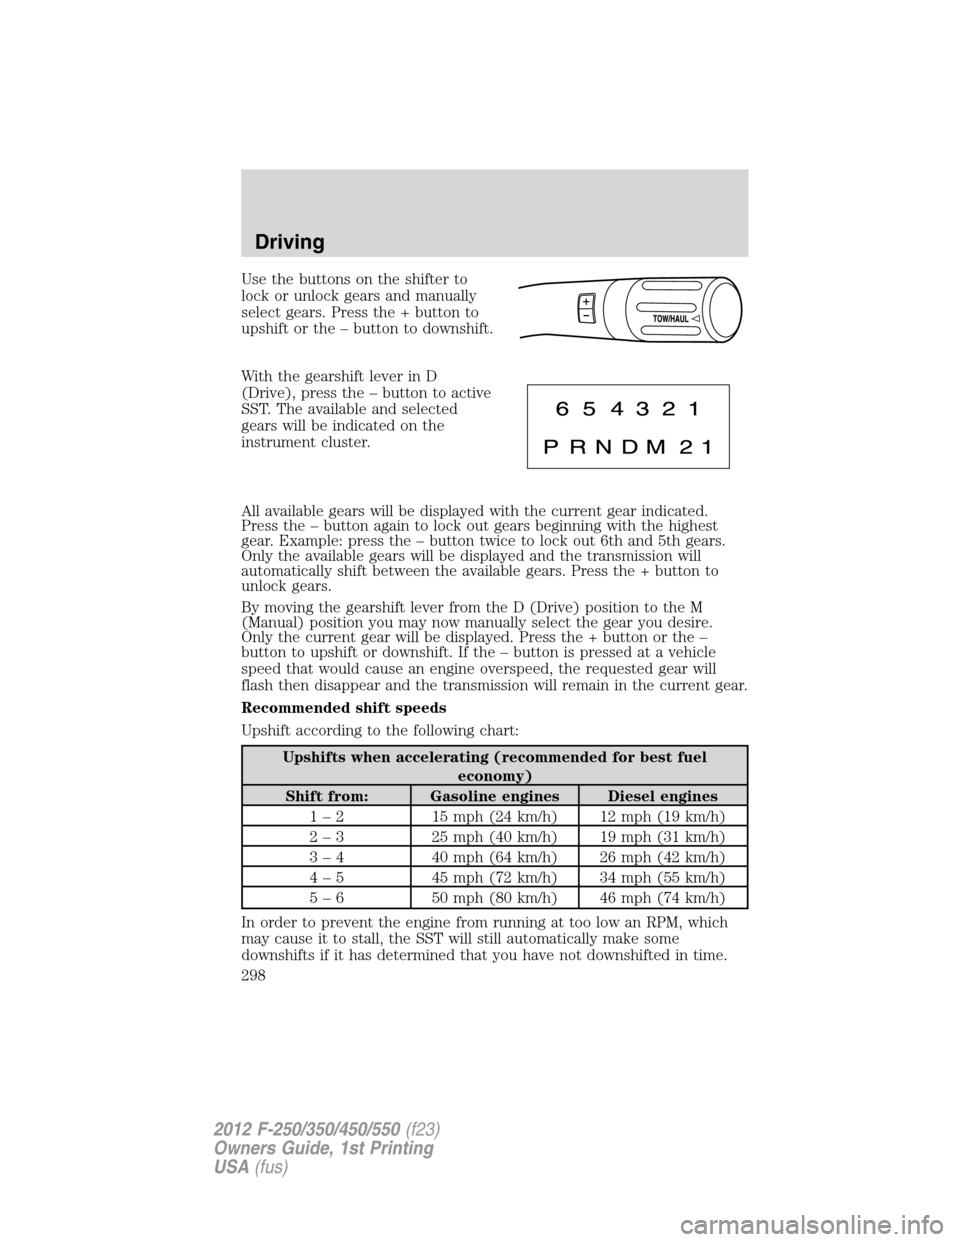
Use the buttons on the shifter to
lock or unlock gears and manually
select gears. Press the + button to
upshift or the – button to downshift.
With the gearshift lever in D
(Drive), press the – button to active
SST. The available and selected
gears will be indicated on the
instrument cluster.
All available gears will be displayed with the current gear indicated.
Press the – button again to lock out gears beginning with the highest
gear. Example: press the – button twice to lock out 6th and 5th gears.
Only the available gears will be displayed and the transmission will
automatically shift between the available gears. Press the + button to
unlock gears.
By moving the gearshift lever from the D (Drive) position to the M
(Manual) position you may now manually select the gear you desire.
Only the current gear will be displayed. Press the + button or the –
button to upshift or downshift. If the – button is pressed at a vehicle
speed that would cause an engine overspeed, the requested gear will
flash then disappear and the transmission will remain in the current gear.
Recommended shift speeds
Upshift according to the following chart:
Upshifts when accelerating (recommended for best fuel
economy)
Shift from: Gasoline engines Diesel engines
1 – 2 15 mph (24 km/h) 12 mph (19 km/h)
2 – 3 25 mph (40 km/h) 19 mph (31 km/h)
3 – 4 40 mph (64 km/h) 26 mph (42 km/h)
4 – 5 45 mph (72 km/h) 34 mph (55 km/h)
5 – 6 50 mph (80 km/h) 46 mph (74 km/h)
In order to prevent the engine from running at too low an RPM, which
may cause it to stall, the SST will still automatically make some
downshifts if it has determined that you have not downshifted in time.
Driving
298
2012 F-250/350/450/550(f23)
Owners Guide, 1st Printing
USA(fus)
Page:
< prev 1-8 9-16 17-24