Page 56 of 306
TILT STEERING
Pull the tilt steering control toward
you to move the steering wheel up
or down. Hold the control while
adjusting the wheel to the desired
position, then release the control to
lock the steering wheel in position.
WARNING:Never adjust the steering wheel when the vehicle is
moving.
OVERHEAD CONSOLE (IF EQUIPPED)
The appearance of your vehicle’s overhead console will vary according to
your option package.
Storage compartment (if equipped)
Press the release tab on the rear
edge of the bin door to open the
storage compartment. The door will
open to the full open position.
The storage compartment may be
used to secure sunglasses or a
similar object.
Driver Controls
56
2012 F-650/750(f67)
Supplement, 2nd Printing
USA(fus)
Page 63 of 306

Clearance lamps (if equipped)
Illuminates when the headlamps or
parking lamps are switched on.
This provides additional visibility of
your vehicle to other drivers on the
road.
SPEED CONTROL
With speed control set, you can maintain a set speed without keeping
your foot on the accelerator pedal.
WARNING:Do not use the speed control in heavy traffic or on
roads that are winding, slippery or unpaved.
Using speed control
The speed controls are located on the steering wheel. The following
buttons work with speed control.
ON:Press to turn on speed control.
OFF:Press to turn off speed
control.
RES (Resume):Press to resume a
set speed.
SET/ACCEL:Press to set a speed
or increase a set speed.
COAST:Press to reduce a set speed.
Setting speed control
1. Press and release ON.
2. Accelerate to the desired speed.
3. Press and release SET/ACCEL.
4. Take your foot off the accelerator pedal.
5. The indicator
light on the instrument cluster will turn on.
Driver Controls
63
2012 F-650/750(f67)
Supplement, 2nd Printing
USA(fus)
Page 65 of 306

STEERING WHEEL CONTROLS (IF EQUIPPED)
SYNC�system hands free
control feature (if equipped)
Press
briefly to use the voice
command feature. You will hear a
tone and LISTENING will appear in
the radio display. Press and
hold
to exit voice command.
Press
to activate phone mode or answer a phone call. Press and
hold
to end a call or exit phone mode.
For further information on the SYNC�system, refer to theSYNC�
supplement.
UPFITTER CONTROLS (IF EQUIPPED)
Your vehicle may be equipped with
the Upfitter option package which
provides four switches, mounted in
the center of the instrument panel,
labeled AUX 1, AUX 2, AUX 3 and
AUX 4. These switches only operate
while the ignition is in the on
position, whether the engine is
running or not. It is, however, recommended that the engine remain
running to maintain battery charge when using the Upfitter switches for
extended duration or higher current draws. (This is even more important
for vehicles with diesel engines since the glow plugs are also draining
battery power when the ignition key is in the on position.) Each switch
provides 10 amps of power.
If your vehicle is equipped with this option, there is also be a relay box
located on the driver side end of the instrument panel. See your
authorized dealer for service.
Switch access location is in a connector located in the engine
compartment More detailed information can be found at
https://www.fleet.ford.com/truck/bbas/.
Driver Controls
65
2012 F-650/750(f67)
Supplement, 2nd Printing
USA(fus)
Page 108 of 306

WARNING:All vehicles have blind spots. To reduce the risk of
severe injury or property damage, never move your vehicle to
the side or rear or change lanes without being sure your way is clear
on both sides and to your rear.
Backing up
WARNING:To reduce the risk of the possibility of personal
injury while backing the vehicle, always be sure your vehicle’s
path is clear.
Before backing your vehicle, be sure you can do so safely. If anything
behind the cab limits your view, do not rely on mirrors alone to ensure
that your intended path is clear. If other people are in the vicinity, have
someone standing well behind your vehicle and outside of your intended
path (visible through an exterior mirror) guide you as you back up.
Although OSHA or some governmental regulations may require the use
of an electrical or mechanical back-up alarm to warn bystanders, such an
alarm does not ensure that the intended path is clear. When in doubt,
get out of the vehicle and visually check the intended path is clear;
back-up slowly as to allow others time to move, if necessary.
If an electrical back-up alarm is installed, it should be connected to the
back-up lamp circuit.
Parking your vehicle
Always use the parking brake. When parking on a grade, block the
wheels and turn the front wheels to one side so that if the vehicle rolls,
the front tires act against the curb to stop the vehicle. The front wheels
are more effective at stopping a rolling vehicle than the rear wheels.
WARNING:When parking your vehicle, do not leave the
transmission in gear; if the key is in the on position and the
vehicle rolls, the engine could start. Failure to follow these instructions
could result in an unattended vehicle moving, possibly causing personal
injury or property damage.
Driving through water
If driving through deep or standing water is unavoidable, proceed very
slowly especially if the depth is not known. Never drive through water
that is higher than the bottom of the hubs. Traction or brake capability
Driving
108
2012 F-650/750(f67)
Supplement, 2nd Printing
USA(fus)
Page 111 of 306

WARNING:If the red BRAKE warning lamp in the instrument
cluster remains illuminated after engine start up, this indicates a
system failure in the Full Power Brake System. Stop the vehicle safely
as soon as possible and seek service immediately.
Note:During normal driving the pump/motors may be heard
replenishing the accumulators; this is a normal function of the system.
Parking brake
Apply the parking brake whenever
the vehicle is parked. To set the
parking brake, pull handle up until it
snaps into the locked position.
WARNING:Do not use the
gearshift selector in place of
the parking brake. Always set the
parking brake fully AND make
sure the gearshift selector is in R
(Reverse) for vehicles equipped
with manual transmission, P
(Park)(if equipped)or N
(Neutral) for vehicles with
automatic transmission. Use of
wheel chocks is also
recommended in hilly or off-road
usage.
WARNING:Unexpected and possible sudden vehicle movement
may occur if these precautions are not taken.
When the parking brake is out of adjustment, seek service immediately.
Driving
111
2012 F-650/750(f67)
Supplement, 2nd Printing
USA(fus)
Page 112 of 306
The parking brake warning lamp in
the instrument cluster illuminates,
and remains illuminated (when the
ignition is turned on), until the
parking brake is released.
Push the palm release lever on the
parking brake handle and push
down as far as possible to release
the brake. Driving with the parking
brake on causes the brakes to wear
out quickly and reduce fuel
economy.
WARNING:If the parking brake is fully released but the parking
brake warning lamp remains illuminated, the brakes may not be
working properly. See your dealer or a qualified service technician.
The parking brake is not recommended to stop a moving vehicle.
However, if the normal brakes fail, the parking brake can be used to stop
your vehicle in an emergency. Since the parking brake only applies
retardation to the rear wheels, the vehicle’s stopping distance increases
greatly and the handling of your vehicle is adversely affected.
P
Driving
112
2012 F-650/750(f67)
Supplement, 2nd Printing
USA(fus)
Page 115 of 306

WARNING:Block the wheels to help prevent the vehicle from
moving.
WARNING:Unexpected and possibly sudden vehicle movement
may occur if these precautions are not taken.
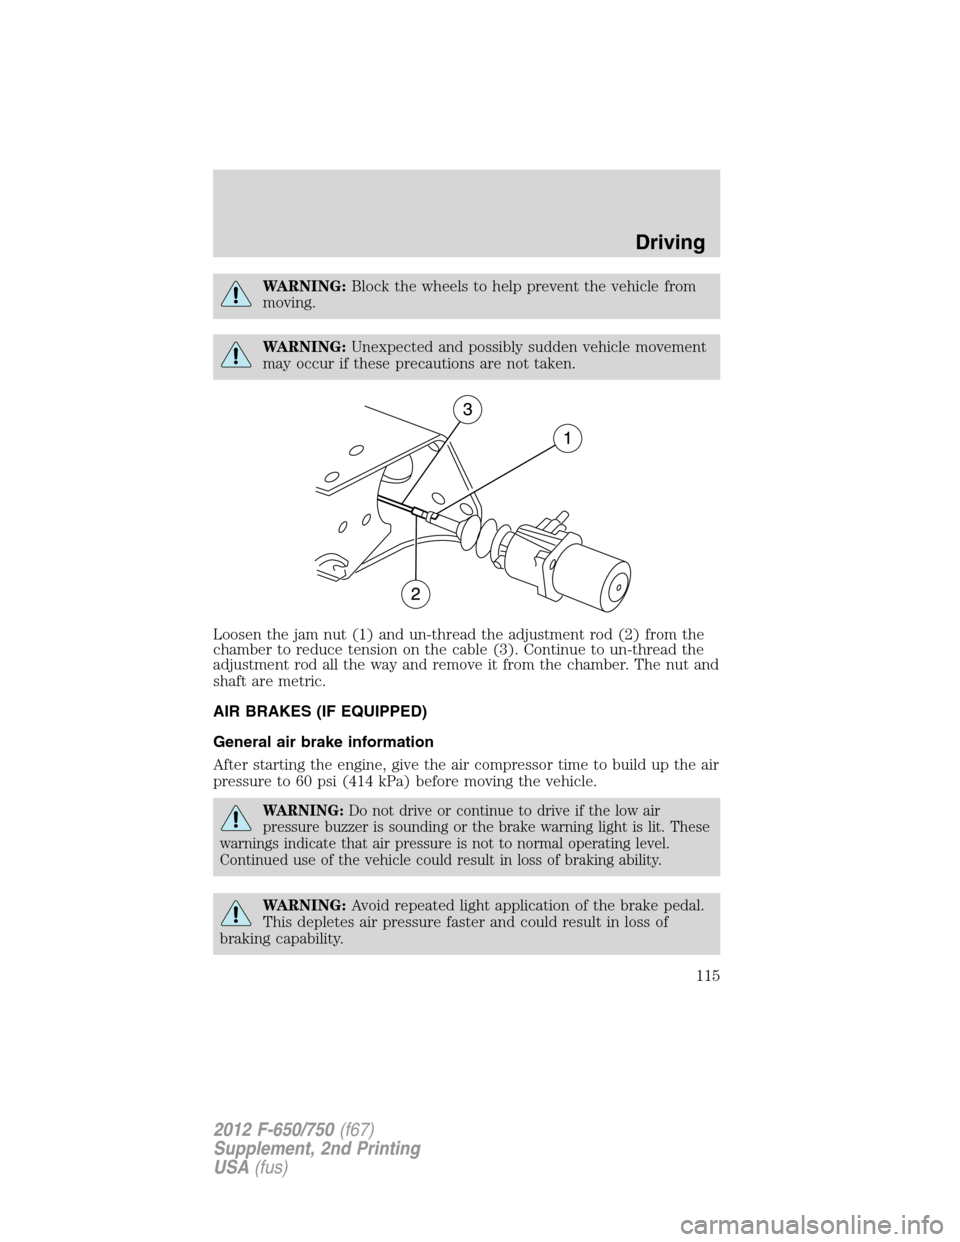
Loosen the jam nut (1) and un-thread the adjustment rod (2) from the
chamber to reduce tension on the cable (3). Continue to un-thread the
adjustment rod all the way and remove it from the chamber. The nut and
shaft are metric.
AIR BRAKES (IF EQUIPPED)
General air brake information
After starting the engine, give the air compressor time to build up the air
pressure to 60 psi (414 kPa) before moving the vehicle.
WARNING:Do not drive or continue to drive if the low air
pressure buzzer is sounding or the brake warning light is lit. These
warnings indicate that air pressure is not to normal operating level.
Continued use of the vehicle could result in loss of braking ability.
WARNING:Avoid repeated light application of the brake pedal.
This depletes air pressure faster and could result in loss of
braking capability.
Driving
115
2012 F-650/750(f67)
Supplement, 2nd Printing
USA(fus)
Page 118 of 306

Air brake reservoir draining
WARNING:Failure to drain air brake reservoirs can result in a
reduction or loss of braking ability due to fluid accumulation in
the reservoir and/or possible freeze-up during cold weather.
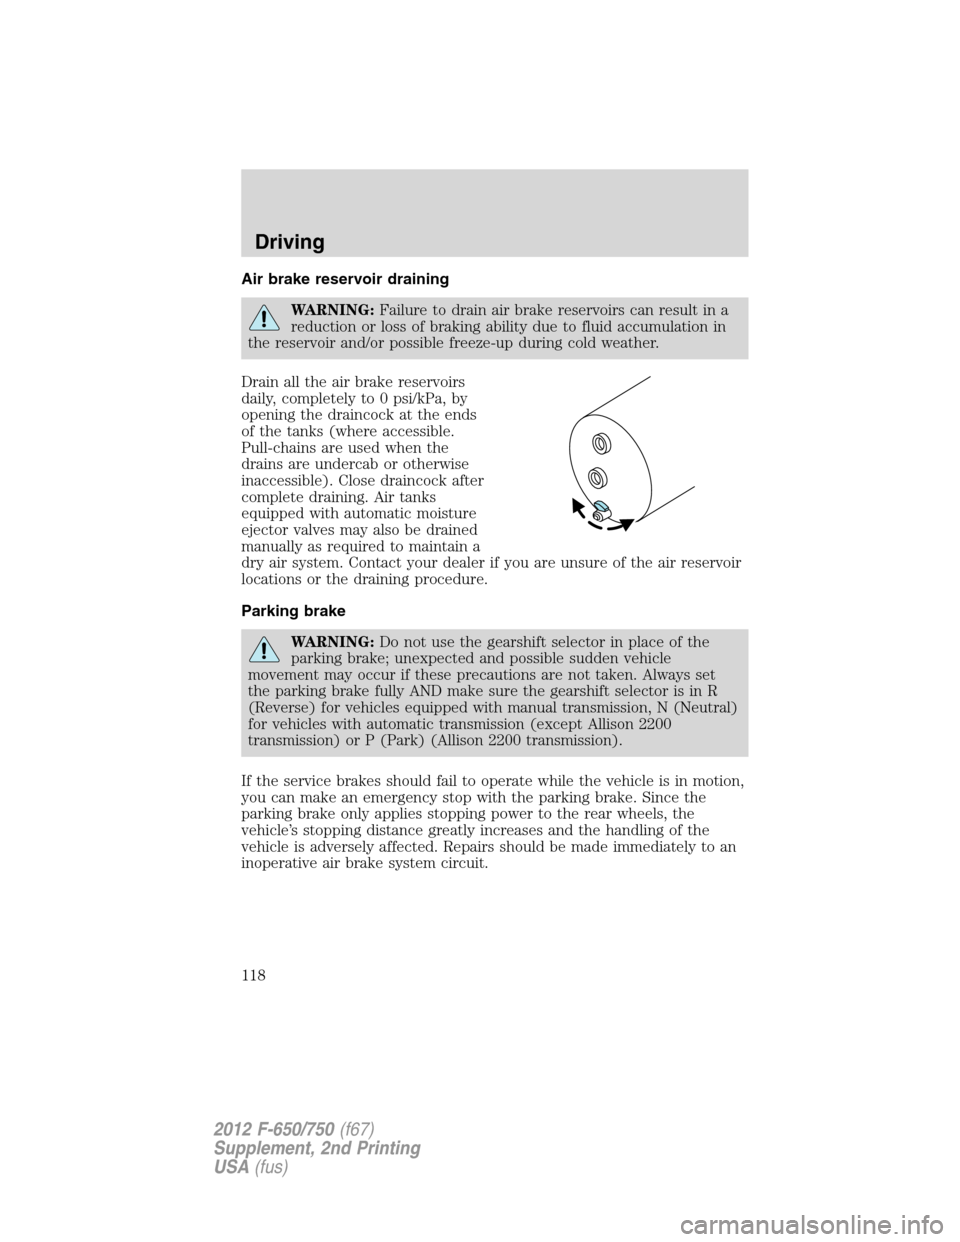
Drain all the air brake reservoirs
daily, completely to 0 psi/kPa, by
opening the draincock at the ends
of the tanks (where accessible.
Pull-chains are used when the
drains are undercab or otherwise
inaccessible). Close draincock after
complete draining. Air tanks
equipped with automatic moisture
ejector valves may also be drained
manually as required to maintain a
dry air system. Contact your dealer if you are unsure of the air reservoir
locations or the draining procedure.
Parking brake
WARNING:Do not use the gearshift selector in place of the
parking brake; unexpected and possible sudden vehicle
movement may occur if these precautions are not taken. Always set
the parking brake fully AND make sure the gearshift selector is in R
(Reverse) for vehicles equipped with manual transmission, N (Neutral)
for vehicles with automatic transmission (except Allison 2200
transmission) or P (Park) (Allison 2200 transmission).
If the service brakes should fail to operate while the vehicle is in motion,
you can make an emergency stop with the parking brake. Since the
parking brake only applies stopping power to the rear wheels, the
vehicle’s stopping distance greatly increases and the handling of the
vehicle is adversely affected. Repairs should be made immediately to an
inoperative air brake system circuit.
Driving
118
2012 F-650/750(f67)
Supplement, 2nd Printing
USA(fus)