2012 FORD F550 remove seats
[x] Cancel search: remove seatsPage 79 of 448

5. Recirculated air (if equipped): Press to activate/deactivate air
recirculation in the vehicle. Recirculated air may reduce the amount of
time needed to cool down the interior of the vehicle and may also help
reduce undesired odors from reaching the interior of the vehicle.
Recirculated air engages automatically when MAX A/C is selected or can
be engaged manually in any airflow mode except (defrost). When
the ignition switch is turned off and back on, the climate system will
return to the recirculated air mode only if the A/C button LED is
illuminated and the air distribution selection is either (panel)
or (panel/floor).
6. MAX A/C (if equipped): Distributes recirculated air through the
instrument panel vents to cool the vehicle. This re-cooling of the interior
air is more economical and efficient than normal A/C mode. Recirculated
air may also help reduce undesirable odors from entering the vehicle.
Press the MAX A/C button again for normal A/C operation.
7. Temperature control: Controls the temperature of the airflow in the
vehicle.
8. Fan speed adjustment: Controls the volume of air circulated in
the vehicle.
9. Power: Press to activate/deactivate the climate control system.
When the system is off, outside air is prevented from entering the
vehicle.
Operating tips
• To reduce fog build-up on the windshield during humid weather,
select (defrost) or (floor/defrost). Temperature and/or fan
speed can also be increased to improve clearing.
• To reduce humidity build-up inside the vehicle: do not drive with the
system off or with recirculated air engaged and A/C off.
• Do not put objects under the front seats that will interfere with the
airflow to the back seats.
• Remove any snow, ice or leaves from the air intake area at the base of
the windshield.
• To improve the A/C cool down, drive with the windows slightly open
for 2-3 minutes after start up or until the vehicle has been “aired out.”
• A small amount of air may be felt from the floor vent regardless of the
air distribution setting that is selected. Climate Controls
79
2012 F-250/350/450/550 (f23)
Owners Guide, 4th Printing
USA (fus)
Page 85 of 448

REAR WINDOW DEFROSTER (IF EQUIPPED) R
The rear defroster control is located on the climate control panel and
works to defrost your rear window from fog and thin ice. If equipped, it
also operates the heated mirror to remove snow and thin ice from the
side mirrors.
Ensure that the ignition on. Press to turn the defroster on/off. The
indicator light will illuminate when activated. For vehicles with a sliding
rear window– the defroster will be disabled when the window is opened.
Do not use razor blades or other sharp objects to clean the inside
of the rear window or to remove decals from the inside of the
rear window. This may cause damage to the heated grid lines and
will not be covered by your warranty.
REMOTE START CLIMATE OPERATION (IF EQUIPPED)
The climate control system will condition the cabin temperature during
remote start based on the outside temperature. Engine idle may increase
to help with adjusting the cabin temperature.
Note: No climate control adjustments will be recognized during remote
start operation and none of the climate function indicators will be
illuminated while the vehicle is in remote start. Once the ignition is
cycled to the on position, the climate control system will return to the
previous settings (last ignition-on cycle) and adjustments can be made
normally. If the previous setting was off, the climate control system will
turn off.
If you previously had any of the following activated: heated seats (if
equipped), cooled seats (if equipped), heated mirrors (if equipped), or
rear defrost, they will not return to their previous settings (on) when the
ignition is turned on and will need to be re-activated if desired.
For more information on remote start climate settings and options, refer
to Message Center in the Instrument Cluster chapter.
Manual climate control
For hot weather conditions:
• The climate control system will be set to MAX A/C.
For cold weather conditions:
• The climate control system will be set to provide maximum heating
in (floor/defrost) mode.
• Rear defrost/heated mirrors (if equipped) will be activated. Climate Controls
85
2012 F-250/350/450/550 (f23)
Owners Guide, 4th Printing
USA (fus)
Page 162 of 448
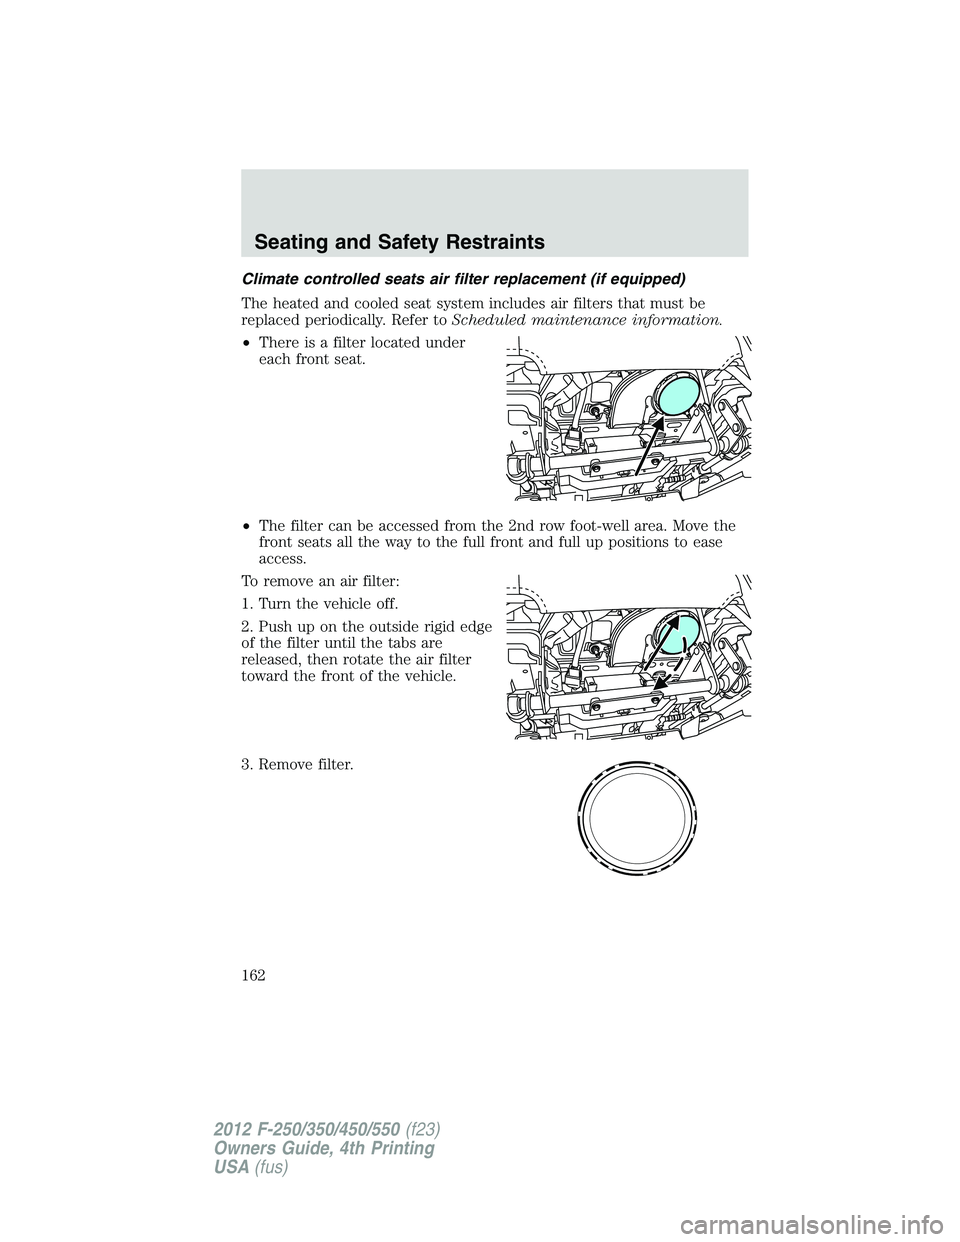
Climate controlled seats air filter replacement (if equipped)
The heated and cooled seat system includes air filters that must be
replaced periodically. Refer to Scheduled maintenance information.
• There is a filter located under
each front seat.
• The filter can be accessed from the 2nd row foot-well area. Move the
front seats all the way to the full front and full up positions to ease
access.
To remove an air filter:
1. Turn the vehicle off.
2. Push up on the outside rigid edge
of the filter until the tabs are
released, then rotate the air filter
toward the front of the vehicle.
3. Remove filter.Seating and Safety Restraints
162
2012 F-250/350/450/550 (f23)
Owners Guide, 4th Printing
USA (fus)
Page 164 of 448
Easy-access/easy-out feature (if equipped)
The easy entry feature can be turned off or on through the vehicle
message center. Refer to Message center in the Instrument Cluster
chapter.
The easy entry feature automatically moves the driver’s seat 2 inches
(5 cm) forward when:
• the transmission is in P (Park)
• the key is inserted into the ignition cylinder
(If the seat is located less than 2 inches [5 cm] from the front of the seat
track, the seat will travel up to 1
� 4
inch (6 mm) to the front of the seat
track).
The easy out feature automatically moves the driver’s seat 2 inches
(5 cm) backward when:
• the transmission is in P (Park)
• the key is removed from the ignition cylinder
(If the seat is located less than 2 inches (5 cm) from the rear of the seat
track, the seat will travel up to 1
� 4
inch (6 mm) to the rear of the seat
track).
If the memory setting is programmed through the remote transmitter,
upon unlocking the door via remote entry system, the seat position will
travel to the desired memory setting less 2 inches (5 cm). Once entering
the vehicle and inserting the key in the ignition while in P (Park), the
easy entry feature will move the seat an additional 2 inches (5 cm) to
the desired memory location. See Locks and Security for activating the
memory seat feature through the remote entry system.
REAR SEATS
Non-adjustable second-row head restraints
Your vehicle is equipped with second row head restraints that are
non-adjustable.
WARNING: To minimize the risk of neck injury in the event of a
crash, the driver and passenger occupants should not sit in
and/or operate the vehicle, until the head restraint is placed in its
proper position. The driver should never adjust the head restraint
while the vehicle is in motion.Seating and Safety Restraints
164
2012 F-250/350/450/550 (f23)
Owners Guide, 4th Printing
USA (fus)
Page 173 of 448

Automatic locking mode
In this mode, the shoulder belt is automatically pre-locked. The belt will
still retract to remove any slack in the shoulder belt. The automatic
locking mode is not available on the driver safety belt or the optional
front or rear seat center safety belt.
When to use the automatic locking mode
This mode should be used any time a child safety seat is installed in a
front outboard passenger seating position or any outboard rear seating
position (if equipped). The optional front and rear seat center safety belt
have a cinch mechanism. Refer to Safety belt with cinch tongue earlier
in this chapter. Children 12 years old and under should be properly
restrained in a rear seat whenever possible. Refer to Safety restraints
for children or Safety seats for children later in this chapter.
How to use the automatic locking mode
1. Buckle the combination lap and
shoulder belt (front safety
belt/buckle shown, rear similar).
2. Grasp the shoulder portion and
pull downward until the entire belt
is pulled out.
• Allow the belt to retract. As the belt retracts, you will hear a clicking
sound. This indicates the safety belt is now in the automatic locking
mode.
How to disengage the automatic locking mode
Disconnect the combination lap/shoulder belt and allow it to retract
completely to disengage the automatic locking mode and activate the
vehicle sensitive (emergency) locking mode.
WARNING: After any vehicle collision, the safety belt system at
all passenger seating positions must be checked by an authorized
dealer to verify that the “automatic locking retractor” feature for child
seats is still functioning properly. In addition, all safety belts should be
checked for proper function. Seating and Safety Restraints
173
2012 F-250/350/450/550 (f23)
Owners Guide, 4th Printing
USA (fus)
Page 190 of 448
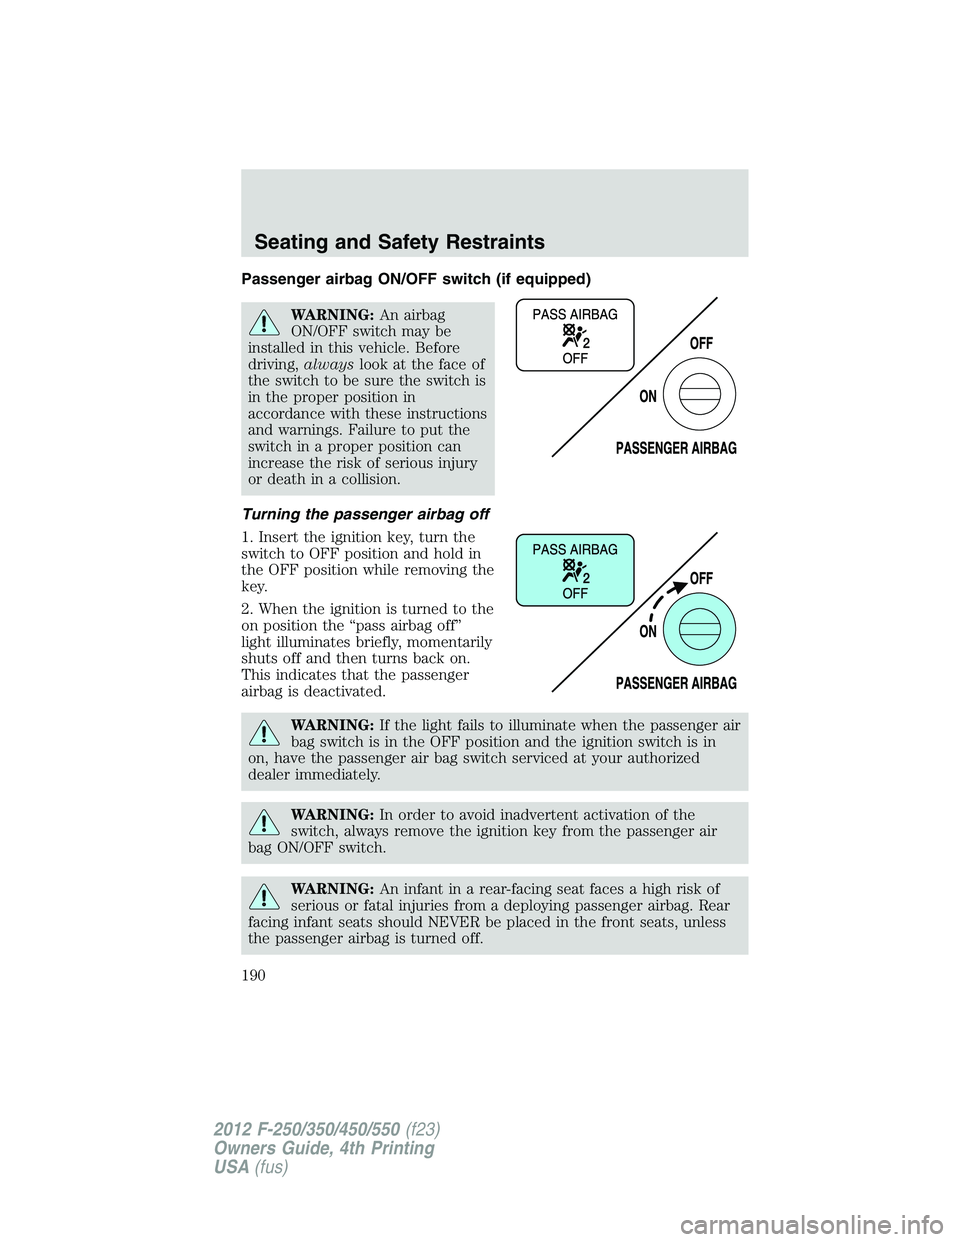
Passenger airbag ON/OFF switch (if equipped)
WARNING: An airbag
ON/OFF switch may be
installed in this vehicle. Before
driving, always look at the face of
the switch to be sure the switch is
in the proper position in
accordance with these instructions
and warnings. Failure to put the
switch in a proper position can
increase the risk of serious injury
or death in a collision.
Turning the passenger airbag off
1. Insert the ignition key, turn the
switch to OFF position and hold in
the OFF position while removing the
key.
2. When the ignition is turned to the
on position the “pass airbag off”
light illuminates briefly, momentarily
shuts off and then turns back on.
This indicates that the passenger
airbag is deactivated.
WARNING: If the light fails to illuminate when the passenger air
bag switch is in the OFF position and the ignition switch is in
on, have the passenger air bag switch serviced at your authorized
dealer immediately.
WARNING: In order to avoid inadvertent activation of the
switch, always remove the ignition key from the passenger air
bag ON/OFF switch.
WARNING: An infant in a rear-facing seat faces a high risk of
serious or fatal injuries from a deploying passenger airbag. Rear
facing infant seats should NEVER be placed in the front seats, unless
the passenger airbag is turned off.Seating and Safety Restraints
190
2012 F-250/350/450/550 (f23)
Owners Guide, 4th Printing
USA (fus)
Page 203 of 448
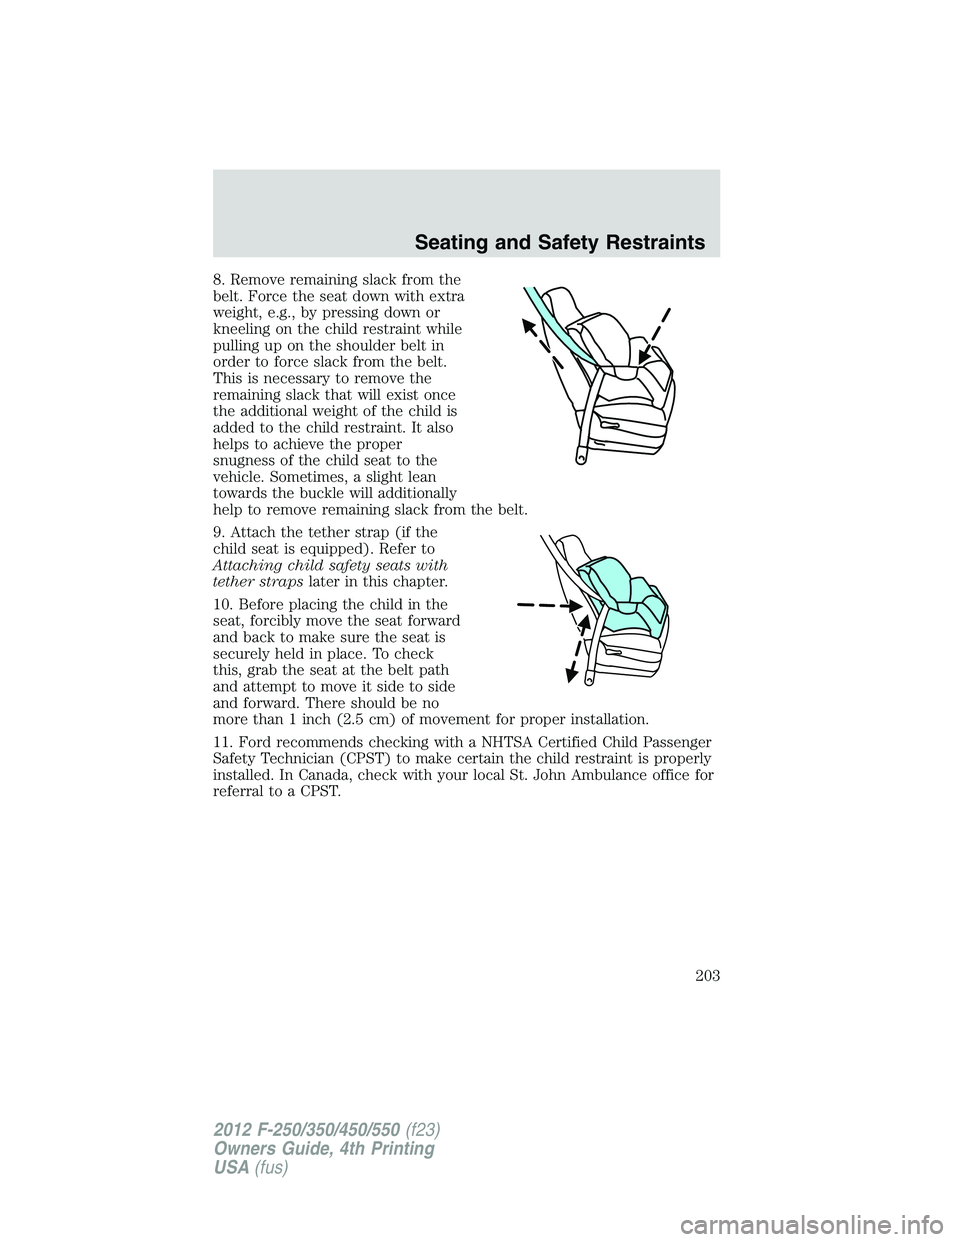
8. Remove remaining slack from the
belt. Force the seat down with extra
weight, e.g., by pressing down or
kneeling on the child restraint while
pulling up on the shoulder belt in
order to force slack from the belt.
This is necessary to remove the
remaining slack that will exist once
the additional weight of the child is
added to the child restraint. It also
helps to achieve the proper
snugness of the child seat to the
vehicle. Sometimes, a slight lean
towards the buckle will additionally
help to remove remaining slack from the belt.
9. Attach the tether strap (if the
child seat is equipped). Refer to
Attaching child safety seats with
tether straps later in this chapter.
10. Before placing the child in the
seat, forcibly move the seat forward
and back to make sure the seat is
securely held in place. To check
this, grab the seat at the belt path
and attempt to move it side to side
and forward. There should be no
more than 1 inch (2.5 cm) of movement for proper installation.
11. Ford recommends checking with a NHTSA Certified Child Passenger
Safety Technician (CPST) to make certain the child restraint is properly
installed. In Canada, check with your local St. John Ambulance office for
referral to a CPST. Seating and Safety Restraints
203
2012 F-250/350/450/550 (f23)
Owners Guide, 4th Printing
USA (fus)
Page 208 of 448
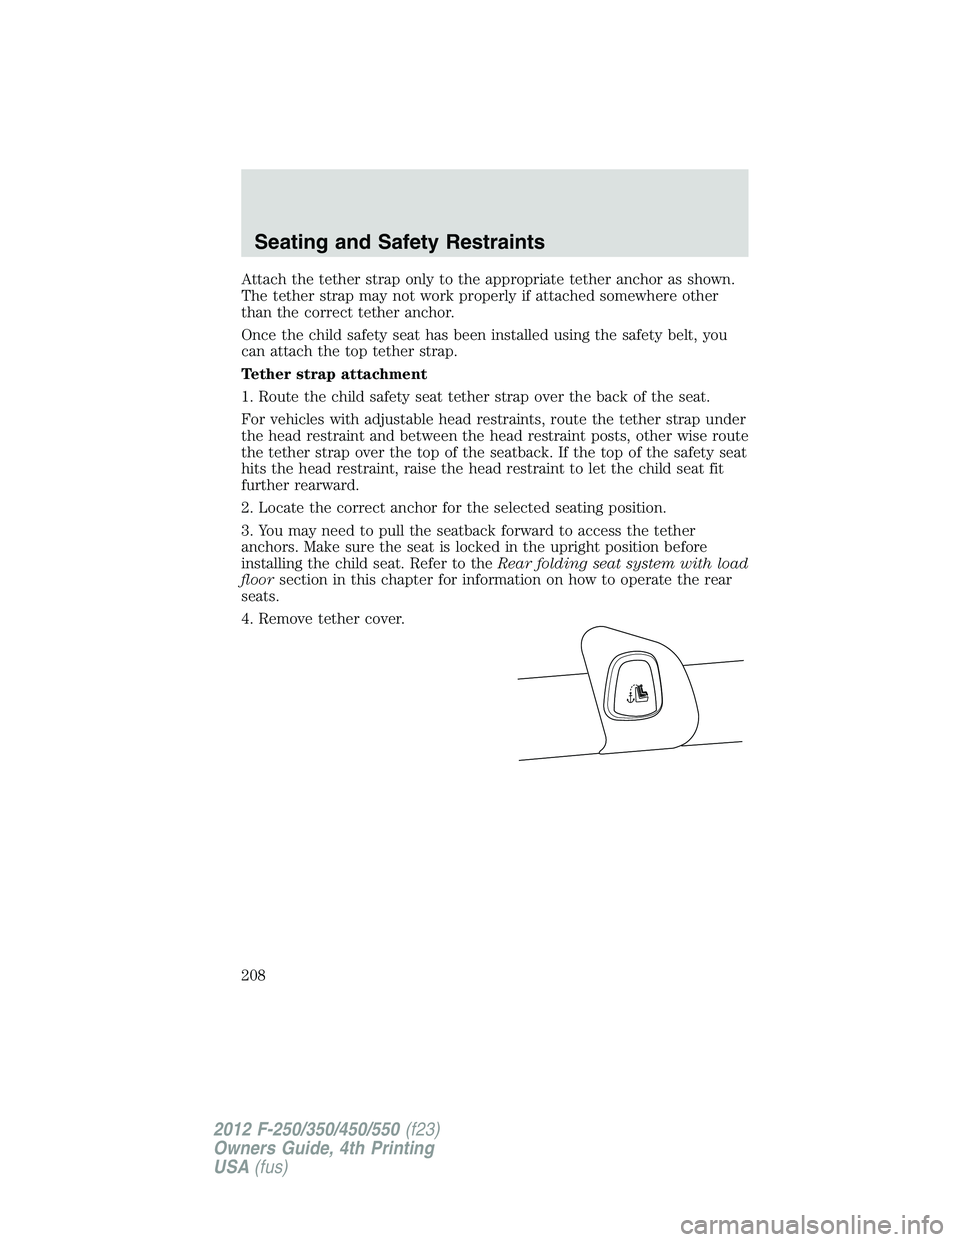
Attach the tether strap only to the appropriate tether anchor as shown.
The tether strap may not work properly if attached somewhere other
than the correct tether anchor.
Once the child safety seat has been installed using the safety belt, you
can attach the top tether strap.
Tether strap attachment
1. Route the child safety seat tether strap over the back of the seat.
For vehicles with adjustable head restraints, route the tether strap under
the head restraint and between the head restraint posts, other wise route
the tether strap over the top of the seatback. If the top of the safety seat
hits the head restraint, raise the head restraint to let the child seat fit
further rearward.
2. Locate the correct anchor for the selected seating position.
3. You may need to pull the seatback forward to access the tether
anchors. Make sure the seat is locked in the upright position before
installing the child seat. Refer to the Rear folding seat system with load
floor section in this chapter for information on how to operate the rear
seats.
4. Remove tether cover.Seating and Safety Restraints
208
2012 F-250/350/450/550 (f23)
Owners Guide, 4th Printing
USA (fus)