Page 1 of 462
Introduction 4
Instrument Cluster 12
Warning lights and chimes 12
Gauges 18
Message center 20
Entertainment Systems 47
AM/FM stereo 47
AM/FM stereo with CD/MP3 49
Auxiliary input jack (Line in) 58
USB port 60
Satellite radio information 63
Navigation system 67
SYNC�67
Climate Controls 68
Manual heating and air conditioning 68
Dual electronic automatic temperature control 71
Navigation system based climate control 76
Rear window defroster 80
Lights 82
Headlamps 82
Turn signal control 85
Interior lamps 86
Bulb replacement 88
Driver Controls 94
Windshield wiper/washer control 94
Steering wheel adjustment 95
Power windows 103
Mirrors 105
Speed control 111
Tailgate 123
Table of Contents
1
2012 F-150(f12)
Owners Guide, 1st Printing
USA(fus)
Page 92 of 462

Replacing tail/brake/turn signal/backup lamp bulbs
1. Make sure the headlamp control
is in the off position.
2. Open the tailgate to expose the
lamp assembly and remove the two
bolts from the tail lamp assembly.
3. Carefully pull the lamp assembly
straight rearward from the tailgate
pillar to disengage two hidden
snap-in retainers. (Flare side tail
lamps are not equipped with snap-in
retainers.)
4. Remove bulb socket from the
lamp assembly by turning it
counterclockwise.
5. Pull bulb straight out of socket
and press in the new bulb.
Install the new bulb(s) in reverse order.
Replacing high-mount brake and cargo lamp bulbs
Make sure the headlamp control is
in the off position.
1. Remove the two screws and move
the lamp assembly away from the
vehicle to expose the bulb sockets.
2. Remove the bulb socket by rotating counterclockwise and pulling it
out of the lamp assembly.
3. Pull the bulb straight out of the socket and push in the new bulb.
Install the new bulbs in reverse order.
Lights
92
2012 F-150(f12)
Owners Guide, 1st Printing
USA(fus)
Page 123 of 462

WARNING (Continued)
•Failure to properly follow floor mat installation or attachment
instructions can potentially cause interference with pedal operation
causing loss of control of vehicle.
•To install floor mats, position the floor mat so that the eyelet is over
the retention post and press down to lock in.
•To remove the floor mat, reverse the installation procedure.
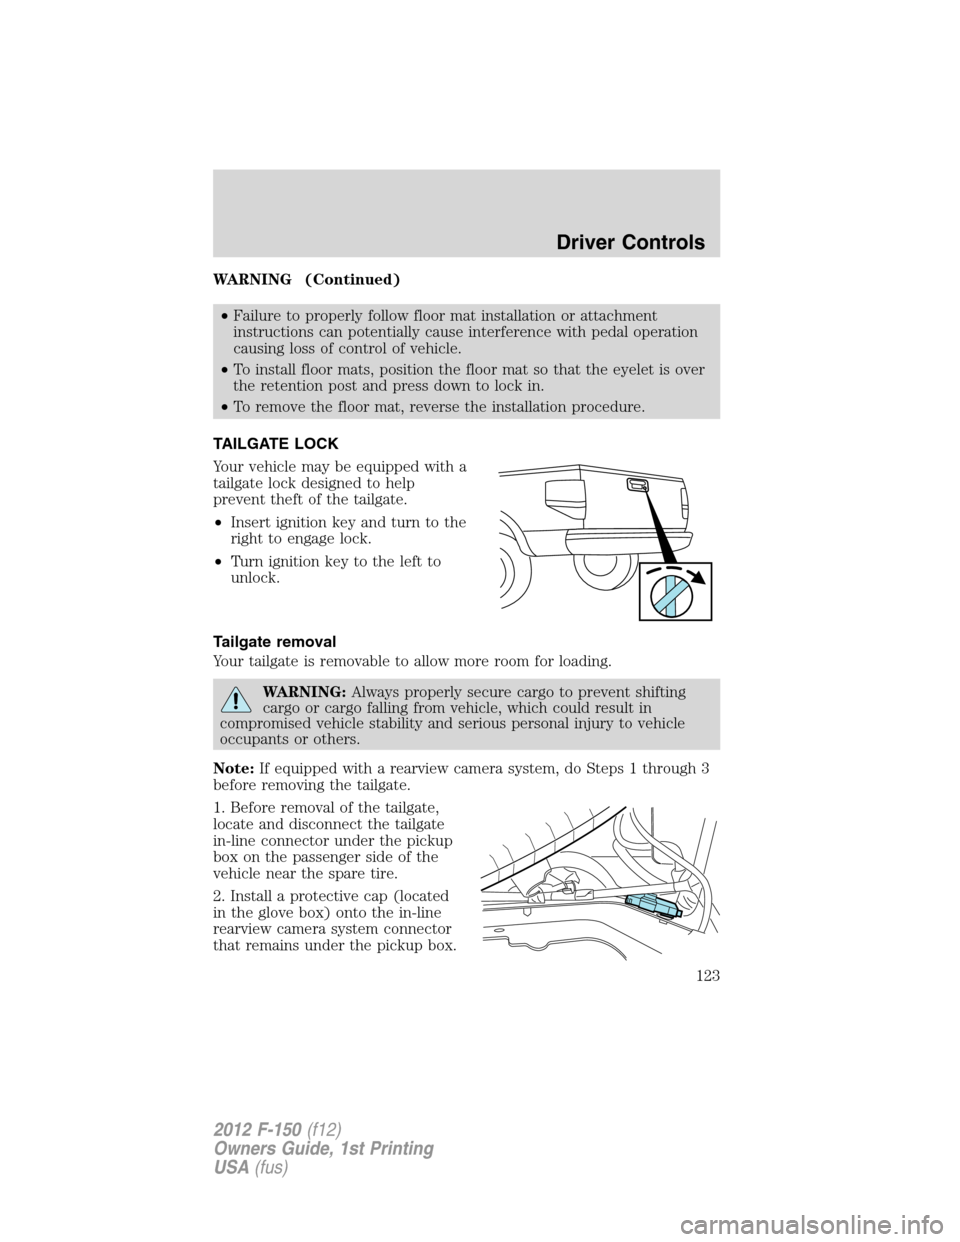
TAILGATE LOCK
Your vehicle may be equipped with a
tailgate lock designed to help
prevent theft of the tailgate.
•Insert ignition key and turn to the
right to engage lock.
•Turn ignition key to the left to
unlock.
Tailgate removal
Your tailgate is removable to allow more room for loading.
WARNING:Always properly secure cargo to prevent shifting
cargo or cargo falling from vehicle, which could result in
compromised vehicle stability and serious personal injury to vehicle
occupants or others.
Note:If equipped with a rearview camera system, do Steps 1 through 3
before removing the tailgate.
1. Before removal of the tailgate,
locate and disconnect the tailgate
in-line connector under the pickup
box on the passenger side of the
vehicle near the spare tire.
2. Install a protective cap (located
in the glove box) onto the in-line
rearview camera system connector
that remains under the pickup box.
Driver Controls
123
2012 F-150(f12)
Owners Guide, 1st Printing
USA(fus)
Page 124 of 462

3. Partially lower tailgate and carefully feed tailgate harness up through
the gap between the pickup box and the bumper. Place the tailgate
harness out of the way under the pickup box.
4. Lower the tailgate.
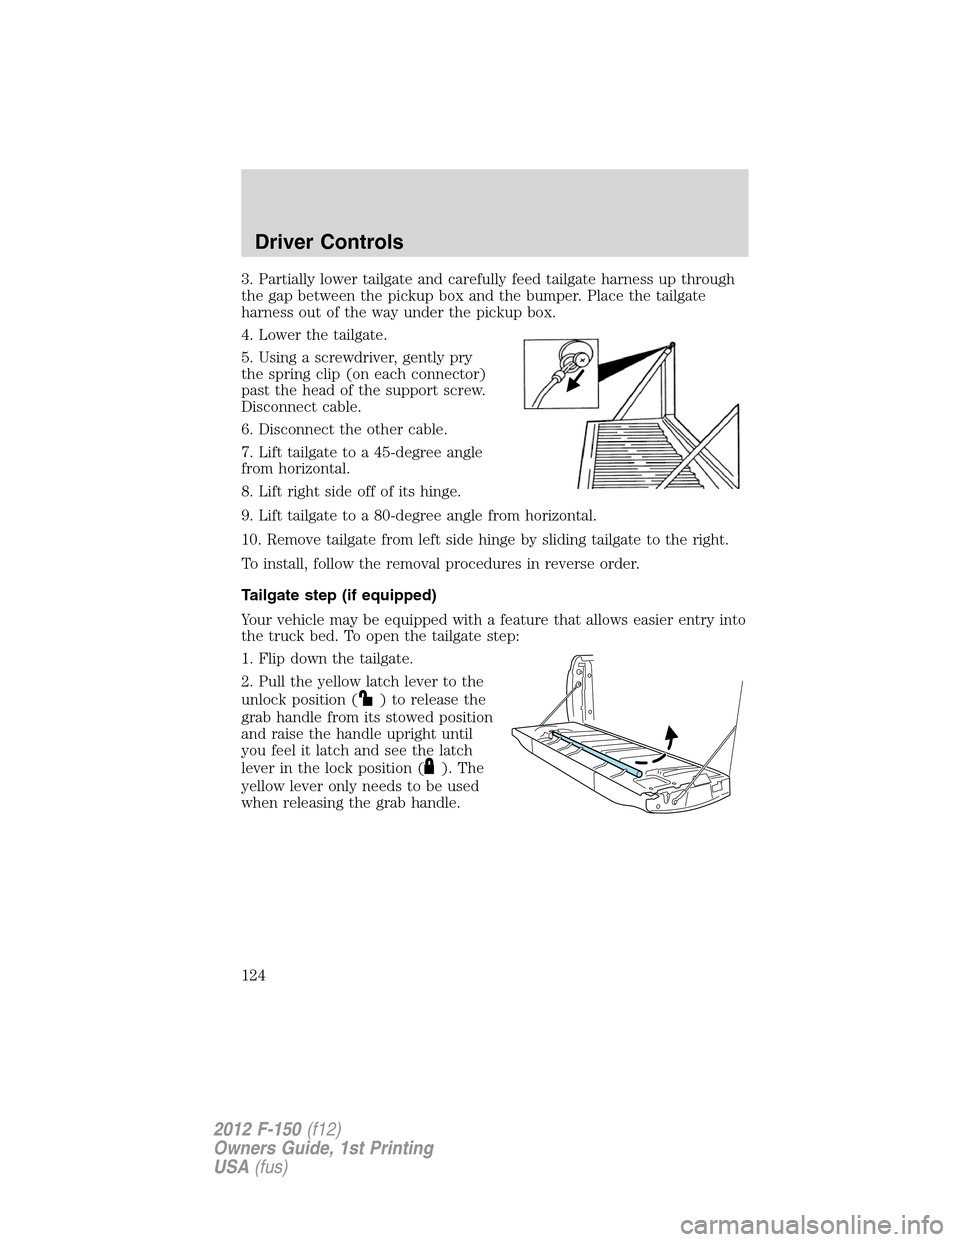
5. Using a screwdriver, gently pry
the spring clip (on each connector)
past the head of the support screw.
Disconnect cable.
6. Disconnect the other cable.
7. Lift tailgate to a 45-degree angle
from horizontal.
8. Lift right side off of its hinge.
9. Lift tailgate to a 80-degree angle from horizontal.
10. Remove tailgate from left side hinge by sliding tailgate to the right.
To install, follow the removal procedures in reverse order.
Tailgate step (if equipped)
Your vehicle may be equipped with a feature that allows easier entry into
the truck bed. To open the tailgate step:
1. Flip down the tailgate.
2. Pull the yellow latch lever to the
unlock position (
) to release the
grab handle from its stowed position
and raise the handle upright until
you feel it latch and see the latch
lever in the lock position (
). The
yellow lever only needs to be used
when releasing the grab handle.
Driver Controls
124
2012 F-150(f12)
Owners Guide, 1st Printing
USA(fus)
Page 125 of 462

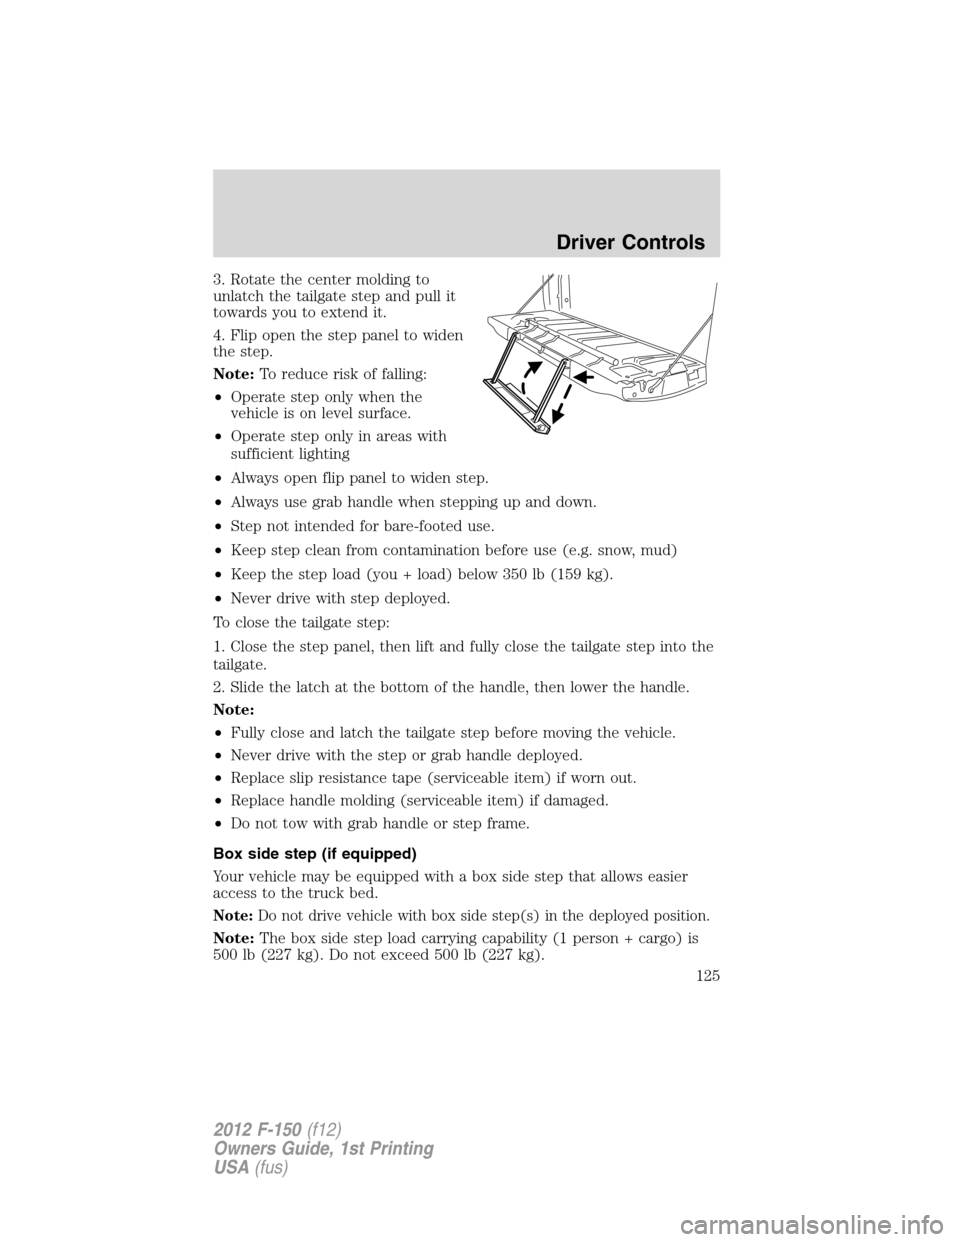
3. Rotate the center molding to
unlatch the tailgate step and pull it
towards you to extend it.
4. Flip open the step panel to widen
the step.
Note:To reduce risk of falling:
•Operate step only when the
vehicle is on level surface.
•Operate step only in areas with
sufficient lighting
•Always open flip panel to widen step.
•Always use grab handle when stepping up and down.
•Step not intended for bare-footed use.
•Keep step clean from contamination before use (e.g. snow, mud)
•Keep the step load (you + load) below 350 lb (159 kg).
•Never drive with step deployed.
To close the tailgate step:
1. Close the step panel, then lift and fully close the tailgate step into the
tailgate.
2. Slide the latch at the bottom of the handle, then lower the handle.
Note:
•Fully close and latch the tailgate step before moving the vehicle.
•Never drive with the step or grab handle deployed.
•Replace slip resistance tape (serviceable item) if worn out.
•Replace handle molding (serviceable item) if damaged.
•Do not tow with grab handle or step frame.
Box side step (if equipped)
Your vehicle may be equipped with a box side step that allows easier
access to the truck bed.
Note:Do not drive vehicle with box side step(s) in the deployed position.
Note:The box side step load carrying capability (1 person + cargo) is
500 lb (227 kg). Do not exceed 500 lb (227 kg).
Driver Controls
125
2012 F-150(f12)
Owners Guide, 1st Printing
USA(fus)
Page 127 of 462
BED EXTENDER (IF EQUIPPED)
Your vehicle may be equipped with a cargo management feature in the
truck bed.
Note:This feature is not intended for off-road usage.
To open the bed extender into tailgate mode:
1. Pull the locking pin toward the
center of the vehicle.
2. Open the latches to release the
panels.
3. Rotate the panels toward the
tailgate.
Repeat Steps 1–3 for the other side of the bed extender.
Driver Controls
127
2012 F-150(f12)
Owners Guide, 1st Printing
USA(fus)
Page 128 of 462
4. Connect the two panels, then rotate both knobs a quarter-turn
clockwise to secure the panels.
5. Ensure the latch rod is inserted
into the tailgate hole and the locking
pins on both sides are engaged into
their holes in the pick-up box.
6. Reverse steps for storage of the
bed extender.
Note:When the vehicle is in motion, ensure the locking pins and knobs
are fully engaged.
Note:Ensure all cargo is secured.
Note:When the vehicle is in motion, the tailgate load must not exceed
150 lb (68 kg).
Note:The bed extender should always be kept in the grocery mode or
stowed position with the tailgate closed when not being used for the
purpose of restraining cargo in the tailgate mode.
Driver Controls
128
2012 F-150(f12)
Owners Guide, 1st Printing
USA(fus)
Page 129 of 462
To open the bed extender into grocery mode, follow Steps 1–4 by
rotating the panels away from the tailgate. Close the tailgate.
CARGO MANAGEMENT SYSTEM (IF EQUIPPED)
The cargo management system consists of the Cargo rail package with
the following as optional accessories:
•Front header bar (if equipped)
•Cross bars (if equipped)
•Bed divider (if equipped)
•Side mounted tool bins (if equipped)
Driver Controls
129
2012 F-150(f12)
Owners Guide, 1st Printing
USA(fus)