2012 FORD EXPEDITION parking brake
[x] Cancel search: parking brakePage 239 of 400
Starting the engine
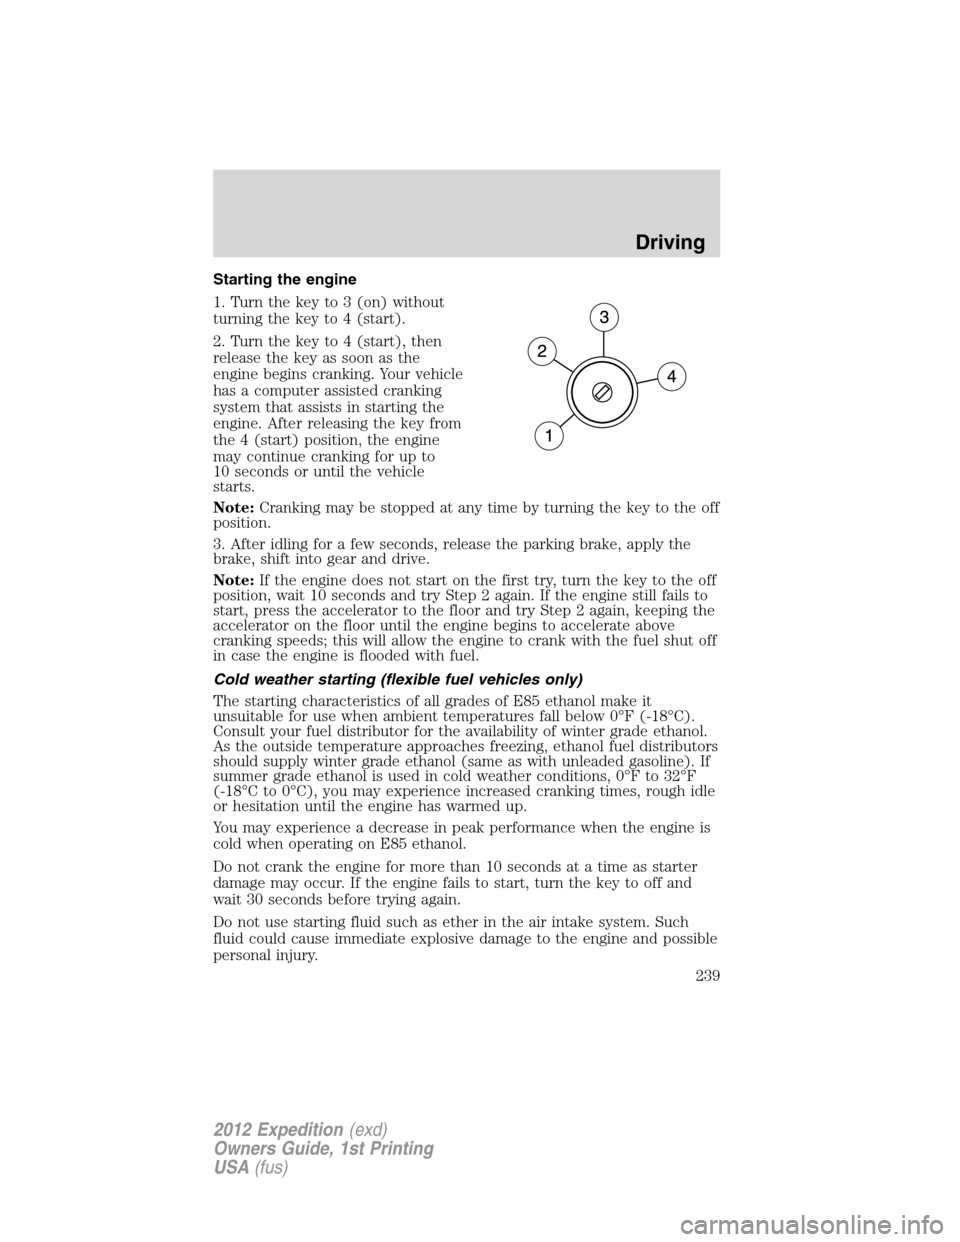
1. Turn the key to 3 (on) without
turning the key to 4 (start).
2. Turn the key to 4 (start), then
release the key as soon as the
engine begins cranking. Your vehicle
has a computer assisted cranking
system that assists in starting the
engine. After releasing the key from
the 4 (start) position, the engine
may continue cranking for up to
10 seconds or until the vehicle
starts.
Note:Cranking may be stopped at any time by turning the key to the off
position.
3. After idling for a few seconds, release the parking brake, apply the
brake, shift into gear and drive.
Note:If the engine does not start on the first try, turn the key to the off
position, wait 10 seconds and try Step 2 again. If the engine still fails to
start, press the accelerator to the floor and try Step 2 again, keeping the
accelerator on the floor until the engine begins to accelerate above
cranking speeds; this will allow the engine to crank with the fuel shut off
in case the engine is flooded with fuel.
Cold weather starting (flexible fuel vehicles only)
The starting characteristics of all grades of E85 ethanol make it
unsuitable for use when ambient temperatures fall below 0°F (-18°C).
Consult your fuel distributor for the availability of winter grade ethanol.
As the outside temperature approaches freezing, ethanol fuel distributors
should supply winter grade ethanol (same as with unleaded gasoline). If
summer grade ethanol is used in cold weather conditions, 0°F to 32°F
(-18°C to 0°C), you may experience increased cranking times, rough idle
or hesitation until the engine has warmed up.
You may experience a decrease in peak performance when the engine is
cold when operating on E85 ethanol.
Do not crank the engine for more than 10 seconds at a time as starter
damage may occur. If the engine fails to start, turn the key to off and
wait 30 seconds before trying again.
Do not use starting fluid such as ether in the air intake system. Such
fluid could cause immediate explosive damage to the engine and possible
personal injury.
Driving
239
2012 Expedition(exd)
Owners Guide, 1st Printing
USA(fus)
Page 244 of 400
Using ABS
•In an emergency or when maximum efficiency from the four-wheel
ABS is required, apply continuous force on the brake. The four-wheel
ABS will be activated immediately, thus allowing you to retain steering
control of your vehicle and, providing there is sufficient space, will
enable you to avoid obstacles and bring the vehicle to a controlled
stop.
•The anti-lock system does not always reduce stopping distance.
Always leave enough room between your vehicle and the vehicle in
front of you to stop.
•We recommend that you familiarize yourself with this braking
technique. However, avoid taking any unnecessary risks.
ABS warning lamp
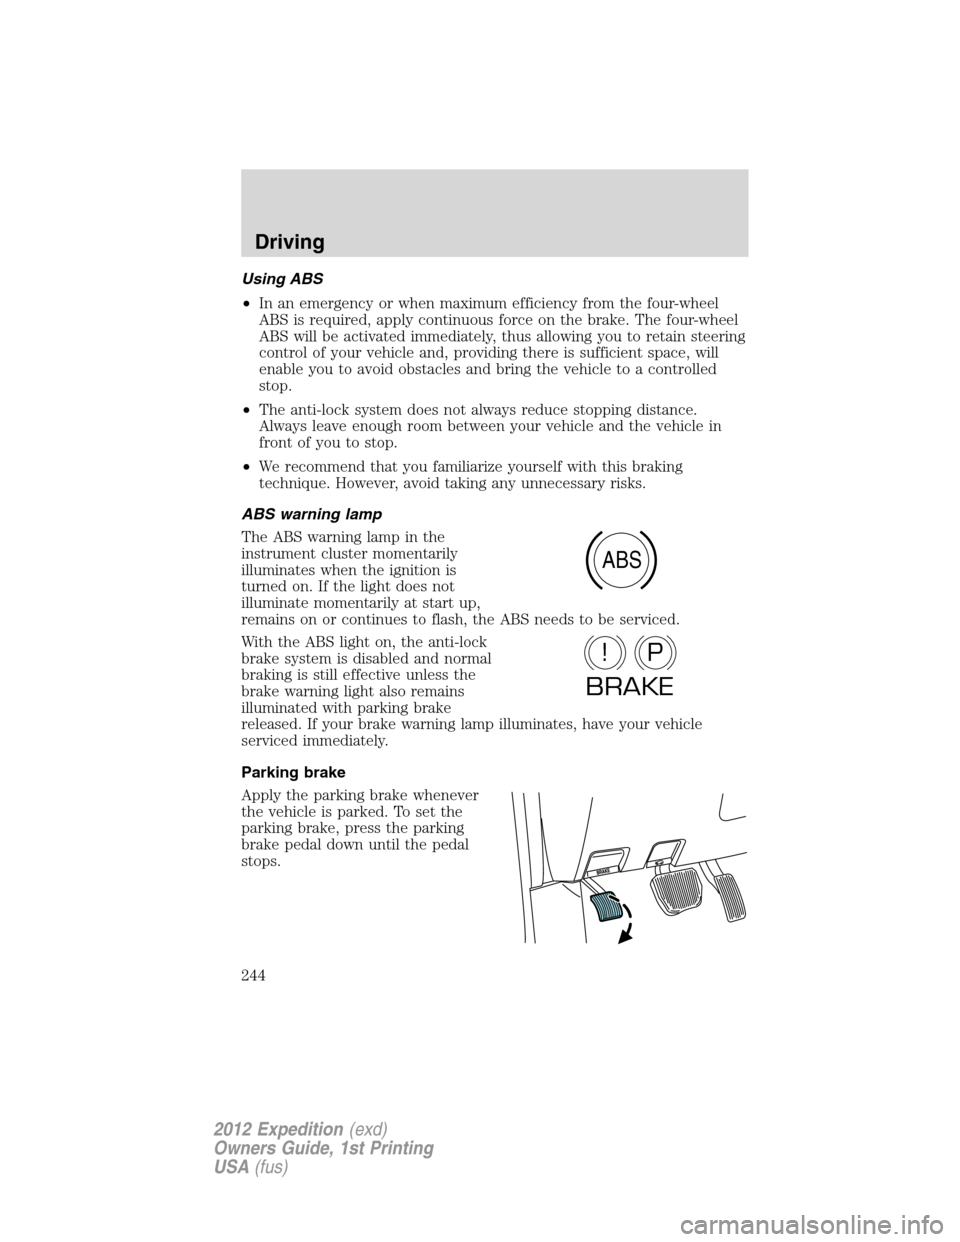
The ABS warning lamp in the
instrument cluster momentarily
illuminates when the ignition is
turned on. If the light does not
illuminate momentarily at start up,
remains on or continues to flash, the ABS needs to be serviced.
With the ABS light on, the anti-lock
brake system is disabled and normal
braking is still effective unless the
brake warning light also remains
illuminated with parking brake
released. If your brake warning lamp illuminates, have your vehicle
serviced immediately.
Parking brake
Apply the parking brake whenever
the vehicle is parked. To set the
parking brake, press the parking
brake pedal down until the pedal
stops.
ABS
P!
BRAKE
Driving
244
2012 Expedition(exd)
Owners Guide, 1st Printing
USA(fus)
Page 245 of 400
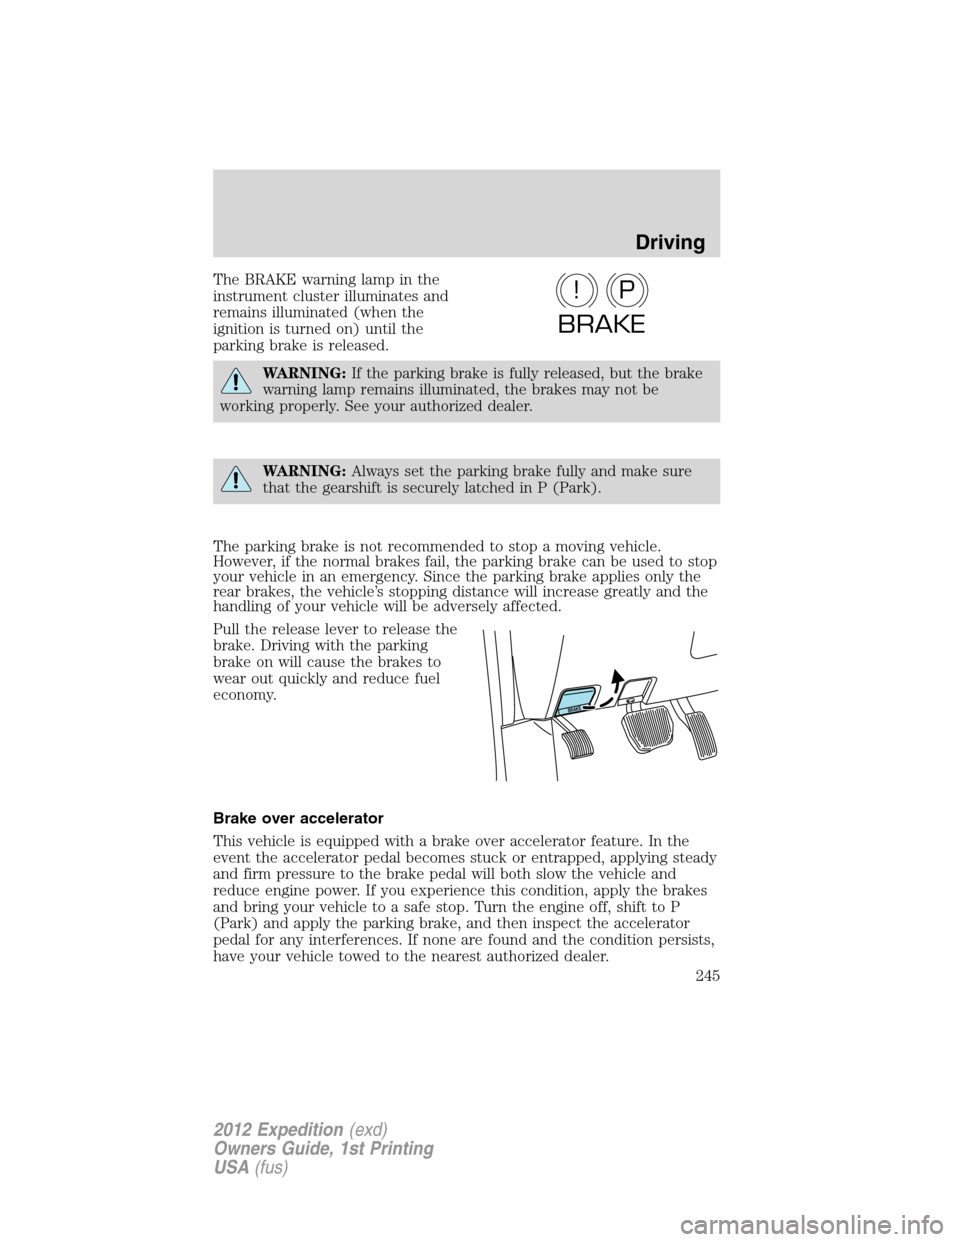
The BRAKE warning lamp in the
instrument cluster illuminates and
remains illuminated (when the
ignition is turned on) until the
parking brake is released.
WARNING:If the parking brake is fully released, but the brake
warning lamp remains illuminated, the brakes may not be
working properly. See your authorized dealer.
WARNING:Always set the parking brake fully and make sure
that the gearshift is securely latched in P (Park).
The parking brake is not recommended to stop a moving vehicle.
However, if the normal brakes fail, the parking brake can be used to stop
your vehicle in an emergency. Since the parking brake applies only the
rear brakes, the vehicle’s stopping distance will increase greatly and the
handling of your vehicle will be adversely affected.
Pull the release lever to release the
brake. Driving with the parking
brake on will cause the brakes to
wear out quickly and reduce fuel
economy.
Brake over accelerator
This vehicle is equipped with a brake over accelerator feature. In the
event the accelerator pedal becomes stuck or entrapped, applying steady
and firm pressure to the brake pedal will both slow the vehicle and
reduce engine power. If you experience this condition, apply the brakes
and bring your vehicle to a safe stop. Turn the engine off, shift to P
(Park) and apply the parking brake, and then inspect the accelerator
pedal for any interferences. If none are found and the condition persists,
have your vehicle towed to the nearest authorized dealer.
P!
BRAKE
B
R
A
K
E
Driving
245
2012 Expedition(exd)
Owners Guide, 1st Printing
USA(fus)
Page 254 of 400
If the fuse is not blown, perform the following procedure:
1. Apply the parking brake.
2. Turn the key to the off position.
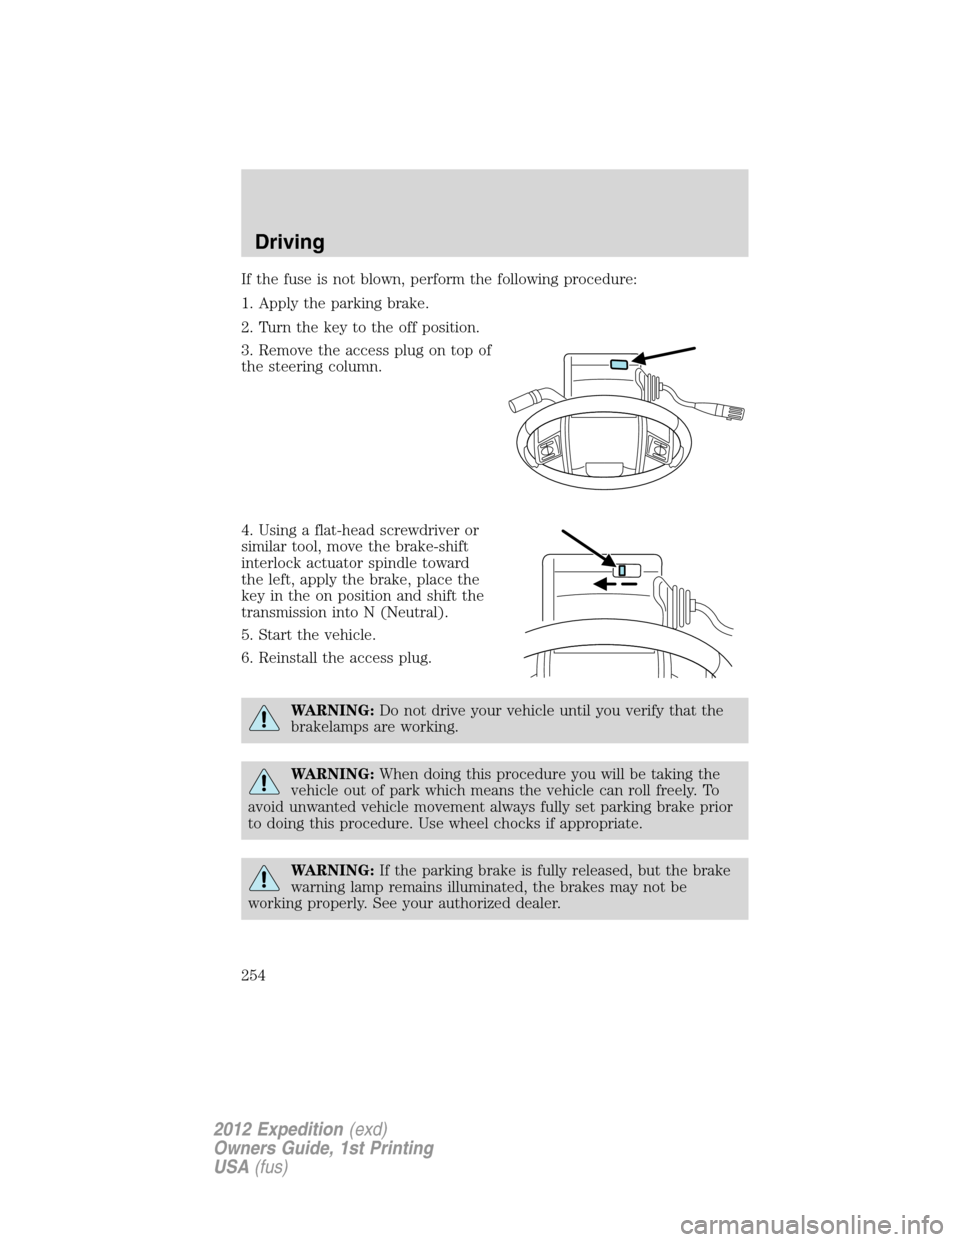
3. Remove the access plug on top of
the steering column.
4. Using a flat-head screwdriver or
similar tool, move the brake-shift
interlock actuator spindle toward
the left, apply the brake, place the
key in the on position and shift the
transmission into N (Neutral).
5. Start the vehicle.
6. Reinstall the access plug.
WARNING:Do not drive your vehicle until you verify that the
brakelamps are working.
WARNING:When doing this procedure you will be taking the
vehicle out of park which means the vehicle can roll freely. To
avoid unwanted vehicle movement always fully set parking brake prior
to doing this procedure. Use wheel chocks if appropriate.
WARNING:If the parking brake is fully released, but the brake
warning lamp remains illuminated, the brakes may not be
working properly. See your authorized dealer.
Driving
254
2012 Expedition(exd)
Owners Guide, 1st Printing
USA(fus)
Page 255 of 400
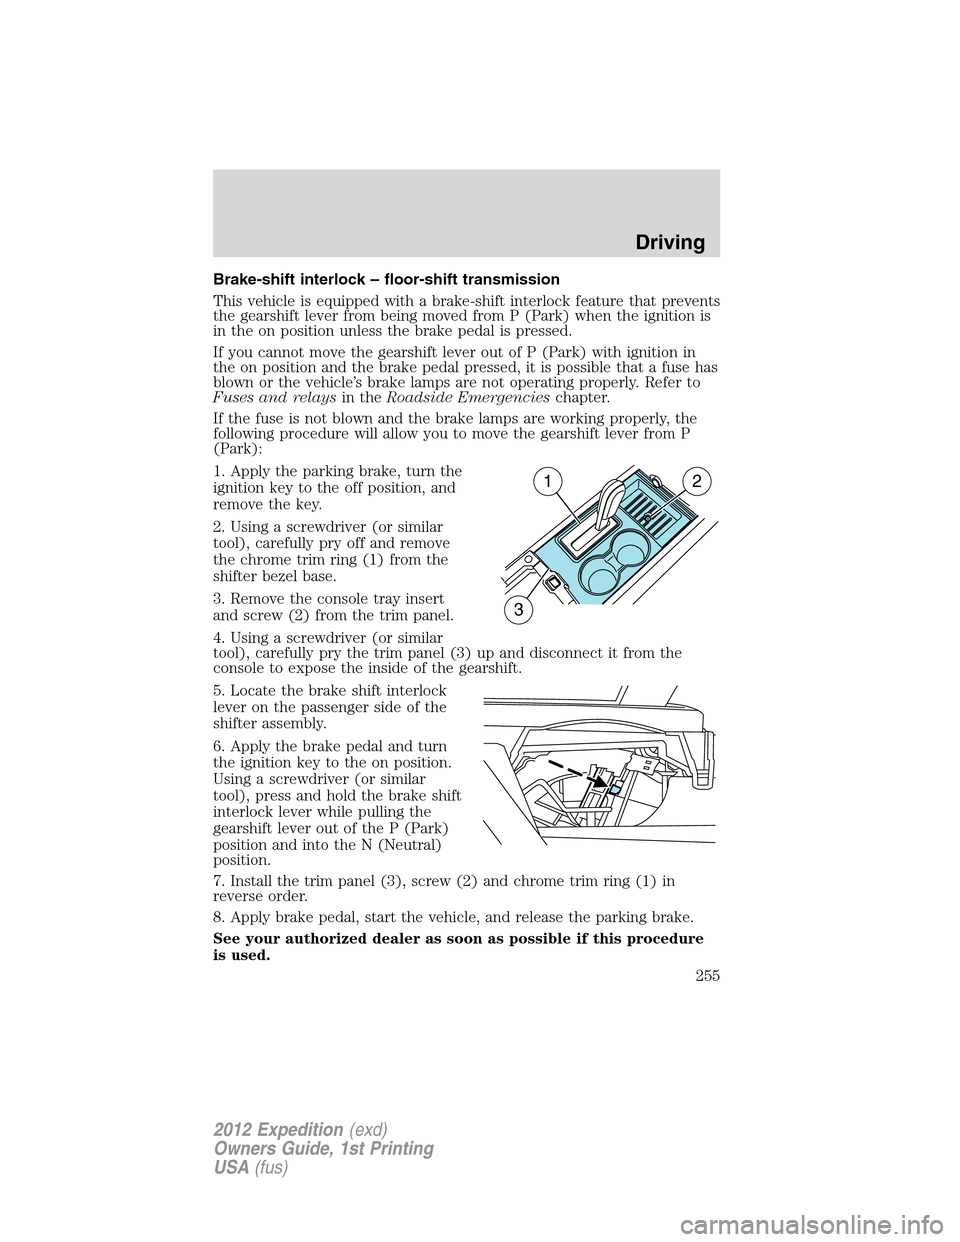
Brake-shift interlock – floor-shift transmission
This vehicle is equipped with a brake-shift interlock feature that prevents
the gearshift lever from being moved from P (Park) when the ignition is
in the on position unless the brake pedal is pressed.
If you cannot move the gearshift lever out of P (Park) with ignition in
the on position and the brake pedal pressed, it is possible that a fuse has
blown or the vehicle’s brake lamps are not operating properly. Refer to
Fuses and relaysin theRoadside Emergencieschapter.
If the fuse is not blown and the brake lamps are working properly, the
following procedure will allow you to move the gearshift lever from P
(Park):
1. Apply the parking brake, turn the
ignition key to the off position, and
remove the key.
2. Using a screwdriver (or similar
tool), carefully pry off and remove
the chrome trim ring (1) from the
shifter bezel base.
3. Remove the console tray insert
and screw (2) from the trim panel.
4. Using a screwdriver (or similar
tool), carefully pry the trim panel (3) up and disconnect it from the
console to expose the inside of the gearshift.
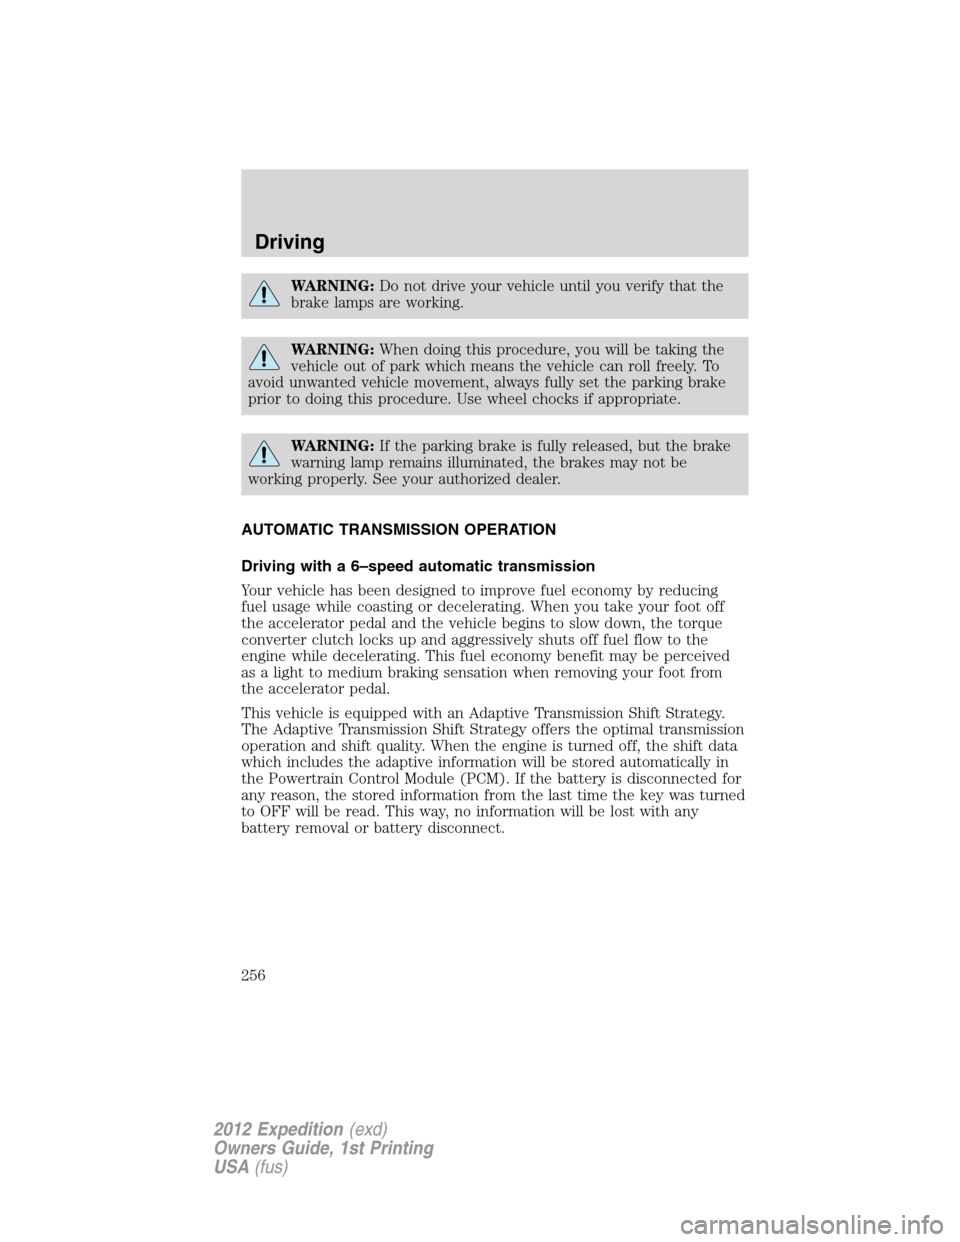
5. Locate the brake shift interlock
lever on the passenger side of the
shifter assembly.
6. Apply the brake pedal and turn
the ignition key to the on position.
Using a screwdriver (or similar
tool), press and hold the brake shift
interlock lever while pulling the
gearshift lever out of the P (Park)
position and into the N (Neutral)
position.
7. Install the trim panel (3), screw (2) and chrome trim ring (1) in
reverse order.
8. Apply brake pedal, start the vehicle, and release the parking brake.
See your authorized dealer as soon as possible if this procedure
is used.
12
3
Driving
255
2012 Expedition(exd)
Owners Guide, 1st Printing
USA(fus)
Page 256 of 400
WARNING:Do not drive your vehicle until you verify that the
brake lamps are working.
WARNING:When doing this procedure, you will be taking the
vehicle out of park which means the vehicle can roll freely. To
avoid unwanted vehicle movement, always fully set the parking brake
prior to doing this procedure. Use wheel chocks if appropriate.
WARNING:If the parking brake is fully released, but the brake
warning lamp remains illuminated, the brakes may not be
working properly. See your authorized dealer.
AUTOMATIC TRANSMISSION OPERATION
Driving with a 6–speed automatic transmission
Your vehicle has been designed to improve fuel economy by reducing
fuel usage while coasting or decelerating. When you take your foot off
the accelerator pedal and the vehicle begins to slow down, the torque
converter clutch locks up and aggressively shuts off fuel flow to the
engine while decelerating. This fuel economy benefit may be perceived
as a light to medium braking sensation when removing your foot from
the accelerator pedal.
This vehicle is equipped with an Adaptive Transmission Shift Strategy.
The Adaptive Transmission Shift Strategy offers the optimal transmission
operation and shift quality. When the engine is turned off, the shift data
which includes the adaptive information will be stored automatically in
the Powertrain Control Module (PCM). If the battery is disconnected for
any reason, the stored information from the last time the key was turned
to OFF will be read. This way, no information will be lost with any
battery removal or battery disconnect.
Driving
256
2012 Expedition(exd)
Owners Guide, 1st Printing
USA(fus)
Page 257 of 400
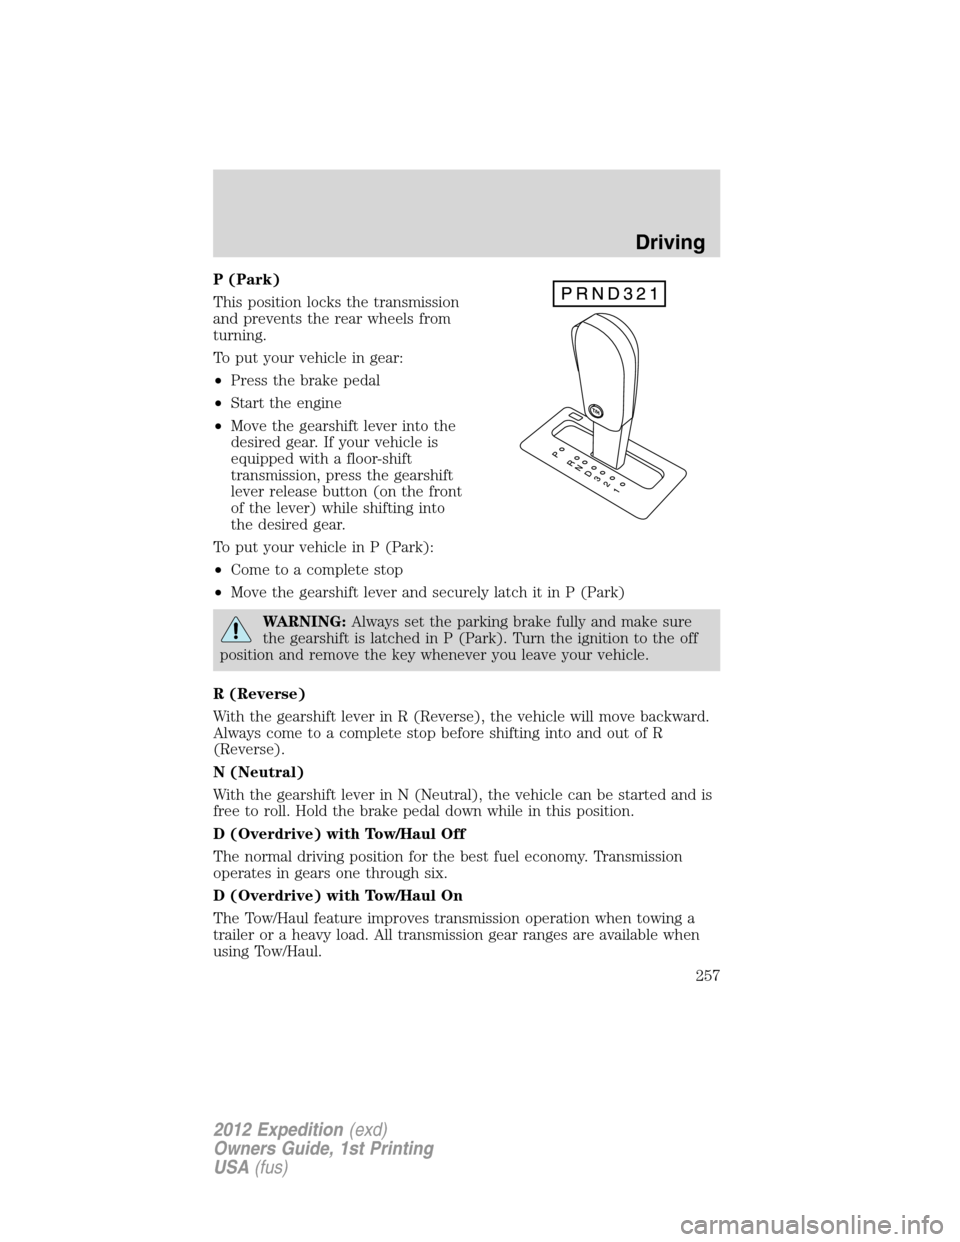
P (Park)
This position locks the transmission
and prevents the rear wheels from
turning.
To put your vehicle in gear:
•Press the brake pedal
•Start the engine
•Move the gearshift lever into the
desired gear. If your vehicle is
equipped with a floor-shift
transmission, press the gearshift
lever release button (on the front
of the lever) while shifting into
the desired gear.
To put your vehicle in P (Park):
•Come to a complete stop
•Move the gearshift lever and securely latch it in P (Park)
WARNING:Always set the parking brake fully and make sure
the gearshift is latched in P (Park). Turn the ignition to the off
position and remove the key whenever you leave your vehicle.
R (Reverse)
With the gearshift lever in R (Reverse), the vehicle will move backward.
Always come to a complete stop before shifting into and out of R
(Reverse).
N (Neutral)
With the gearshift lever in N (Neutral), the vehicle can be started and is
free to roll. Hold the brake pedal down while in this position.
D (Overdrive) with Tow/Haul Off
The normal driving position for the best fuel economy. Transmission
operates in gears one through six.
D (Overdrive) with Tow/Haul On
The Tow/Haul feature improves transmission operation when towing a
trailer or a heavy load. All transmission gear ranges are available when
using Tow/Haul.
Driving
257
2012 Expedition(exd)
Owners Guide, 1st Printing
USA(fus)
Page 261 of 400
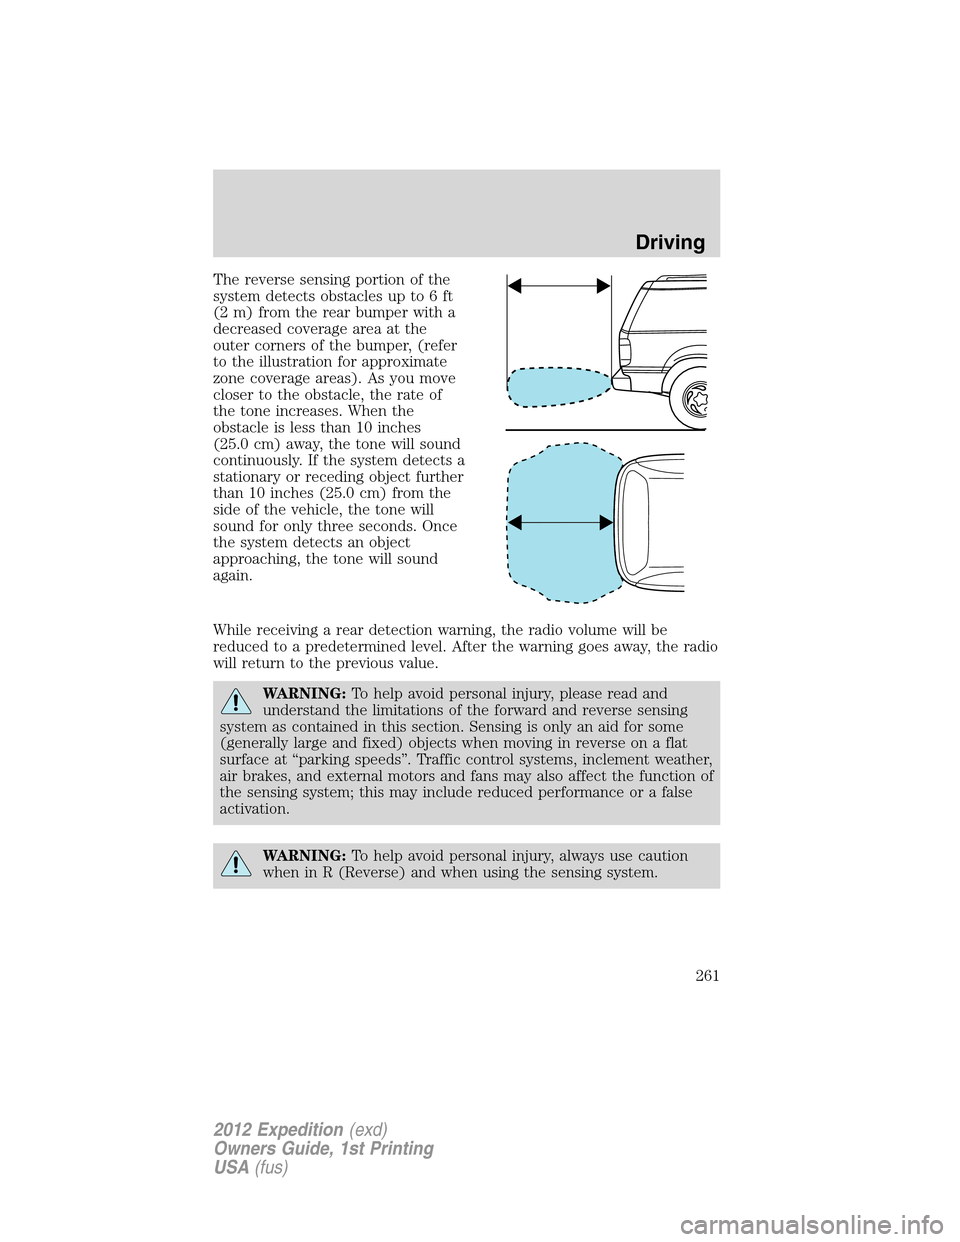
The reverse sensing portion of the
system detects obstacles up to 6 ft
(2 m) from the rear bumper with a
decreased coverage area at the
outer corners of the bumper, (refer
to the illustration for approximate
zone coverage areas). As you move
closer to the obstacle, the rate of
the tone increases. When the
obstacle is less than 10 inches
(25.0 cm) away, the tone will sound
continuously. If the system detects a
stationary or receding object further
than 10 inches (25.0 cm) from the
side of the vehicle, the tone will
sound for only three seconds. Once
the system detects an object
approaching, the tone will sound
again.
While receiving a rear detection warning, the radio volume will be
reduced to a predetermined level. After the warning goes away, the radio
will return to the previous value.
WARNING:To help avoid personal injury, please read and
understand the limitations of the forward and reverse sensing
system as contained in this section. Sensing is only an aid for some
(generally large and fixed) objects when moving in reverse on a flat
surface at “parking speeds”. Traffic control systems, inclement weather,
air brakes, and external motors and fans may also affect the function of
the sensing system; this may include reduced performance or a false
activation.
WARNING:To help avoid personal injury, always use caution
when in R (Reverse) and when using the sensing system.
Driving
261
2012 Expedition(exd)
Owners Guide, 1st Printing
USA(fus)