2012 FIAT BRAVO instrument panel
[x] Cancel search: instrument panelPage 7 of 299

GETTING TO KNOW YOUR CAR
DASHBOARDThe presence and position of the controls, instruments and indicators may vary according to the different
versions.1. Diffuser for directing air to the side windows - 2. Adjustable and directable air diffuser - 3. Exterior light control lever -
4. Instrument panel - 5. Windscreen wiper/rear window wiper/trip computer control lever - 6. Adjustable and directable
air diffusers - 7. Hazard warning lights switch - 8. Passenger front airbag - 9. Glove compartment - 10. Fog lights/rear
fog lights and menu access/setting switch unit - 11. Radio controls - 12. Heating/ventilation/climate control system
controls - 13. Electric power steering and ASR system (for versions/markets, where present)/front and rear parking
sensors (for versions/markets, where present) on/off switch unit - 14. Ignition key and ignition switch - 15. Driver side
front knee bag (for versions/markets, where provided) - 16. Driver front airbag - 17. Steering wheel locking lever -
18. Fuse box access flap - 19. Bonnet release lever
fig. 1
F0Q0639
3GETTING TO
KNOW YOUR CARSAFETY
STARTING AND
DRIVING
WARNING LIGHTS
AND MESSAGES
IN AN EMERGENCY
SERVICING AND
MAINTENANCE
TECHNICAL
SPECIFICATIONS
INDEX
Page 8 of 299

CONTROL PANEL AND INSTRUMENTSVersions with multifunction display
Warning lights supplied on diesel versions only
On diesel versions, the end of scale for the rev counter is 6000 rpm.
A. Speedometer B. Fuel level gauge with reserve warning light C. Engine coolant temperature gauge with overheating
warning light D. Rev counter E. Multifunction display
fig. 2
F0Q0604
4
GETTING TO
KNOW YOUR CAR
SAFETY
STARTING AND
DRIVING
WARNING LIGHTS
AND MESSAGES
IN AN EMERGENCY
SERVICING AND
MAINTENANCE
TECHNICAL
SPECIFICATIONS
INDEX
Page 12 of 299

SYMBOLSSome car components have coloured labels whose
symbols indicate precautions to be observed when
using this component.
A plate summarising these symbols fig. 6 can be
found under the bonnet.
THE FIAT CODE SYSTEMTo further protect your car from theft, it has been
fitted with an engine immobilising system. It is
automatically activated when the ignition key is
removed.
There is an electronic device in each key which can
identify the signal emitted, when the engine is
started, from an aerial built into the ignition switch.
The signal is the "password", different every time
the vehicle is started, through which the control
unit recognises the key and enables starting.
OPERATION
Each time the vehicle is started turning the ignition
key to MAR-ON, the Fiat CODE system control
unit sends an acknowledgement code to the engine
control unit to deactivate the immobiliser. The
code is sent only if the Fiat CODE system control
unit has acknowledged the code received from
the key.
Each time the ignition key is turned to STOP, the
Fiat CODE system deactivates the functions of the
engine management control unit.
If, during starting, the code is not correctly
recognised, the
warning light (or symbol on the
display) switches on in the instrument panel.
In this case, turn the key to STOP and then to
MAR-ON; if it is still locked, try again with the
other keys that come with the vehicle. Contact a
Fiat Dealership if you still cannot start the engine.
fig. 6
F0Q0640
8
GETTING TO
KNOW YOUR CAR
SAFETY
STARTING AND
DRIVING
WARNING LIGHTS
AND MESSAGES
IN AN EMERGENCY
SERVICING AND
MAINTENANCE
TECHNICAL
SPECIFICATIONS
INDEX
Page 23 of 299

TURNING THE ALARM OFF
Press button
on the key with remote control.
The following operations are performed
(excluding some versions for specific markets):
❒direction indicators flash twice;
❒there are two short acoustic signals (beeps);
❒doors are unlocked.
IMPORTANT The alarm does not switch off when
the central opening is activated using the metal
insert in the key.VOLUME SENSING/ANTI-LIFT
PROTECTION
To guarantee the correct operation of the
protection system it is advisable to shut all the side
windows and the sun roof (for versions/markets,
where provided).
If necessary, the function can be turned off (if, for
example, you are leaving an animal in the car) by
pressing button A fig. 14, located in the front roof
light, before activating the alarm itself.
When the function is disabled, this is indicated by
the LED on the button flashing for several seconds.
Any disabling of the volume sensing/anti-lift
protection must be repeated each time the
instrument panel is switched off.
fig. 14
F0Q0752
19GETTING TO
KNOW YOUR CARSAFETY
STARTING AND
DRIVING
WARNING LIGHTS
AND MESSAGES
IN AN EMERGENCY
SERVICING AND
MAINTENANCE
TECHNICAL
SPECIFICATIONS
INDEX
Page 27 of 299

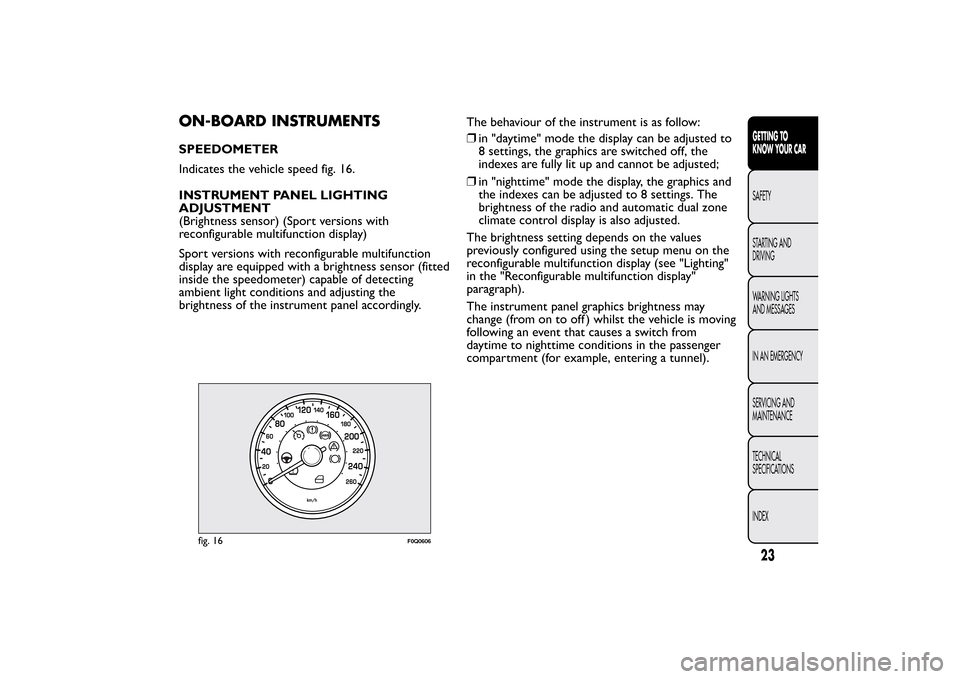
ON-BOARD INSTRUMENTSSPEEDOMETER
Indicates the vehicle speed fig. 16.
INSTRUMENT PANEL LIGHTING
ADJUSTMENT
(Brightness sensor) (Sport versions with
reconfigurable multifunction display)
Sport versions with reconfigurable multifunction
display are equipped with a brightness sensor (fitted
inside the speedometer) capable of detecting
ambient light conditions and adjusting the
brightness of the instrument panel accordingly.The behaviour of the instrument is as follow:
❒in "daytime" mode the display can be adjusted to
8 settings, the graphics are switched off, the
indexes are fully lit up and cannot be adjusted;
❒in "nighttime" mode the display, the graphics and
the indexes can be adjusted to 8 settings. The
brightness of the radio and automatic dual zone
climate control display is also adjusted.
The brightness setting depends on the values
previously configured using the setup menu on the
reconfigurable multifunction display (see "Lighting"
in the "Reconfigurable multifunction display"
paragraph).
The instrument panel graphics brightness may
change (from on to off ) whilst the vehicle is moving
following an event that causes a switch from
daytime to nighttime conditions in the passenger
compartment (for example, entering a tunnel).
fig. 16
F0Q0606
23GETTING TO
KNOW YOUR CARSAFETY
STARTING AND
DRIVING
WARNING LIGHTS
AND MESSAGES
IN AN EMERGENCY
SERVICING AND
MAINTENANCE
TECHNICAL
SPECIFICATIONS
INDEX
Page 33 of 299

SETUP MENU
The menu fig. 22 comprises a series of functions
arranged in a cycle which can be selected through
buttons
and
to access the different selection
and setting options (setup) given in the following
paragraphs. A submenu is provided for some
options ("Time adjustment" and "Unit of
measurement").
The setup menu can be activated by pressing the
MODE button briefly.
Single presses on buttons
or
will scroll through
the setup menu options. Operating modes are
different according to the characteristics of the
option selected.
If the Radionavigator system is installed, only the
following functions can be adjusted/set from the
instrument panel: "Lighting," “Speed beep” and
"Headlight sensor" (for versions/markets, where
provided), "Belt buzzer" and "Passenger airbag". The
other functions are shown on the Radionavigator
display. Set and adjustment them there.Selecting an option from the main menu without a
submenu:
❒briefly press button MODE to select the main
menu option that needs to be changed;
❒press buttons
or
(with single presses) to
select the new setting;
❒briefly press button MODE to store the new
setting and at the same time go back to the
previously selected menu option.
Selecting an option from the main menu with a
submenu:
❒briefly press the MODE button to display the
first submenu option;
❒press buttons
or
(with single presses) to
scroll through all the submenu options;
❒briefly press the MODE button to select the
displayed submenu option and to open the
relevant settings menu;
❒press buttons
or
(with single presses) to
select the new setting for this submenu option;
❒briefly press button MODE to store the new
setting and at the same time go back to the
previously selected submenu option.
29GETTING TO
KNOW YOUR CARSAFETY
STARTING AND
DRIVING
WARNING LIGHTS
AND MESSAGES
IN AN EMERGENCY
SERVICING AND
MAINTENANCE
TECHNICAL
SPECIFICATIONS
INDEX
Page 37 of 299

Note Buttons
and
activate different functions
according to the following situations:
❒within the menu, they allow you to scroll up and
down through the options;
❒during settings operations, they increase or
decrease values.
Note When opening one of the front doors, the
display will turn on and show for a few seconds the
time and the distance covered.GEAR SHIFT INDICATOR
The “GSI” (Gear Shift Indicator) system advises the
driver to change gear through a specific indication
on the control panel fig. 26.
Through the GSI, the driver is notified that
changing gear will allow a reduction in fuel
consumption.
When the SHIFT UP icon (
SHIFT) is shown on
the display, the GSI is advising the driver to engage
a higher gear, while the SHIFT DOWN (
SHIFT)
icon advises the driver to engage a lower gear.
Note The indication on the instrument panel
remains on until the driver changes gear or until
the driving conditions return to a situation where a
gear change is not required to reduce consumption.
fig. 26
F0Q3242
33GETTING TO
KNOW YOUR CARSAFETY
STARTING AND
DRIVING
WARNING LIGHTS
AND MESSAGES
IN AN EMERGENCY
SERVICING AND
MAINTENANCE
TECHNICAL
SPECIFICATIONS
INDEX
Page 38 of 299

SETUP MENU
The menu fig. 27 comprises a series of functions
arranged in a cycle which can be selected through
buttons
and
to access the different selection
and setting options (setup) given in the following
paragraphs. A submenu is provided for some
options (Time adjustment and Unit of
measurement).
The setup menu can be activated by pressing the
MODE button briefly.
Single presses on buttons
or
will scroll through
the setup menu options. Operating modes are
different according to the characteristics of the
option selected.
If the Radionavigator system is installed, only the
following functions can be adjusted/set from the
instrument panel:
"Lighting," “Speed beep” and "Headlight sensor" (for
versions/markets, where provided), "Belt buzzer"
and "Passenger airbag". The other functions are
shown on the Radionavigator display. Set and
adjustment them there.Selecting an option from the main menu without a
submenu:
❒briefly press button MODE to select the main
menu option that needs to be changed;
❒press buttons
or
(with single presses) to
select the new setting;
❒briefly press button MODE to store the new
setting and at the same time go back to the
previously selected menu option.
Selecting an option from the main menu with a
submenu:
❒briefly press the MODE button to display the
first submenu option;
❒press buttons
or
(with single presses) to
scroll through all the submenu options;
❒briefly press the MODE button to select the
displayed submenu option and to open the
relevant settings menu;
❒press buttons
or
(with single presses) to
select the new setting for this submenu option;
❒briefly press button MODE to store the new
setting and at the same time go back to the
previously selected submenu option.
34GETTING TO
KNOW YOUR CAR
SAFETY
STARTING AND
DRIVING
WARNING LIGHTS
AND MESSAGES
IN AN EMERGENCY
SERVICING AND
MAINTENANCE
TECHNICAL
SPECIFICATIONS
INDEX