Page 355 of 643
 anywhere in the vehicle in
extreme heat or cold can alter the operation or
damage the device. Follow the device manufactur")
CAUTION!
•Leaving the iPod�or external USB device (or any
supported device) anywhere in the vehicle in
extreme heat or cold can alter the operation or
damage the device. Follow the device manufactur-
er ’s guidelines.
•Placing items on the iPod� or external USB device,
or connections to the iPod� or external USB device
in the vehicle, can cause damage to the device
and/or to the connectors.
WARNING!
Do not plug in or remove the iPod� or external USB
device while driving. Failure to follow this warning
could result in an accident.
Bluetooth Streaming Audio (BTSA)
Music can be streamed from your cellular phone to the
Uconnect™ phone system.
Controlling BTSA Using Radio Buttons
To get into the BTSA mode, press either “AUX” button on
the radio or press the VR button and say “Bluetooth
Streaming Audio”.
Play Mode
When switched to BTSA mode, some audio devices can
start playing music over the vehicle’s audio system, but
some devices require the music to be initiated on the
device first, then it will get streamed to the Uconnect™
phone system. Seven devices can be paired to the
Uconnect™ phone system, but just one can be selected
and played.
Selecting Different Audio Device
1. Press PHONE button to begin.
352 UNDERSTANDING YOUR INSTRUMENT PANEL
Page 356 of 643
2. After the�Ready�prompt and the following beep, say
�Setup�, then �Select Audio Devices�.
3. Say the name of the audio device or ask the
Uconnect™ phone system to list audio devices.
Next Track
Use the SEEK UP button, or press the VR button on the
radio and say “Next Track” to jump to the next track
music on your cellular phone.
Previous Track
Use the SEEK DOWN button, or press the VR button on
the radio and say “Previous Track” to jump to the
previous track music on your cellular phone.
Browse
Browsing is not available on a BTSA device. Only the
current song that is playing will display info.
UCONNECT™ MULTIMEDIA VIDEO
ENTERTAINMENT SYSTEM (VES)™ — IF EQUIPPED
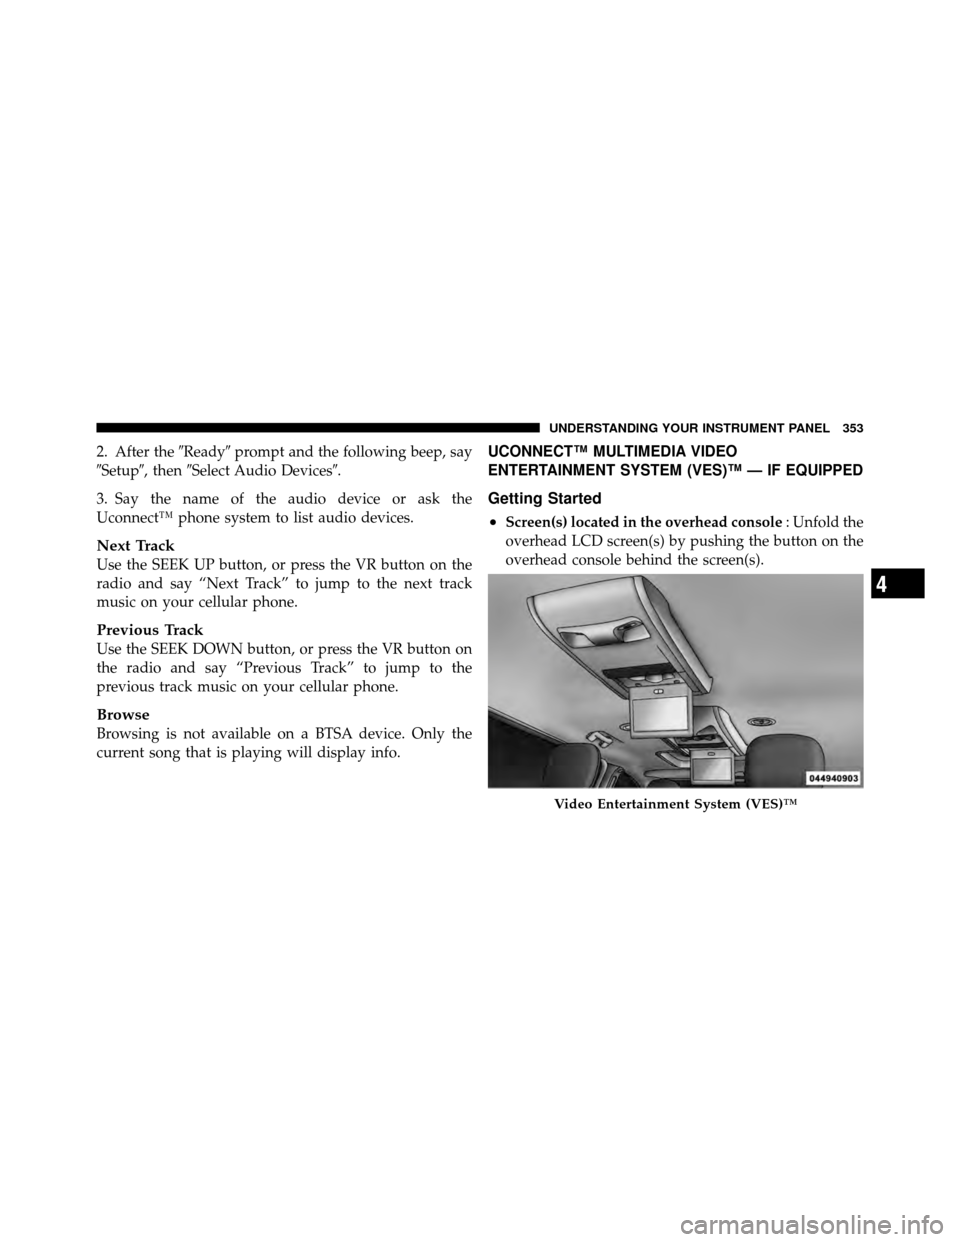
Getting Started
•
Screen(s) located in the overhead console : Unfold the
overhead LCD screen(s) by pushing the button on the
overhead console behind the screen(s).
Video Entertainment System (VES)™
4
UNDERSTANDING YOUR INSTRUMENT PANEL 353
Page 359 of 643
Using The Touch-Screen Radio Controls
1. Press the MENU hard-key on the radio faceplate.
2. Touch the Rear VES soft-key to display the Rear VES
Controls. If a channel list is displayed, press the HIDE
LIST soft-key to display the Rear VES Controls screen.3. Touch the 1 soft-key and then touch either AUX 1 or
AUX 2 in the VES column (depending which AUX input
is used). To exit press the back arrow soft-key at the top
of the screen.
Rear VES Soft-key
Select Channel/Screen 1 And
AUX 1 In The VES Column
356 UNDERSTANDING YOUR INSTRUMENT PANEL
Page 361 of 643
Using The Touch-Screen Radio Controls
1. Press the MENU hard-key on the radio faceplate.
2. Touch the Rear VES soft-key to display the Rear VES
Controls. If a channel list is displayed, press the HIDE
LIST soft-key to display the Rear VES Controls screen.3. To listen to an audio source on Channel 2 while a
video is playing on Channel 1, touch the 2 soft-key and
choose an audio source. To exit touch the back arrow
soft-key at the top left of the left screen.
Rear VES Soft-key
Select Channel/Screen 2 And
HDD In The MEDIA Column
358 UNDERSTANDING YOUR INSTRUMENT PANEL
Page 362 of 643
Dual Video Screen
NOTE:Typically there are two different ways to operate
the features of the Video Entertainment System (VES)™.
•The Remote Control
•The Touch-Screen Radio (If Equipped)
Play A DVD Using The Touch-Screen Radio
1. Press the OPEN/CLOSE or LOAD hard-key on the
radio faceplate (Touch-Screen).
2. Insert the DVD with the label facing up. The radio
automatically selects the appropriate mode after the disc
is recognized and displays the menu screen or starts
playing the first track. 3. To watch a DVD on Screen 1 for second row passen-
gers, ensure the Remote Control and Headphone switch
is on Channel 1.
4. To watch a DVD on Screen 2 for third row passengers,
ensure the Remote Control and Headphone switch is on
Channel 2.
4
UNDERSTANDING YOUR INSTRUMENT PANEL 359
Page 363 of 643
Using The Remote Control
1. Press the MODE button on the Remote Control.
2. While looking at Screen 1 or 2, highlight DISC by
either pressing Up/Down/Left/Right buttons or by re-
peatedly pressing the MODE button, then press ENTER.NOTE:•Channel/Screen 1 select mode information is shown
on the left side of the screen.
•Channel/Screen 2 select mode information is shown
on the right side of the screen.
•The VES™ will retain the last setting when turned off.
Using The Touch-Screen Radio Controls
1. Press the MENU hard-key on the radio faceplate.
2. Touch the Rear VES soft-key to display the Rear VES
Controls. If a channel list is displayed, press the HIDE
LIST soft-key to display the Rear VES Controls screen.
Select DISC Mode On The VES Screen
360 UNDERSTANDING YOUR INSTRUMENT PANEL
Page 364 of 643
3. Touch the 1 or 2 soft-key based on the channel you
want to change and then the DISC soft-key in the MEDIA
column. To exit touch the back arrow at the top left of the
screen.NOTE:
•To view a DVD on the radio press the RADIO/MEDIA
hard-key, on the radio faceplate, then touch the DISC
tab soft-key and then the VIEW VIDEO soft-key.
Rear VES Soft-keySelect Channel/Screen 1 And DISC
In The MEDIA Column
4
UNDERSTANDING YOUR INSTRUMENT PANEL 361
Page 365 of 643

•Viewing a DVD on the Touch-Screen radio screen is
not available in all states/provinces, and the vehicle
must be stopped, and the shift lever must be in the
PARK position for vehicles with automatic transmis-
sion. In vehicles with manual transmission the parking
brake must be engaged.
•Touching the screen on a Touch-Screen radio while a
DVD is playing brings up basic remote control func-
tions for DVD play such as scene selection, Play,
Pause, FF, RW, and Stop. Pressing the X in the upper
corner will turn off the remote control screen
functions.
Play A DVD Using The VES™ Player (If Equipped)
1. Insert the DVD with the label facing up. The VES™
player automatically selects the appropriate mode after
the disc is recognized and starts playing the DVD.
NOTE:The VES™ player has basic DVD control func-
tion such as Menu, Play, Pause, FF, RW and Stop
2. To watch a DVD on Screen 1 for second row passen-
gers, ensure the Remote Control and Headphone switch
is on Channel 1.
3. To watch a DVD on Screen 2 for third row passengers,
ensure the Remote Control and Headphone switch is on
Channel 2.
362 UNDERSTANDING YOUR INSTRUMENT PANEL


™.
•The Remote Control
•The Touch-Screen Radio (If Equipped)
Play A D")

