Page 390 of 686
with a DVD player, follow the radio’s instructions to
turn Video Lock on. The radio and the video screen(s)
indicate when Video Lock is active.
•Pressing the Video Lock again or turning the ignition
OFF turns Video Lock OFF and allows remote control
operation of the VES™.
Replacing The Batteries
The remote control requires two AAA batteries for op-
eration. To replace the batteries:
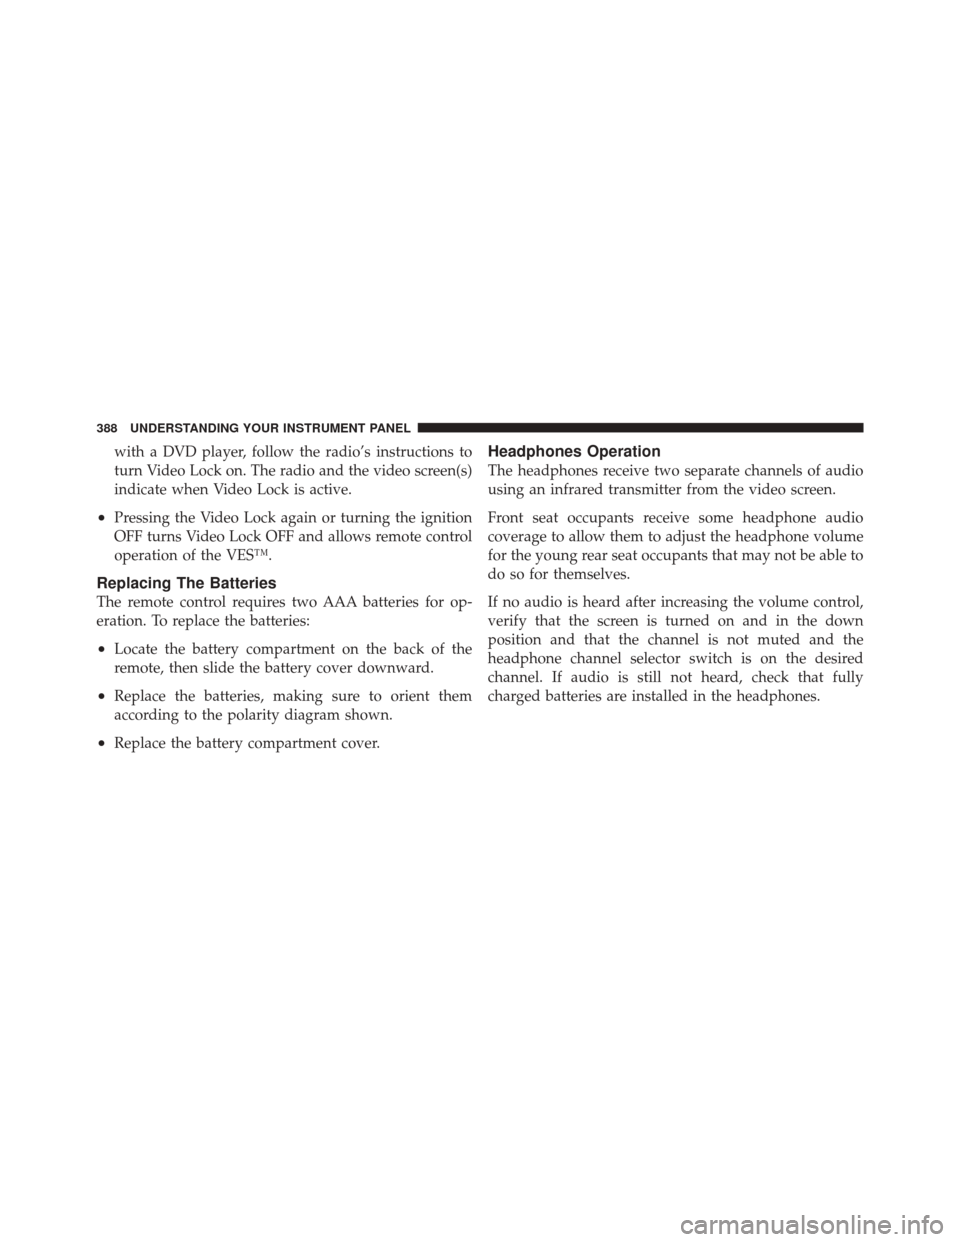
•Locate the battery compartment on the back of the
remote, then slide the battery cover downward.
•Replace the batteries, making sure to orient them
according to the polarity diagram shown.
•Replace the battery compartment cover.
Headphones Operation
The headphones receive two separate channels of audio
using an infrared transmitter from the video screen.
Front seat occupants receive some headphone audio
coverage to allow them to adjust the headphone volume
for the young rear seat occupants that may not be able to
do so for themselves.
If no audio is heard after increasing the volume control,
verify that the screen is turned on and in the down
position and that the channel is not muted and the
headphone channel selector switch is on the desired
channel. If audio is still not heard, check that fully
charged batteries are installed in the headphones.
388 UNDERSTANDING YOUR INSTRUMENT PANEL
Page 391 of 686
Controls
The headphone power indicator and controls are located
on the right ear cup.NOTE:
The rear video system must be turned on before
sound can be heard from the headphones. To conserve
battery life, the headphones will automatically turn off
approximately three minutes after the rear video system
is turned off.
Changing the Audio Mode for Headphones
1. Ensure the Remote Control channel/screen selector
switch is in the same position as the headphone selector
switch..
NOTE:
•When both switches are on Channel 1, the Remote is
controlling Channel 1 and the headphones are tuned
to the audio of the VES™ Channel 1.
•When both switches are on Channel 2, the Remote is
controlling Channel 2 and the headphones are tuned
to the audio of the VES™ Channel 2.
2. Press the MODE button on the remote control.
1. Volume Control
2. Power Button
3. Channel Selection Switch
4. Power Indicator
4
UNDERSTANDING YOUR INSTRUMENT PANEL 389
Page 392 of 686
3. If the video screen is displaying a video source (such
as a DVD Video), pressing DISPLAY shows the status on
a popup banner at the bottom of the screen. Pressing the
MODE button will advance to the next mode. When the
mode is in an audio only source (such as FM), the Mode
Selection menu appears on screen.
4. When the Mode Selection menu appears on screen,
use the cursor buttons on the remote control to navigate
to the available modes and press the ENTER button to
select the new mode.
5. To cancel out of the Mode Selection menu, press the
BACK button on the remote control.Replacing The Batteries
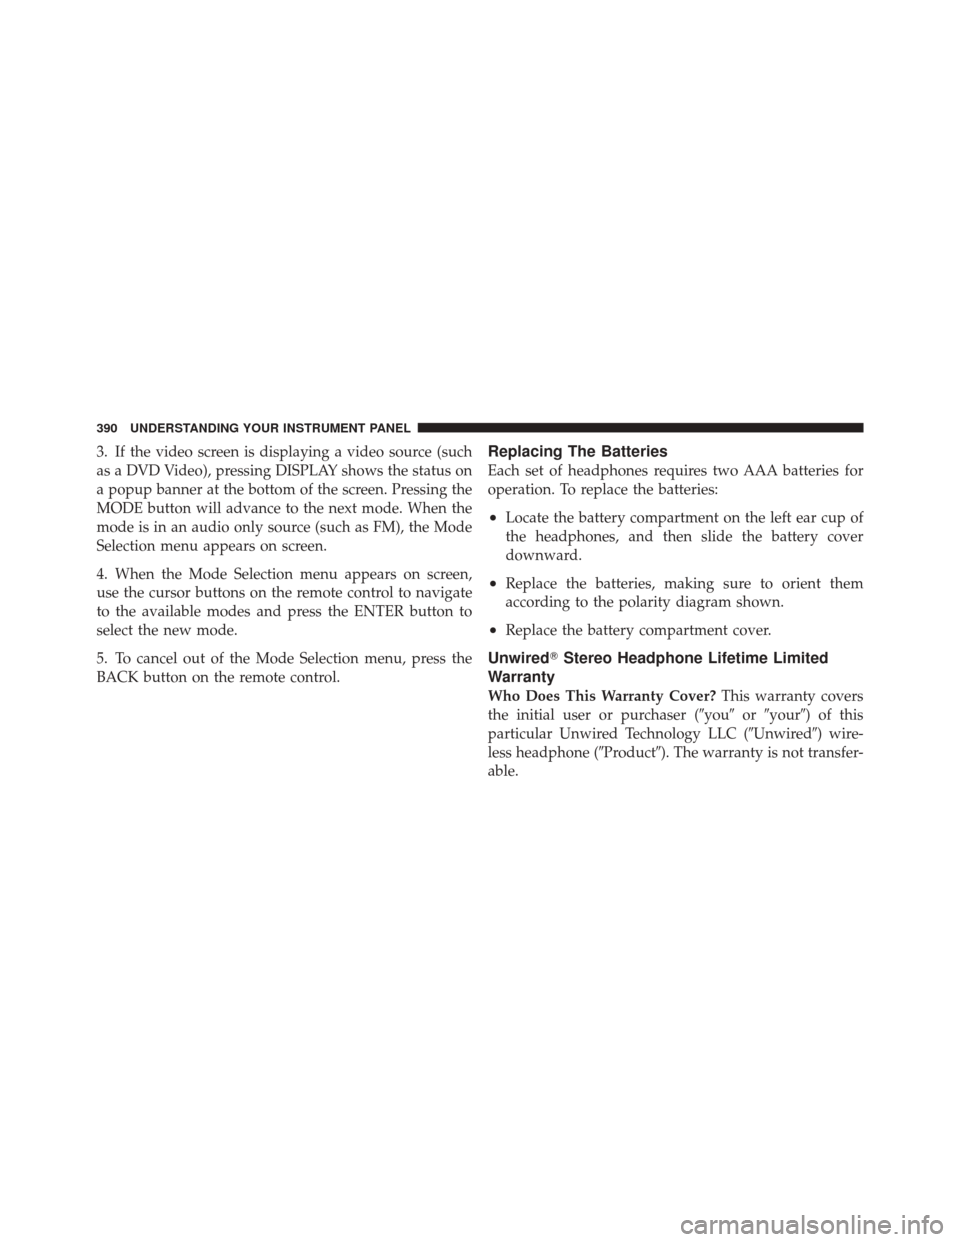
Each set of headphones requires two AAA batteries for
operation. To replace the batteries:
•Locate the battery compartment on the left ear cup of
the headphones, and then slide the battery cover
downward.
•Replace the batteries, making sure to orient them
according to the polarity diagram shown.
•Replace the battery compartment cover.
Unwired�Stereo Headphone Lifetime Limited
Warranty
Who Does This Warranty Cover? This warranty covers
the initial user or purchaser (�you� or�your�) of this
particular Unwired Technology LLC (�Unwired�) wire-
less headphone (�Product�). The warranty is not transfer-
able.
390 UNDERSTANDING YOUR INSTRUMENT PANEL
Page 394 of 686
You may register your Unwired�wireless headphones
online at www.unwiredtechnology.com or by phone at
1-888-293-3332.
System Information
Shared Modes
The VES™ and radio are capable of communicating with
each other. This allows the VES™ to output radio audio
to the headphones and the radio to output VES™ audio
to the vehicle speakers. When the radio and VES™ are in
the same (shared) mode, a VES™ icon will be visible on
the radio’s display and the shared icon will be visible on
the VES™ screen. When in shared mode, the same audio
source is heard in the headphones and vehicle speakers
simultaneously.
If the radio functions (FM, AM, or SAT) are in the shared
mode with the VES™, only the radio is able to control the
radio functions. In this case, VES™ can share the radio mode, but not change stations until the radio mode is
changed to a mode that is different from the VES™
selected radio mode. When shared, the radio has priority
over the VES™ or all radio modes (FM, AM, and SAT).
The VES™ has the ability to switch tuner (AM/FM),
SEEK, SCAN, TUNE, and recall presets in radio modes as
long as it is not in shared mode.
When in shared disc mode both the radio and the VES™
have control of the video functions. The VES™ has the
ability to control the following video modes:
1. CD: Ability to Fast Forward, Rewind, Scan, and Track
Up/Down.
2. CD Changer (in radio): Ability to Disk Up/Down and
program all listed CD controls (Fast Forward, Rewind,
Scan, and Track Up/Down).
392 UNDERSTANDING YOUR INSTRUMENT PANEL
Page 395 of 686
The VES™ can even control radio modes or video modes
while the radio is turned off. The VES™ can access the
radio modes or disc modes by navigating to those modes
on the VES™ and activating a radio mode or disc mode.
Information Mode Display
1. Channel 1 Mode
2. Channel 1 Shared Status
3. Channel 1 Audio Only/Mute
4. Channel 2 Mode
5. Channel 2 Shared Status
6. Channel 2 Audio Only/Mute
7. Channel 1 ENTER Button Action
8. Channel 2 ENTER Button Action
9. Clock
10. Video Lock
11. Not Available / Error
12. Disc Changer Status
Information Mode Video Screen Display
4
UNDERSTANDING YOUR INSTRUMENT PANEL 393
Page 397 of 686
Station List Menu
When listening to Satellite audio or watching SIRIUS
Backseat TV™ (if equipped), pressing the remote con-
trol’s MENU button displays a list of all available chan-
nels. Navigate this list using the remote control’s naviga-
tion buttons (�,�) to find the desired station, press the
remote control’s ENTER button to tune to that station. To
jump through the list more quickly, navigate to the Page
Up and Page Down icons on the screen.
Disc Menu
When listening to a CD Audio or CD Data disc, pressing
the remote control’s MENU button displays a list of all
commands which control playback of the disc. Using the
options you can activate or cancel Scan play and Random
play.
Channel Selection Menu For SIRIUS Backseat TV™
Disc Menu For CDs
4
UNDERSTANDING YOUR INSTRUMENT PANEL 395
Page 398 of 686
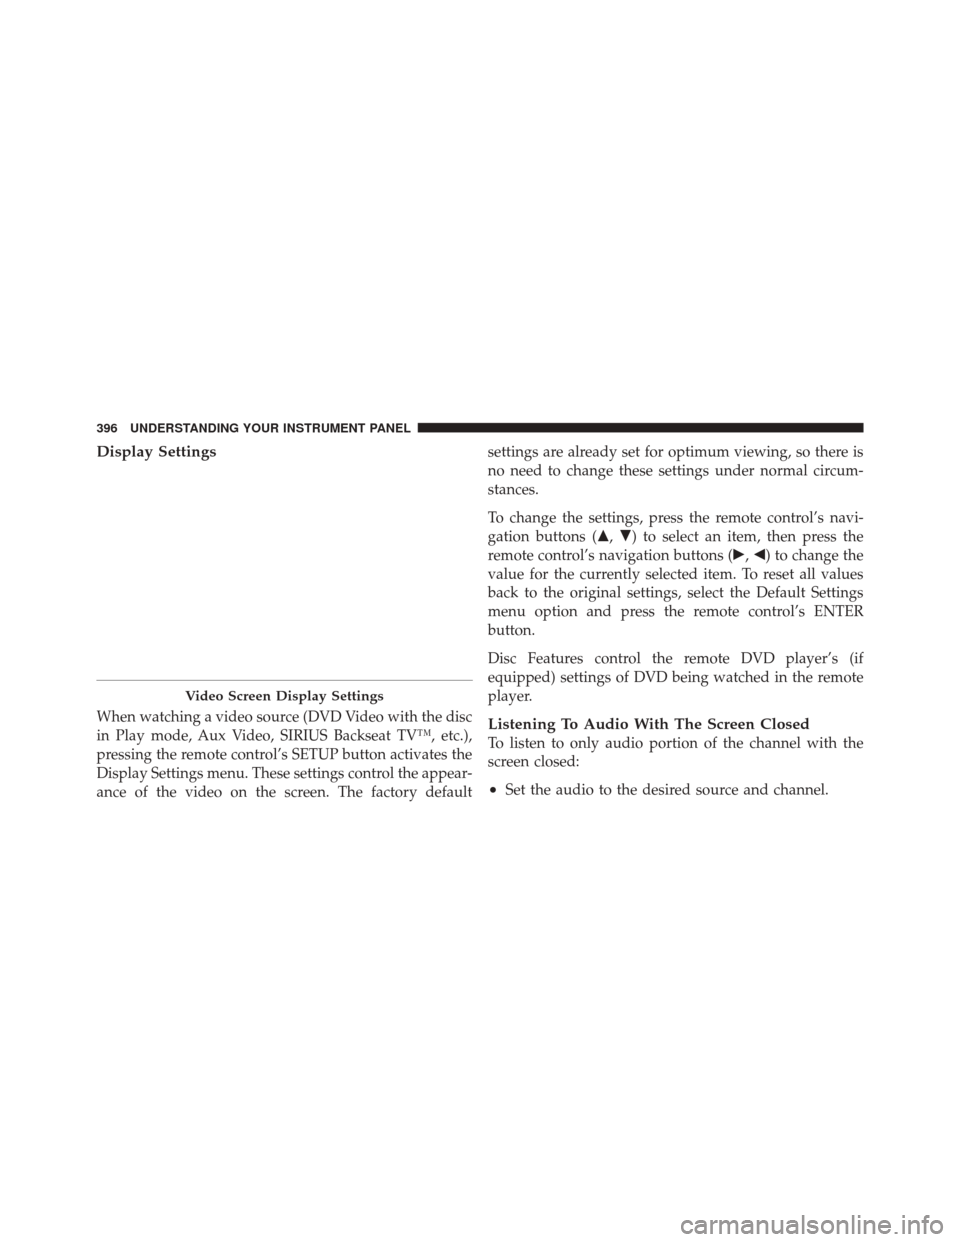
Display Settings
When watching a video source (DVD Video with the disc
in Play mode, Aux Video, SIRIUS Backseat TV™, etc.),
pressing the remote control’s SETUP button activates the
Display Settings menu. These settings control the appear-
ance of the video on the screen. The factory defaultsettings are already set for optimum viewing, so there is
no need to change these settings under normal circum-
stances.
To change the settings, press the remote control’s navi-
gation buttons (�,
�) to select an item, then press the
remote control’s navigation buttons (�, �) to change the
value for the currently selected item. To reset all values
back to the original settings, select the Default Settings
menu option and press the remote control’s ENTER
button.
Disc Features control the remote DVD player’s (if
equipped) settings of DVD being watched in the remote
player.Listening To Audio With The Screen Closed
To listen to only audio portion of the channel with the
screen closed:
•Set the audio to the desired source and channel.
Video Screen Display Settings
396 UNDERSTANDING YOUR INSTRUMENT PANEL
Page 399 of 686
•Close the video screen.
•To change the current audio mode, press the remote
control’s MODE button. This will automatically select
the next available audio mode without using the Mode
Select menu.
•When the screen is reopened, the video screen will
automatically turn back on and show the appropriate
display menu or media.
If the screen is closed and there is no audio heard, verify
that the headphones are turned on (the ON indicator is
illuminated) and the headphone selector switch is on the
desired channel. If the headphones are turned on, press
the remote control’s power button to turn audio on. If
audio is still not heard, check that fully charged batteries
are installed in the headphones.
Disc Formats
The VES™ DVD player is capable of playing the follow-
ing types of discs (12 mm or 8 mm diameter):
•DVD-Video discs (MPEG-2 video compression) (see
notes about DVD Region Codes)
•DVD-Audio discs (2 channel audio output only)
•Audio Compact Discs (CDs)
•CD Data discs with MP3 and WMA compressed audio
format files
•Video CDs (MPEG-1 video compression)
DVD Region Codes
The VES™ DVD player and many DVD discs are coded
by geographic region. These region codes must match in
order for the disc to play. If the region code for the DVD
disc does not match the region code for the player, the
disc will not play and will be ejected.
4
UNDERSTANDING YOUR INSTRUMENT PANEL 397