Page 26 of 124

Instrument Panel Dimmer
• Rotate the dimmer control to the extreme bottom position to fully dim theinstrument panel lights and prevent the interior lights from illuminating when a
door is opened.
• Rotate the dimmer control up to increase the brightness of the instrument panel when the parking lights or headlights are on.
• Rotate the dimmer control up to the next detent position to fully brighten the odometer and radio when the parking lights or headlights are on. Refer to your
Media Center/Radio User Manual on the DVD for display dimming.
• Rotate the dimmer control up to the last detent position to turn on the interior lighting.
SPEED CONTROL
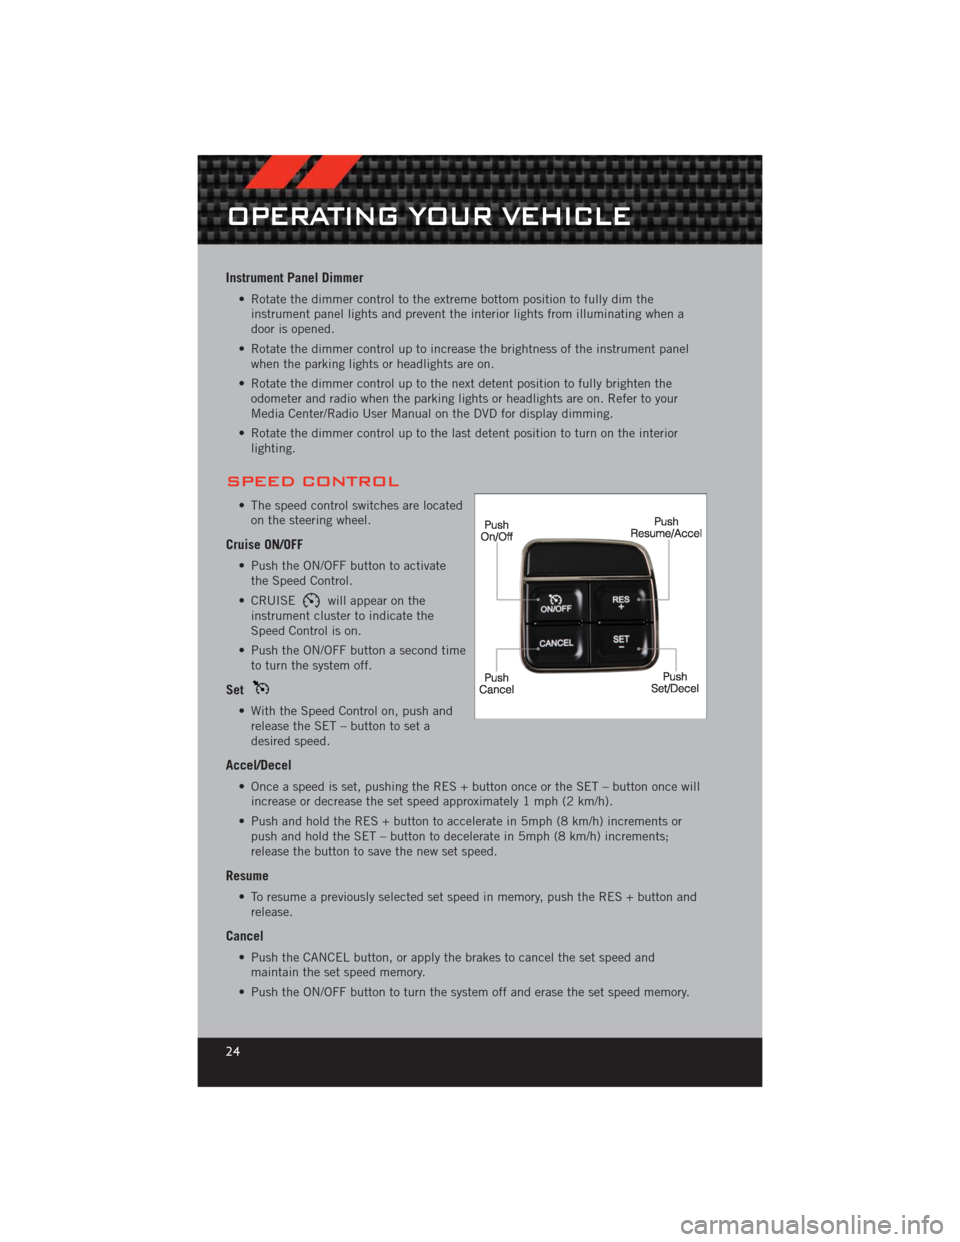
• The speed control switches are locatedon the steering wheel.
Cruise ON/OFF
• Push the ON/OFF button to activatethe Speed Control.
• CRUISE
will appear on the
instrument cluster to indicate the
Speed Control is on.
• Push the ON/OFF button a second time to turn the system off.
Set
• With the Speed Control on, push andrelease the SET – button to set a
desired speed.
Accel/Decel
• Once a speed is set, pushing the RES + button once or the SET – button once willincrease or decrease the set speed approximately 1 mph (2 km/h).
• Push and hold the RES + button to accelerate in 5mph (8 km/h) increments or push and hold the SET – button to decelerate in 5mph (8 km/h) increments;
release the button to save the new set speed.
Resume
• To resume a previously selected set speed in memory, push the RES + button andrelease.
Cancel
• Push the CANCEL button, or apply the brakes to cancel the set speed andmaintain the set speed memory.
• Push the ON/OFF button to turn the system off and erase the set speed memory.
OPERATING YOUR VEHICLE
24
Page 37 of 124

Clock Setting
• Turn the radio on, then touch the screen where the time is displayed.
• Touch the “USER CLOCK” soft-key (Navigation radio only).
• To adjust the hours, touch either the “HOUR FORWARD” or “HOUR BACKWARD”soft-key.
• To adjust the minutes, touch either the “MINUTE FORWARD” or “MINUTE BACKWARD” soft-key.
• To save the new time setting, touch the screen where the word “Save” is displayed.
Menu
• Press the “MENU” hard-key to access the System Setup menu and the My Files menu.
• Press the “MENU” hard-key in an active mode (SAT, CD, AUX, etc.) in order to change mode specific settings.
Equalizer, Balance And Fade
Audio Control Menu
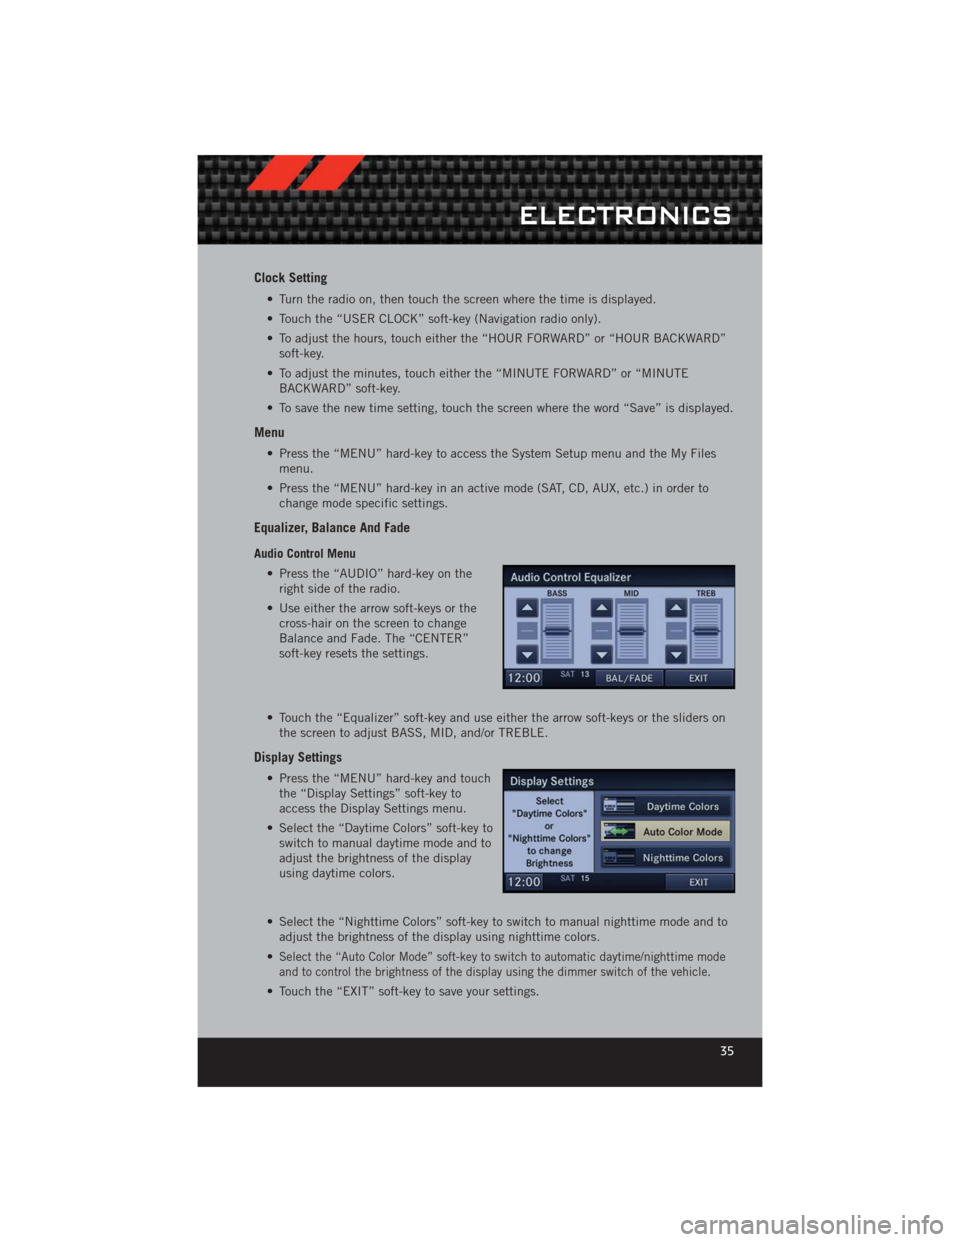
• Press the “AUDIO” hard-key on theright side of the radio.
• Use either the arrow soft-keys or the cross-hair on the screen to change
Balance and Fade. The “CENTER”
soft-key resets the settings.
• Touch the “Equalizer” soft-key and use either the arrow soft-keys or the sliders on the screen to adjust BASS, MID, and/or TREBLE.
Display Settings
• Press the “MENU” hard-key and touchthe “Display Settings” soft-key to
access the Display Settings menu.
• Select the “Daytime Colors” soft-key to switch to manual daytime mode and to
adjust the brightness of the display
using daytime colors.
• Select the “Nighttime Colors” soft-key to switch to manual nighttime mode and to adjust the brightness of the display using nighttime colors.
•
Select the “Auto Color Mode” soft-key to switch to automatic daytime/nighttime mode
and to control the brightness of the display using the dimmer switch of the vehicle.
• Touch the “EXIT” soft-key to save your settings.
ELECTRONICS
35
Page 46 of 124

Equalizer, Balance And Fade
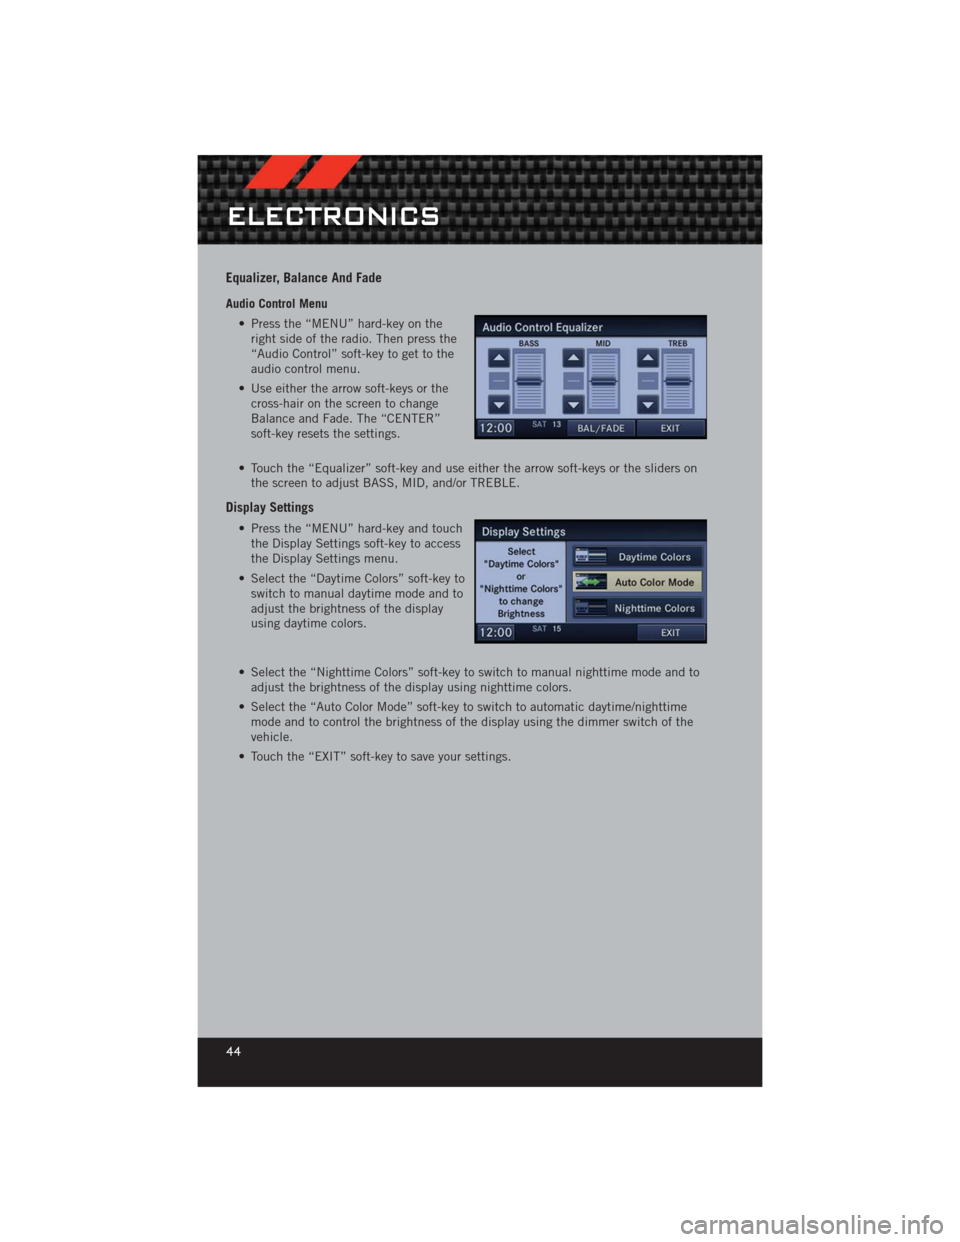
Audio Control Menu• Press the “MENU” hard-key on theright side of the radio. Then press the
“Audio Control” soft-key to get to the
audio control menu.
• Use either the arrow soft-keys or the cross-hair on the screen to change
Balance and Fade. The “CENTER”
soft-key resets the settings.
• Touch the “Equalizer” soft-key and use either the arrow soft-keys or the sliders on the screen to adjust BASS, MID, and/or TREBLE.
Display Settings
• Press the “MENU” hard-key and touchthe Display Settings soft-key to access
the Display Settings menu.
• Select the “Daytime Colors” soft-key to switch to manual daytime mode and to
adjust the brightness of the display
using daytime colors.
• Select the “Nighttime Colors” soft-key to switch to manual nighttime mode and to adjust the brightness of the display using nighttime colors.
• Select the “Auto Color Mode” soft-key to switch to automatic daytime/nighttime mode and to control the brightness of the display using the dimmer switch of the
vehicle.
• Touch the “EXIT” soft-key to save your settings.
ELECTRONICS
44
Page 58 of 124

STEERING WHEEL AUDIO CONTROLS
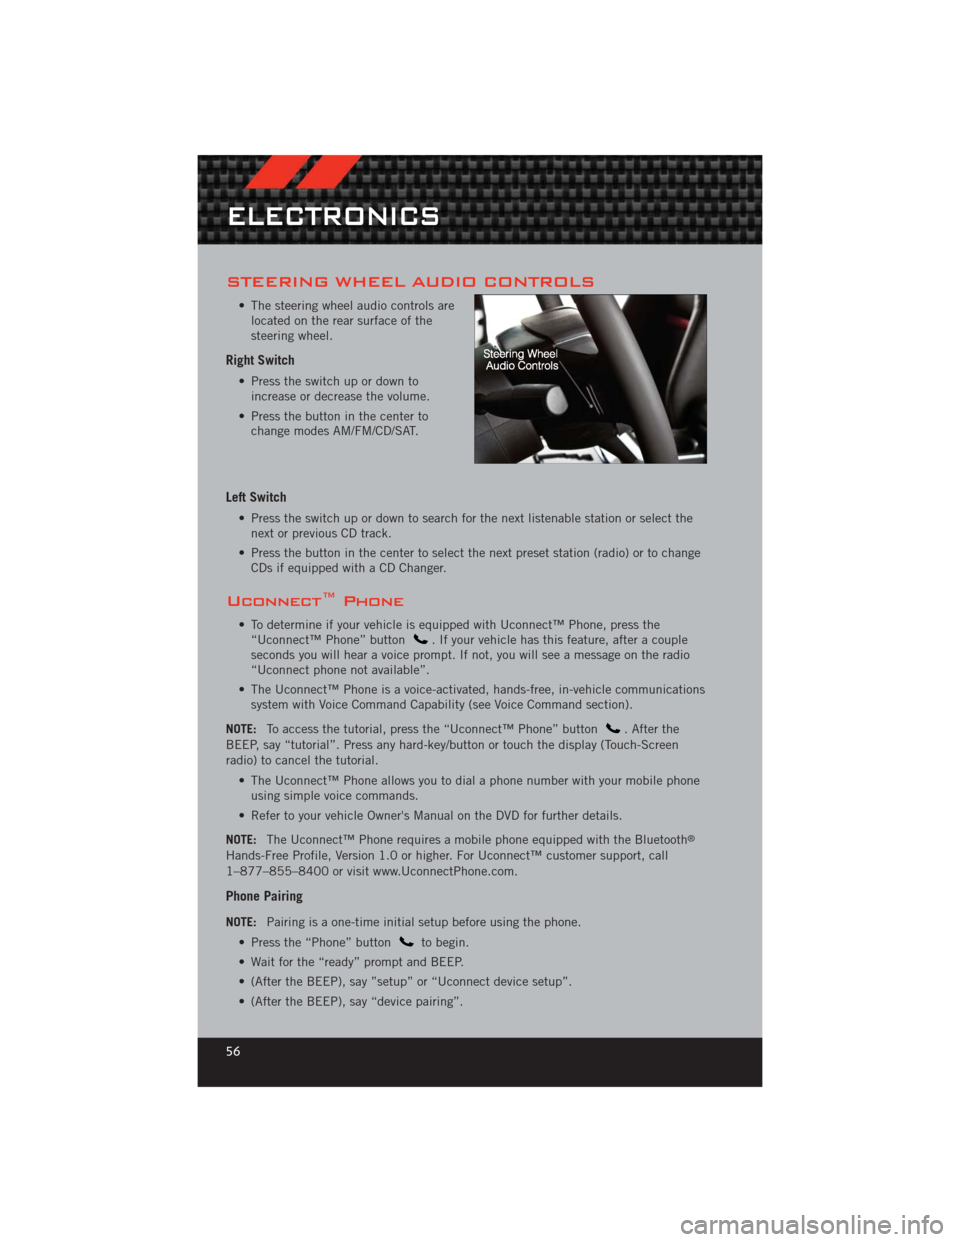
• The steering wheel audio controls arelocated on the rear surface of the
steering wheel.
Right Switch
• Press the switch up or down toincrease or decrease the volume.
• Press the button in the center to change modes AM/FM/CD/SAT.
Left Switch
• Press the switch up or down to search for the next listenable station or select thenext or previous CD track.
• Press the button in the center to select the next preset station (radio) or to change CDs if equipped with a CD Changer.
Uconnect™ Phone
• To determine if your vehicle is equipped with Uconnect™ Phone, press the“Uconnect™ Phone” button. If your vehicle has this feature, after a couple
seconds you will hear a voice prompt. If not, you will see a message on the radio
“Uconnect phone not available”.
• The Uconnect™ Phone is a voice-activated, hands-free, in-vehicle communications system with Voice Command Capability (see Voice Command section).
NOTE: To access the tutorial, press the “Uconnect™ Phone” button
. After the
BEEP, say “tutorial”. Press any hard-key/button or touch the display (Touch-Screen
radio) to cancel the tutorial.
• The Uconnect™ Phone allows you to dial a phone number with your mobile phoneusing simple voice commands.
• Refer to your vehicle Owner's Manual on the DVD for further details.
NOTE: The Uconnect™ Phone requires a mobile phone equipped with the Bluetooth
®
Hands-Free Profile, Version 1.0 or higher. For Uconnect™ customer support, call
1–877–855–8400 or visit www.UconnectPhone.com.
Phone Pairing
NOTE:Pairing is a one-time initial setup before using the phone.
• Press the “Phone” button
to begin.
• Wait for the “ready” prompt and BEEP.
• (After the BEEP), say ”setup” or “Uconnect device setup”.
• (After the BEEP), say “device pairing”.
ELECTRONICS
56