2012 DACIA SANDERO lock
[x] Cancel search: lockPage 62 of 183
fuel filler cap .......................................................... (current page)
fuel tank capacity ................................................... (current page)
fuel grade ................................................................ (current page)
fuel tank ................................................ (up to the end of the DU)
fuel filler cap .......................................................... (current page)
fuel grade ............................................................... (current page)
1.56
ENG_UD22575_7
Réservoir carburant (B90 - Dacia)
ENG_NU_817-9_B90_Dacia_1
Jaune NoirNoir texte
Fuel tank (filling with fuel)
FUEL TANK (1/3)
Capacity of the fuel tank: 50 litres ap-
proximately.
The cap can be unlocked with the igni -
tion key.
For details on filling the fuel tank, refer
to the information on “Filling with fuel”.
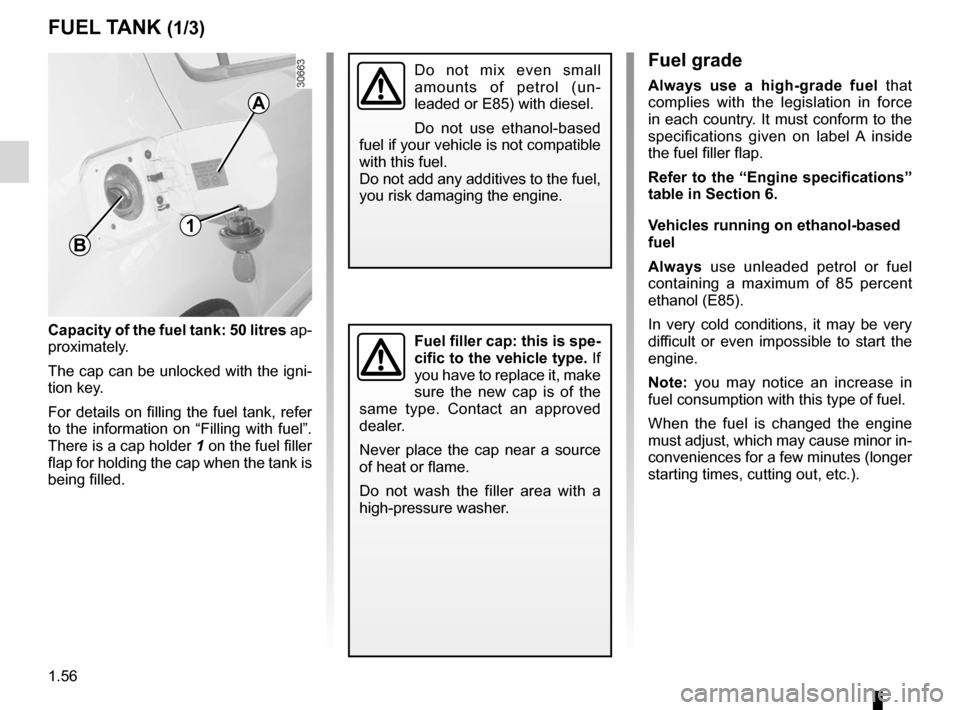
There is a cap holder 1 on the fuel filler
flap for holding the cap when the tank is
being filled.
Fuel grade
Always use a high-grade fuel that
complies with the legislation in force
in each country. It must conform to the
specifications given on label A inside
the fuel filler flap.
Refer to the “Engine specifications”
table in Section 6.
Vehicles running on ethanol-based
fuel
Always use unleaded petrol or fuel
containing a maximum of 85 percent
ethanol (E85).
In very cold conditions, it may be very
difficult or even impossible to start the
engine.
Note: you may notice an increase in
fuel consumption with this type of fuel.
When the fuel is changed the engine
must adjust, which may cause minor in-
conveniences for a few minutes (longer
starting times, cutting out, etc.).
Fuel filler cap: this is spe-
cific to the vehicle type. If
you have to replace it, make
sure the new cap is of the
same type. Contact an approved
dealer.
Never place the cap near a source
of heat or flame.
Do not wash the filler area with a
high-pressure washer.
A
B
1
Do not mix even small
amounts of petrol (un -
leaded or E85) with diesel.
Do not use ethanol-based
fuel if your vehicle is not compatible
with this fuel.
Do not add any additives to the fuel,
you risk damaging the engine.
Page 66 of 183
running in ............................................................... (current page)
ignition switch ........................................................ (current page)
engine immobiliser (switch) ................................... (current page)
driving .................................................................... (current page)
starting ................................................................... (current page)
2.2
ENG_UD18236_9
Rodage / Contacteur de démarrage (B90 - U90 - L90 Ph2 - Dacia)
ENG_NU_817-9_B90_Dacia_2
Running in, Ignition switch
RUNNING IN, IGNITION SWITCH
Petrol version
For the first 600 miles (1,000 km), do
not exceed 78 mph (130 km/h) in the
highest gear, or 3,000 to 3,500 rpm.
You may only expect top performance
from your vehicle after approximately
1,800 miles (3,000 km).
S e r v i c e i n t e r v a l s : r e f e r t o t h e
Maintenance Service Booklet for the
vehicle.
Diesel version
For the first 900 miles (1,500 km), do
not exceed 2,500 rpm. After complet -
ing this mileage you may drive faster,
although you may only expect top per-
formance after approximately 3,600
miles (6,000 km).
Do not accelerate hard while the engine
is still cold and do not let the engine
over-rev.
S e r v i c e i n t e r v a l s : r e f e r t o t h e
Maintenance Service Booklet for the
vehicle.
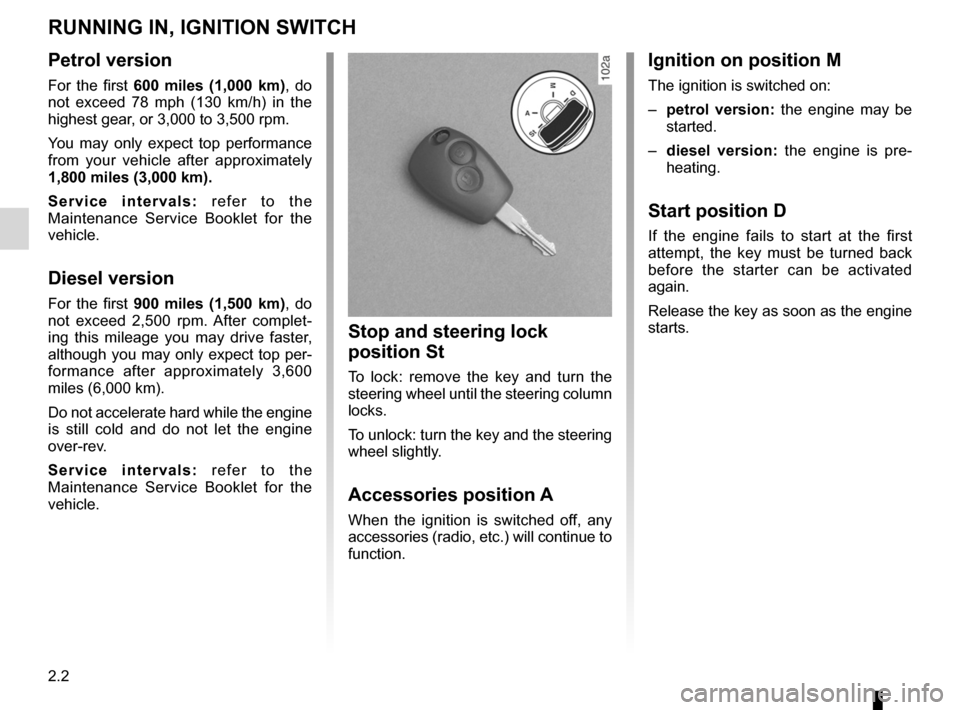
Stop and steering lock
position St
To lock: remove the key and turn the
steering wheel until the steering column
locks.
To unlock: turn the key and the steering
wheel slightly.
Accessories position A
When the ignition is switched off, any
accessories (radio, etc.) will continue to
function.
Ignition on position M
The ignition is switched on:
– petrol version: the engine may be
started.
– diesel version: the engine is pre -
heating.
Start position D
If the engine fails to start at the first
attempt, the key must be turned back
before the starter can be activated
again.
Release the key as soon as the engine
starts.
Page 67 of 183
driving ................................................... (up to the end of the DU)
starting .................................................. (up to the end of the DU)
starting the engine ................................ (up to the end of the DU)
2.3
ENG_UD18206_6
Démarrage, Arrêt du moteur (B90 - L90 Ph2 - F90 Ph2 - R90 Ph2 - Dacia)
ENG_NU_817-9_B90_Dacia_2
Vehicle equipped with an automatic
gearbox
Before starting, move the lever to posi-
tion N or P.
Refer to the information on the
“Automatic gearbox” in Section 2.
Petrol injection
Engine warm or cold
– Activate the starter without de-
pressing the accelerator.
– Release the key as soon as the
engine starts.ÉDiesel injection
Turn the ignition key to ignition “On” po-
sition M, and hold this position until the
preheating warning light goes out.
Move the key to “Start” position D with-
out accelerating. Release the key as
soon as the engine starts.
Stopping the engine
With the engine idling, turn the key
back to “Stop” position St.
Starting the engine
In very cold conditions (temperatures
below –20°C): so that it is easier to
start the engine, switch on the ignition
for several seconds before starting the
engine.
Make sure the engine immobiliser is not
activated. Refer to the information on
the “Engine immobiliser” in Section 1.
Starting/stopping the engine
STARTING/STOPPING THE ENGINE
Never leave your vehicle with the key or remote control inside and never leave a child (or a pet) unsupervised, even
for a short while.
The reason for this is that the child may endanger himself or others by starting the engine, activating equipment such
as the window winders for example, or locking the doors.
Risk of serious injury.
Never switch off the ignition before the vehicle has stopped completely. Once the engine has stopped, the brake servo,
power assisted steering and passive safety equipment such as air bags wi\
ll no longer operate.
The steering is locked when the key is removed.
Page 75 of 183
power-assisted steering......................................... (current page)
driving .................................................................... (current page)
power-assisted steering ......................................... (current page)
handbrake .............................................................. (current page)
2.11
ENG_UD18241_6
Frein à main / Direction assistée (B90 - L90 Ph2 - F90 Ph2 - R90 \
Ph2 - Dacia)
ENG_NU_817-9_B90_Dacia_2
Handbrake
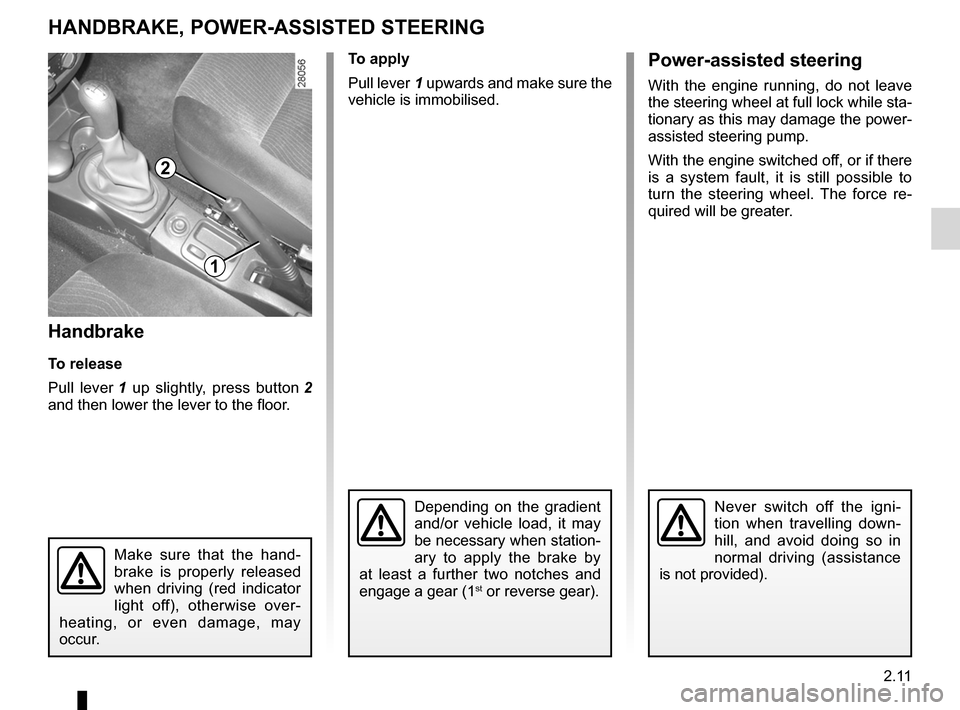
To release
Pull lever 1 up slightly, press button 2
and then lower the lever to the floor.
Handbrake/Power-assisted steering
HANDBRAKE, POWER-ASSISTED STEERING
To apply
Pull lever 1 upwards and make sure the
vehicle is immobilised.
Depending on the gradient
and/or vehicle load, it may
be necessary when station-
ary to apply the brake by
at least a further two notches and
engage a gear (1
st or reverse gear).
Never switch off the igni -
tion when travelling down -
hill, and avoid doing so in
normal driving (assistance
is not provided).
Make sure that the hand -
brake is properly released
when driving (red indicator
light off), otherwise over -
heating, or even damage, may
occur.
1
2
Power-assisted steering
With the engine running, do not leave
the steering wheel at full lock while sta-
tionary as this may damage the power -
assisted steering pump.
With the engine switched off, or if there
is a system fault, it is still possible to
turn the steering wheel. The force re -
quired will be greater.
Page 76 of 183
driving ................................................... (up to the end of the DU)
ABS ...................................................... (up to the end of the DU)
anti-lock braking system: ABS ..............(up to the end of the DU)
2.12
ENG_UD18242_8
Dispositifs de correction et d’assistance à la conduite (B90 - U9\
0 - L90 Ph2 - F90 Ph2 - R90 Ph2 - Dacia)
ENG_NU_817-9_B90_Dacia_2
Jaune NoirNoir texte
ABS (anti-lock braking
system)
Under heavy braking, the ABS prevents
the wheels from locking, allowing the
stopping distance to be managed and
keeping control of the vehicle.
Under these circumstances, the vehi -
cle can be steered to avoid an obstacle
whilst braking. In addition, this system
can increase stopping distances, par -
ticularly on roads with low surface grip
(wet ground etc.).
You will feel a pulsation through the
brake pedal each time the system is
activated. The ABS does not in any way
improve the vehicle's physical perform-
ance relating to the road surface and
roadholding. It is still essential to follow
the rules of good driving practice (such
as driving at a safe distance from the
vehicle in front etc.).
Driver correction devices/aids
DRIVER CORRECTION DEVICES/AIDS (1/2)
Depending on the vehicle, this is com-
posed of:
– t h e A B S ( a n t i - l o c k b r a k i n g
system);
– emergency brake assist.
These functions are an ad-
ditional aid in the event of
critical driving conditions,
enabling the vehicle behav -
iour to be adapted to suit the driving
conditions.
However, the functions do not take
the place of the driver. They do
not increase the vehicle’s limits
and should not encourage you
to drive more quickly. Therefore,
they can under no circumstances
replace the vigilance or responsibil -
ity of the driver when manoeuvring
the vehicle (the driver must always
be ready for sudden incidents which
may occur when driving).
In an emergency, apply firm and
continuous pressure to the brake
pedal. There is no need to pump
it repeatedly. The ABS will modu -
late the force applied in the braking
system.
Page 78 of 183
automatic gearbox (use) ....................... (up to the end of the DU)
changing gear ....................................... (up to the end of the DU)
driving ................................................... (up to the end of the DU)
automatic gearbox selector lever ..........(up to the end of the DU)
2.14
ENG_UD22554_10
Boîte automatique (B90 - L90 Ph2 - F90 Ph2 - R90 Ph2 - Dacia)
ENG_NU_817-9_B90_Dacia_2
Jaune NoirNoir texte
Automatic gearbox
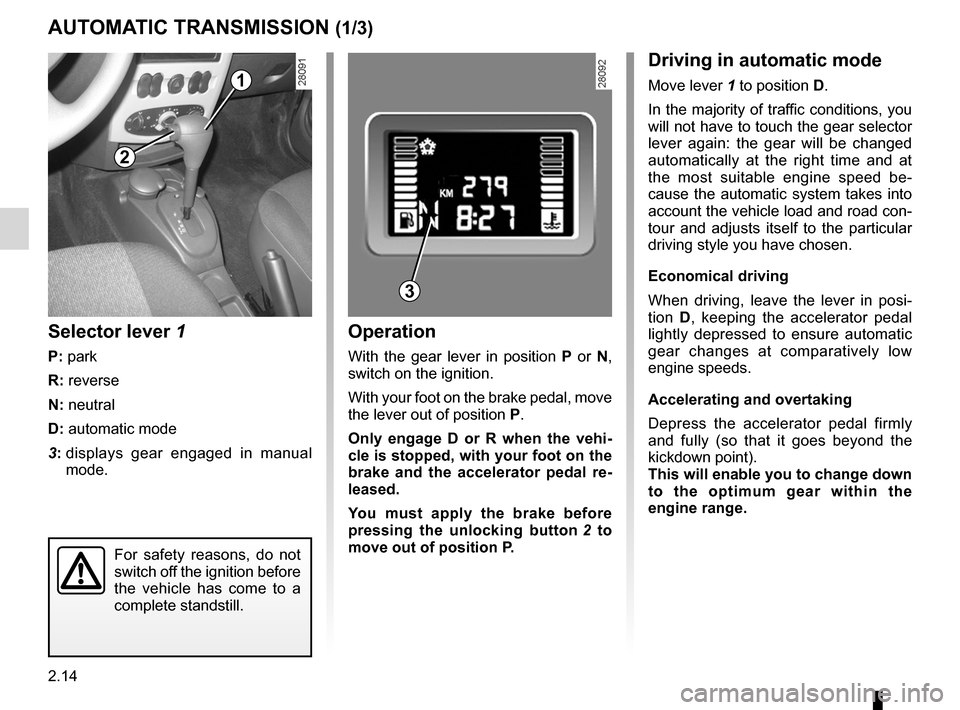
Selector lever 1
P: park
R: reverse
N: neutral
D: automatic mode
3: displays gear engaged in manual
mode.
Operation
With the gear lever in position P or N,
switch on the ignition.
With your foot on the brake pedal, move
the lever out of position P.
Only engage D or R when the vehi -
cle is stopped, with your foot on the
brake and the accelerator pedal re -
leased.
You must apply the brake before
pressing the unlocking button 2 to
move out of position P.
AUTOMATIC TRANSMISSION (1/3)
2
1
Driving in automatic mode
Move lever 1 to position D.
In the majority of traffic conditions, you
will not have to touch the gear selector
lever again: the gear will be changed
automatically at the right time and at
the most suitable engine speed be -
cause the automatic system takes into
account the vehicle load and road con-
tour and adjusts itself to the particular
driving style you have chosen.
Economical driving
When driving, leave the lever in posi -
tion D, keeping the accelerator pedal
lightly depressed to ensure automatic
gear changes at comparatively low
engine speeds.
Accelerating and overtaking
Depress the accelerator pedal firmly
and fully (so that it goes beyond the
kickdown point).
This will enable you to change down
to the optimum gear within the
engine range.
3
For safety reasons, do not
switch off the ignition before
the vehicle has come to a
complete standstill.
Page 80 of 183
2.16
ENG_UD22554_10
Boîte automatique (B90 - L90 Ph2 - F90 Ph2 - R90 Ph2 - Dacia)
ENG_NU_817-9_B90_Dacia_2
Parking the vehicleWhen the vehicle is stopped, move the
lever to position P while keeping your
foot on the brake pedal: the gearbox is
in neutral and the drive wheels are me-
chanically locked by the driveshaft.
Apply the handbrake.
AUTOMATIC TRANSMISSION (3/3)
An impact to the under -
side of the vehicle while
manoeuvring (e.g.: strik -
ing a post, raised kerb or
other street furniture) may result in
damage to the vehicle (e.g.: defor -
mation of an axle).
To avoid any risk of accident, have
your vehicle checked by an ap -
proved Dealer.
2
6
Operating faults
If a vehicle with an automatic gear -
box breaks down, please refer to the
information on “Towing” in Section 5.
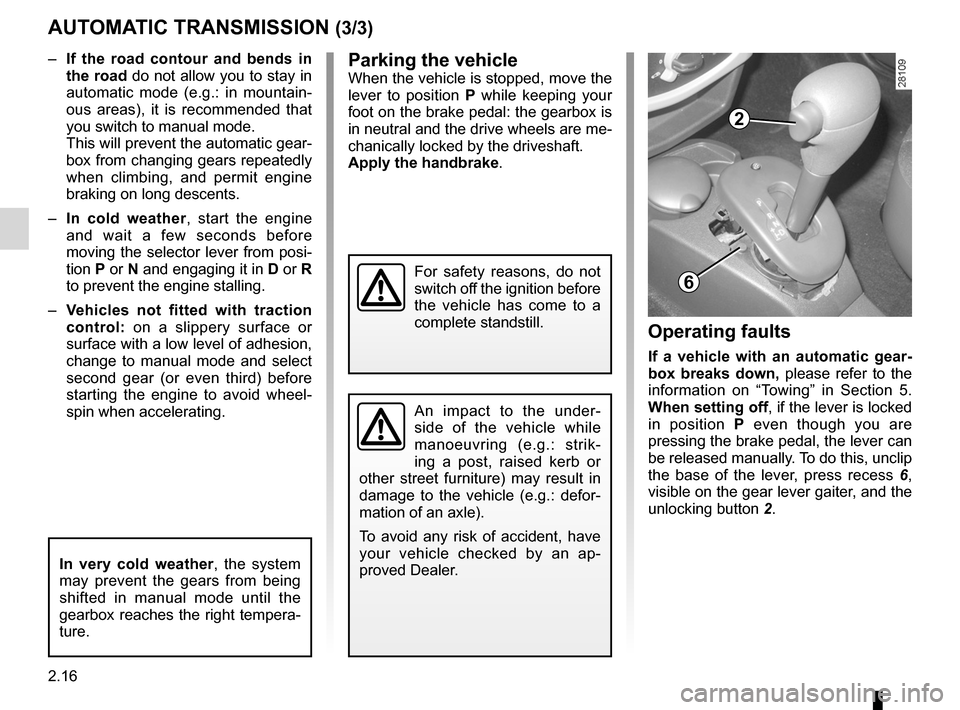
When setting off, if the lever is locked
in position P even though you are
pressing the brake pedal, the lever can
be released manually. To do this, unclip
the base of the lever, press recess 6 ,
visible on the gear lever gaiter, and the
unlocking button 2.
–
If the road contour and bends in
the road do not allow you to stay in
automatic mode (e.g.: in mountain -
ous areas), it is recommended that
you switch to manual mode.
This will prevent the automatic gear-
box from changing gears repeatedly
when climbing, and permit engine
braking on long descents.
– In cold weather , start the engine
and wait a few seconds before
moving the selector lever from posi-
tion P or N and engaging it in D or R
to prevent the engine stalling.
– Vehicles not fitted with traction
control: on a slippery surface or
surface with a low level of adhesion,
change to manual mode and select
second gear (or even third) before
starting the engine to avoid wheel -
spin when accelerating.
In very cold weather , the system
may prevent the gears from being
shifted in manual mode until the
gearbox reaches the right tempera-
ture.
For safety reasons, do not
switch off the ignition before
the vehicle has come to a
complete standstill.
Page 90 of 183
lighting:interior ............................................. (up to the end of the DU)
courtesy light ........................................ (up to the end of the DU)
3.10
ENG_UD18207_5
Eclairage intérieur (B90 - L90 Ph2 - Dacia)
ENG_NU_817-9_B90_Dacia_3
Interior lighting
INTERIOR LIGHTING
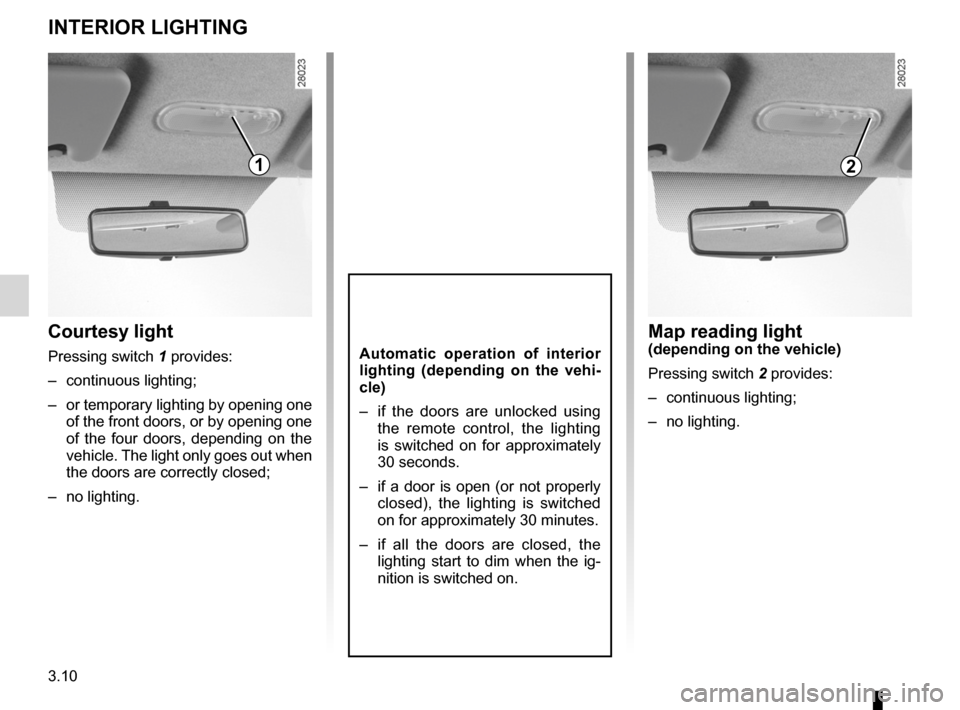
Courtesy light
Pressing switch 1 provides:
– continuous lighting;
– or temporary lighting by opening one
of the front doors, or by opening one
of the four doors, depending on the
vehicle. The light only goes out when
the doors are correctly closed;
– no lighting.Automatic operation of interior
lighting (depending on the vehi -
cle)
– if the doors are unlocked using
the remote control, the lighting
is switched on for approximately
30 seconds.
– if a door is open (or not properly
closed), the lighting is switched
on for approximately 30 minutes.
– if all the doors are closed, the
lighting start to dim when the ig-
nition is switched on.
Map reading light(depending on the vehicle)
Pressing switch 2 provides:
– continuous lighting;
– no lighting.
12