2012 DACIA SANDERO lock
[x] Cancel search: lockPage 31 of 183

JauneNoirNoir texte
1.25
ENG_UD22573_6
Sécurité enfants : fixation du siège enfant (B90 - Dacia)
ENG_NU_817-9_B90_Dacia_1
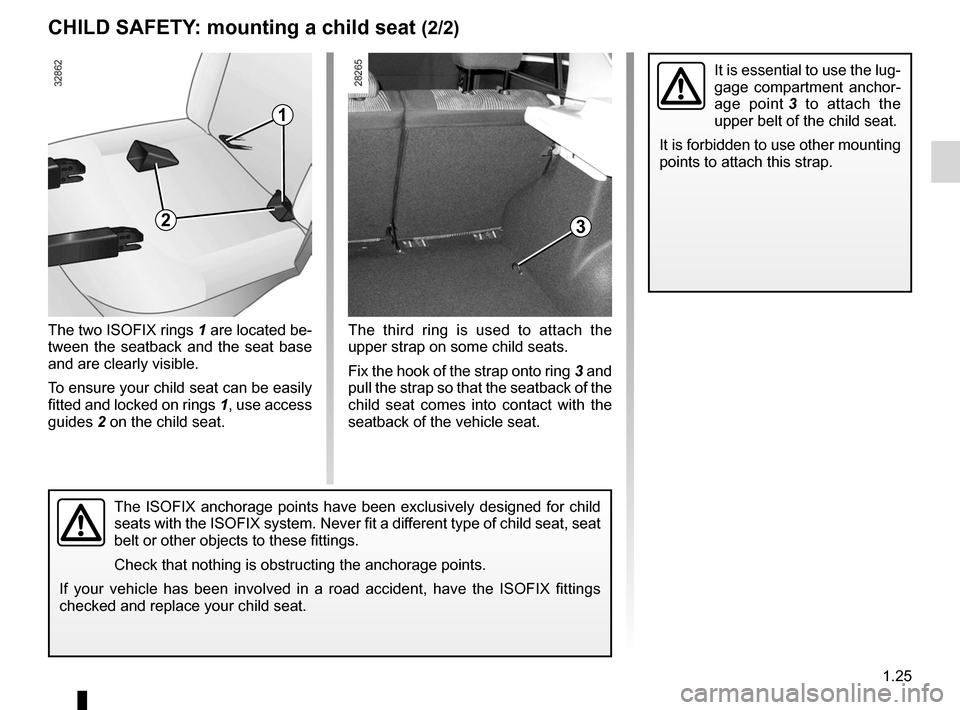
The third ring is used to attach the
upper strap on some child seats.
Fix the hook of the strap onto ring 3 and
pull the strap so that the seatback of the
child seat comes into contact with the
seatback of the vehicle seat.
The two ISOFIX rings 1 are located be-
tween the seatback and the seat base
and are clearly visible.
To ensure your child seat can be easily
fitted and locked on rings 1, use access
guides
2 on the child seat.
CHILD SAFETY : mounting a child seat (2/2)
The ISOFIX anchorage points have been exclusively designed for child
seats with the ISOFIX system. Never fit a different type of child seat, seat
belt or other objects to these fittings.
Check that nothing is obstructing the anchorage points.
If your vehicle has been involved in a road accident, have the ISOFIX fittings
checked and replace your child seat.
3
It is essential to use the lug-
gage compartment anchor -
age point 3 to attach the
upper belt of the child seat.
It is forbidden to use other mounting
points to attach this strap.
1
2
Page 33 of 183

JauneNoirNoir texte
1.27
ENG_UD25178_7
Sécurité enfants : installation du siège enfant (B90 - Dacia)\
ENG_NU_817-9_B90_Dacia_1
In the rear side seat
A carrycot can be installed across the
vehicle and will take up at least two
seats. Position the child with his or her
feet nearest the door.
Before installing a child seat in the
ISOFIX anchoring points on a rear side
seat, check that the seat belt buckles
are not placed between the two ISOFIX
anchorage points in this seat. If neces-
sary, move the buckle for the seat con-
cerned towards the centre of the vehi-
cle.
Move the front seat as far forward as
possible to install a rear-facing child
seat, then move back the seat in front
as far as it will go, although without al-
lowing it to come into contact with the
child seat.For the safety of the child in the for -
ward-facing seat, do not move the seat
in front back past the middle of the
runner, do not tilt the seatback too far
(maximum of 25° ) and raise the seat as
much as possible.
Check that the forward-facing child seat
is resting against the back of the vehi-
cle seat and that the headrest of the ve-
hicle is not obstructing its use. Rear centre seat
A child seat may only be fitted in this
seat if it is equipped with an inertia-reel
seat belt. For any additional informa
-
tion, contact an approved dealer.
CHILD SAFETY : Fitting a child seat (2/6)
Check that neither the child
seat nor the child’s feet
prevent the front seat from
locking into place. Refer to
the information on the “Front seat”
in Section 1.
Page 38 of 183

air bagdeactivating the front passenger air bags ........ (current page)
front passenger air bag deactivation ..................... (current page)
1.32
ENG_UD19963_7
Sécurité enfants : désactivation/activation airbag passager ava\
nt (B90 - L90 Ph2 - F90 Ph2 - R90 Ph2 - Dacia)
ENG_NU_817-9_B90_Dacia_1
deactivating/activating the front passenger air bag
CHILD SAFETY : deactivating/activating the front passenger air bag (1/3)
The passenger air bag must
be activated or deactivated
with the ignition off.
If handled when the igni -
tion is on, the warning light
å
comes on.
Switch the ignition off then on again
to reset the air bag in accordance
with the lock.
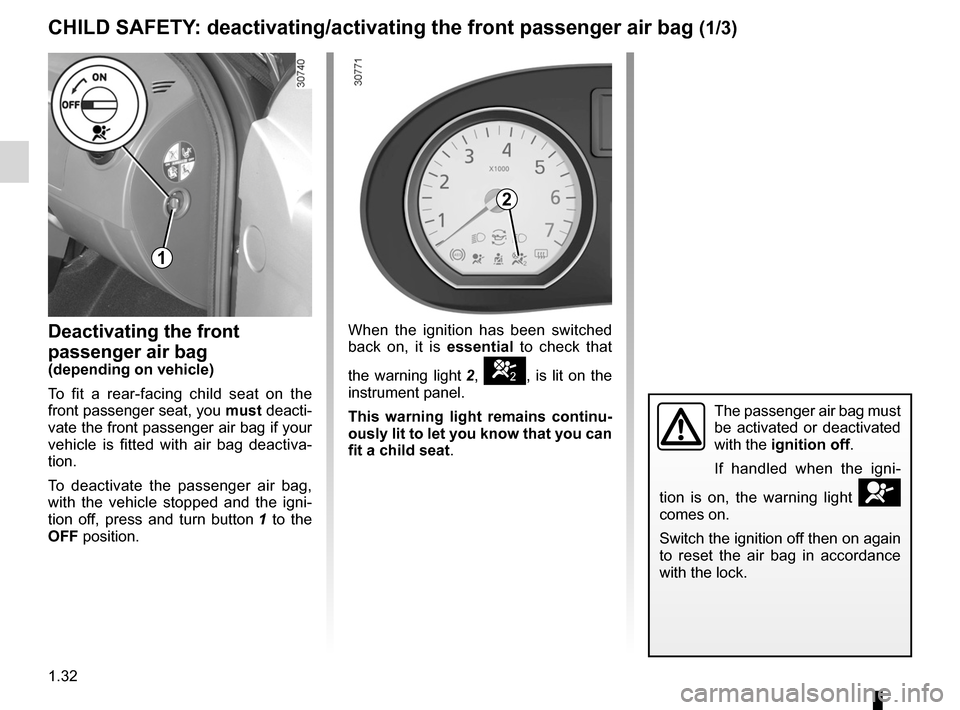
When the ignition has been switched
back on, it is essential to check that
the warning light 2,
], is lit on the
instrument panel.
This warning light remains continu -
ously lit to let you know that you can
fit a child seat .
Deactivating the front
passenger air bag
(depending on vehicle)
To fit a rear-facing child seat on the
front passenger seat, you must deacti-
vate the front passenger air bag if your
vehicle is fitted with air bag deactiva -
tion.
To deactivate the passenger air bag,
with the vehicle stopped and the igni -
tion off, press and turn button 1 to the
OFF position.
1
2
Page 43 of 183

rear screendemisting ......................................................... (current page)
JauneNoirNoir texte
1.37
ENG_UD25096_5
Poste de conduite direction à gauche (B90 - L90 Ph2 - F90 Ph2 - R90 \
Ph2 - Dacia)
ENG_NU_817-9_B90_Dacia_1
DRIVER’S POSITION, LEFT-HAND DRIVE (2/2)
The presence of the equipment DEPENDS ON THE VEHICLE VERSION AND COUNTRY.
1 Side air vent.
2 Demister outlet.
3 Stalk for:
– direction indicator lights,
– exterior lights,
– front fog lights,
– rear fog lights,
– horn.
4 Instrument panel.
5 Location for driver’s air bag.
6 Steering column stalk for wind -
screen and rear screen wash/wipe.
On-board computer information re-
adout control.
7 Centre air vents.
8 Location for passenger air bag or
storage compartment.
9 Demister outlet. 10 Side air vent.
11 Passenger air bag activation/deac-
tivation switch.
12 Glove box.
13 Location for radio or storage com-
partment.
14 Electric window control.
15 Central door locking switch.
16 Hazard warning lights switch.
17 Heating and ventilation controls.
18 Cigar lighter.
19 Handbrake.
20 Rear window electric locking con -
trol.
21 Electric door mirror control.
22 Location for ashtray or cup holder.
23 Gear lever.
24 Heated rear screen control.
25 Electric window control.
26 Ignition switch.
27 Headlight beam height adjustment
control.
28 Bonnet release.
29 Fuse flap.
Page 45 of 183

JauneNoirNoir texte
1.39
ENG_UD18230_3
Poste de conduite direction à droite (B90 - Dacia)
ENG_NU_817-9_B90_Dacia_1
1 Side air vent.
2 Demister outlet.
3 Storage compartment or location
for passenger air bag.
4 Centre air vents.
5 Stalk for:
– direction indicator lights,
– exterior lights,
– front fog lights,
– rear fog lights.
6 Instrument panel.
7 Location for driver’s air bag (de -
pending on vehicle).
8 Windscreen wiper/washer stalk.
On-board computer information re-
adout control.
9 Demister outlet.
22 Rear window electric locking con -
trol
23 Electric door mirror control.
24 Location for ashtray or cup holder.
25 Gear lever.
26 Heated rear screen control.
27 Electric window control.
28 Glove box.
29 Passenger air bag activation/deac -
tivation switch.
DRIVER’S POSITION, RIGHT -HAND DRIVE (2/2)
The presence of the equipment DEPENDS ON THE VEHICLE VERSION AND COUNTRY.
10 Side air vent.
11 Fuse box.
12 Bonnet release.
13 Headlight beam height adjustment
control.
14 Ignition switch.
15 Location for radio or storage com-
partment.
16 Electric window control.
17 Central locking switch.
18 Hazard warning lights switch.
19 Heating and ventilation controls.
20 Cigar lighter.
21 Handbrake.
Page 46 of 183

control instruments ............................... (up to the end of the DU)
instrument panel ................................... (up to the end of the DU)
warning lights ........................................ (up to the end of the DU)
1.40
ENG_UD19003_9
Tableau de bord : témoins lumineux (B90 - L90 Ph2 - F90 Ph2 - R90 Ph2\
- Dacia)
ENG_NU_817-9_B90_Dacia_1
Jaune NoirNoir texte
xAnti-lock braking warning
light
This light comes on when the ignition is
switched on and goes out within three
seconds. If it lights up when you are
driving, it indicates a fault in the anti -
lock braking system. Braking will then
be as normal, without the ABS system:
contact an approved dealer urgently.
]Front passenger air bag de-
activation warning light.
Refer to the information on “Child
Safety” in Section 1.
çSeat belt reminder light
This warning light goes out to
let you know that the seat belt has been
correctly fastened.
Warning lights
mDipped beam headlight tell -
tale light
oMain beam headlight tell-tale
light
#Engine oil change warning
light
This lights up on the instrument panel
when an oil change is required.
Change the oil or have it changed as
soon as possible.
Only the distance travelled between two
oil changes is taken into account; the
time interval between two oil changes
is not.
The oil should always be changed
when the first threshold is reached, i.e.
either the distance travelled or the inter-
val specified in your vehicle’s mainte -
nance document. This means you may
have to change the oil before the warn-
ing light comes on.
Refer to the information on the “Oil
change” in Section 4.
W ARNING LIGHTS (1/3)
The presence and operation of the warning lights DEPEND ON THE EQUIPMENT\
AND COUNTRY.
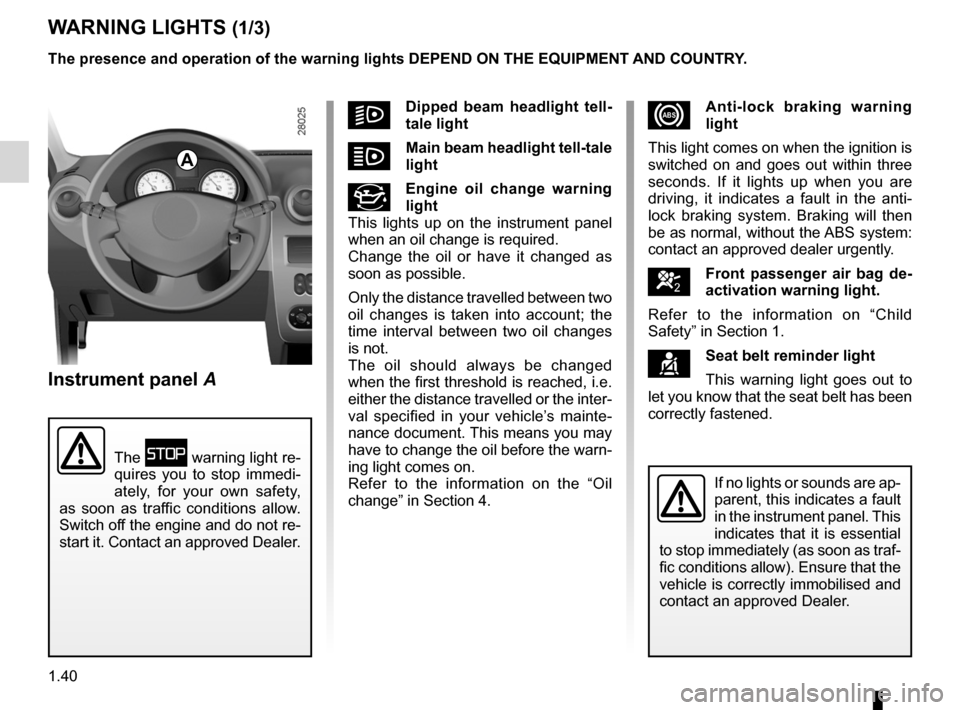
A
If no lights or sounds are ap-
parent, this indicates a fault
in the instrument panel. This
indicates that it is essential
to stop immediately (as soon as traf-
fic conditions allow). Ensure that the
vehicle is correctly immobilised and
contact an approved Dealer.
Instrument panel A
The û warning light re-
quires you to stop immedi -
ately, for your own safety,
as soon as traffic conditions allow.
Switch off the engine and do not re-
start it. Contact an approved Dealer.
Page 50 of 183

fuel level ................................................................ (current page)
1.44
ENG_UD19017_6
Tableau de bord : afficheur et indicateurs (B90 - Dacia)
ENG_NU_817-9_B90_Dacia_1
DISPLAYS AND INDICATORS (2/2)
Fuel gauge 3
The number of squares lit shows the
fuel level. When it is at minimum, the
squares disappear and the low fuel
level warning light comes on.
Coolant temperature
indicator 4
The number of squares lit depends on
the engine coolant temperature. There
is no warning unless the last three
squares light up.
Multifunction display A
Total mileage recorder, distance trav -
elled trip mileometer, clock.
OR
Trip computer and warning
system
Refer to the information on the “Trip
computer and warning system” in
Section 1.
Multifunction key 5
– Display selection
By pressing the button you can shift
from the total mileage recorder, trip
mileometer and time or vice-versa.
– Resetting the trip mileage re -
corder
Once the trip mileage display is se -
lected, press and hold the button.
– Resetting the clock
Refer to the information on the
“Clock” in Section 1.
43
A
5
Page 57 of 183

lights:adjusting ......................................... (up to the end of the DU)
lights ..................................................... (up to the end of the DU)
lights adjustment ...................................... (up to the end of the DU)
headlight beam adjustment .................. (up to the end of the DU)
1.51
ENG_UD18234_5
Réglage de la hauteur des faisceaux (B90 - L90 Ph2 - F90 Ph2 - R90 P\
h2 - Dacia)
ENG_NU_817-9_B90_Dacia_1
Adjusting the headlight beam height
ADJUSTMENT OF HEADLIGHT BEAM HEIGHT
Control A is used to adjust the height
of the headlight beams according to the
load.
Turn control A anticlockwise to lower
the beams and clockwise to raise them.
Vehicle load conditions Setting position
of control A
Basic setting: luggage compartment empty and only the
driver on board or with one front passenger. 0
Luggage compartment empty, 1, 2, 3 passengers 1
Luggage compartment full, 3 passengers 2
Luggage compartment full, driver only 3
A