Page 162 of 216
7.12
11
22
33
44
55
66
77
03
Press the MENU button.
Press the dial to confi rm the selection.
Turn the dial and select the MAP function.
Turn the dial and select the MAP IN WINDOW or FULL SCREEN MAP tab.
Select OK
and press the dial to confi rm.
Press the dial to confi rm the selection.
Turn the dial and select the DISPLAY MAP function.
DISPLAYING THE MAP IN A WINDOW OR
IN FULL SCREEN MODE
GPS
DISPLAY MAP
FULL SCREEN MAP
OK
MAP IN WINDOW
Page 166 of 216
7.16
11
22
33
44
66
55
77
04
Press the MENU button.
READ MESSAGES
NEW MESSAGE DISPLAY
OK
CONFIGURING THE TMC MESSAGE
ANNOUNCEMENTS
We recommend that you do not tick the NEW MESSAGE DISPLAY tab for regions with heavy traffi c.
Turn the dial and select the TRAFFICINFORMATION function.
Press the dial to confi rm the selection.
Press the dial to confi rm the selection.
Turn the dial and select the CONFIGURE MESSAGE ANNOUNCEMENT function.
Select the READ MESSAGES tab.
The Traffi c Information Messages will be read by the voice synthesiser.
Select the NEW MESSAGE DISPLAY tab.
The traffi c information messages are extended to the fi lters selected(geographic...) and can also bedisplayed when guidance is not active.
CONFIGURE MESSAGE ANNOUNCEMENT
TRAFFIC INFORMATION
Select OK and press the dial toconfi rm.
Page 167 of 216
7.17
11
22
33
44
11
22
33
44
05AUDIO/VIDEO
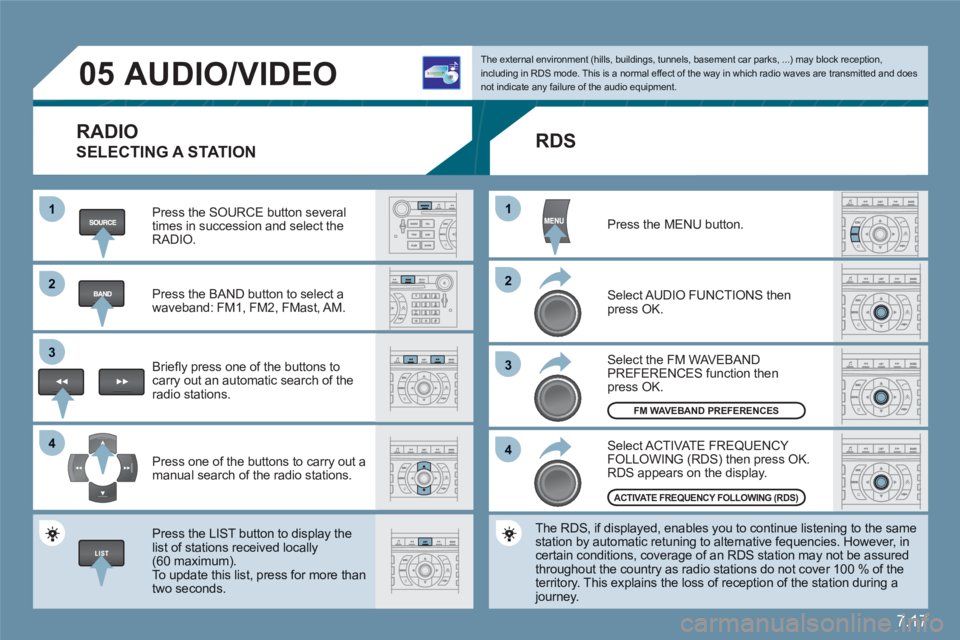
RADIO
SELECTING A STATION
Press the SOURCE button several times in succession and select theRADIO.
Press the BAND button to select awaveband: FM1, FM2, FMast, AM.
Briefl y press one of the buttons to carry out an automatic search of theradio stations.
Press one of the buttons to carry out a manual search of the radio stations.
Press the LIST button to display the list of stations received locally(60 maximum).
To update this list, press for more than two seconds.
The external environment (hills, buildings, tunnels, basement car parks, ...) may block reception,including in RDS mode. This is a normal effect of the way in which radio waves are transmitted and does not indicate any failure of the audio equipment.
RDS
Select ACTIVATE FREQUENCY FOLLOWING (RDS) then press OK. RDS appears on the display.
Select the FM WAVEBANDPREFERENCES function thenpress OK.
Select AUDIO FUNCTIONS then press OK.
Press the MENU button.
The RDS, if displayed, enables you to continue listening to the samestation by automatic retuning to alternative fequencies. However, in certain conditions, coverage of an RDS station may not be assuredthroughout the country as radio stations do not cover 100 % of the territory. This explains the loss of reception of the station during a journey.
FM WAVEBAND PREFERENCES
ACTIVATE FREQUENCY FOLLOWING (RDS)
Page 168 of 216
7.18
1
22
05AUDIO/VIDEO
INFORMATION AND ADVICE
The MP3 format, an abbreviation of MPEG 1.2 & 2.5 Audio Layer 3, is an audio compression standard which permits the recording of several tens of music fi les on a single disc.
In order to be able to play a recorded CDR/DVDR or CDRW/DVDRW, when recording it is preferable to select standardsISO 9660 level 1.2 or Joliet. If the disc is recorded in another format, it may not be played correctly.It is recommended that the same recording standard is always used for an individual disc, with as low a speed as possible (4x maximum)for optimum sound quality. In the particular case of a multi-session CD, the Joliet standard isrecommended.
The audio equipment will only play audio fi les with the extension ".mp3" with a sampling rate of 22.05 KHz or 44.1 KHz. No other type of fi le (.wma, .mp4, .m3u...) can be played.
It is advisable to restrict fi le names to 20 characters without usingspecial characters (e.g.: " " ? ; ù) to avoid any playing or displayingproblems.
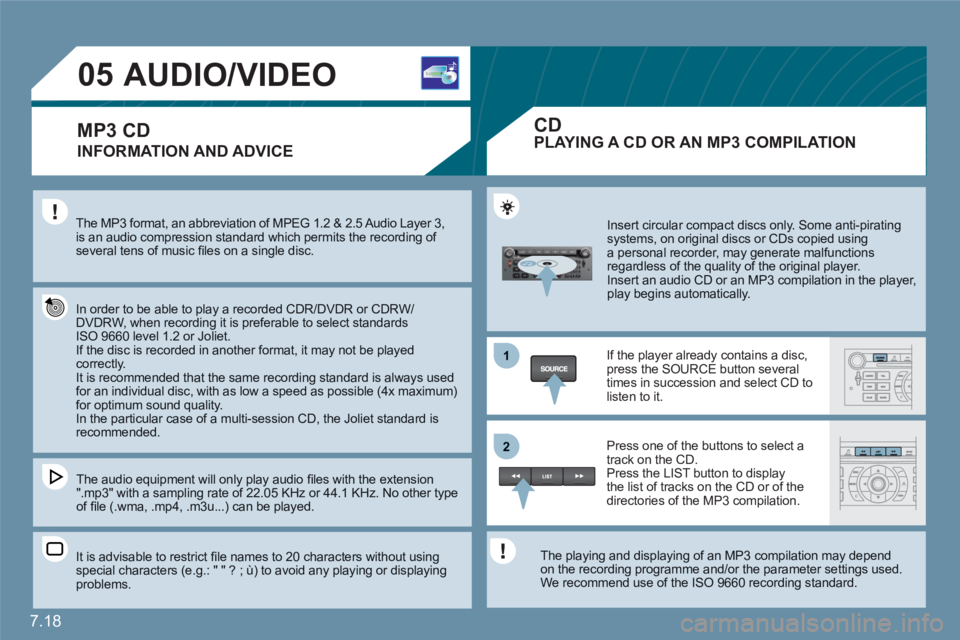
Insert circular compact discs only. Some anti-piratingsystems, on original discs or CDs copied usinga personal recorder, may generate malfunctionsregardless of the quality of the original player.
Insert an audio CD or an MP3 compilation in the player, play begins automatically.
If the player already contains a disc,press the SOURCE button several times in succession and select CD tolisten to it.
Press one of the buttons to select atrack on the CD. Press the LIST button to display the list of tracks on the CD or of thedirectories of the MP3 compilation.
The playing and displaying of an MP3 compilation may depend on the recording programme and/or the parameter settings used.We recommend use of the ISO 9660 recording standard.
MP3 CDPLAYING A CD OR AN MP3 COMPILATION
CD
Page 172 of 216
7.22
11
22
11
33
22
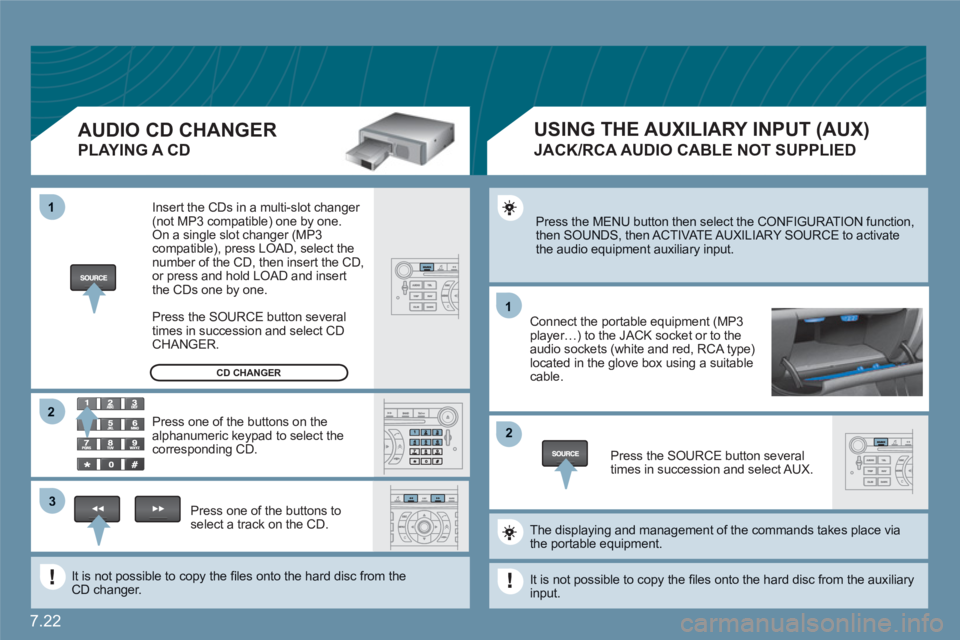
Press the MENU button then select the CONFIGURATION function, then SOUNDS, then ACTIVATE AUXILIARY SOURCE to activatethe audio equipment auxiliary input.
Connect the portable equipment (MP3player…) to the JACK socket or to the audio sockets (white and red, RCA type)located in the glove box using a suitable cable.
Press the SOURCE button severaltimes in succession and select AUX.
The displaying and management of the commands takes place viathe portable equipment.
It is not possible to copy the fi les onto the hard disc from the auxiliaryinput.
USING THE AUXILIARY INPUT (AUX)
JACK/RCA AUDIO CABLE NOT SUPPLIED
AUDIO CD CHANGER
PLAYING A CD
Insert the CDs in a multi-slot changer (not MP3 compatible) one by one. On a single slot changer (MP3compatible), press LOAD, select the number of the CD, then insert the CD,or press and hold LOAD and insert the CDs one by one.
Press the SOURCE button severaltimes in succession and select CD CHANGER.
Press one of the buttons on thealphanumeric keypad to select the corresponding CD.
Press one of the buttons toselect a track on the CD.
It is not possible to copy the fi les onto the hard disc from theCD changer.
CD CHANGER
Page 173 of 216
7.23
11
22
33
44
55
66
77
ACTIVATE VIDEO MODE
VIDEO PARAMETERS
You can connect video equipment (camcorder, digital camera, DVD player...) to the three audio/videosockets, located in the glove box.
Turn the dial and select the VIDEO function.
After connecting the video equipment,press the MENU button.
Turn the dial and select theACTIVATE VIDEO MODE function to activate/deactivate the video.
Press the dial to confi rm the selection.
Press the dial to confi rm the selection.
Pressing the "SOURCE" button several times in succession permits the selection of an audio source other than that of the video.
Pressing the "DARK" button disconnects display of the video.
Turn the dial and select the VIDEOPARAMETERS function to set thedisplay format, the brightness, the contrast and the colours.
Press the dial to confi rm the selection.
VIDEO MENU
Videos can only be displayed when stationary.
Page 177 of 216
7.27
1
22
33
55
66
44
06TELEPHONE
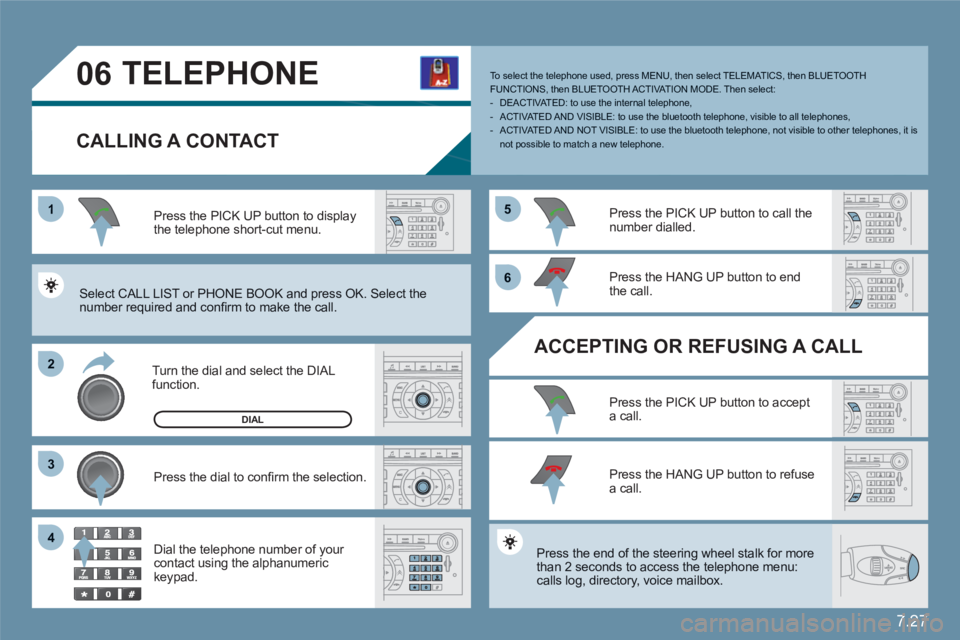
CALLING A CONTACT
Turn the dial and select the DIAL function.
Press the PICK UP button to displaythe telephone short-cut menu.
Press the dial to confi rm the selection.
Dial the telephone number of your contact using the alphanumeric keypad.
Press the PICK UP button to call the number dialled.
Press the HANG UP button to endthe call.
ACCEPTING OR REFUSING A CALL
Press the PICK UP button to accepta call.
Press the HANG UP button to refuse a call.
Press the end of the steering wheel stalk for more than 2 seconds to access the telephone menu: calls log, directory, voice mailbox.
To select the telephone used, press MENU, then select TELEMATICS, then BLUETOOTH FUNCTIONS, then BLUETOOTH ACT I VAT ION MODE. Then select:- DEACTIVATED: to use the internal telephone,- ACTIVATED AND VISIBLE: to use the bluetooth telephone, visible to all telephones,- ACTIVATED AND NOT VISIBLE: to use the bluetooth telephone, not visible to other telephones, it is not possible to match a new telephone.
Select CALL LIST or PHONE BOOK and press OK. Select the number required and confi rm to make the call.
DIAL
Page 178 of 216
7.28
11
22
33
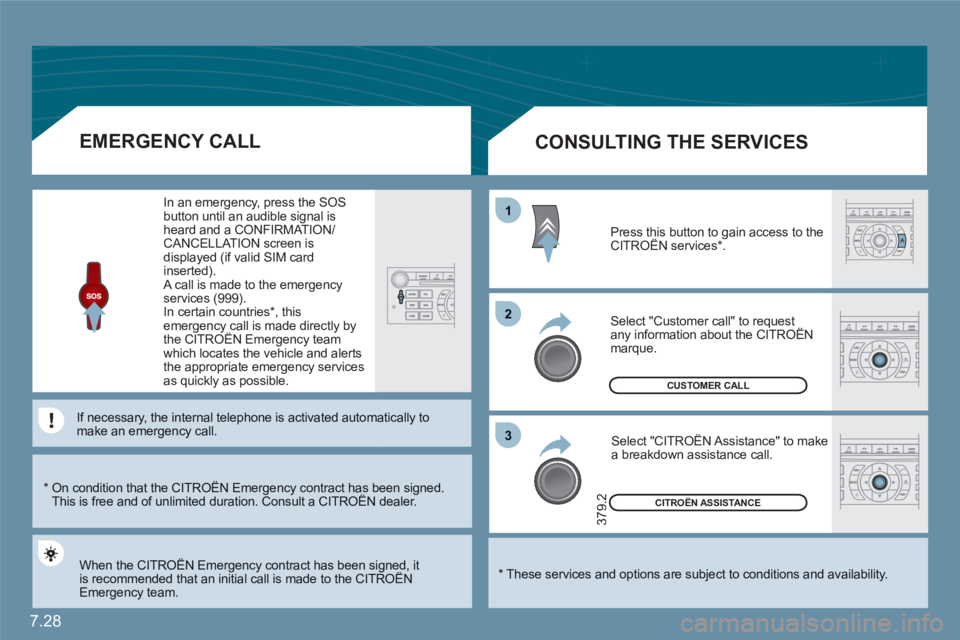
CITROËN ASSISTANCE
379.2
CUSTOMER CALL
*
These services and options are subject to conditions and availability.
CONSULTING THE SERVICES
Press this button to gain access to theCITROËN services * . g
Select "Customer call" to request any information about the CITROËN marque.
Select "CITROËN Assistance" to make a breakdown assistance call.
*
On condition that the CITROËN Emergency contract has been signed. This is free and of unlimited duration. Consult a CITROËN dealer. gy g
EMERGENCY CALL
When the CITROËN Emergency contract has been signed, it is recommended that an initial call is made to the CITROËNgy g
Emergency team.
In an emergency, press the SOS button until an audible signal isheard and a CONFIRMATION/CANCELLATION screen is displayed (if valid SIM card inserted). A call is made to the emergencyservices (999).
In certain countries * , thisemergency call is made directly bythe CITROËN Emergency teamgy y
which locates the vehicle and alerts the appropriate emergency servicesas quickly as possible.
If necessary, the internal telephone is activated autommatically tomake an emergency call.