Page 199 of 238
9.29
Abort guidance/Resume guidance
Destination input Geo
position
Ma
p
Stopovers
Add stopover
Navi
gate HOME
Choose from address book Rearran
ge route
Choose from last destinations Replace stopover
Delete stopover
Recalculate
Fast route
Short route
Optimized route
POI search
POI nearby
Route options
Route t
ype
Short route F
ast route
"Navigation" Menu
City
Street
Enter new address
Country
Navigate HOME Cit
y district
H
ouse number Start route
guidance
P
ostal code
Save to address book
Int
ersection
Address in
put
POI near destination
POI in city
POI in country
POI near route
Choose from address book
3
3
Choose from last destinations
TMC station information Lou
dness
S
peed dependent volume
Reset sound settings
3
3
3
1
2
4
4
4
4
4
4
4
4
4
4
4
3
2
3
3
2
3
4
4
4
4
3
3
3
3
4
4
4
2
4
2
3
3
3
3
3
3
4
Classic
Jazz
Rock/Pop
Techno
Vocal
4
4
4
4
4
Page 204 of 238

9.34
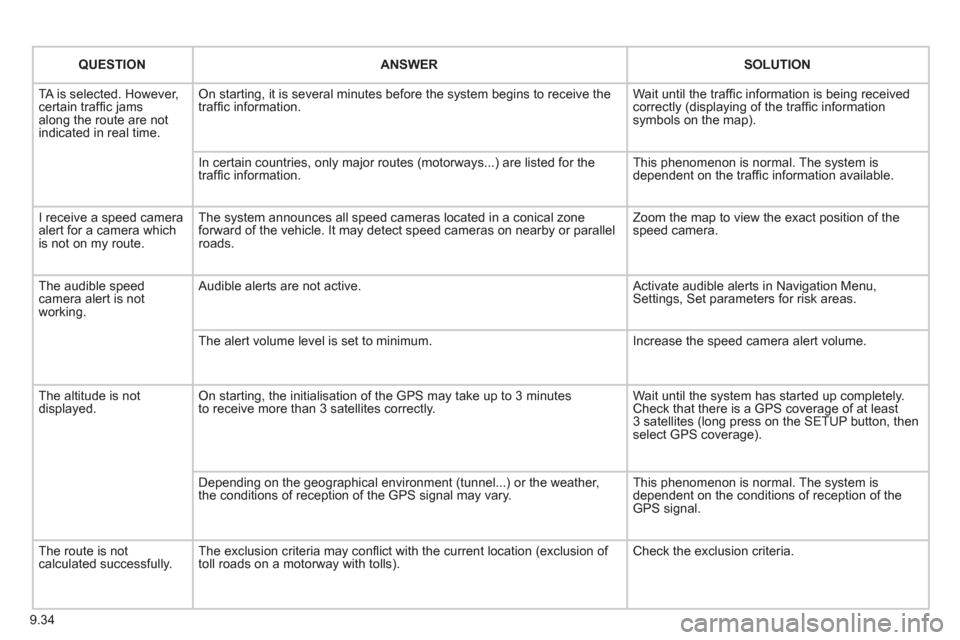
QUESTIONANSWER SOLUTION
TA is selected. However, certain traffi c jams
along the route are not
indicated in real time.
On starting, it is several minutes before the system begins to receive the
traffi c information. Wait until the traffi c information is being received correctly (displaying of the traffi c information symbols on the map).
In certain countries, onl
y major routes (motorways...) are listed for the
traffi c information. This phenomenon is normal. The system is
dependent on the traffi c information available.
I receive a speed camera
alert for a camera which
is not on my route.The system announces all speed cameras located in a conical zoneforward of the vehicle. It may detect speed cameras on nearby or parallel roads. Zoom the map to view the exact position o
f thespeed camera.
The audible speed
camera alert is not
working. A
udible alerts are not active. Activate audible alerts in Navigation Menu, Settings, Set parameters for risk areas.
Th
e alert volume level is set to minimum. Increase the speed camera alert volume.
Th
e altitude is not displayed. On starting, the initialisation of the GPS may take up to 3 minutes
to receive more than 3 satellites correctly. Wait until the system has started up completely.
Check that there is a GPS coverage of at least
3 satellites (long press on the SETUP button, then select GPS coverage).
Dependin
g on the geographical environment (tunnel...) or the weather,
the conditions of reception of the GPS signal may vary. This phenomenon is normal. The system is
dependent on the conditions of reception of the
GPS signal.
The route is notcalculated successfully.The exclusion criteria may confl ict with the current location (exclusion of
toll roads on a motorway with tolls). Check the exclusion criteria.
Page 215 of 238

9.45
3
4
05
2
1
LISTREFRESH
LISTREFRESH
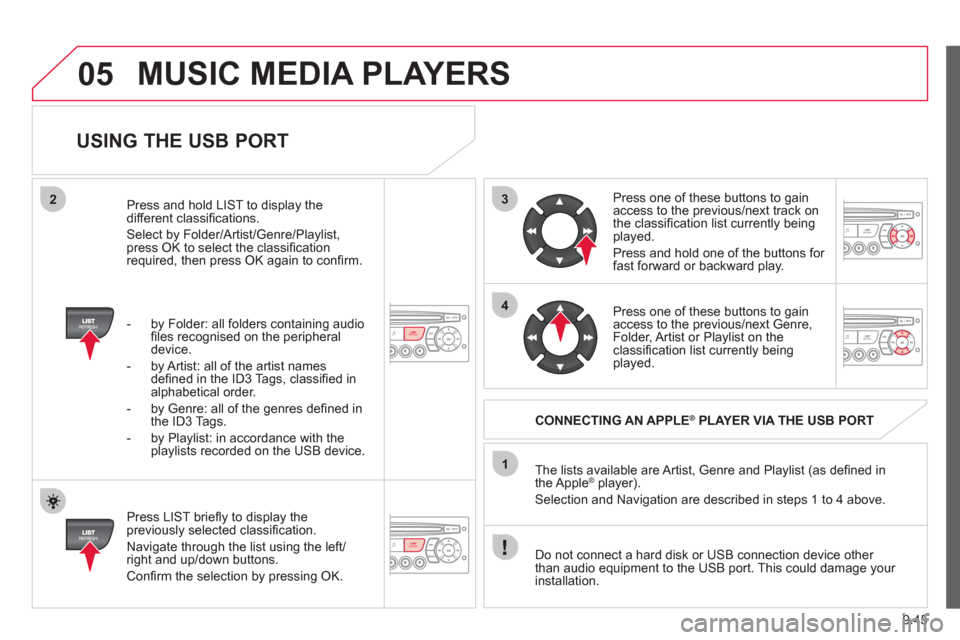
USING THE USB PORT
Press LIST briefl y to display thepreviously selected classifi cation.
Navi
gate through the list using the left/right and up/down buttons.
Confi rm the selection by pressing OK. The lists available are Artist, Genre and Pla
ylist (as defi
ned in
the Apple®
player).®
Selection and Navigation are described in steps 1 to 4 above.
Do not connect a hard disk or
USB connection device other
than audio equipment to the USB port. This could damage your
installation.
CONNECTING AN APPLE®PLAYER VIA THE USB PORT®
Press one of these buttons to gain
access to the previous/next track on
the classifi cation list currently beingplayed.
Pr
ess and hold one of the buttons for fast forward or backward play.
Press one of these buttons to
gain
access to the previous/next Genre,
Folder, Artist or Playlist on theclassifi cation list currently being played.
Press and hold LI
ST to display the different classifi cations.
Select b
y Folder/Artist/Genre/Playlist, press OK to select the classifi cation required, then press OK again to confi rm.
- b
y Folder: all folders containing audio fi les recognised on the peripheraldevice.
- by Artist: all o
f the artist names
defi ned in the ID3 Tags, classifi ed in alphabetical order.
- b
y Genre: all of the genres de fi ned in
the ID3 Tags.
- b
y Playlist: in accordance with the
playlists recorded on the USB device.
MUSIC MEDIA PLAYERS
Page 222 of 238

9.52
08
1
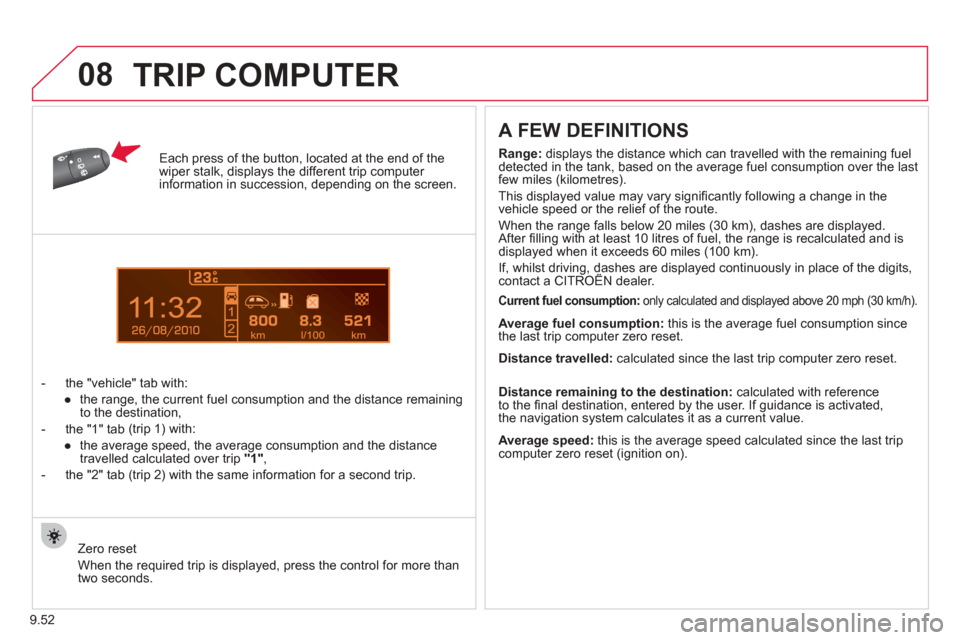
Each press of the button, located at the end of the wiper stalk, displays the different trip computer information in succession, depending on the screen.
- t
he "vehicle" tab with:
● the range, the current
fuel consumption and the distance remaining
to the destination,
- the "1" tab
(trip 1) with:
● the avera
ge speed, the average consumption and the distance
travelled calculated over trip "1",
- the "2" tab
(trip 2) with the same information for a second trip.
A FEW DEFINITIONS
Zero reset
When the required trip is displa
yed, press the control for more than
two seconds.
Range:
displays the distance which can travelled with the remaining fuel
detected in the tank, based on the average fuel consumption over the last few miles (kilometres).
This displa
yed value may vary signifi cantly following a change in the
vehicle speed or the relief of the route.
When the ran
ge falls below 20 miles (30 km), dashes are displayed.
After fi lling with at least 10 litres of fuel, the range is recalculated and is
displayed when it exceeds 60 miles (100 km).
If, whilst driving, dashes are displayed continuously in place of the di\
gits,contact a CITROËN dealer. ,g ,
Current fuel consumption:only calculated and displayed above 20 mph (30 km/h).
Average fuel consumption: this is the average fuel consumption since
the last trip computer zero reset.
Average speed: this is the average speed calculated since the last trip computer zero reset (ignition on).
Distance travelled: calculated since the last trip computer zero reset.
Distance remaining to the destination:calculated with referenceto the fi nal destination, entered by the user. If guidance is activated,
the navigation system calculates it as a current value.
TRIP COMPUTER
Page:
< prev 1-8 9-16 17-24