Page 185 of 652
The seat will automatically fold into position for easy
entry into the third row.
WARNING!
In the event of a collision you could be injured if the
seat is not fully latched.
Quad Seats — If Equipped
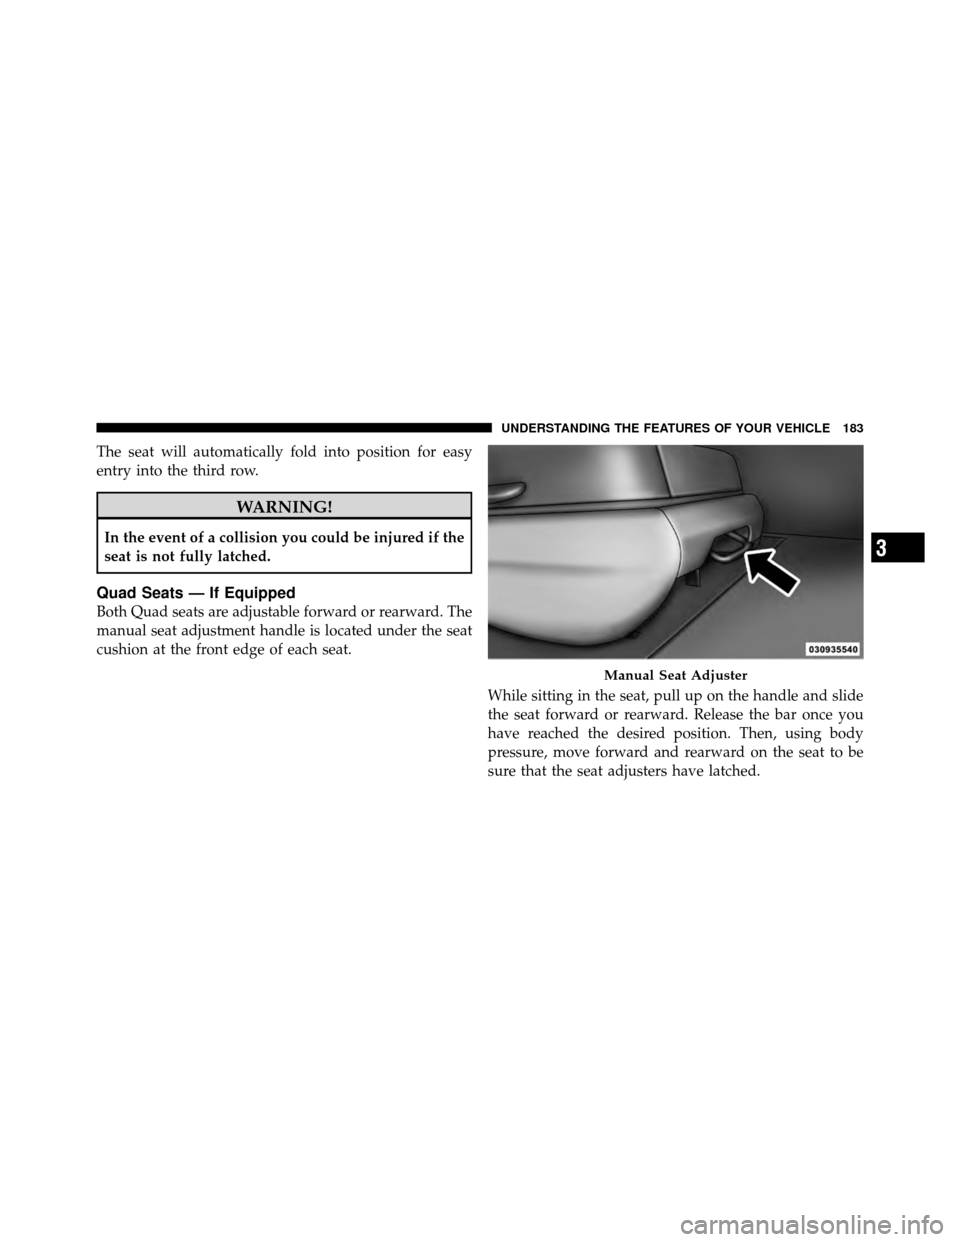
Both Quad seats are adjustable forward or rearward. The
manual seat adjustment handle is located under the seat
cushion at the front edge of each seat.While sitting in the seat, pull up on the handle and slide
the seat forward or rearward. Release the bar once you
have reached the desired position. Then, using body
pressure, move forward and rearward on the seat to be
sure that the seat adjusters have latched.
Manual Seat Adjuster
3
UNDERSTANDING THE FEATURES OF YOUR VEHICLE 183
Page 186 of 652
WARNING!
•Adjusting a seat while driving may be dangerous.
Moving a seat while driving could result in loss of
control which could cause a collision and serious
injury or death.
•Seats should be adjusted before fastening the seat
belts and while the vehicle is parked. Serious
injury or death could result from a poorly adjusted
seat belt.
Manual Recline
To recline, lean forward slightly, lift the lever, then push
back to the desired position and release the lever. Lean
forward and lift the lever to return the seatback to its
normal position. Using body pressure, lean forward and
rearward on the seat to be sure the seatback has latched.
WARNING!
Do not ride with the seatback reclined so that the
shoulder belt is no longer resting against your chest.
In a collision you could slide under the seat belt,
which could result in serious injury or death.
Recline Lever
184 UNDERSTANDING THE FEATURES OF YOUR VEHICLE
Page 190 of 652
Secure the retainer strap to the inside grab handle located
on the B-Pillar. When not in use, store the strap in the
sewn-in pocket located on the base of the seat cushion.WARNING!
To reduce the risk of personal injury:
•Retainer strap must always be securely attached to
grab handle when seat is folded forward and
vehicle is moving.
•Never occupy the seat or the center seat behind a
seat that has been folded forward.
Retainer Strap
188 UNDERSTANDING THE FEATURES OF YOUR VEHICLE
Page 192 of 652
Release levers are located on the rear leg assemblies, near
the floor. To remove the seat, squeeze each release handle
and rotate downwards to deploy the wheels. A lock
indicator button pops up when the seat is unlocked. The
seat assembly can now be removed from the vehicle and
moved on its Easy Out�Rollers. To reinstall the seat, align the seat into the detent posi-
tions on the floor. Squeeze the release handle and rotate
upward until the lock indicator button returns into the
handle.
WARNING!
If not properly latched, the bench seats could become
loose. Personal injuries could result. After reinstall-
ing these seats, be sure the red indicator button on
the release handles return into the handles.
Release Handles
190 UNDERSTANDING THE FEATURES OF YOUR VEHICLE
Page 198 of 652
3. Pulling strap “4” releases the seatback to return to its
full upright position.
4. Raise the head restraint to its upright position.
WARNING!
In a collision, you or others in your vehicle could be
injured if seats are not properly latched to their floor
attachments. Always be sure the seats are fully
latched.
Tailgate Mode
1. Pull release strap “3”, then pull release strap “4” to
rotate the entire seat rearward.
2. To restore the seat to its upright position, lift up on the
seatback and push forward until the anchors latch.
WARNING!
To avoid serious injury or death, never operate the
vehicle with occupants in the third row seat while in
the tailgate mode.
Plastic Grocery Bag Retainer Hooks
Retainer hooks which will hold plastic grocery bag
handles are built into the seatbacks of all rear seats and
some front seats. The floor supports the partial weight of
the bagged goods.
DRIVER MEMORY SEAT — IF EQUIPPED
The Memory Buttons 1 and 2 on the driver’s door panel
can be programmed to recall the driver’s seat, driver’s
outside mirror, adjustable brake and accelerator pedals,
and radio station preset settings. Your Remote Keyless
Entry (RKE) transmitters can also be programmed to
recall the same positions when the UNLOCK button is
pressed.
196 UNDERSTANDING THE FEATURES OF YOUR VEHICLE
Page 204 of 652
Use the hood prop rod to secure the hood in the open
position.
CAUTION!
To prevent possible damage, do not slam the hood to
close it. Lower the hood until it is open approxi-
mately 12 in (30 cm) and then drop it. This should
secure both latches. Never drive your vehicle unless
the hood is fully closed, with both latches engaged.
WARNING!
Be sure the hood is fully latched before driving your
vehicle. If the hood is not fully latched, it could open
when the vehicle is in motion and block your vision.
Failure to follow this warning could result in serious
injury or death.
LIGHTS
All of the lights, except the Hazard Warning lights,
headlight high beams and flash-to-pass, are controlled by
switches to the left of the steering column on the instru-
ment panel.
Headlight Switch With Halo Control Assembly
202 UNDERSTANDING THE FEATURES OF YOUR VEHICLE
Page 210 of 652
The multifunction lever controls the:
•Turn Signals
•Headlight Beams Low/High
•Flash-To-Pass (Optical Horn)
•Front and Rear Wipers — Washer Functions
Turn Signals
Move the multifunction lever up or down and the arrows
on each side of the instrument cluster flash to show
proper operation of the front and rear turn signal lights.
NOTE:If either light remains on and does not flash, or
there is a very fast flash rate, check for a defective outside
light bulb. If an indicator fails to light when the lever is
moved, it would suggest that the indicator bulb is
defective.
Lane Change Assist
Tap the lever up or down once, without moving beyond
the detent, and the turn signal (right or left) will flash
three times then automatically turn off.
Turn Signal Warning
If the vehicle electronics sense that the vehicle has
traveled at over 18 mph (29 km/h) for approximately
1 mile (1.6 km) with the turn signals on, a chime will
sound to alert the driver.
High/Low Beam Switch
When the headlights are turned on, pushing the multi-
function lever toward the instrument panel will switch
from low beams to high beams. Pulling back to the
neutral position returns the headlights to the low beam
operation.
208 UNDERSTANDING THE FEATURES OF YOUR VEHICLE
Page 214 of 652

WARNING!
Sudden loss of visibility through the windshield
could lead to a collision. You might not see other
vehicles or other obstacles. To avoid sudden icing of
the windshield during freezing weather, warm the
windshield with defroster before and during wind-
shield washer use.
Rain Sensing Wipers — If Equipped
This feature senses moisture on the windshield and
automatically activates the wipers for the driver. This
feature is especially useful for road splash or overspray
from the windshield washers of the vehicle ahead. Rotate
the end of the multifunction lever to one of the five
intermittent wiper sensitivity settings to activate this
feature.The sensitivity of the system is adjustable from the
multifunction lever. Wiper sensitivity position 3 has been
calibrated for best overall wiping sensitivity. If the opera-
tor desires more wiping sensitivity, they may select
sensitivity positions 4 or 5. If the operator desires less
wiping sensitivity, they may select sensitivity positions 2
or 1. Place the multifunction lever in the OFF position
when not using the system.
NOTE:•The Rain Sensing feature will not operate when the
wiper speed is in the low or high position.
•The Rain Sensing feature may not function properly
when ice or dried saltwater is present on the wind-
shield.
•Use of Rain-X�
or products containing wax or silicone
may reduce rain sensor performance.
212 UNDERSTANDING THE FEATURES OF YOUR VEHICLE