Page 213 of 652

Mist, Front Wiper And Washer
Use the Mist feature when weather conditions make
occasional usage of the wipers necessary.
Press the end of the multifunction lever inward (toward
the steering column) to the first detent and release for a
single wiping cycle. To use the Washer, push on the end
of the lever to the second detent and hold while spray is
desired. If the lever is pushed while on the intermittent
setting, the wipers will turn on and operate for several
wipe cycles after the lever is released, and then resume
the intermittent interval previously selected. If the lever
is pushed while the wipers are in the off position, the
wipers will operate several wipe cycles, then turn off.
Intermittent, Low And High Speed Wipers
Rotate the end of the lever to one of the first five detent
positions for intermittent wiper operation, the sixth de-
tent for low wiper operation and the seventh detent for
high wiper operation.Use one of the five intermittent wiper settings when
weather conditions make a single wiping cycle, with a
variable delay between cycles, desirable. At driving
speeds above 10 mph (16 km/h), the delay can be
regulated from a maximum of approximately 18 second
between cycles (first detent), to a cycle every one second
(fifth detent).
NOTE:
If the vehicle is moving less than 10 mph
(16 km/h), delay times will be doubled.
Rear Wiper And Washer
Rotating the rotary ring to the first detent activates the
rear intermittent wipers. To activate the washers, rotate
the rotary ring fully forward and the washers will spray
until the ring is released, and then resume the intermit-
tent interval.
NOTE: Rear window wipers function in the intermittent
wiper speed only.
3
UNDERSTANDING THE FEATURES OF YOUR VEHICLE 211
Page 216 of 652

TILT/TELESCOPING STEERING COLUMN
This feature allows you to tilt the steering column
upward or downward. It also allows you to lengthen or
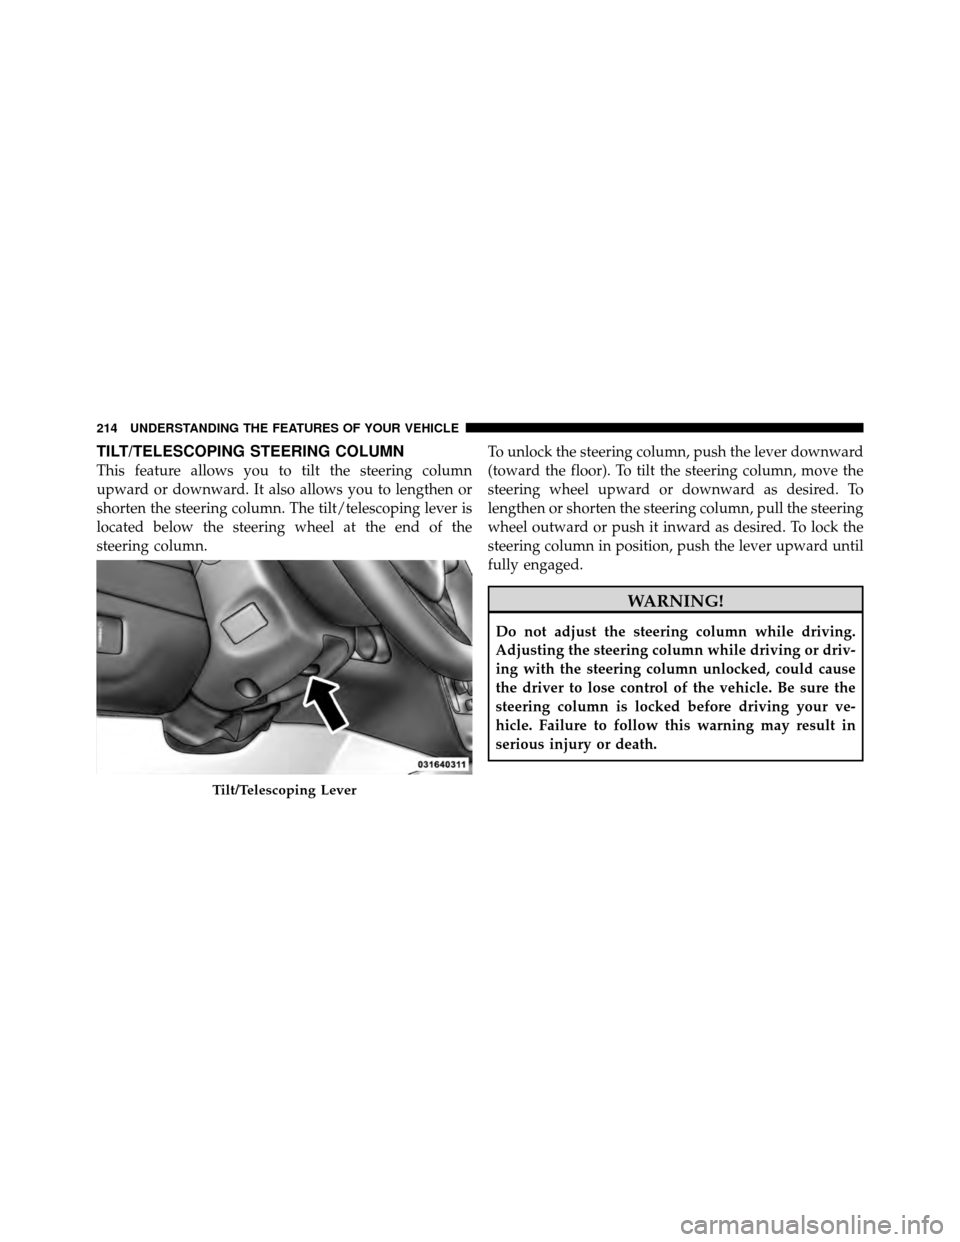
shorten the steering column. The tilt/telescoping lever is
located below the steering wheel at the end of the
steering column.To unlock the steering column, push the lever downward
(toward the floor). To tilt the steering column, move the
steering wheel upward or downward as desired. To
lengthen or shorten the steering column, pull the steering
wheel outward or push it inward as desired. To lock the
steering column in position, push the lever upward until
fully engaged.
WARNING!
Do not adjust the steering column while driving.
Adjusting the steering column while driving or driv-
ing with the steering column unlocked, could cause
the driver to lose control of the vehicle. Be sure the
steering column is locked before driving your ve-
hicle. Failure to follow this warning may result in
serious injury or death.
Tilt/Telescoping Lever
214 UNDERSTANDING THE FEATURES OF YOUR VEHICLE
Page 218 of 652
WARNING! (Continued)
•Do not place anything on the steering wheel that
insulates against heat, such as a blanket or steering
wheel covers of any type and material. This may
cause the steering wheel heater to overheat.
ADJUSTABLE PEDALS — IF EQUIPPED
The adjustable pedals system is designed to allow a
greater range of driver comfort for steering wheel tilt and
seat position. This feature allows the brake, accelerator,
and clutch pedals (if equipped) to move toward or away
from the driver to provide improved position with the
steering wheel.
The switch is located on the left side of the steering
column.Press the switch forward to move the pedals forward
(toward the front of the vehicle).
Press the switch rearward to move the pedals rearward
(toward the driver).
•The pedals can be adjusted with the ignition OFF.
Adjustable Pedal Switch
216 UNDERSTANDING THE FEATURES OF YOUR VEHICLE
Page 231 of 652

WARNING! (Continued)
•Before using the ParkSense�Rear Park Assist
System, it is strongly recommended that the ball
mount and hitch ball assembly is disconnected
from the vehicle when the vehicle is not used for
towing. Failure to do so can result in injury or
damage to vehicles or obstacles because the hitch
ball will be much closer to the obstacle than the
rear fascia when the warning display turns on the
single flashing arc and sounds the continuous
tone. Also, the sensors could detect the ball mount
and hitch ball assembly, depending on its size and
shape, giving a false indication that an obstacle is
behind the vehicle.
PARKVIEW� REAR BACK UP CAMERA — IF
EQUIPPED
Your vehicle may be equipped with the ParkView� Rear
Back Up Camera that allows you to see an on-screen
image of the rear surroundings of your vehicle whenever
the shift lever is put into REVERSE. The image will be
displayed on the Navigation/Multimedia radio display
screen along with a caution note to “check entire sur-
roundings” across the top of the screen. After five sec-
onds this note will disappear. The ParkView� camera is
located on the rear of the vehicle above the rear License
plate.
When the vehicle is shifted out of REVERSE, the rear
camera mode is exited and the navigation or audio screen
appears again.
3
UNDERSTANDING THE FEATURES OF YOUR VEHICLE 229
Page 249 of 652

automatically. This is called “Express Close”. During
Express Close operation, any movement of the sunroof
switch will stop the sunroof.
Closing Sunroof — Manual Mode
To close the sunroof, press and hold the switch in the
forward position. Any release of the switch will stop the
movement and the sunroof will remain in a partially
closed condition until the switch is pushed and held
forward again.
Pinch Protect Feature
This feature will detect an obstruction in the opening of
the sunroof during Express Close operation. If an ob-
struction is detected, the sunroof will automatically re-
tract. Remove the obstruction if this occurs. Next, press
the switch forward and release to Express Close.
NOTE:
If three consecutive sunroof close attempts result
in Pinch Protect reversals, the fourth close attempt will be
a Manual Close movement with Pinch Protect disabled.
Pinch Protect Override
If a known obstruction (ice, debris, etc.) prevents closing
the sunroof, press the switch forward and hold for two
seconds after the reversal occurs. This allows the sunroof
to move toward the closed position.
NOTE: Pinch protection is disabled while the switch is
pressed.
Venting Sunroof — Express
Press and release the “Vent” button, and the sunroof will
open to the vent position. This is called “Express Vent”,
and will occur regardless of sunroof position. During
Express Vent operation, any movement of the switch will
stop the sunroof.
Sunshade Operation
The sunshade can be opened manually. However, the
sunshade will open automatically as the sunroof opens.
3
UNDERSTANDING THE FEATURES OF YOUR VEHICLE 247
Page 252 of 652
One outlet in the removable floor console (if equipped)
shares a fuse with the lower outlet in the instrument
panel and is also connected to the battery. Do not exceed
a maximum power of 160 Watts (13 Amps) shared
between the lower panel outlet and the removable floor
console outlet.On vehicles equipped with the Super Console the power
outlets are located under the retractable cover. To access
the power outlets push down on the cover and slide it
toward the instrument panel.
Removable Console Outlet
Super Console Outlets
250 UNDERSTANDING THE FEATURES OF YOUR VEHICLE
Page 266 of 652
Coat Hooks
Coat hooks are located along the headliner for the second
and third row seating positions. The coat hook load limit
is 10 lbs (4.5 kg). Exceeding the recommended load limit
can cause the coat hooks to break or disengage from the
vehicle.
Cargo Area Storage
The liftgate sill plate has a raised line with the statement
“Load To This Line”. This line indicates how far rearward
cargo can be placed without interfering with liftgate
closing.NOTE:With all rear seats stowed or removed,4x8foot
sheets of building material will fit on the vehicle floor
with the liftgate closed. The front seats must be moved
slightly forward of the rearmost position.
Rear Cargo Area Loading Limit
264 UNDERSTANDING THE FEATURES OF YOUR VEHICLE
Page 267 of 652

CONSOLE FEATURES
There are three consoles available: Basic, Premium and
Super.
WARNING!
Do not operate this vehicle with a console compart-
ment lid in the open position. Cellular phones, music
players, and other handheld electronic devices
should be stowed while driving. Use of these devices
while driving can cause an accident due to distrac-
tion, resulting in death or injury.
Basic Console
Basic Console features consist of the following:
•The basic console profile allows vehicle occupants to
easily pass through the first row to the second.
•Four cupholders accept up to extra large size beverage
cups or 20 oz (.6 L) plastic bottles. Cupholders are
dishwasher safe for cleaning.
•The cupholders are removable to access a large storage
bin.
•The basic console is removable from the vehicle for
additional floor space by removing the cap and clip at
the console base.
To Remove The Basic Floor Console
1. Remove the front anchor cup plug and clip.
2. Slide the console base forward while lifting slightly to
clear the rear load floor hook.
3. Remove the console.
3
UNDERSTANDING THE FEATURES OF YOUR VEHICLE 265