Page 183 of 557
Rotate the headlight switch clockwise to the first detent
for parking light and instrument panel light operation.
Rotate the headlight switch to the second detent for
headlight, parking light and instrument panel light
operation.
Automatic Headlights — If Equipped
This system automatically turns the headlights on or off
according to ambient light levels. To turn the system on,
rotate the headlight switch counterclockwise to the
AUTO position. When the system is on, the headlight
time delay feature is also on. This means the headlights
will stay on for up to 90 seconds after you place the
ignition into the OFF position. To turn the automatic
system off, move the headlight switch out of the AUTO
position.
NOTE:The engine must be running before the head-
lights will come on in the automatic mode.
Headlight Switch
3
UNDERSTANDING THE FEATURES OF YOUR VEHICLE 181
Page 184 of 557

Headlights On With Wipers (Available With
Automatic Headlights Only)
When this feature is active, the headlights will turn on
approximately 10 seconds after the wipers are turned on
if the headlight switch is placed in the AUTO position. In
addition, the headlights will turn off when the wipers are
turned off if they were turned on by this feature.
NOTE:The Headlights On with Wipers feature can be
turned on or off using the Uconnect Touch™ System,
refer to “Uconnect Touch™ Settings” in “Understanding
Your Instrument Panel” for further information.
Headlight Time Delay
This feature provides the safety of headlight illumination
for up to 90 seconds (programmable) when leaving your
vehicle in an unlit area. To activate the delay feature, place the ignition in the OFF
position while the headlights are still on. Then, turn off
the headlights within 45 seconds. The delay interval
begins when the headlight switch is turned off.
If you turn the headlights or parking lights on, or place
the ignition in ACC or RUN, the system will cancel the
delay.
If you turn the headlights off before the ignition, they will
turn off in the normal manner.
NOTE:
•The lights must be turned off within 45 seconds of
placing the ignition in the OFF position to activate this
feature.
•The headlight delay time is programmable using the
Uconnect Touch™ System, refer to “Uconnect Touch™
Settings” in “Understanding Your Instrument Panel”
for further information.
182 UNDERSTANDING THE FEATURES OF YOUR VEHICLE
Page 186 of 557
Daytime Running Lights (DRL)
The LED Daytime Running Lights will come on when-
ever the ignition is placed in the RUN position, the
headlights are off and the parking brake is off. The
headlight switch must be used for normal nighttime
driving.
NOTE:The Daytime Running Lights can be turned on
and off using the Uconnect Touch™ System, refer to
“Uconnect Touch™ Settings” in “Understanding Your
Instrument Panel” for further information.
Lights-On Reminder
If the headlights or parking lights are on after the ignition
is placed in the OFF position, a chime will sound to alert
the driver when the driver’s door is opened.
Fog Lights — If Equipped
The front fog light switch is built into the headlight
switch.
Fog Light Switch
184 UNDERSTANDING THE FEATURES OF YOUR VEHICLE
Page 191 of 557
Interior Lights
The interior lights come on when a door is opened.
To protect the battery, the interior lights will turn off
automatically 10 minutes after the ignition switch is
moved to the LOCK position. This will occur if the
interior lights were switched on manually or are on
because a door is open. This includes the glove box light,
but not the trunk light. To restore interior light operation,
either turn the ignition switch ON or cycle the light
switch.
Dimmer Control
The dimmer control is part of the headlight switch and is
located on the left side of the instrument panel.
Dimmer Controls
3
UNDERSTANDING THE FEATURES OF YOUR VEHICLE 189
Page 193 of 557
Dome Light Position
Rotate the dimmer control completely upward to the
second detent to turn on the interior lights. The interior
lights will remain on when the dimmer control is in this
position.
Interior Light Defeat (OFF)
Rotate the dimmer control to the extreme bottom OFF
position. The interior lights will remain off when the
doors are open.
Parade Mode (Daytime Brightness Feature)
Rotate the dimmer control upward to the first detent.
This feature brightens all text displays such as the
odometer, EVIC (if equipped), and radio when the park-
ing lights or headlights are on.
WINDSHIELD WIPERS AND WASHERS
The multifunction lever operates the windshield wipers
and washer when the ignition is placed in the RUN
position. The multifunction lever is located on the left
side of the steering column.
Windshield Wiper/Washer Control
3
UNDERSTANDING THE FEATURES OF YOUR VEHICLE 191
Page 197 of 557

The Rain Sensing system has protective features for the
wiper blades and arms. It will not operate under the
following conditions:
•Low Temperature Wipe Inhibit— The Rain Sensing
feature will not operate when the ignition is placed in
the RUN position, the vehicle is stationary and the
outside temperature is below 32°F (0°C), unless the
wiper control on the multifunction lever is moved, the
vehicle speed becomes greater than 0 mph (0 km/h) or
the outside temperature rises above freezing.
•Neutral Wipe Inhibit — The Rain Sensing feature will
not operate when the ignition is placed in the RUN
position, the transmission shift lever is in the NEU-
TRAL position and the vehicle speed is less than
5 mph (8 km/h), unless the wiper control on the
multifunction lever is moved or the shift lever is
moved out of the NEUTRAL position.
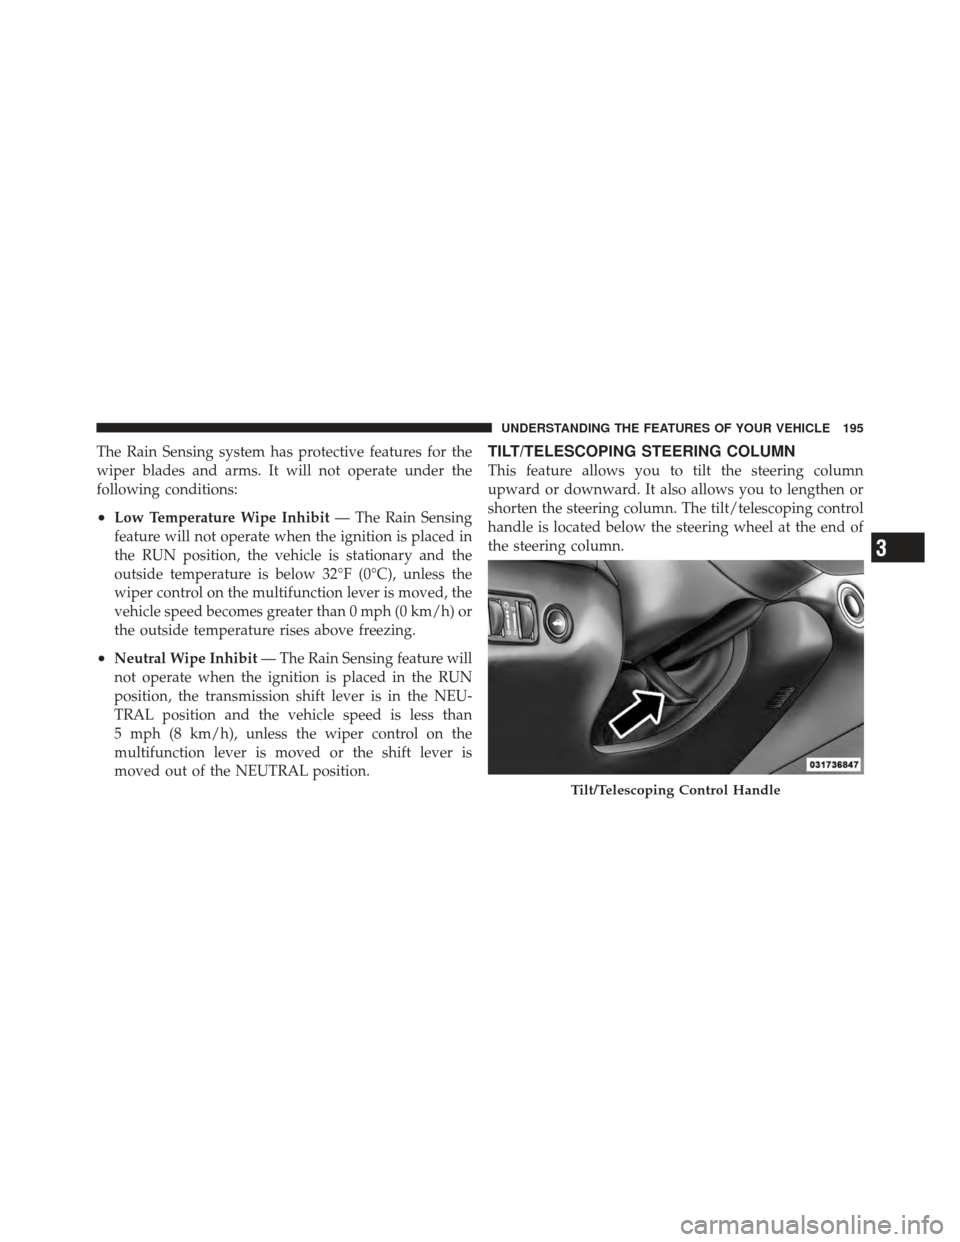
TILT/TELESCOPING STEERING COLUMN
This feature allows you to tilt the steering column
upward or downward. It also allows you to lengthen or
shorten the steering column. The tilt/telescoping control
handle is located below the steering wheel at the end of
the steering column.
Tilt/Telescoping Control Handle
3
UNDERSTANDING THE FEATURES OF YOUR VEHICLE 195
Page 203 of 557

Press the switch rearward to move the pedals rearward
(toward the driver).
•The pedals can be adjusted with the ignition OFF.
•The pedalscannotbe adjusted when the vehicle is in
REVERSE or when the Electronic Speed Control Sys-
tem is on. The following messages will be displayed
on vehicles equipped with the Electronic Vehicle In-
formation System (EVIC) if the pedals are attempted to
be adjusted when the system is locked out (“Adjust-
able Pedal Disabled — Cruise Control Engaged” or
“Adjustable Pedal Disabled — Vehicle In Reverse”.
NOTE: For vehicles equipped with Driver Memory
Seat, you can use your Remote Keyless Entry (RKE)
transmitter or the memory switch on the driver’s door
trim panel to return the adjustable pedals to pre-
programmed positions. Refer to “Driver Memory Seat”
in “Understanding The Features Of Your Vehicle” for
further information.
CAUTION!
Do not place any article under the adjustable pedals
or impede its ability to move as it may cause damage
to the pedal controls. Pedal travel may become lim-
ited if movement is stopped by an obstruction in the
adjustable pedal’s path.
WARNING!
Do not adjust the pedals while the vehicle is moving.
You could lose control and have an accident. Always
adjust the pedals while the vehicle is parked.
3
UNDERSTANDING THE FEATURES OF YOUR VEHICLE 201
Page 205 of 557

System can be reactivated by pushing the Electronic
Speed Control ON/OFF button and resetting the desired
vehicle set speed.
To Activate
Push the ON/OFF button. The Cruise Indicator Light in
the Electronic Vehicle Information Center (EVIC) will
illuminate. To turn the system off, push the ON/OFF
button a second time. The Cruise Indicator Light will
turn off. The system should be turned off when not in
use.
WARNING!
Leaving the Electronic Speed Control system on
when not in use is dangerous. You could accidentally
set the system or cause it to go faster than you want.
You could lose control and have an accident. Always
leave the system OFF when you are not using it.
To Set A Desired Speed
Turn the Electronic Speed Control ON. When the vehicle
has reached the desired speed, press the SET (-) button
and release. Release the accelerator and the vehicle will
operate at the selected speed.
NOTE:The vehicle should be traveling at a steady
speed and on level ground before pressing the SET
button.
To Deactivate
A soft tap on the brake pedal, pushing the CANCEL
button, or normal brake pressure while slowing the
vehicle will deactivate Electronic Speed Control without
erasing the set speed memory. Pressing the ON/OFF
button or turning the ignition switch OFF erases the set
speed memory.
3
UNDERSTANDING THE FEATURES OF YOUR VEHICLE 203