Page 97 of 352
Black plate (1,1)Chevrolet Sonic Owner Manual - 2012
Storage 4-1
Storage
Storage Compartments
Instrument Panel Storage . . . . . 4-1
Glove Box . . . . . . . . . . . . . . . . . . . . 4-1
Luggage/Load Locations
Load Compartment(Hatchback) . . . . . . . . . . . . . . . . . 4-1
Additional Storage Features
Cargo Cover (Hatchback) . . . . . 4-2
Storage
Compartments
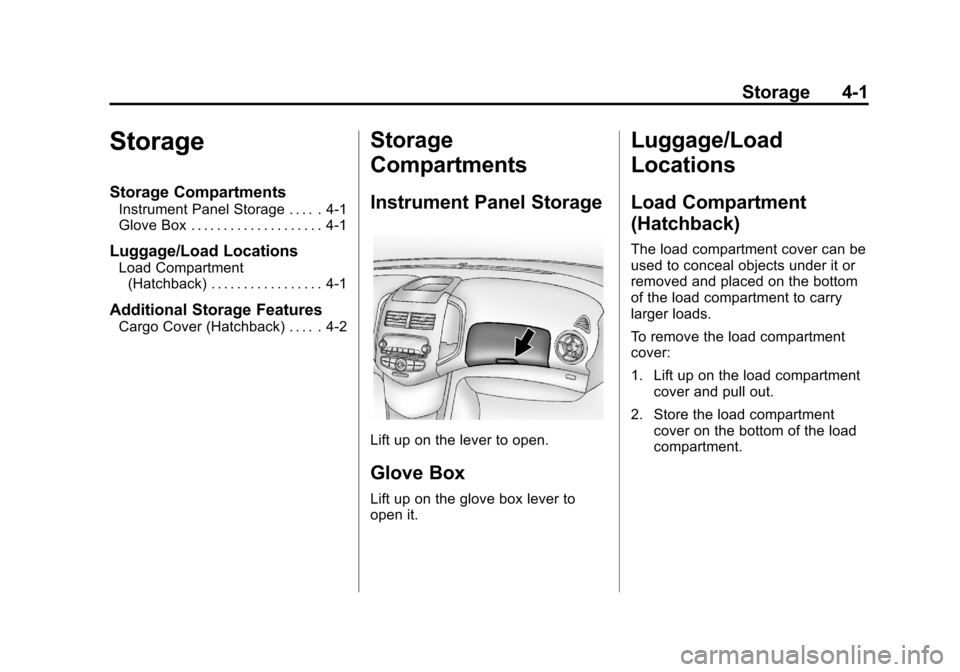
Instrument Panel Storage
Lift up on the lever to open.
Glove Box
Lift up on the glove box lever to
open it.
Luggage/Load
Locations
Load Compartment
(Hatchback)
The load compartment cover can be
used to conceal objects under it or
removed and placed on the bottom
of the load compartment to carry
larger loads.
To remove the load compartment
cover:
1. Lift up on the load compartment
cover and pull out.
2. Store the load compartment cover on the bottom of the load
compartment.
Page 98 of 352
Black plate (2,1)Chevrolet Sonic Owner Manual - 2012
4-2 Storage
To install the load compartment
cover:
1. Align the front sides of the loadcompartment cover into the slots
on both sides at the front of the
load compartment.
2. Lower the load compartment cover onto the lip around the
load compartment.Additional Storage
Features
Cargo Cover (Hatchback)
The cargo cover can be use to
cover items in the rear of the
vehicle.
To remove the cargo cover:
1. Remove both of the cords fromthe hooks at the top of the
liftgate.
2. Push up on the underside of the cargo cover at both pens at the
front sides of the cargo cover. To install the cargo cover:
1. Align the clips on the underside
of the cargo cover over the pens
on both sides of the cargo area
and push down.
2. Reconnect both of the cords to the hooks at the top of the
liftgate.
Page 99 of 352

Black plate (1,1)Chevrolet Sonic Owner Manual - 2012
Instruments and Controls 5-1
Instruments and
Controls
Controls
Steering Wheel Adjustment . . . 5-2
Steering Wheel Controls . . . . . . 5-2
Horn . . . . . . . . . . . . . . . . . . . . . . . . . . 5-2
Windshield Wiper/Washer . . . . . 5-3
Rear Window Wiper/Washer . . . . . . . . . . . . . . . . . . . . . . 5-4
Compass . . . . . . . . . . . . . . . . . . . . . 5-4
Clock . . . . . . . . . . . . . . . . . . . . . . . . . 5-4
Power Outlets . . . . . . . . . . . . . . . . . 5-5
Cigarette Lighter . . . . . . . . . . . . . . 5-6
Ashtrays . . . . . . . . . . . . . . . . . . . . . . 5-6
Warning Lights, Gauges, and
Indicators
Warning Lights, Gauges, and Indicators . . . . . . . . . . . . . . . . . . . . 5-7
Instrument Cluster . . . . . . . . . . . . 5-8
Speedometer . . . . . . . . . . . . . . . . . 5-9
Odometer . . . . . . . . . . . . . . . . . . . . . 5-9
Trip Odometer . . . . . . . . . . . . . . . . . 5-9 Tachometer . . . . . . . . . . . . . . . . . . . 5-9
Fuel Gauge . . . . . . . . . . . . . . . . . . . 5-9
Safety Belt Reminders . . . . . . . 5-10
Airbag Readiness Light . . . . . . 5-11
Passenger Airbag Status
Indicator . . . . . . . . . . . . . . . . . . . . 5-12
Charging System Light . . . . . . 5-12
Malfunction Indicator Lamp . . . . . . . . . . . . . 5-13
Service Vehicle Soon Light . . . . . . . . . . . . . . . . . . . . . . . 5-15
Owner Manual Indicator . . . . . 5-15
Code Set Indicator . . . . . . . . . . . 5-15
Brake System Warning Light . . . . . . . . . . . . . . . . . . . . . . . 5-16
Antilock Brake System (ABS) Warning Light . . . . . . . . . . . . . . 5-16
Up-Shift Light . . . . . . . . . . . . . . . . 5-17
Speed Sensitive Power Steering (SSPS) Warning
Light . . . . . . . . . . . . . . . . . . . . . . . 5-17
Traction Off Light . . . . . . . . . . . . 5-17
StabiliTrak
®OFF Light . . . . . . . 5-18
Traction Control System (TCS)/StabiliTrak
®Light . . . . 5-18 Engine Coolant Temperature
Warning Light . . . . . . . . . . . . . . 5-18
Tire Pressure Light . . . . . . . . . . 5-19
Engine Oil Pressure Light . . . . 5-19
Low Fuel Warning Light . . . . . . 5-20
Immobilizer Light . . . . . . . . . . . . 5-20
Reduced Engine Power Light . . . . . . . . . . . . . . . . . . . . . . . 5-21
High-Beam On Light . . . . . . . . . 5-21
Daytime Running Lamps (DRL) Indicator Light . . . . . . . 5-21
Front Fog Lamp Light . . . . . . . . 5-21
Lamps On Reminder . . . . . . . . . 5-22
Cruise Control Light . . . . . . . . . 5-22
Door Ajar Light . . . . . . . . . . . . . . 5-22
Information Displays
Driver Information Center (DIC) . . . . . . . . . . . . . . . 5-23
Vehicle Messages
Vehicle Messages . . . . . . . . . . . 5-26
Vehicle Personalization
Vehicle Personalization . . . . . . 5-27
Page 100 of 352

Black plate (2,1)Chevrolet Sonic Owner Manual - 2012
5-2 Instruments and Controls
Controls
Steering Wheel
Adjustment
To adjust the steering wheel:
1. Pull the lever down.
2. Move the steering wheel up,down, forward, and backward.
3. Pull the lever up to lock the steering wheel in place.
Do not adjust the steering wheel
while driving.
Steering Wheel Controls
Some audio steering wheel controls
could differ depending on the
vehicle options. Some audio
controls can be adjusted at the
steering wheel.
b/g(Push to Talk): For vehicles
with Bluetooth or OnStar, press to
interact with those systems. See
Bluetooth (Overview) on page 7‑19
or Bluetooth (Infotainment Controls)
on page 7‑21 orBluetooth (Voice Recognition) on page 14‑1
or
OnStar Overview on page 14‑1 for
more information.
$/i(Mute/End Call): Press to
reject an incoming call, or end a
current call. Press to silence the
vehicle speakers while using the
infotainment system. Press again to
turn the sound on.
For vehicles with OnStar or
Bluetooth systems, press to reject
an incoming call, or end a
current call.
_SRC^(Source): Press to select
an audio source.
Toggle up or down to select the next
or previous favorite radio station or
CD/MP3 track.
+
x− (Volume): Press + or−to
increase or decrease the volume.
Horn
Pressaon the steering wheel pad
to sound the horn.
Page 101 of 352

Black plate (3,1)Chevrolet Sonic Owner Manual - 2012
Instruments and Controls 5-3
Windshield Wiper/Washer
Sedan
Hatchback
The windshield wiper/washer lever
is located on the right side of the
steering column.
Move the lever to one of the
following positions:
HI: Use for fast wipes.
LO: Use for slow wipes.
Hatchback Shown, Sedan Similar
INT: (Intermittent Wipes): Move
the lever up to INT for intermittent
wipes, then turn the
xINT band
up for more frequent wipes or down
for less frequent wipes.
OFF: Use to turn the wipers off.
8(Mist): For a single wipe, briefly
move the wiper lever down. For
several wipes, hold the wiper
lever down.
Clear snow and ice from the wiper
blades before using them. If frozen
to the windshield, carefully loosen or
thaw them. Damaged wiper blades
should be replaced. See Wiper
Blade Replacement on page 10‑27.
Heavy snow or ice can overload the
wiper motor. A circuit breaker will
stop the motor until it cools down.
Windshield Washer
Pull the windshield wiper lever
toward you to spray windshield
washer fluid and activate the wipers.
The wipers will continue until the
lever is released or the maximum
wash time is reached.
When the windshield wiper lever is
released, additional wipes may
occur depending on how long the
windshield washer had been
activated. See Washer Fluid on
page 10‑21 for information on filling
the windshield washer fluid
reservoir.
{WARNING
In freezing weather, do not use
the washer until the windshield is
warmed. Otherwise the washer
fluid can form ice on the
windshield, blocking your vision.
Page 102 of 352

Black plate (4,1)Chevrolet Sonic Owner Manual - 2012
5-4 Instruments and Controls
Rear Window Wiper/
Washer
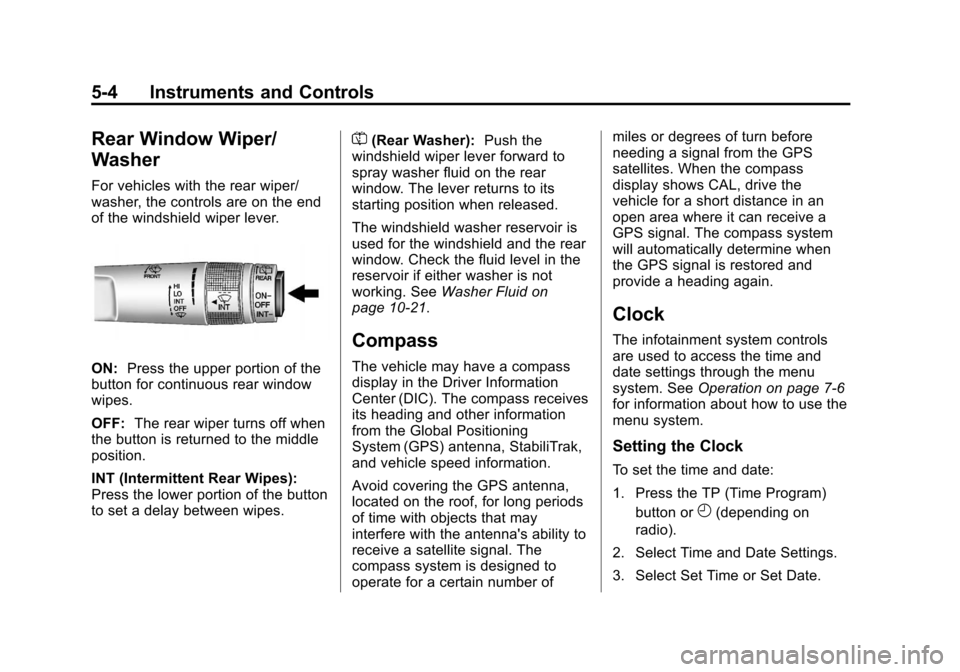
For vehicles with the rear wiper/
washer, the controls are on the end
of the windshield wiper lever.
ON:Press the upper portion of the
button for continuous rear window
wipes.
OFF: The rear wiper turns off when
the button is returned to the middle
position.
INT (Intermittent Rear Wipes):
Press the lower portion of the button
to set a delay between wipes.
=(Rear Washer): Push the
windshield wiper lever forward to
spray washer fluid on the rear
window. The lever returns to its
starting position when released.
The windshield washer reservoir is
used for the windshield and the rear
window. Check the fluid level in the
reservoir if either washer is not
working. See Washer Fluid on
page 10‑21.
Compass
The vehicle may have a compass
display in the Driver Information
Center (DIC). The compass receives
its heading and other information
from the Global Positioning
System (GPS) antenna, StabiliTrak,
and vehicle speed information.
Avoid covering the GPS antenna,
located on the roof, for long periods
of time with objects that may
interfere with the antenna's ability to
receive a satellite signal. The
compass system is designed to
operate for a certain number of miles or degrees of turn before
needing a signal from the GPS
satellites. When the compass
display shows CAL, drive the
vehicle for a short distance in an
open area where it can receive a
GPS signal. The compass system
will automatically determine when
the GPS signal is restored and
provide a heading again.
Clock
The infotainment system controls
are used to access the time and
date settings through the menu
system. See
Operation on page 7‑6
for information about how to use the
menu system.
Setting the Clock
To set the time and date:
1. Press the TP (Time Program)
button or
H(depending on
radio).
2. Select Time and Date Settings.
3. Select Set Time or Set Date.
Page 103 of 352

Black plate (5,1)Chevrolet Sonic Owner Manual - 2012
Instruments and Controls 5-5
4. Turn the MENU/TUNE knob toadjust the highlighted value.
5. Press the MENU/TUNE knob to select the next value.
6. To save the time or date and return to the Time and Date
Settings menu, press the
/
BACK button at any time or
press the MENU/TUNE knob
after adjusting the minutes
or year.
To set the 12/24 hour format:
1. Press the TP (Time Program) button or
H(depending on
radio).
2. Select Time and Date Settings.
3. Highlight Set Time Format.
4. Press the MENU/TUNE knob to select the 12 hour or 24 hour
display format. To set the month and day format:
1. Press the TP (Time Program)
button or
H(depending on
radio).
2. Select Time and Date Settings.
3. Highlight Set Date Format.
4. Press the MENU/TUNE knob to select MM/DD/YYYY (month/
day/year), or DD/MM/YYYY
(day/month/year), or YYYY/MM/
DD (year/month/day).
Power Outlets
The accessory power outlets can be
used to plug in electrical equipment,
such as a cell phone or MP3 player.
The vehicle has an accessory
power outlet located in front of the
cupholders on the center floor
console.
Remove the cover to access and
replace when not in use.
{WARNING
Power is always supplied to the
outlets. Do not leave electrical
equipment plugged in when the
vehicle is not in use because the
vehicle could catch fire and cause
injury or death.
Notice: Leaving electrical
equipment plugged in for an
extended period of time while
the vehicle is off will drain the
battery. Always unplug electrical
equipment when not in use and
do not plug in equipment that
exceeds the maximum 20 ampere
rating.
Certain accessory power plugs
may not be compatible with the
accessory power outlet and could
overload vehicle or adapter fuses.
If a problem is experienced, see
your dealer.
Page 104 of 352

Black plate (6,1)Chevrolet Sonic Owner Manual - 2012
5-6 Instruments and Controls
When adding electrical equipment,
be sure to follow the proper
installation instructions included
with the equipment. SeeAdd-On
Electrical Equipment on page 9‑39.
Notice: Hanging heavy
equipment from the power outlet
can cause damage not covered
by the vehicle warranty. The
power outlets are designed for
accessory power plugs only, such
as cell phone charge cords.Cigarette Lighter
For vehicles with a cigarette lighter,
it is located in the center floor
console.
The ignition must be turned to ACC/
ACCESSORY or ON/RUN.
To activate the cigarette lighter,
push it into the heating element and
let go. When the lighter is ready it
will pop back out.
Notice: Holding a cigarette lighter
in while it is heating does not let
the lighter back away from the
heating element when it is hot.
Damage from overheating can
occur to the lighter or heating
element, or a fuse could be
blown. Do not hold a cigarette
lighter in while it is heating.
Ashtrays
The vehicle may have a removable
ashtray.
The removable ashtray can be
placed in the front cupholders. To
open the removable ashtray, lift the
lid of the ashtray. After using, close
the lid.
Notice: If papers, pins, or other
flammable items are put in the
ashtray, hot cigarettes or other
smoking materials could ignite
them and possibly damage the
vehicle. Never put flammable
items in the ashtray.