2012 CHEVROLET ORLANDO fuel pressure
[x] Cancel search: fuel pressurePage 5 of 378

Black plate (5,1)Chevrolet Orlando Owner Manual - 2012
Introduction v
Vehicle Symbol Chart
Here are some additional symbols
that may be found on the vehicle
and what they mean. For more
information on the symbol, refer to
the Index.
9:Airbag Readiness Light
#:Air Conditioning
!:Antilock Brake System (ABS)
%:Audio Steering Wheel Controls
or OnStar®
$: Brake System Warning Light
":Charging System
I:Cruise Control
B: Engine Coolant Temperature
O:Exterior Lamps
#:Fog Lamps
.: Fuel Gauge
+:Fuses
3: Headlamp High/Low-Beam
Changer
j: LATCH System Child
Restraints
*: Malfunction Indicator Lamp
::Oil Pressure
}:Power
/:Remote Vehicle Start
>:Safety Belt Reminders
7:Tire Pressure Monitor
d:Traction Control/StabiliTrak®
M:Windshield Washer Fluid
Page 7 of 378
Black plate (1,1)Chevrolet Orlando Owner Manual - 2012
In Brief 1-1
In Brief
Instrument Panel
Instrument Panel . . . . . . . . . . . . . . 1-2
Initial Drive Information
Initial Drive Information . . . . . . . . 1-4
Remote Keyless Entry (RKE)System . . . . . . . . . . . . . . . . . . . . . . 1-4
Remote Vehicle Start . . . . . . . . . 1-4
Door Locks . . . . . . . . . . . . . . . . . . . 1-5
Liftgate . . . . . . . . . . . . . . . . . . . . . . . . 1-6
Windows . . . . . . . . . . . . . . . . . . . . . . 1-6
Seat Adjustment . . . . . . . . . . . . . . 1-6
Second Row Seats . . . . . . . . . . . 1-8
Third Row Seats . . . . . . . . . . . . . . 1-8
Heated Seats . . . . . . . . . . . . . . . . . 1-8
Head Restraint Adjustment . . . . 1-8
Safety Belts . . . . . . . . . . . . . . . . . . . 1-9 Mirror Adjustment . . . . . . . . . . . . . 1-9
Steering Wheel
Adjustment . . . . . . . . . . . . . . . . . 1-10
Interior Lighting . . . . . . . . . . . . . . 1-11
Exterior Lighting . . . . . . . . . . . . . 1-11
Windshield Wiper/Washer . . . . 1-12
Climate Controls . . . . . . . . . . . . . 1-13
Transmission . . . . . . . . . . . . . . . . 1-14
Vehicle Features
Radio(s) . . . . . . . . . . . . . . . . . . . . . 1-15
Satellite Radio . . . . . . . . . . . . . . . 1-16
Portable Audio Devices . . . . . . 1-16
Bluetooth
®. . . . . . . . . . . . . . . . . . . 1-16
Steering Wheel Controls . . . . . 1-17
Cruise Control . . . . . . . . . . . . . . . 1-17
Navigation System . . . . . . . . . . . 1-18
Driver Information Center (DIC) . . . . . . . . . . . . . . . 1-18
Ultrasonic Parking Assist . . . . 1-18
Storage Compartments . . . . . . 1-19
Power Outlets . . . . . . . . . . . . . . . 1-19
Performance and Maintenance
Traction Control System (TCS) . . . . . . . . . . . . . . 1-19
StabiliTrak
®System . . . . . . . . . 1-20
Tire Pressure Monitor . . . . . . . . 1-20
Tire Sealant and Compressor Kit . . . . . . . . . . . . . 1-20
Engine Oil Life System . . . . . . 1-21
Driving for Better Fuel Economy . . . . . . . . . . . . . . . . . . . 1-21
Roadside Assistance Program . . . . . . . . . . . . . . . . . . . . 1-21
OnStar
®. . . . . . . . . . . . . . . . . . . . . 1-22
Page 105 of 378

Black plate (1,1)Chevrolet Orlando Owner Manual - 2012
Instruments and Controls 5-1
Instruments and
Controls
Controls
Steering Wheel Adjustment . . . 5-2
Steering Wheel Controls . . . . . . 5-3
Horn . . . . . . . . . . . . . . . . . . . . . . . . . . 5-3
Windshield Wiper/Washer . . . . . 5-3
Rear Window Wiper/Washer . . . . . . . . . . . . . . . . . . . . . . 5-5
Compass . . . . . . . . . . . . . . . . . . . . . 5-5
Clock . . . . . . . . . . . . . . . . . . . . . . . . . 5-5
Power Outlets . . . . . . . . . . . . . . . . . 5-6
Cigarette Lighter . . . . . . . . . . . . . . 5-7
Ashtrays . . . . . . . . . . . . . . . . . . . . . . 5-7
Warning Lights, Gauges, and
Indicators
Warning Lights, Gauges, and Indicators . . . . . . . . . . . . . . . . . . . . 5-7
Instrument Cluster . . . . . . . . . . . . 5-9
Speedometer . . . . . . . . . . . . . . . . 5-10
Odometer . . . . . . . . . . . . . . . . . . . . 5-10
Tachometer . . . . . . . . . . . . . . . . . . 5-10 Fuel Gauge . . . . . . . . . . . . . . . . . . 5-10
Engine Coolant Temperature
Gauge . . . . . . . . . . . . . . . . . . . . . . 5-11
Safety Belt Reminders . . . . . . . 5-11
Airbag Readiness Light . . . . . . 5-12
Charging System Light . . . . . . 5-12
Malfunction Indicator Lamp . . . . . . . . . . . . . 5-13
Service Vehicle Soon Light . . . . . . . . . . . . . . . . . . . . . . . 5-15
Brake System Warning Light . . . . . . . . . . . . . . . . . . . . . . . 5-15
Antilock Brake System (ABS) Warning Light . . . . . . . . . . . . . . 5-16
Up-Shift Light . . . . . . . . . . . . . . . . 5-17
Power Steering Warning Light . . . . . . . . . . . . . . . . . . . . . . . 5-17
Traction Off Light . . . . . . . . . . . . 5-17
StabiliTrak
®OFF Light . . . . . . . 5-18
Traction Control System (TCS)/StabiliTrak
®Light . . . . 5-18
Tire Pressure Light . . . . . . . . . . 5-18
Engine Oil Pressure Light . . . . 5-19
Low Fuel Warning Light . . . . . . 5-20
Security Light . . . . . . . . . . . . . . . . 5-20
Reduced Engine Power Light . . . . . . . . . . . . . . . . . . . . . . . 5-20 High-Beam On Light . . . . . . . . . 5-21
Daytime Running Lamps
(DRL) Indicator Light . . . . . . . 5-21
Front Fog Lamp Light . . . . . . . . 5-21
Lamps On Reminder . . . . . . . . . 5-21
Cruise Control Light . . . . . . . . . 5-22
Door Ajar Light . . . . . . . . . . . . . . 5-22
Information Displays
Driver Information Center (DIC) . . . . . . . . . . . . . . . 5-22
Vehicle Messages
Vehicle Messages(Base Level) . . . . . . . . . . . . . . . 5-26
Vehicle Messages (Uplevel) . . . . . . . . . . . . . . . . . . . 5-26
Battery Voltage and Charging Messages . . . . . . . . . . . . . . . . . . 5-26
Brake System Messages . . . . 5-27
Compass Messages . . . . . . . . . 5-27
Cruise Control Messages . . . . 5-27
Door Ajar Messages . . . . . . . . . 5-27
Engine Cooling System Messages . . . . . . . . . . . . . . . . . . 5-27
Engine Oil Messages . . . . . . . . 5-28
Engine Power Messages . . . . 5-28
Page 128 of 378

Black plate (24,1)Chevrolet Orlando Owner Manual - 2012
5-24 Instruments and Controls
Reset the average consumption by
pressing SET/CLR when it is
displayed.
Instantaneous Fuel Economy
The Instantaneous Fuel Economy
display shows the current fuel
economy in liters per 100 kilometers
(L/100 km) or miles per gallon
(mpg). This number reflects only the
fuel economy that the vehicle has
right now and changes frequently as
driving conditions change. Unlike
average fuel economy, this display
cannot be reset.
Average Speed
This displays the average speed of
the vehicle in kilometers per hour
(km/h) or miles per hour (mph). This
average is based on the various
vehicle speeds recorded since the
last reset. On some models, this
display is shown as
ckm/h (mph).
Reset the average speed by
pressing SET/CLR when it is
displayed. Fuel Used
This display shows the approximate
liters (L) or gallons (gal) of fuel that
have been used since last reset.
The fuel used can be reset by
pressing the SET/CLR button while
the Fuel Used display is showing.
Digital Speed
The speedometer shows how fast
the vehicle is moving in either
kilometers per hour (km/h) or miles
per hour (mph). The speedometer
cannot be reset.
Vehicle Information Menu
Items
Press MENU on the turn signal
lever until the Vehicle Information
menu is displayed. Use
w/xto
scroll through the menu items. Not
all items are available on every
vehicle. The following is a list of all
of the possible menu items:
.Units
.Tire Pressure
.Remaining Oil Life
.Battery Voltage
.Blank Display
Units
Move
w/xto change between
metric or US when the Unit display
is active. Press SET/CLR to confirm
the setting. On some models, you
will have to select 1, 2, or 3 for the
Unit display. 1 is Imperial units, 2 is
US units, and 3 is metric units. This
will change the displays on the
cluster and DIC to the type of
measurements you select.
Tire Pressure
The display may show a vehicle
with the approximate pressures of
all four tires. Tire pressure is
displayed in either kilopascal (kPa)
or in pounds per square inch (psi).
On some models, this display only
allows for matching of the TPMS
sensors. In this case, the display
will show TIRE LEARN. See Tire
Pressure Monitor System on
Page 214 of 378
Black plate (26,1)Chevrolet Orlando Owner Manual - 2012
9-26 Driving and Operating
Notice:Do not rest your foot on
the clutch pedal while driving or
while stopped. The pressure can
cause premature wear in the
clutch. The repairs would not be
covered by the vehicle warranty.
1 (First): Press the clutch pedal
fully to the pedal stop and shift into
1 (First). Then slowly let up on the
clutch pedal as you press the
accelerator pedal.
If you come to a complete stop and
it is hard to shift into 1 (First), put
the shift lever in Neutral and let up
on the clutch. Press the clutch pedal
back down. Then shift into 1 (First).
2 (Second): Press the clutch pedal
fully to the pedal stop as you let up
on the accelerator pedal and shift
into 2 (Second). Then, slowly let up
on the clutch pedal as you press the
accelerator pedal. 3 (Third), 4 (Fourth), 5 (Fifth) and
6 (Sixth):
Shift into 3 (Third),
4 (Fourth), 5 (Fifth) and 6 (Sixth) the
same way you do for 2 (Second).
Slowly let up on the clutch pedal as
you press the accelerator pedal.
For the best fuel economy, use
6 (Sixth) gear whenever vehicle
speed and driving conditions allow.
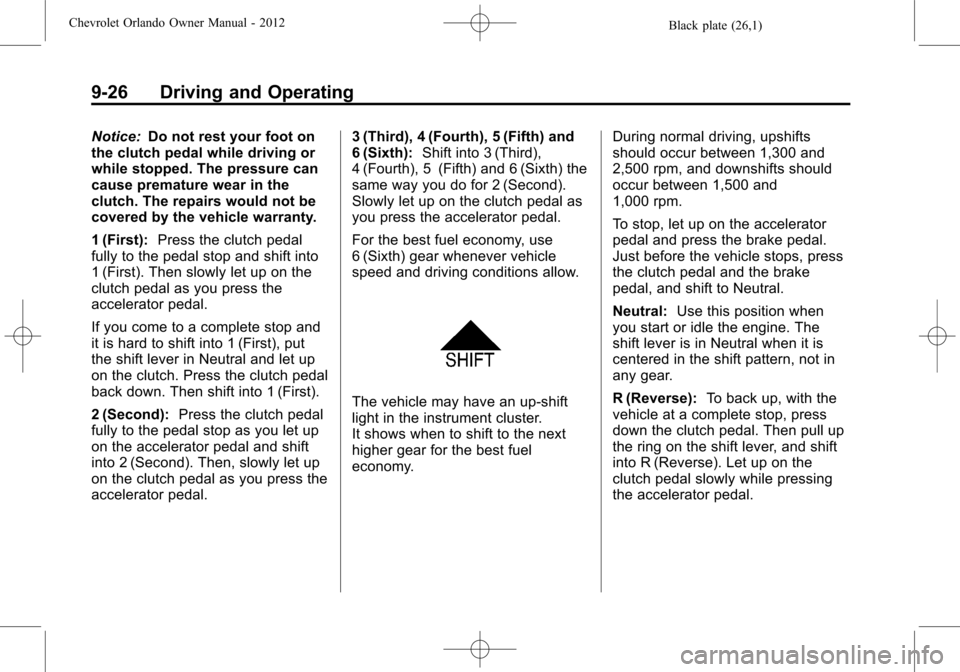
The vehicle may have an up-shift
light in the instrument cluster.
It shows when to shift to the next
higher gear for the best fuel
economy. During normal driving, upshifts
should occur between 1,300 and
2,500 rpm, and downshifts should
occur between 1,500 and
1,000 rpm.
To stop, let up on the accelerator
pedal and press the brake pedal.
Just before the vehicle stops, press
the clutch pedal and the brake
pedal, and shift to Neutral.
Neutral:
Use this position when
you start or idle the engine. The
shift lever is in Neutral when it is
centered in the shift pattern, not in
any gear.
R (Reverse): To back up, with the
vehicle at a complete stop, press
down the clutch pedal. Then pull up
the ring on the shift lever, and shift
into R (Reverse). Let up on the
clutch pedal slowly while pressing
the accelerator pedal.
Page 241 of 378
Black plate (7,1)Chevrolet Orlando Owner Manual - 2012
Vehicle Care 10-7
A.Engine Air Cleaner/Filter on
page 10‑11.
B. Engine Cover.
C. Engine Cooling Fan (Out of View). See Cooling System on
page 10‑13.
D. Engine Oil Fill Cap. See Engine
Oil on page 10‑7.
E. Engine Oil Dipstick (Out of View). See Engine Oil on
page 10‑7.
F. Brake Fluid Reservoir. See Brakes on page 10‑19.
G. Engine Coolant Surge Tank and Pressure Cap. See Engine
Coolant on page 10‑14.
H. Battery on page 10‑21
(Out of View).
I. Remote Positive (+) Terminal. See Jump Starting on
page 10‑73.
J. Engine Compartment Fuse
Block on page 10‑32. K. Windshield Washer Fluid
Reservoir. See Washer Fluid on
page 10‑18.
Engine Oil
To ensure proper engine
performance and long life, careful
attention must be paid to engine oil.
Following these simple, but
important steps will help protect
your investment:
.Always use engine oil approved
to the proper specification and of
the proper viscosity grade. See
“Selecting the Right Engine Oil”
in this section.
.Check the engine oil level
regularly and maintain the
proper oil level. See “Checking
Engine Oil” and“When to Add
Engine Oil” in this section.
.Change the engine oil at the
appropriate time. See Engine Oil
Life System on page 10‑9.
.Always dispose of engine oil
properly. See “What to Do with
Used Oil” in this section.
Checking Engine Oil
It is a good idea to check the engine
oil level at each fuel fill. In order to
get an accurate reading, the vehicle
must be on level ground. The
engine oil dipstick handle is a yellow
loop. See Engine Compartment
Overview on page 10‑6 for the
location of the engine oil dipstick.
Obtaining an accurate oil level
reading is essential:
1. If the engine has been running recently, turn off the engine and
allow several minutes for the oil
to drain back into the oil pan.
Checking the oil level too soon
after engine shutoff will not
provide an accurate oil level
reading.
Page 275 of 378
Black plate (41,1)Chevrolet Orlando Owner Manual - 2012
Vehicle Care 10-41
is certified to carry. The speed
rating is the maximum speed a
tire is certified to carry a load.
Tire Terminology and
Definitions
Air Pressure:The amount of
air inside the tire pressing
outward on each square inch
of the tire. Air pressure is
expressed in kPa (kilopascal)
or psi (pounds per square inch).
Accessory Weight
:The
combined weight of optional
accessories. Some examples of
optional accessories are
automatic transmission, power
steering, power brakes, power
windows, power seats, and air
conditioning.
Aspect Ratio
:The relationship
of a tire's height to its width. Belt
:A rubber coated layer of
cords that is located between
the plies and the tread. Cords
may be made from steel or other
reinforcing materials.
Bead
:The tire bead contains
steel wires wrapped by steel
cords that hold the tire onto
the rim.
Bias Ply Tire
:A pneumatic tire
in which the plies are laid at
alternate angles less than
90 degrees to the centerline of
the tread.
Cold Tire Pressure
:The
amount of air pressure in a tire,
measured in kPa (kilopascal)
or psi (pounds per square inch)
before a tire has built up heat
from driving. See Tire Pressure
on page 10‑44.
Curb Weight
:The weight of a
motor vehicle with standard and
optional equipment including the maximum capacity of fuel, oil,
and coolant, but without
passengers and cargo.
DOT Markings
:A code molded
into the sidewall of a tire
signifying that the tire is in
compliance with the U.S.
Department of Transportation
(DOT) Motor Vehicle Safety
Standards. The DOT code
includes the Tire Identification
Number (TIN), an alphanumeric
designator which can also
identify the tire manufacturer,
production plant, brand, and
date of production.
GVWR
:Gross Vehicle Weight
Rating. See Vehicle Load Limits
on page 9‑10.
GAWR FRT
:Gross Axle Weight
Rating for the front axle. See
Vehicle Load Limits on
page 9‑10.
Page 278 of 378
Black plate (44,1)Chevrolet Orlando Owner Manual - 2012
10-44 Vehicle Care
Tire Pressure
Tires need the correct amount of
air pressure to operate
effectively.
Notice:Neither tire
underinflation nor
overinflation is good.
Underinflated tires, or tires
that do not have enough air,
can result in:
.Tire overloading and
overheating which could
lead to a blowout.
.Premature or
irregular wear.
.Poor handling.
.Reduced fuel economy.
Overinflated tires, or tires that
have too much air, can
result in:
.Unusual wear.
.Poor handling.
.Rough ride.
.Needless damage from
road hazards.
The Tire and Loading
Information label on the vehicle
indicates the original equipment
tires and the correct cold tire
inflation pressures. The
recommended pressure is the
minimum air pressure needed to
support the vehicle's maximum
load carrying capacity.
For additional information
regarding how much weight the
vehicle can carry, and an
example of the Tire and Loading
Information label, see Vehicle
Load Limits on page 9‑10. How
the vehicle is loaded affects
vehicle handling and ride
comfort. Never load the vehicle
with more weight than it was
designed to carry. When to Check
Check the tires once a month
or more.
How to Check
Use a good quality pocket-type
gauge to check the tire
pressure. Proper tire inflation
cannot be determined by looking
at the tire. Check the tire
inflation pressure when the tires
are cold, meaning the vehicle
has not been driven for at least
three hours or no more than
1.6 km (1 mi).
Remove the valve cap from the
tire valve stem. Press the tire
gauge firmly onto the valve to
get the pressure measurement.
If the cold tire inflation pressure
matches the recommended
pressure on the Tire and
Loading Information label, no
further adjustment is necessary.