2012 CHEVROLET MALIBU instrument cluster
[x] Cancel search: instrument clusterPage 9 of 398

Black plate (3,1)Chevrolet Malibu Owner Manual - 2012
In Brief 1-3
A.Air Vents on page 8‑9.
B. Turn and Lane‐Change Lever. See Turn and Lane-Change
Signals on page 6‑4.
C. Instrument Cluster on
page 5‑10.
D. Windshield Wiper/Washer on
page 5‑4.
E. Instrument Panel Storage on
page 4‑1.
F. Infotainment on page 7‑1.
G. Instrument Panel Illumination
Control on page 6‑5.
H. Driver Compartment Storage. See Front Storage on page 4‑2.
I. Hood Release. See Hood on
page 10‑4. J.
Cruise Control on page 9‑33.
Driver Information Center (DIC)
Buttons. See Driver Information
Center (DIC) on page 5‑24.
K. Data Link Connector (DLC) (Out of View). See Malfunction
Indicator Lamp on page 5‑16.
L. Steering Wheel Adjustment on
page 5‑2 (Out of View).
M. Horn on page 5‑3.
N. Steering Wheel Controls on
page 5‑2 (If Equipped).
O. Ignition Positions on page 9‑16.
P. Climate Control Systems on
page 8‑1 (If Equipped).
Automatic Climate Control
System on page 8‑5
(If Equipped). Q.
Hazard Warning Flashers on
page 6‑4.
R. Shift Lever. See Automatic
Transmission on page 9‑24.
S. Front Storage on page 4‑2.
Power Outlets on page 5‑7.
T. Passenger Sensing System on
page 3‑26.
U. Traction Control System (TCS)
on page 9‑30.
Page 25 of 398
Black plate (19,1)Chevrolet Malibu Owner Manual - 2012
In Brief 1-19
Cruise Control
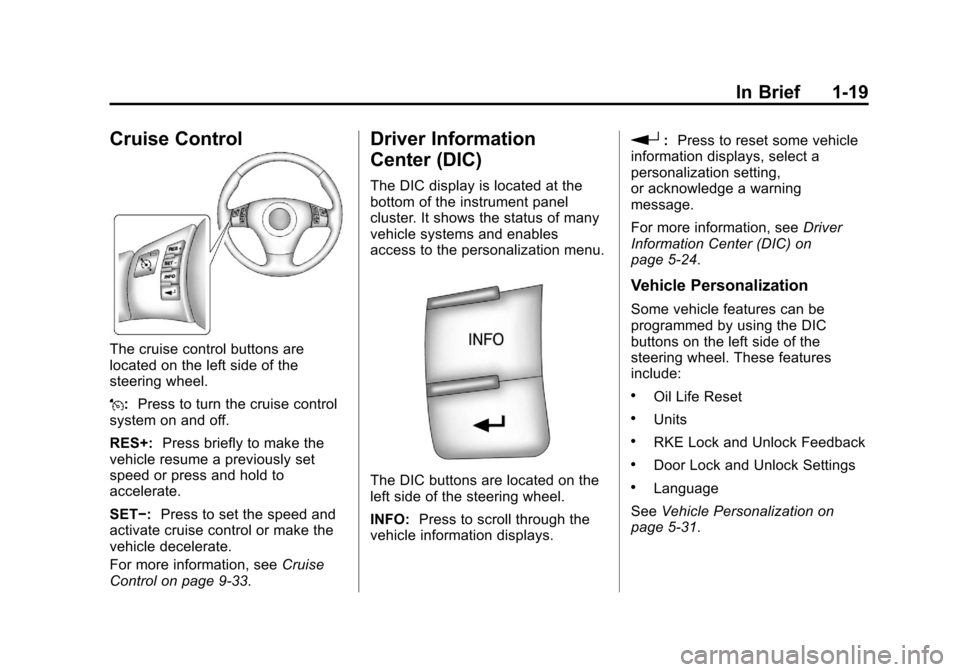
The cruise control buttons are
located on the left side of the
steering wheel.
J:Press to turn the cruise control
system on and off.
RES+: Press briefly to make the
vehicle resume a previously set
speed or press and hold to
accelerate.
SET−: Press to set the speed and
activate cruise control or make the
vehicle decelerate.
For more information, see Cruise
Control on page 9‑33.
Driver Information
Center (DIC)
The DIC display is located at the
bottom of the instrument panel
cluster. It shows the status of many
vehicle systems and enables
access to the personalization menu.
The DIC buttons are located on the
left side of the steering wheel.
INFO: Press to scroll through the
vehicle information displays.
r: Press to reset some vehicle
information displays, select a
personalization setting,
or acknowledge a warning
message.
For more information, see Driver
Information Center (DIC) on
page 5‑24.
Vehicle Personalization
Some vehicle features can be
programmed by using the DIC
buttons on the left side of the
steering wheel. These features
include:
.Oil Life Reset
.Units
.RKE Lock and Unlock Feedback
.Door Lock and Unlock Settings
.Language
See Vehicle Personalization on
page 5‑31.
Page 41 of 398
Black plate (11,1)Chevrolet Malibu Owner Manual - 2012
Keys, Doors, and Windows 2-11
Vehicle Security
This vehicle has theft-deterrent
features; however, they do not make
it impossible to steal.
Anti-theft Alarm System
Your vehicle may have an anti-theft
alarm system.
Arming the System
With the ignition off, press the
Remote Keyless Entry (RKE)
transmitter lock button to arm the
system.
The system will arm 30 seconds
after all the doors are closed,
or 60 seconds with any door open.
If you press the lock button on the
transmitter a second time while all
the doors are closed, the system will
arm immediately. The system will
still arm in 60 seconds if a door is
open. When the open door is
closed, the system will arm.
The security light, located on the
instrument panel cluster, comes on
to indicate that arming has been
initiated. Once the system is armed,
the security light flashes once every
three seconds.
If the security light is flashing twice
per second, this means that a door
is open.
If the system is armed and the key
is used to unlock the vehicle, the
alarm will be activated.
If you do not want to arm the
system, lock the vehicle with the
manual lock knob on the doors or
with the inside power door lock
switches.
The alarm will sound and the
exterior lights will flash if any door is
opened while armed.
Disarming the System
To disarm the system:
.Press the RKE transmitter
unlock button.
.Turn the ignition to ON/RUN.
Once the system is disarmed, the
security light will stop flashing.
How the System Alarm is
Activated
To activate the system if it is armed:
.Open the driver's door or trunk.
A ten second pre-alarm chirp
will sound followed by a
thirty second full alarm of horn
and lights.
.Open any other door. A full
alarm of horn and lights will
immediately sound for thirty
seconds.
.Open the hood. If the vehicle
has the remote start feature,
it will activate the full alarm.
Page 42 of 398
Black plate (12,1)Chevrolet Malibu Owner Manual - 2012
2-12 Keys, Doors, and Windows
When an alarm event has finished,
the system will re-arm itself
automatically.
How to Turn Off the System
Alarm
To turn off the system alarm:
.Press the lock button on the
RKE transmitter. The system will
then re-arm itself.
.Press the unlock button on the
RKE transmitter. This will also
disarm the system.
.Insert the key in the ignition and
turn it on. This will also disarm
the system.
How to Detect a Tamper
Condition
If three chirps are heard when the
unlock or lock button is pressed on
the RKE transmitter, it means that
the system alarm was previously
triggered.
Immobilizer
SeeRadio Frequency Statement on
page 13‑22 for information
regarding Part 15 of the Federal
Communications Commission (FCC)
rules and Industry Canada
Standards RSS-GEN/210/220/310.
Immobilizer Operation
This vehicle has a passive
theft-deterrent system.
The system does not have to be
manually armed or disarmed.
The vehicle is automatically
immobilized when the key is
removed from the ignition.
The system is automatically
disarmed when the vehicle is
started with the correct key. The key
uses a transponder that matches an
immobilizer control unit in the
vehicle and automatically disarms
the system. Only the correct key
starts the vehicle. The vehicle may
not start if the key is damaged.
The security light, located in the
instrument panel cluster, comes on
if there is a problem with arming or
disarming the theft-deterrent
system.
When trying to start the vehicle, the
security light comes on briefly when
the ignition is turned on.
If the engine does not start and the
security light stays on there is a
problem with the system. Turn the
ignition off and try again.
If the engine still does not start, and
the key appears to be undamaged
or the light continues to stay on, try
another ignition key. If the engine
does not start with the other key, the
vehicle needs service. If the vehicle
does start, the first key may be
Page 68 of 398
Black plate (20,1)Chevrolet Malibu Owner Manual - 2012
3-20 Seats and Restraints
{WARNING
Because airbags inflate with great
force and faster than the blink of
an eye, anyone who is up
against, or very close to any
airbag when it inflates can be
seriously injured or killed. Do not
sit unnecessarily close to any
airbag, as you would be if sitting
on the edge of the seat or leaning
forward. Safety belts help keep
you in position before and during
a crash. Always wear a safety
belt, even with airbags. The driver
should sit as far back as possible
while still maintaining control of
the vehicle.
Occupants should not lean on or
sleep against the door or side
windows in seating positions with
seat-mounted side impact airbags
and/or roof-rail airbags.
{WARNING
Children who are up against,
or very close to, any airbag when
it inflates can be seriously injured
or killed. Airbags plus
lap-shoulder belts offer protection
for adults and older children, but
not for young children and infants.
Neither the vehicle's safety belt
system nor its airbag system is
designed for them. Young
children and infants need the
protection that a child restraint
system can provide. Always
secure children properly in the
vehicle. To read how, seeOlder
Children on page 3‑33 orInfants
and Young Children on
page 3‑35.
There is an airbag readiness light
on the instrument panel cluster,
which shows the airbag symbol.
The system checks the airbag
electrical system for malfunctions.
The light tells you if there is an
electrical problem. See Airbag
Readiness Light on page 5‑14 for
more information.
Page 107 of 398
Black plate (1,1)Chevrolet Malibu Owner Manual - 2012
Instruments and Controls 5-1
Instruments and
Controls
Controls
Steering Wheel Adjustment . . . 5-2
Steering Wheel Controls . . . . . . 5-2
Horn . . . . . . . . . . . . . . . . . . . . . . . . . . 5-3
Windshield Wiper/Washer . . . . . 5-4
Compass . . . . . . . . . . . . . . . . . . . . . 5-5
Clock . . . . . . . . . . . . . . . . . . . . . . . . . 5-6
Power Outlets . . . . . . . . . . . . . . . . . 5-7
Warning Lights, Gauges, and
Indicators
Warning Lights, Gauges, andIndicators . . . . . . . . . . . . . . . . . . . . 5-9
Instrument Cluster . . . . . . . . . . . 5-10
Speedometer . . . . . . . . . . . . . . . . 5-11
Odometer . . . . . . . . . . . . . . . . . . . . 5-11
Trip Odometer . . . . . . . . . . . . . . . 5-11
Tachometer . . . . . . . . . . . . . . . . . . 5-11
Fuel Gauge . . . . . . . . . . . . . . . . . . 5-12
Engine Coolant Temperature Gauge . . . . . . . . . . . . . . . . . . . . . . 5-13
Safety Belt Reminders . . . . . . . 5-13
Airbag Readiness Light . . . . . . 5-14 Passenger Airbag Status
Indicator . . . . . . . . . . . . . . . . . . . . 5-15
Charging System Light . . . . . . 5-16
Malfunction Indicator Lamp . . . . . . . . . . . . . 5-16
Brake System Warning Light . . . . . . . . . . . . . . . . . . . . . . . 5-18
Antilock Brake System (ABS) Warning Light . . . . . . . . . . . . . . 5-19
Traction Off Light . . . . . . . . . . . . 5-20
Electronic Stability Control (ESC) Off Light . . . . . . . . . . . . . 5-20
Electronic Stability Control (ESC)/Traction Control
System (TCS) Indicator/
Warning Light . . . . . . . . . . . . . . 5-20
Engine Coolant Temperature Warning Light . . . . . . . . . . . . . . 5-21
Tire Pressure Light . . . . . . . . . . 5-21
Engine Oil Pressure Light . . . . 5-22
Security Light . . . . . . . . . . . . . . . . 5-23
High-Beam On Light . . . . . . . . . 5-23
Cruise Control Light . . . . . . . . . 5-23
Information Displays
Driver Information Center (DIC) . . . . . . . . . . . . . . . 5-24
Vehicle Messages
Vehicle Messages . . . . . . . . . . . 5-26
Brake System Messages . . . . 5-27
Cruise Control Messages . . . . 5-27
Door Ajar Messages . . . . . . . . . 5-27
Engine Oil Messages . . . . . . . . 5-27
Engine Power Messages . . . . 5-27
Fuel System Messages . . . . . . 5-28
Key and Lock Messages . . . . . 5-28
Lamp Messages . . . . . . . . . . . . . 5-28
Ride Control SystemMessages . . . . . . . . . . . . . . . . . . 5-28
Airbag System Messages . . . . 5-30
Service Vehicle Messages . . . 5-30
Tire Messages . . . . . . . . . . . . . . . 5-30
Vehicle Reminder Messages . . . . . . . . . . . . . . . . . . 5-31
Washer Fluid Messages . . . . . 5-31
Vehicle Personalization
Vehicle Personalization . . . . . . 5-31
Page 116 of 398
Black plate (10,1)Chevrolet Malibu Owner Manual - 2012
5-10 Instruments and Controls
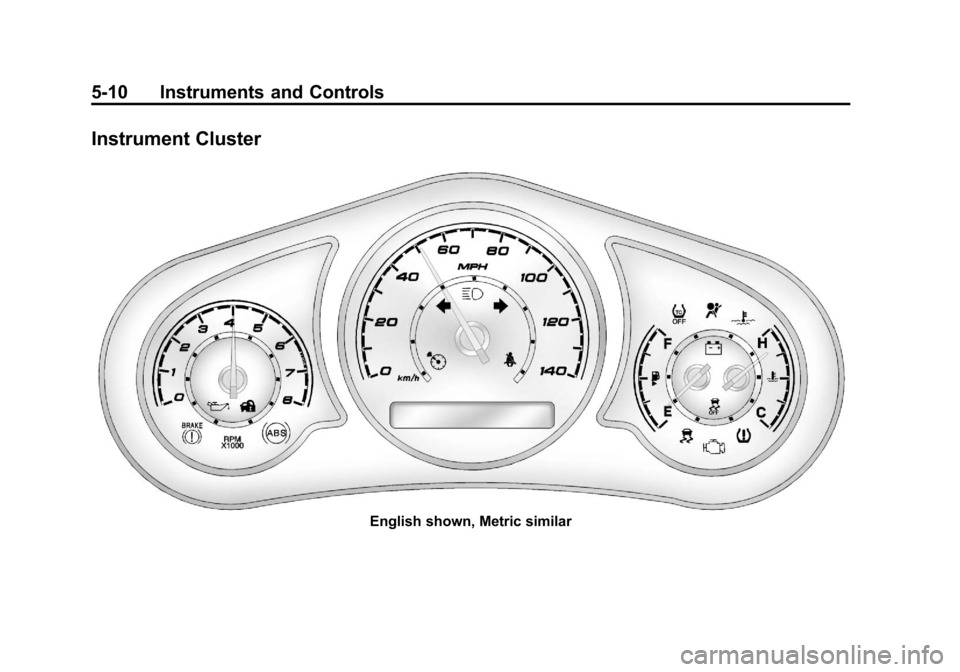
Instrument Cluster
English shown, Metric similar
Page 130 of 398
Black plate (24,1)Chevrolet Malibu Owner Manual - 2012
5-24 Instruments and Controls
Information Displays
Driver Information
Center (DIC)
Your vehicle has a Driver
Information Center (DIC). The DIC
display gives you the status of many
of your vehicle's systems. The DIC
is also used to display driver
personalization menu modes and
warning/status messages. All
messages will appear in the DIC
display, located at the bottom of the
instrument panel cluster.
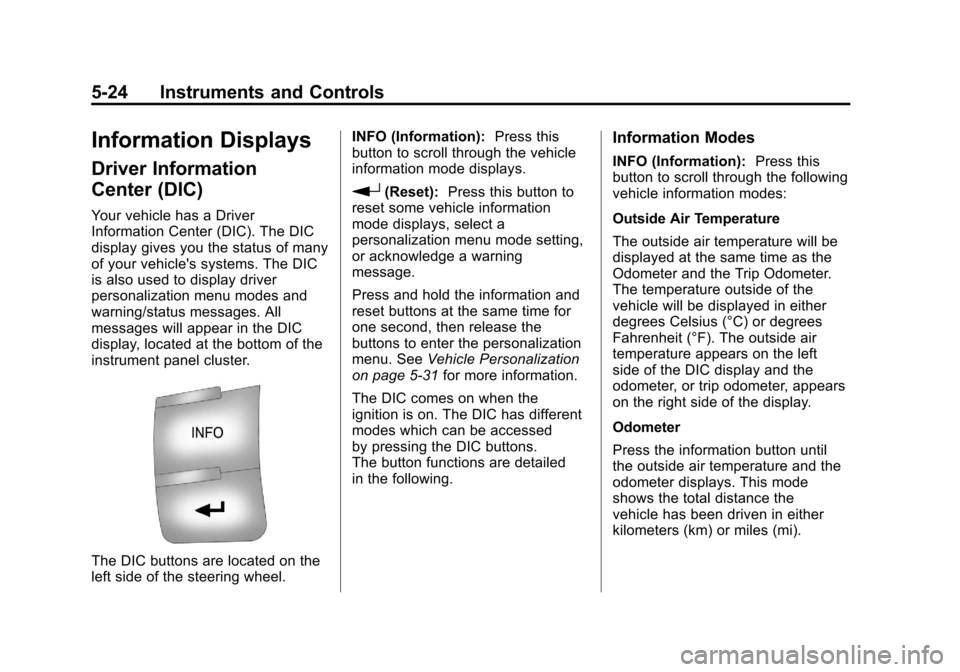
The DIC buttons are located on the
left side of the steering wheel.INFO (Information):
Press this
button to scroll through the vehicle
information mode displays.
r(Reset): Press this button to
reset some vehicle information
mode displays, select a
personalization menu mode setting,
or acknowledge a warning
message.
Press and hold the information and
reset buttons at the same time for
one second, then release the
buttons to enter the personalization
menu. See Vehicle Personalization
on page 5‑31 for more information.
The DIC comes on when the
ignition is on. The DIC has different
modes which can be accessed
by pressing the DIC buttons.
The button functions are detailed
in the following.
Information Modes
INFO (Information): Press this
button to scroll through the following
vehicle information modes:
Outside Air Temperature
The outside air temperature will be
displayed at the same time as the
Odometer and the Trip Odometer.
The temperature outside of the
vehicle will be displayed in either
degrees Celsius (°C) or degrees
Fahrenheit (°F). The outside air
temperature appears on the left
side of the DIC display and the
odometer, or trip odometer, appears
on the right side of the display.
Odometer
Press the information button until
the outside air temperature and the
odometer displays. This mode
shows the total distance the
vehicle has been driven in either
kilometers (km) or miles (mi).