2012 CHEVROLET IMPALA radio controls
[x] Cancel search: radio controlsPage 1 of 374

Black plate (1,1)Chevrolet Impala Owner Manual - 2012
2012 Chevrolet Impala Owner ManualM
In Brief. . . . . . . . . . . . . . . . . . . . . . . . 1-1
Instrument Panel . . . . . . . . . . . . . . 1-2
Initial Drive Information . . . . . . . . 1-3
Vehicle Features . . . . . . . . . . . . . 1-13
Performance and Maintenance . . . . . . . . . . . . . . . . 1-17
Keys, Doors, and Windows . . . . . . . . . . . . . . . . . . . . 2-1
Keys and Locks . . . . . . . . . . . . . . . 2-2
Doors . . . . . . . . . . . . . . . . . . . . . . . . 2-10
Vehicle Security . . . . . . . . . . . . . . 2-11
Exterior Mirrors . . . . . . . . . . . . . . . 2-14
Interior Mirrors . . . . . . . . . . . . . . . . 2-15
Windows . . . . . . . . . . . . . . . . . . . . . 2-16
Roof . . . . . . . . . . . . . . . . . . . . . . . . . . 2-18
Seats and Restraints . . . . . . . . . 3-1
Head Restraints . . . . . . . . . . . . . . . 3-2
Front Seats . . . . . . . . . . . . . . . . . . . . 3-3
Rear Seats . . . . . . . . . . . . . . . . . . . . 3-8
Safety Belts . . . . . . . . . . . . . . . . . . 3-10
Airbag System . . . . . . . . . . . . . . . . 3-20
Child Restraints . . . . . . . . . . . . . . 3-36 Storage
. . . . . . . . . . . . . . . . . . . . . . . 4-1
Storage Compartments . . . . . . . . 4-1
Additional Storage Features . . . 4-2
Instruments and Controls . . . . 5-1
Controls . . . . . . . . . . . . . . . . . . . . . . . 5-2
Warning Lights, Gauges, and
Indicators . . . . . . . . . . . . . . . . . . . . 5-9
Information Displays . . . . . . . . . . 5-24
Vehicle Messages . . . . . . . . . . . . 5-29
Vehicle Personalization . . . . . . . 5-37
Universal Remote System . . . . 5-43
Lighting . . . . . . . . . . . . . . . . . . . . . . . 6-1
Exterior Lighting . . . . . . . . . . . . . . . 6-1
Interior Lighting . . . . . . . . . . . . . . . . 6-5
Lighting Features . . . . . . . . . . . . . . 6-7
Infotainment System . . . . . . . . . 7-1
Introduction . . . . . . . . . . . . . . . . . . . . 7-1
Radio . . . . . . . . . . . . . . . . . . . . . . . . . . 7-6
Audio Players . . . . . . . . . . . . . . . . 7-14
Phone . . . . . . . . . . . . . . . . . . . . . . . . 7-20 Climate Controls
. . . . . . . . . . . . . 8-1
Climate Control Systems . . . . . . 8-1
Air Vents . . . . . . . . . . . . . . . . . . . . . . . 8-5
Maintenance . . . . . . . . . . . . . . . . . . . 8-5
Driving and Operating . . . . . . . . 9-1
Driving Information . . . . . . . . . . . . . 9-2
Starting and Operating . . . . . . . 9-16
Engine Exhaust . . . . . . . . . . . . . . 9-24
Automatic Transmission . . . . . . 9-26
Brakes . . . . . . . . . . . . . . . . . . . . . . . 9-29
Ride Control Systems . . . . . . . . 9-30
Cruise Control . . . . . . . . . . . . . . . . 9-34
Fuel . . . . . . . . . . . . . . . . . . . . . . . . . . 9-36
Towing . . . . . . . . . . . . . . . . . . . . . . . 9-42
Conversions and Add-Ons . . . 9-49
Vehicle Care . . . . . . . . . . . . . . . . . 10-1
General Information . . . . . . . . . . 10-2
Vehicle Checks . . . . . . . . . . . . . . . 10-4
Headlamp Aiming . . . . . . . . . . . 10-25
Bulb Replacement . . . . . . . . . . 10-25
Page 7 of 374
Black plate (1,1)Chevrolet Impala Owner Manual - 2012
In Brief 1-1
In Brief
Instrument Panel
Instrument Panel . . . . . . . . . . . . . . 1-2
Initial Drive Information
Initial Drive Information . . . . . . . . 1-3
Remote Keyless Entry (RKE)System . . . . . . . . . . . . . . . . . . . . . . 1-3
Remote Vehicle Start . . . . . . . . . 1-4
Door Locks . . . . . . . . . . . . . . . . . . . 1-5
Trunk Release . . . . . . . . . . . . . . . . 1-5
Windows . . . . . . . . . . . . . . . . . . . . . . 1-5
Seat Adjustment . . . . . . . . . . . . . . 1-6
Second Row Seats . . . . . . . . . . . 1-7
Head Restraint Adjustment . . . . 1-7
Safety Belts . . . . . . . . . . . . . . . . . . . 1-7
Passenger Sensing System . . . 1-8
Mirror Adjustment . . . . . . . . . . . . . 1-8
Steering Wheel Adjustment . . . 1-9
Interior Lighting . . . . . . . . . . . . . . . 1-9
Exterior Lighting . . . . . . . . . . . . . 1-10
Windshield Wiper/Washer . . . . 1-10
Climate Controls . . . . . . . . . . . . . 1-11
Vehicle Features
Radio(s) . . . . . . . . . . . . . . . . . . . . . 1-13
Satellite Radio . . . . . . . . . . . . . . . 1-14
Portable Audio Devices . . . . . . 1-15
Bluetooth
®. . . . . . . . . . . . . . . . . . . 1-15
Steering Wheel Controls . . . . . 1-15
Cruise Control . . . . . . . . . . . . . . . 1-16
Power Outlets . . . . . . . . . . . . . . . 1-16
Performance and Maintenance
Traction Control
System (TCS) . . . . . . . . . . . . . . 1-17
Electronic Stability Control (ESC) . . . . . . . . . . . . . . 1-17
Tire Pressure Monitor . . . . . . . . 1-17
Engine Oil Life System . . . . . . 1-18
Fuel E85 (85% Ethanol) . . . . . 1-18
Driving for Better Fuel Economy . . . . . . . . . . . . . . . . . . . 1-18
Roadside Assistance Program . . . . . . . . . . . . . . . . . . . . 1-19
OnStar
®. . . . . . . . . . . . . . . . . . . . . 1-19
Page 21 of 374
Black plate (15,1)Chevrolet Impala Owner Manual - 2012
In Brief 1-15
Portable Audio Devices
This vehicle may have an auxiliary
input jack, located on the audio
faceplate. External devices such as
iPods
®, MP3 players, etc. can be
connected to the auxiliary input jack
using a 3.5 mm (1/8 in) input jack
cable.
See “Using the Auxiliary Input Jack”
under Auxiliary Devices on
page 7‑19.
Bluetooth®
For vehicles with a Bluetooth
system, it allows users with a
Bluetooth‐enabled cell phone to
make and receive hands-free calls
using the vehicle’ s audio system
and controls.
The Bluetooth‐enabled cell phone
must be paired with the Bluetooth
system before it can be used in the
vehicle. Not all phones will support
all functions. For more information,
visit www.gm.com/bluetooth. For more information, see
Bluetooth
on page 7‑20.
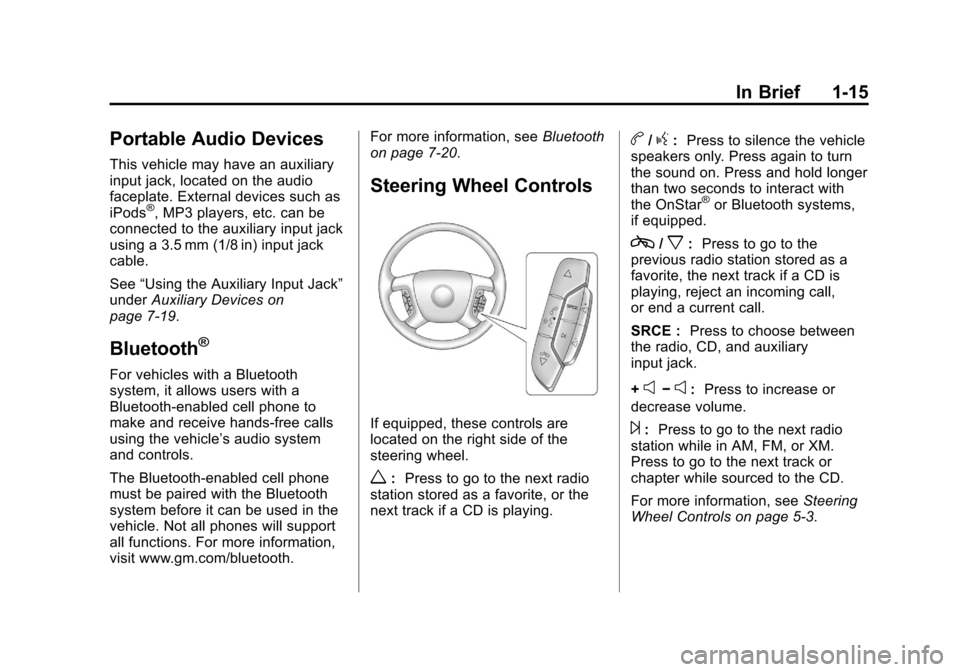
Steering Wheel Controls
If equipped, these controls are
located on the right side of the
steering wheel.
w: Press to go to the next radio
station stored as a favorite, or the
next track if a CD is playing.
b/g: Press to silence the vehicle
speakers only. Press again to turn
the sound on. Press and hold longer
than two seconds to interact with
the OnStar
®or Bluetooth systems,
if equipped.
c/x: Press to go to the
previous radio station stored as a
favorite, the next track if a CD is
playing, reject an incoming call,
or end a current call.
SRCE : Press to choose between
the radio, CD, and auxiliary
input jack.
+
e−e: Press to increase or
decrease volume.
¨: Press to go to the next radio
station while in AM, FM, or XM.
Press to go to the next track or
chapter while sourced to the CD.
For more information, see Steering
Wheel Controls on page 5‑3.
Page 28 of 374
Black plate (2,1)Chevrolet Impala Owner Manual - 2012
2-2 Keys, Doors, and Windows
Keys and Locks
Keys
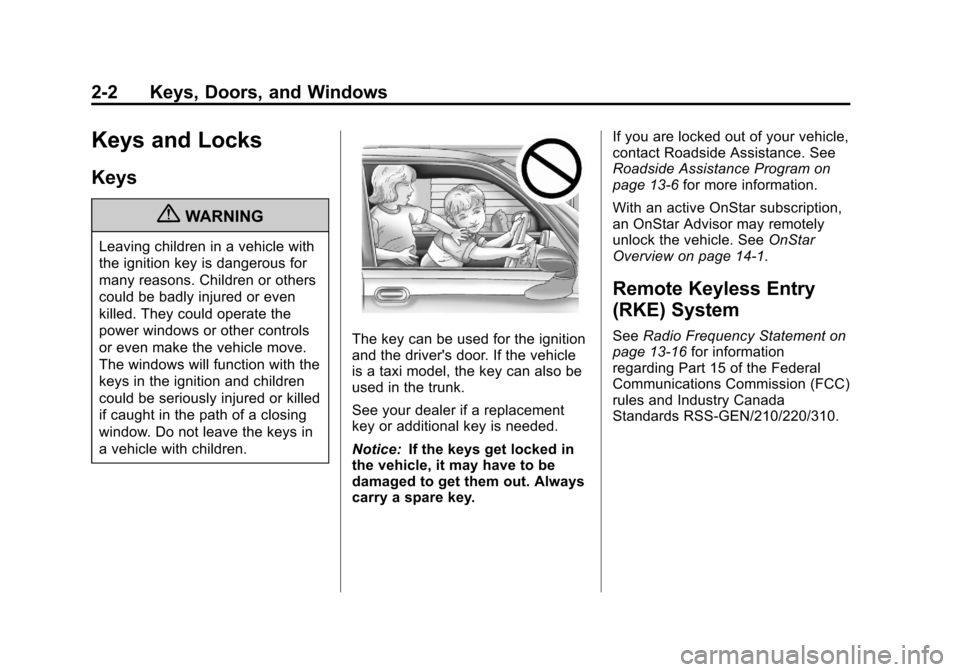
{WARNING
Leaving children in a vehicle with
the ignition key is dangerous for
many reasons. Children or others
could be badly injured or even
killed. They could operate the
power windows or other controls
or even make the vehicle move.
The windows will function with the
keys in the ignition and children
could be seriously injured or killed
if caught in the path of a closing
window. Do not leave the keys in
a vehicle with children.
The key can be used for the ignition
and the driver's door. If the vehicle
is a taxi model, the key can also be
used in the trunk.
See your dealer if a replacement
key or additional key is needed.
Notice:If the keys get locked in
the vehicle, it may have to be
damaged to get them out. Always
carry a spare key. If you are locked out of your vehicle,
contact Roadside Assistance. See
Roadside Assistance Program on
page 13‑6
for more information.
With an active OnStar subscription,
an OnStar Advisor may remotely
unlock the vehicle. See OnStar
Overview on page 14‑1.
Remote Keyless Entry
(RKE) System
See Radio Frequency Statement on
page 13‑16 for information
regarding Part 15 of the Federal
Communications Commission (FCC)
rules and Industry Canada
Standards RSS-GEN/210/220/310.
Page 105 of 374
Black plate (3,1)Chevrolet Impala Owner Manual - 2012
Instruments and Controls 5-3
Steering Wheel Controls
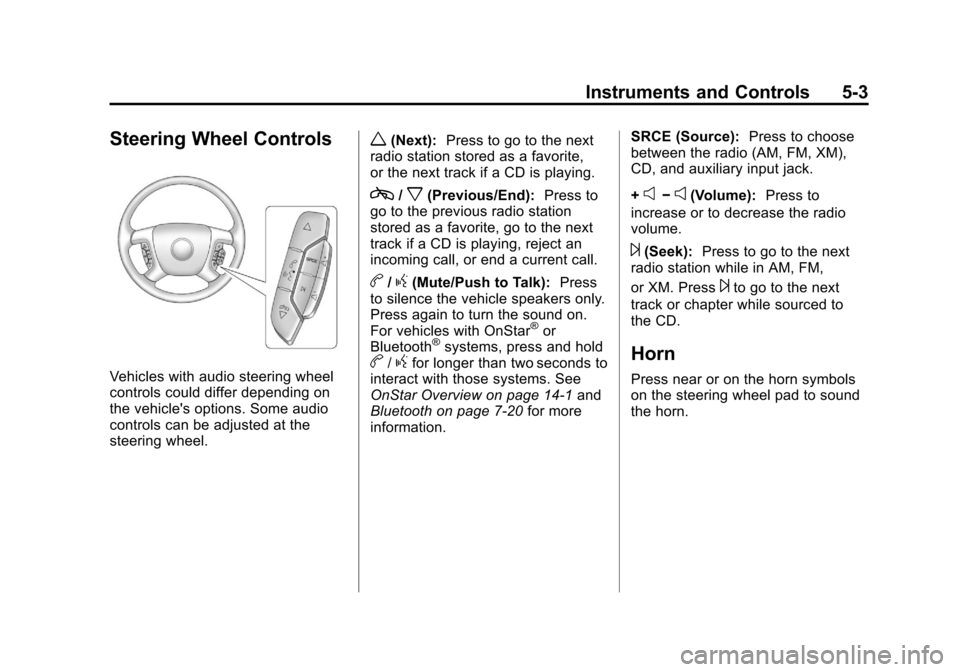
Vehicles with audio steering wheel
controls could differ depending on
the vehicle's options. Some audio
controls can be adjusted at the
steering wheel.
w(Next):Press to go to the next
radio station stored as a favorite,
or the next track if a CD is playing.
c/x(Previous/End): Press to
go to the previous radio station
stored as a favorite, go to the next
track if a CD is playing, reject an
incoming call, or end a current call.
b/g(Mute/Push to Talk): Press
to silence the vehicle speakers only.
Press again to turn the sound on.
For vehicles with OnStar
®or
Bluetooth®systems, press and holdb/gfor longer than two seconds to
interact with those systems. See
OnStar Overview on page 14‑1 and
Bluetooth on page 7‑20 for more
information. SRCE (Source):
Press to choose
between the radio (AM, FM, XM),
CD, and auxiliary input jack.
+
e−e(Volume): Press to
increase or to decrease the radio
volume.
¨(Seek): Press to go to the next
radio station while in AM, FM,
or XM. Press
¨to go to the next
track or chapter while sourced to
the CD.
Horn
Press near or on the horn symbols
on the steering wheel pad to sound
the horn.
Page 108 of 374
Black plate (6,1)Chevrolet Impala Owner Manual - 2012
5-6 Instruments and Controls
If CAL should ever appear in the
DIC display, the compass should be
calibrated.
If the DIC display does not show a
heading, for example, N for North,
or the heading does not change
after making turns, there may be a
strong magnetic field interfering with
the compass. Such interference
may be caused by a magnetic CB or
cell phone antenna mount, a
magnetic emergency light, magnetic
note pad holder, or any other
magnetic item. Turn off the vehicle,
move the magnetic item, then turn
on the vehicle and calibrate the
compass.
To calibrate the compass, use the
following procedure:
Compass Calibration Procedure
1. Before calibrating the compass,make sure the compass zone is
set to the variance zone in which
the vehicle is located. See
“Compass Variance (Zone)
Procedure” earlier in this
section. Do not operate any switches
such as window, sunroof,
climate controls, seats, etc.
during the calibration procedure.
2. Press
Tuntil PRESSVTO
CALIBRATE COMPASS
displays.
3. Press
Vto start the compass
calibration.
4. The DIC will display CALIBRATING: DRIVE IN
CIRCLES. Drive the vehicle in
tight circles at less than 8 km/h
(5 mph) to complete the
calibration. The DIC will display
CALIBRATION COMPLETE
for a few seconds when the
calibration is complete. The DIC
display will then return to
PRESS
VTO CALIBRATE
COMPASS.
Clock
Without Date Display
AM/FM Base Radio with a Single
CD Player
This radio has a
Hbutton for setting
the time.
To set the time:
1. Press the
Hbutton until the hour
begins flashing on the display.
Press
Ha second time and the
minutes begin flashing on the
display.
2. To increase or decrease the time, do one of the following
while the hours or minutes are
flashing:
.Turn thefknob.
.Press¨SEEK or©SEEK.
.Press\FWD orsREV.
Page 109 of 374
Black plate (7,1)Chevrolet Impala Owner Manual - 2012
Instruments and Controls 5-7
3. Press theHbutton again until
the clock display stops flashing
to set the currently displayed
time, or wait five seconds until
the flashing stops and the
current time displayed is
automatically set.
To change the time default setting
from 12 hour to 24 hour, press the
Hbutton until 12H or 24H is
displayed. Once 12H or 24H is
displayed, turn the
fknob to the
desired option to select the setting.
Press the
Hbutton again to apply
the setting, or let the screen
time out.
With Date Display
Single CD (MP3) Player
This radio has a
Hbutton for setting
the time. To set the time and date:
1. Turn the radio on.
2. Press the
Hbutton and the HR,
MIN, MM, DD, and YYYY (hour,
minute, month, day, and year)
display.
3. Press the pushbutton located under any one of the tabs to be
changed.
4. To increase the time or date, do one of the following:
.Press the pushbutton below
the selected tab.
.Turn thefknob clockwise.
.Press¨SEEK.
.Press\FWD. 5. To decrease the time or date, do
one of the following:
.Turn thefknob
counter‐clockwise.
.Press©SEEK.
.PresssREV.
The date does not automatically
display. To see the date press the
Hbutton while the radio is on. The
date with display times out after a
few seconds and goes back to the
normal radio and time display.
To change the time default setting
from 12 hour to 24 hour or to
change the date default setting from
month/day/year to day/month/year:
1. Press the
Hbutton and then the
pushbutton located under the
forward arrow tab. The time 12H
and 24H, and the date MM/DD/
YYYY (month, day, and year)
and DD/MM/YYYY (day, month,
and year) displays.
Page 118 of 374

Black plate (16,1)Chevrolet Impala Owner Manual - 2012
5-16 Instruments and Controls
Charging System Light
This light comes on briefly when the
ignition key is turned to START, but
the engine is not running, as a
check to show it is working.
If it does not, have the vehicle
serviced by your dealer.
The light should go out once the
engine starts. If it stays on,
or comes on while driving, there
could be a problem with the
charging system. A charging system
message in the Driver Information
Center (DIC) can also appear. See
Battery Voltage and Charging
Messages on page 5‑29for more
information. This light could indicate
that there are problems with a
generator drive belt, or that there is
an electrical problem. Have it checked right away. If the vehicle
must be driven a short distance with
the light on, turn off accessories,
such as the radio and air
conditioner.
Malfunction
Indicator Lamp
A computer system called OBD II
(On-Board Diagnostics-Second
Generation) monitors the operation
of the vehicle to ensure emissions
are at acceptable levels, to produce
a cleaner environment. This light
comes on when the vehicle is
placed in ON/RUN, as a check to
show it is working. If it does not,
have the vehicle serviced by your
dealer. See
Ignition Positions on
page 9‑16 for more information.
If the malfunction indicator lamp
comes on and stays on while the
engine is running, this indicates that
there is an OBD II problem and
service is required.
Malfunctions often are indicated by
the system before any problem is
apparent. Being aware of the light
can prevent more serious damage
to the vehicle. This system assists
the service technician in correctly
diagnosing any malfunction.
Notice:If the vehicle is
continually driven with this light
on, the emission controls might
not work as well, the vehicle fuel
economy might not be as good,
and the engine might not run as
smoothly. This could lead to
costly repairs that might not be
covered by the vehicle warranty.