2012 CHEVROLET CRUZE light
[x] Cancel search: lightPage 158 of 400
Black plate (6,1)Chevrolet Cruze Owner Manual - 2012
7-6 Infotainment System
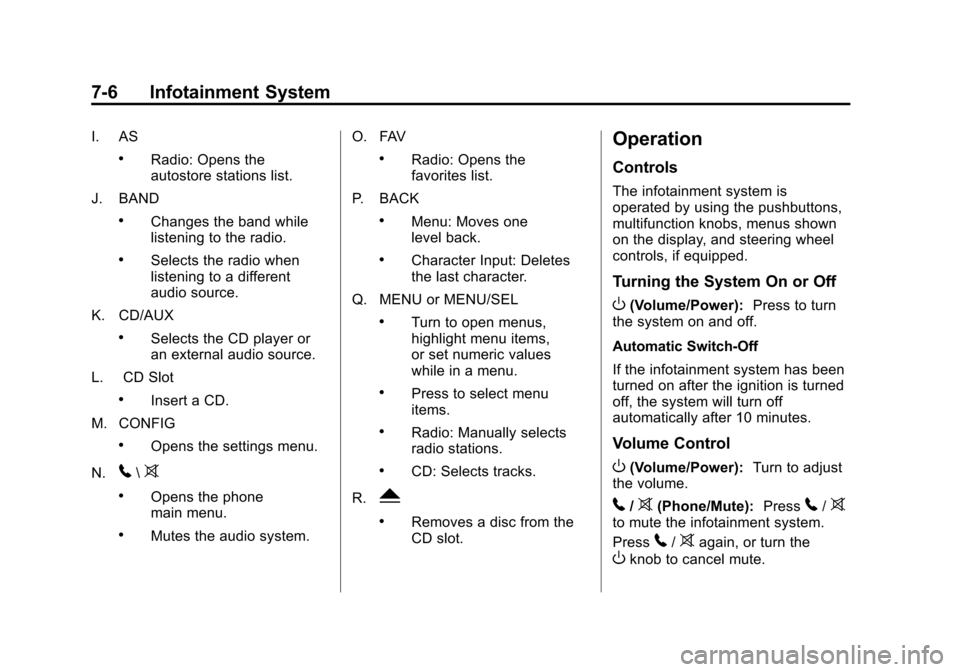
I. AS
.Radio: Opens the
autostore stations list.
J. BAND
.Changes the band while
listening to the radio.
.Selects the radio when
listening to a different
audio source.
K. CD/AUX
.Selects the CD player or
an external audio source.
L. CD Slot
.Insert a CD.
M. CONFIG
.Opens the settings menu.
N.
5\>
.Opens the phone
main menu.
.Mutes the audio system. O. FAV
.Radio: Opens the
favorites list.
P. BACK
.Menu: Moves one
level back.
.Character Input: Deletes
the last character.
Q. MENU or MENU/SEL
.Turn to open menus,
highlight menu items,
or set numeric values
while in a menu.
.Press to select menu
items.
.Radio: Manually selects
radio stations.
.CD: Selects tracks.
R.
Y
.Removes a disc from the
CD slot.
Operation
Controls
The infotainment system is
operated by using the pushbuttons,
multifunction knobs, menus shown
on the display, and steering wheel
controls, if equipped.
Turning the System On or Off
O(Volume/Power): Press to turn
the system on and off.
Automatic Switch‐Off
If the infotainment system has been
turned on after the ignition is turned
off, the system will turn off
automatically after 10 minutes.
Volume Control
O(Volume/Power): Turn to adjust
the volume.
5/>(Phone/Mute): Press5/>to mute the infotainment system.
Press
5/>again, or turn the
Oknob to cancel mute.
Page 160 of 400
Black plate (8,1)Chevrolet Cruze Owner Manual - 2012
7-8 Infotainment System
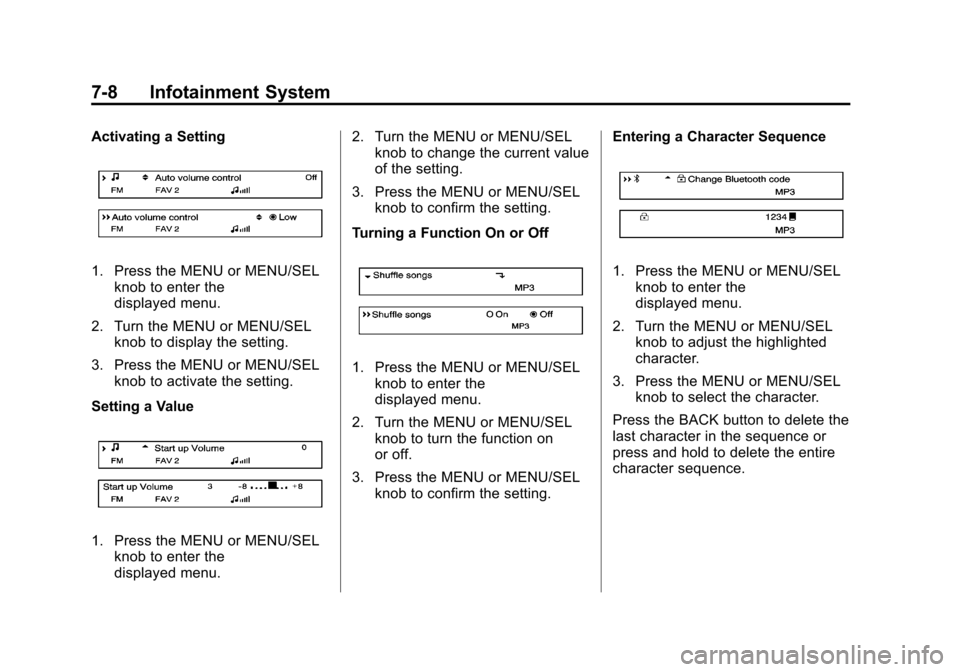
Activating a Setting
1. Press the MENU or MENU/SELknob to enter the
displayed menu.
2. Turn the MENU or MENU/SEL knob to display the setting.
3. Press the MENU or MENU/SEL knob to activate the setting.
Setting a Value
1. Press the MENU or MENU/SEL knob to enter the
displayed menu. 2. Turn the MENU or MENU/SEL
knob to change the current value
of the setting.
3. Press the MENU or MENU/SEL knob to confirm the setting.
Turning a Function On or Off
1. Press the MENU or MENU/SEL knob to enter the
displayed menu.
2. Turn the MENU or MENU/SEL knob to turn the function on
or off.
3. Press the MENU or MENU/SEL knob to confirm the setting. Entering a Character Sequence
1. Press the MENU or MENU/SEL
knob to enter the
displayed menu.
2. Turn the MENU or MENU/SEL knob to adjust the highlighted
character.
3. Press the MENU or MENU/SEL knob to select the character.
Press the BACK button to delete the
last character in the sequence or
press and hold to delete the entire
character sequence.
Page 161 of 400
Black plate (9,1)Chevrolet Cruze Owner Manual - 2012
Infotainment System 7-9
Menu System (Uplevel)
The menu system for the uplevel
infotainment system appears on
the display screen.
Controls
The MENU or MENU/SEL knob and
the BACK button are used to
navigate the menu system.
MENU or MENU/SEL Knob:
Press to:
.Enter the menu system.
.Select or activate the highlighted
menu option.
.Confirm a set value.
.Turn a system setting on or off.
Turn to:
.Highlight a menu option.
.Select a value. BACK:
Press to:
.Exit a menu.
.Return from a submenu screen
to the previous menu screen.
.Delete the last character in a
sequence.
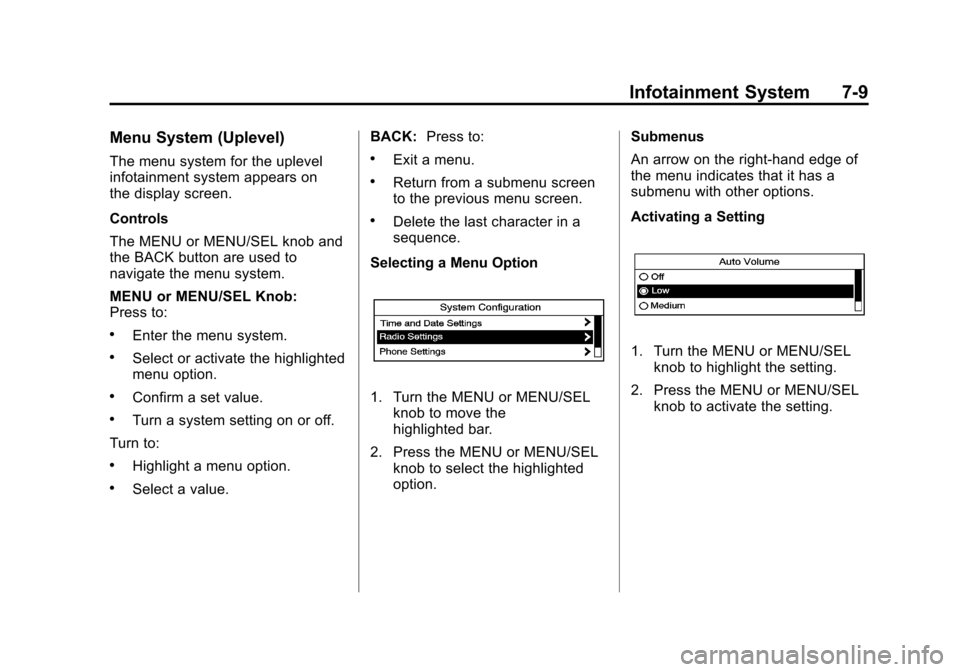
Selecting a Menu Option
1. Turn the MENU or MENU/SEL knob to move the
highlighted bar.
2. Press the MENU or MENU/SEL knob to select the highlighted
option. Submenus
An arrow on the right‐hand edge of
the menu indicates that it has a
submenu with other options.
Activating a Setting
1. Turn the MENU or MENU/SEL
knob to highlight the setting.
2. Press the MENU or MENU/SEL knob to activate the setting.
Page 162 of 400
Black plate (10,1)Chevrolet Cruze Owner Manual - 2012
7-10 Infotainment System
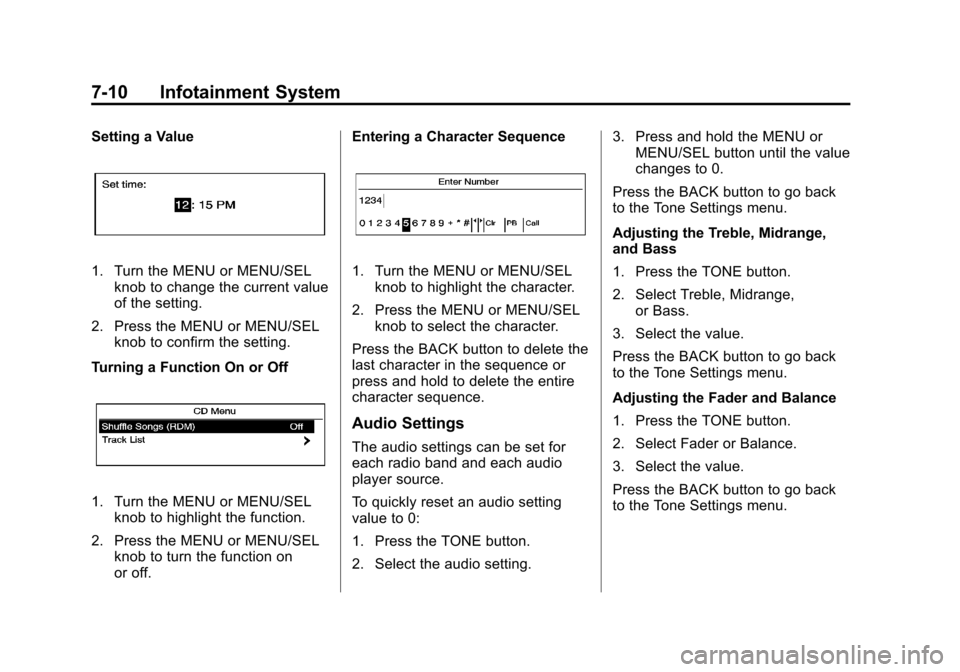
Setting a Value
1. Turn the MENU or MENU/SELknob to change the current value
of the setting.
2. Press the MENU or MENU/SEL knob to confirm the setting.
Turning a Function On or Off
1. Turn the MENU or MENU/SEL knob to highlight the function.
2. Press the MENU or MENU/SEL knob to turn the function on
or off. Entering a Character Sequence
1. Turn the MENU or MENU/SEL
knob to highlight the character.
2. Press the MENU or MENU/SEL knob to select the character.
Press the BACK button to delete the
last character in the sequence or
press and hold to delete the entire
character sequence.
Audio Settings
The audio settings can be set for
each radio band and each audio
player source.
To quickly reset an audio setting
value to 0:
1. Press the TONE button.
2. Select the audio setting. 3. Press and hold the MENU or
MENU/SEL button until the value
changes to 0.
Press the BACK button to go back
to the Tone Settings menu.
Adjusting the Treble, Midrange,
and Bass
1. Press the TONE button.
2. Select Treble, Midrange, or Bass.
3. Select the value.
Press the BACK button to go back
to the Tone Settings menu.
Adjusting the Fader and Balance
1. Press the TONE button.
2. Select Fader or Balance.
3. Select the value.
Press the BACK button to go back
to the Tone Settings menu.
Page 167 of 400
Black plate (15,1)Chevrolet Cruze Owner Manual - 2012
Infotainment System 7-15
Selecting the XM Band
Press the BAND button to choose
between the AM, FM, and XM
bands. The last channel played in
that band begins to play when that
band is selected.
XM Categories
XM channels are organized in
categories.
Removing or Adding Categories
Channels in a category that have
been removed can still be accessed
by using
gorl, or the MENU or
MENU/SEL knob.
To add or remove categories:
1. Press the CONFIG button.
2. Select Radio Settings.
3. Select XM Categories.
4. Turn the MENU or MENU/SEL knob to highlight the category.
5. Press the MENU or MENU/SEL knob to remove or add the
category.
Selecting an XM Channel
XM channels can be selected by
using
g,l, the MENU or MENU/
SEL knob, or the Menu system.
Selecting a Channel Using
g
orl
.Press and releasegorlto
go to the previous or next
channel.
.Press and holdgorlto
scroll through the previous or
next channel until the channel is
reached.
Selecting a Channel Using the
MENU or MENU/SEL Knob
To select an XM channel using the
MENU or MENU/SEL knob:
Turn the MENU or MENU/SEL knob
to highlight an XM channel. The
channel is selected after a short
delay. To select a channel using the MENU
or MENU/SEL knob:
1. Turn the MENU or MENU/SEL
knob and select Channel List.
2. Select the desired channel.
Selecting a Channel Using the
Menu System
1. Turn the MENU or MENU/ SEL knob.
2. Select XM Category List.
3. Select the category.
4. Select the channel.
Storing an XM Channel as a
Favorite
Channels from all bands can be
stored in any order in the favorite
pages.
Up to six channels can be stored in
each favorite page and the number
of available favorite pages can
be set.
Page 170 of 400
Black plate (18,1)Chevrolet Cruze Owner Manual - 2012
7-18 Infotainment System
Satellite Radio Antenna
The XM Satellite Radio antenna is
located on the roof of the vehicle.
Keep the antenna clear of
obstructions for clear radio
reception.
If the vehicle has a sunroof, the
performance of the XM system may
be affected if the sunroof is open.
Multi-Band Antenna
The multi-band antenna is on the
roof of the vehicle. The antenna is
used for the AM‐FM radio, OnStar,
the XM Satellite Radio Service
System, and GPS (Global
Positioning System), if the vehicle
has these features. Keep the
antenna clear of obstructions for
clear reception.
Audio Players
CD Player
The CD player can play audio CDs
and MP3 CDs.
The CD player will not play
8 cm (3 in) CDs.
Care of CDs
Sound quality can be reduced due
to disc quality, recording method,
quality of the music recorded, and
how the disc has been handled.
Handle discs carefully and store
them in their original cases or other
protective cases away from direct
sunlight and dust. If the bottom
surface of a disc is damaged, the
disc may not play properly or at all.
Do not touch the bottom surface of
a disc while handling it; this could
damage the surface. Pick up discs
by grasping the outer edges or the
edge of the hole and the outer edge.
If the bottom surface of a disc is
dirty, take a soft lint‐free cloth,
or dampen a clean soft cloth in amild neutral detergent solution
mixed with water, and clean it.
Wipe the disc from the center to
the outer edge.
Care of the CD Player
Do not add a label to a disc, as it
could get caught in the CD player.
If a label is needed, label the top of
the recorded disc with a
marking pen.
Do not use disc lens cleaners
because they could contaminate the
lens of the disc optics and damage
the CD player.
Notice:
If a label is added to a
CD, more than one CD is inserted
into the slot at a time, or an
attempt is made to play scratched
or damaged CDs, the CD player
could be damaged. While using
the CD player, use only CDs in
good condition without any label,
load one CD at a time, and keep
the CD player and the loading slot
free of foreign materials, liquids,
and debris.
Page 178 of 400

Black plate (26,1)Chevrolet Cruze Owner Manual - 2012
7-26 Infotainment System
Pairing a Phone
1. Press the CONFIG button.
2. Select Phone Settings.
3. Select Bluetooth.
4. Select Pair Device (Phone).A four‐digit Personal
Identification Number (PIN)
appears on the display.
The PIN is used in Step 6.
5. Start the pairing process on the cell phone to be paired to the
vehicle. See the cell phone
manufacturer's user guide for
information on this process.
6. Locate the device named “Your Vehicle” in the list on
the cell phone. Follow the
instructions on the cell phone to
enter the PIN provided in Step 4.
After the PIN is successfully
entered, the system prompts you
to provide a name for the paired
cell phone. This name will be
used to indicate which phones
are paired and connected to
the vehicle. The system responds with
“
successfully paired”
after the
pairing process is complete.
7. Repeat Steps 1 through 6 to pair additional phones.
Listing All Paired and Connected
Phones
1. Press the CONFIG button.
2. Select Phone Settings.
3. Select Bluetooth.
4. Select Device List.
Deleting a Paired Phone
1. Press the CONFIG button.
2. Select Phone Settings.
3. Select Bluetooth.
4. Select Device List.
5. Select the phone to delete and follow the on screen prompts. Linking to a Different Phone
To link to a different phone, the new
phone must be in the vehicle and
available to be connected to the
Bluetooth system before the
process is started.
1. Press the CONFIG button.
2. Select Phone Settings.
3. Select Bluetooth.
4. Select Device List.
5. Select the new phone to
link to and follow the on
screen prompts.
If delete is selected, the
highlighted phone will
be deleted.
Page 192 of 400
Black plate (2,1)Chevrolet Cruze Owner Manual - 2012
8-2 Climate Controls
F. Driver and Passenger HeatedSeats (If Equipped)
G. Rear Window Defogger
H. Recirculation
I. Defog
J. Air Conditioning
K. Defrost
9(Fan Control): Turn to increase
or decrease the fan speed.
Temperature Control: Turn to
increase or decrease the
temperature.
Air Delivery Mode Control:
To change the current mode, press
one of the following:
F (Vent): Air is directed to the
instrument panel outlets.
* (Bi-level): Air is directed to the
instrument panel outlets and the
floor outlets. 7
(Floor): Air is directed to the
floor outlets.
W(Defog): Clears the windows of
fog or moisture. Air is directed to the
windshield and floor outlets.
0(Defrost): Clears the
windshield of fog or frost more
quickly. Air is directed to the
windshield and side window outlets.
For best results, clear all snow and
ice from the windshield before
defrosting.
Do not drive the vehicle until all
windows are clear.
Air Conditioning
#(Air Conditioning, If
Equipped): Press to turn the
air conditioning on or off. If the
fan is turned off or the outside
temperature falls below freezing,
the air conditioning compressor
will not work.
h(Recirculation, If Equipped):
Press to turn on the recirculation.
An indicator light comes on. Air is
recirculated inside the vehicle.
It helps to quickly cool the air inside
the vehicle or prevent outside air
and odors from entering.
To improve fuel efficiency and to
cool the vehicle faster, recirculation
may be automatically selected in
warm weather. The recirculation
light will not come on. Press
hto
select recirculation; press it again to
select outside air.
Rear Window Defogger
1(Rear Defogger): Press to turn
the rear window defogger on or off.
The rear window defogger turns off
after about 10 minutes. It can also
be turned off by turning the ignition
to ACC/ACCESSORY or LOCK/
OFF. If turned on again it runs for
about five minutes before
turning off.
Do not drive the vehicle until all
windows are clear.