2012 CHEVROLET CRUZE engine
[x] Cancel search: enginePage 2 of 400

Black plate (2,1)Chevrolet Cruze Owner Manual - 2012
2012 Chevrolet Cruze Owner ManualM
Driving and Operating. . . . . . . . 9-1
Driving Information . . . . . . . . . . . . . 9-2
Starting and Operating . . . . . . . 9-15
Engine Exhaust . . . . . . . . . . . . . . 9-27
Automatic Transmission . . . . . . 9-29
Manual Transmission . . . . . . . . . 9-33
Brakes . . . . . . . . . . . . . . . . . . . . . . . 9-35
Ride Control Systems . . . . . . . . 9-37
Cruise Control . . . . . . . . . . . . . . . . 9-40
Object Detection Systems . . . . 9-42
Fuel . . . . . . . . . . . . . . . . . . . . . . . . . . 9-44
Towing . . . . . . . . . . . . . . . . . . . . . . . 9-48
Conversions and
Add-Ons . . . . . . . . . . . . . . . . . . . . 9-55 Vehicle Care
. . . . . . . . . . . . . . . . . 10-1
General Information . . . . . . . . . . 10-2
Vehicle Checks . . . . . . . . . . . . . . . 10-4
Headlamp Aiming . . . . . . . . . . . 10-29
Bulb Replacement . . . . . . . . . . 10-29
Electrical System . . . . . . . . . . . . 10-35
Wheels and Tires . . . . . . . . . . . 10-42
Jump Starting . . . . . . . . . . . . . . . 10-80
Towing . . . . . . . . . . . . . . . . . . . . . . 10-83
Appearance Care . . . . . . . . . . . 10-86
Service and Maintenance . . . 11-1
General Information . . . . . . . . . . 11-1
Maintenance Schedule . . . . . . . 11-3
Special Application
Services . . . . . . . . . . . . . . . . . . . . 11-9
Additional Maintenance
and Care . . . . . . . . . . . . . . . . . . . 11-10
Recommended Fluids, Lubricants, and Parts . . . . . . 11-13
Maintenance Records . . . . . . . 11-16 Technical Data
. . . . . . . . . . . . . . . 12-1
Vehicle Identification . . . . . . . . . 12-1
Vehicle Data . . . . . . . . . . . . . . . . . . 12-2
Customer Information . . . . . . . 13-1
Customer Information . . . . . . . . 13-1
Reporting Safety Defects . . . . 13-13
Vehicle Data Recording and
Privacy . . . . . . . . . . . . . . . . . . . . 13-14
Index . . . . . . . . . . . . . . . . . . . . . i-1
Page 5 of 400

Black plate (5,1)Chevrolet Cruze Owner Manual - 2012
Introduction v
Vehicle Symbol Chart
Here are some additional symbols
that may be found on the vehicle
and what they mean. For more
information on the symbol, refer to
the Index.
9:Airbag Readiness Light
#:Air Conditioning
!:Antilock Brake System (ABS)
%:Audio Steering Wheel Controls
or OnStar®
$: Brake System Warning Light
":Charging System
I:Cruise Control
B: Engine Coolant Temperature
O:Exterior Lamps
#:Fog Lamps
.: Fuel Gauge
+:Fuses
3: Headlamp High/Low-Beam
Changer
j: LATCH System Child
Restraints
*: Malfunction Indicator Lamp
::Oil Pressure
}:Power
/:Remote Vehicle Start
>:Safety Belt Reminders
7:Tire Pressure Monitor
d:Traction Control/Stabilitrak®
M:Windshield Washer Fluid
Page 7 of 400

Black plate (1,1)Chevrolet Cruze Owner Manual - 2012
In Brief 1-1
In Brief
Instrument Panel
Instrument Panel Overview . . . . 1-2
Initial Drive Information
Initial Drive Information . . . . . . . . 1-4
Remote Keyless Entry (RKE)System . . . . . . . . . . . . . . . . . . . . . . 1-4
Remote Vehicle Start . . . . . . . . . 1-5
Door Locks . . . . . . . . . . . . . . . . . . . 1-6
Seat Adjustment . . . . . . . . . . . . . . 1-7
Heated Seats . . . . . . . . . . . . . . . . . 1-9
Head Restraint Adjustment . . . . 1-9
Safety Belts . . . . . . . . . . . . . . . . . . . 1-9
Passenger Sensing System . . . . . . . . . . . . . . . . . . . . . 1-10
Mirror Adjustment . . . . . . . . . . . . 1-10 Steering Wheel
Adjustment . . . . . . . . . . . . . . . . . 1-11
Interior Lighting . . . . . . . . . . . . . . 1-11
Exterior Lighting . . . . . . . . . . . . . 1-12
Windshield Wiper/Washer . . . . 1-13
Climate Controls . . . . . . . . . . . . . 1-14
Transmission . . . . . . . . . . . . . . . . 1-15Vehicle Features
Radio(s) . . . . . . . . . . . . . . . . . . . . . 1-15
Satellite Radio . . . . . . . . . . . . . . . 1-16
Portable Audio Devices . . . . . . 1-17
Bluetooth
®. . . . . . . . . . . . . . . . . . . 1-17
Steering Wheel Controls . . . . . 1-17
Cruise Control . . . . . . . . . . . . . . . 1-18
Navigation System . . . . . . . . . . . 1-18
Driver Information Center (DIC) . . . . . . . . . . . . . . . 1-18
Ultrasonic Parking Assist . . . . 1-19
Power Outlets . . . . . . . . . . . . . . . 1-19
Performance and Maintenance
Traction Control System (TCS) . . . . . . . . . . . . . . 1-19
StabiliTrak
®System . . . . . . . . . 1-20
Tire Pressure Monitor . . . . . . . . 1-20
Tire Sealant and Compressor Kit . . . . . . . . . . . . . 1-20
Engine Oil Life System . . . . . . 1-21
Driving for Better Fuel Economy . . . . . . . . . . . . . . . . . . . 1-21
Roadside Assistance Program . . . . . . . . . . . . . . . . . . . . 1-22
OnStar
®. . . . . . . . . . . . . . . . . . . . . 1-22
Page 11 of 400
Black plate (5,1)Chevrolet Cruze Owner Manual - 2012
In Brief 1-5
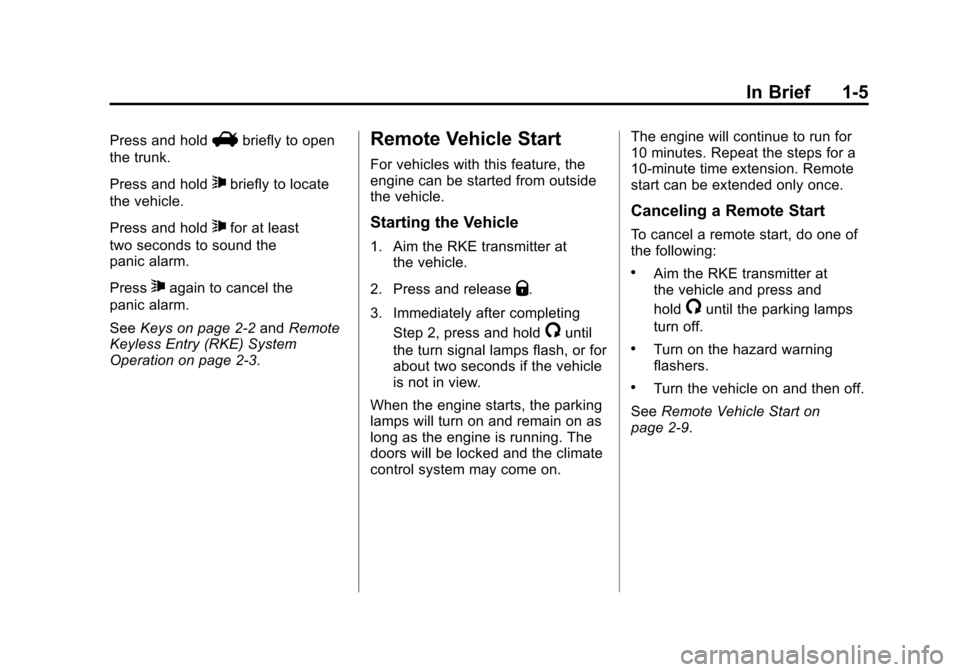
Press and holdVbriefly to open
the trunk.
Press and hold
7briefly to locate
the vehicle.
Press and hold
7for at least
two seconds to sound the
panic alarm.
Press
7again to cancel the
panic alarm.
See Keys on page 2‑2 andRemote
Keyless Entry (RKE) System
Operation on page 2‑3.
Remote Vehicle Start
For vehicles with this feature, the
engine can be started from outside
the vehicle.
Starting the Vehicle
1. Aim the RKE transmitter at the vehicle.
2. Press and release
Q.
3. Immediately after completing Step 2, press and hold
/until
the turn signal lamps flash, or for
about two seconds if the vehicle
is not in view.
When the engine starts, the parking
lamps will turn on and remain on as
long as the engine is running. The
doors will be locked and the climate
control system may come on. The engine will continue to run for
10 minutes. Repeat the steps for a
10-minute time extension. Remote
start can be extended only once.
Canceling a Remote Start
To cancel a remote start, do one of
the following:
.Aim the RKE transmitter at
the vehicle and press and
hold
/until the parking lamps
turn off.
.Turn on the hazard warning
flashers.
.Turn the vehicle on and then off.
See Remote Vehicle Start on
page 2‑9.
Page 15 of 400
Black plate (9,1)Chevrolet Cruze Owner Manual - 2012
In Brief 1-9
Heated Seats
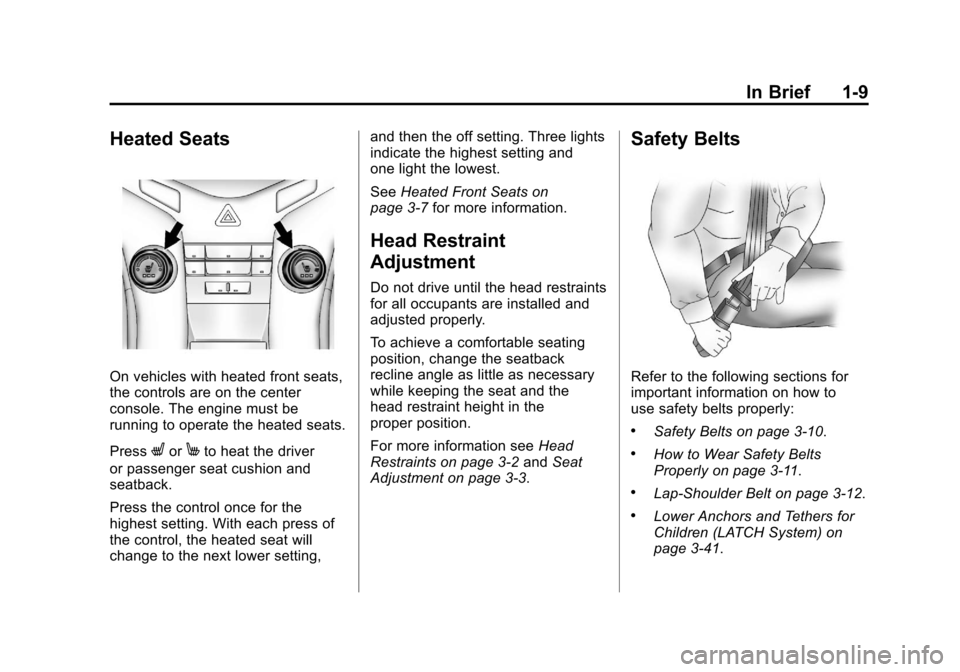
On vehicles with heated front seats,
the controls are on the center
console. The engine must be
running to operate the heated seats.
Press
LorMto heat the driver
or passenger seat cushion and
seatback.
Press the control once for the
highest setting. With each press of
the control, the heated seat will
change to the next lower setting, and then the off setting. Three lights
indicate the highest setting and
one light the lowest.
See
Heated Front Seats on
page 3‑7 for more information.
Head Restraint
Adjustment
Do not drive until the head restraints
for all occupants are installed and
adjusted properly.
To achieve a comfortable seating
position, change the seatback
recline angle as little as necessary
while keeping the seat and the
head restraint height in the
proper position.
For more information see Head
Restraints on page 3‑2 andSeat
Adjustment on page 3‑3.
Safety Belts
Refer to the following sections for
important information on how to
use safety belts properly:
.Safety Belts on page 3‑10.
.How to Wear Safety Belts
Properly on page 3‑11.
.Lap-Shoulder Belt on page 3‑12.
.Lower Anchors and Tethers for
Children (LATCH System) on
page 3‑41.
Page 27 of 400
Black plate (21,1)Chevrolet Cruze Owner Manual - 2012
In Brief 1-21
Engine Oil Life System
The engine oil life system calculates
engine oil life based on vehicle use
and displays the CHANGE ENGINE
OIL SOON DIC message or
Code 82 DIC message when it is
necessary to change the engine oil
and filter.
Remember, the Oil Life display
must be reset after each oil change.
It will not reset itself. Also, be
careful not to reset the Oil Life
display accidentally at break="2"
any time other than when the oil has
just been changed. It cannot be
reset accurately until the next oil
change. To reset the engine oil life
system press the
SET button while the Oil Life display
is active.
Resetting the Oil Life System
1. Using the DIC MENU button andthumbwheel, scroll until you
reach REMAINING OIL LIFE on
the DIC (oil can symbol with
% sign for Canada). 2. Press the SET button to reset
the oil life at 100%. When
prompted, use the thumbwheel
to highlight YES or NO. Press
the SET/CLEAR button to
confirm.
Be careful not to reset the oil life
display accidentally at any time
other than after the oil is changed.
It cannot be reset accurately.
See Engine Oil Life System on
page 10‑12.
Driving for Better Fuel
Economy
Driving habits can affect fuel
mileage. Here are some driving tips
to get the best fuel economy
possible.
.Avoid fast starts and accelerate
smoothly.
.Brake gradually and avoid
abrupt stops.
.Avoid idling the engine for long
periods of time.
.When road and weather
conditions are appropriate, use
cruise control.
.Always follow posted speed
limits or drive more slowly when
conditions require.
.Keep vehicle tires properly
inflated.
.Combine several trips into a
single trip.
.Replace the vehicle's tires with
the same TPC Spec number
molded into the tire's sidewall
near the size.
.Follow recommended scheduled
maintenance.
Page 34 of 400
Black plate (4,1)Chevrolet Cruze Owner Manual - 2012
2-4 Keys, Doors, and Windows
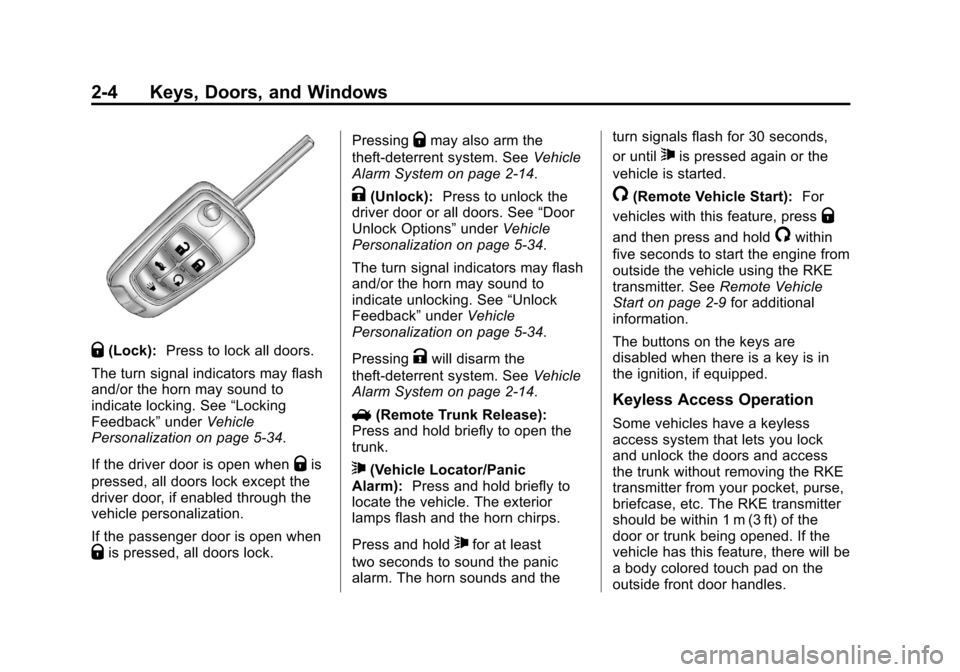
Q(Lock):Press to lock all doors.
The turn signal indicators may flash
and/or the horn may sound to
indicate locking. See “Locking
Feedback” underVehicle
Personalization on page 5‑34.
If the driver door is open when
Qis
pressed, all doors lock except the
driver door, if enabled through the
vehicle personalization.
If the passenger door is open when
Qis pressed, all doors lock. Pressing
Qmay also arm the
theft-deterrent system. See Vehicle
Alarm System on page 2‑14.
K(Unlock): Press to unlock the
driver door or all doors. See “Door
Unlock Options” underVehicle
Personalization on page 5‑34.
The turn signal indicators may flash
and/or the horn may sound to
indicate unlocking. See “Unlock
Feedback” underVehicle
Personalization on page 5‑34.
Pressing
Kwill disarm the
theft-deterrent system. See Vehicle
Alarm System on page 2‑14.
V (Remote Trunk Release):
Press and hold briefly to open the
trunk.
7(Vehicle Locator/Panic
Alarm): Press and hold briefly to
locate the vehicle. The exterior
lamps flash and the horn chirps.
Press and hold
7for at least
two seconds to sound the panic
alarm. The horn sounds and the turn signals flash for 30 seconds,
or until
7is pressed again or the
vehicle is started.
/(Remote Vehicle Start): For
vehicles with this feature, press
Q
and then press and hold/within
five seconds to start the engine from
outside the vehicle using the RKE
transmitter. See Remote Vehicle
Start on page 2‑9 for additional
information.
The buttons on the keys are
disabled when there is a key is in
the ignition, if equipped.
Keyless Access Operation
Some vehicles have a keyless
access system that lets you lock
and unlock the doors and access
the trunk without removing the RKE
transmitter from your pocket, purse,
briefcase, etc. The RKE transmitter
should be within 1 m (3 ft) of the
door or trunk being opened. If the
vehicle has this feature, there will be
a body colored touch pad on the
outside front door handles.
Page 37 of 400
Black plate (7,1)Chevrolet Cruze Owner Manual - 2012
Keys, Doors, and Windows 2-7
Programming without a
Recognized Transmitter
(Keyless Access Vehicles Only)
If there are no currently recognized
transmitters available, follow this
procedure to program up to five
transmitters. This feature is not
available in Canada. This procedure
will take approximately 30 minutes
to complete. The vehicle must be off
and all of the transmitters you wish
to program must be with you.
1. Insert the vehicle key of thetransmitter into the key lock
cylinder located on the outside
of the driver door and turn the
key to the unlock position five
times within 10 seconds.
The Driver Information Center
(DIC) displays REMOTE LEARN
PENDING, PLEASE WAIT.
2. Wait for 10 minutes until the DIC displays PRESS ENGINE
START BUTTON TO LEARN
and then press the ignition. The DIC displays will again
show REMOTE LEARN
PENDING, PLEASE WAIT.
3. Repeat Step 2 two additional times. After the third time all
previously known transmitters
will no longer work with the
vehicle. Remaining transmitters
can be relearned during the
next steps.
The DIC display should
now show READY FOR
REMOTE # 1.4. Remove the plastic trim piecefrom the small storage area next
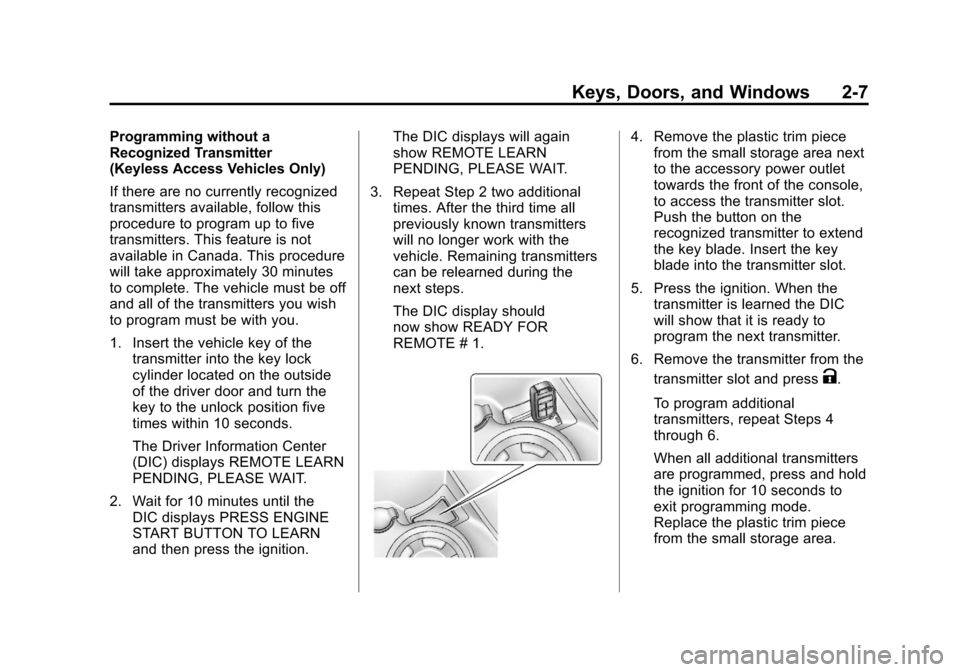
to the accessory power outlet
towards the front of the console,
to access the transmitter slot.
Push the button on the
recognized transmitter to extend
the key blade. Insert the key
blade into the transmitter slot.
5. Press the ignition. When the transmitter is learned the DIC
will show that it is ready to
program the next transmitter.
6. Remove the transmitter from the transmitter slot and press
K.
To program additional
transmitters, repeat Steps 4
through 6.
When all additional transmitters
are programmed, press and hold
the ignition for 10 seconds to
exit programming mode.
Replace the plastic trim piece
from the small storage area.