2012 CHEVROLET CORVETTE display
[x] Cancel search: displayPage 29 of 434
Black plate (23,1)Chevrolet Corvette Owner Manual - 2012
In Brief 1-23
Jump Starting the Battery
The battery of Z06, ZR1, and
manual transmission Z16 (Grand
Sport) coupe models is in the rear of
the vehicle. You do not need to
access the battery for jump starting.
There are remote positive (+) and
negative (−) terminals under the
hood for this purpose. SeeBattery
on page 10‑43 andJump Starting
on page 10‑82.
Brake Noise
Under certain weather or operating
conditions, occasional brake noise
might be heard with the vehicle's
performance braking system. This
brake system is designed for
superior fade resistance and
consistent operation using high
performance brake pads. Brake
noise is normal and does not affect
system performance. See Braking
on page 9‑4. Car Wash Guidelines
Automatic car washes are not
recommended for this vehicle.
Some car washes cause damage to
the vehicle, the wheels, and the
convertible top, if the vehicle is
so equipped.
If you drive the vehicle through an
automatic car wash that does not
have enough clearance for the
undercarriage and/or wide rear tires
and wheels, you could damage the
vehicle. Verify with the manager of
the car wash that the vehicle will fit
before entering the car wash or use
a touchless car wash. See
“Washing
Your Vehicle” underExterior Care
on page 10‑86.Engine Oil Life System
The engine oil life system calculates
engine oil life based on vehicle use
and displays a DIC message when
it is necessary to change the engine
oil and filter. The oil life system
should be reset to 100% only
following an oil change.
Resetting the Oil Life System
1. Press the TRIP button so the OIL LIFE percentage is
displayed.
2. Press RESET and hold for two seconds. OIL LIFE
REMAINING 100% will appear.
See Engine Oil Life System on
page 10‑22.
Page 37 of 434
Black plate (5,1)Chevrolet Corvette Owner Manual - 2012
Keys, Doors, and Windows 2-5
Programming with a Recognized
Transmitter
A new transmitter can be
programmed to the vehicle when
there is one recognized transmitter.
For vehicles sold in Canada, two
recognized transmitters are required
to program a new transmitter.
1. The vehicle must be off.
2. Both the recognized and newtransmitters must be with you.
3. Insert the vehicle key into the key cylinder located above the
license plate.
4. Open the hatch/trunk.
5. Turn the key five times within five seconds.
6. The DIC displays READY FOR FOB #2, 3 or 4.
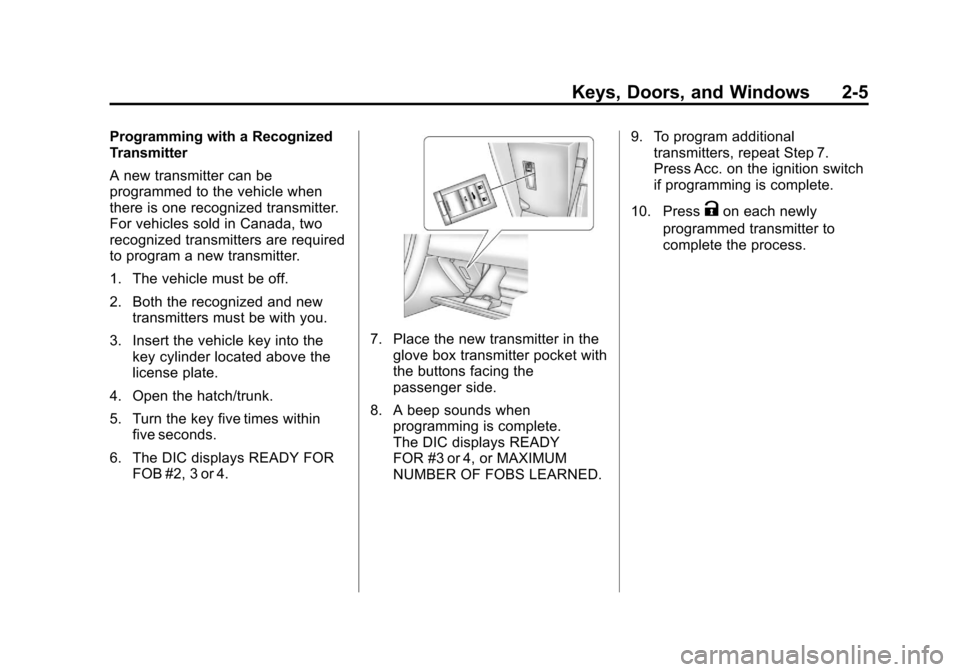
7. Place the new transmitter in theglove box transmitter pocket with
the buttons facing the
passenger side.
8. A beep sounds when programming is complete.
The DIC displays READY
FOR #3 or 4, or MAXIMUM
NUMBER OF FOBS LEARNED. 9. To program additional
transmitters, repeat Step 7.
Press Acc. on the ignition switch
if programming is complete.
10. Press
Kon each newly
programmed transmitter to
complete the process.
Page 38 of 434
Black plate (6,1)Chevrolet Corvette Owner Manual - 2012
2-6 Keys, Doors, and Windows
Programming without a
Recognized Transmitter
This procedure requires three
10-minute cycles to complete the
programming process. United
States owners are permitted to
program a new transmitter to
their vehicle when a recognized
transmitter is not available. The
Canadian immobilizer standard
requires that Canadian owners see
their dealer for programming new
transmitters when two recognized
transmitters are not available.
1. The vehicle must be off.
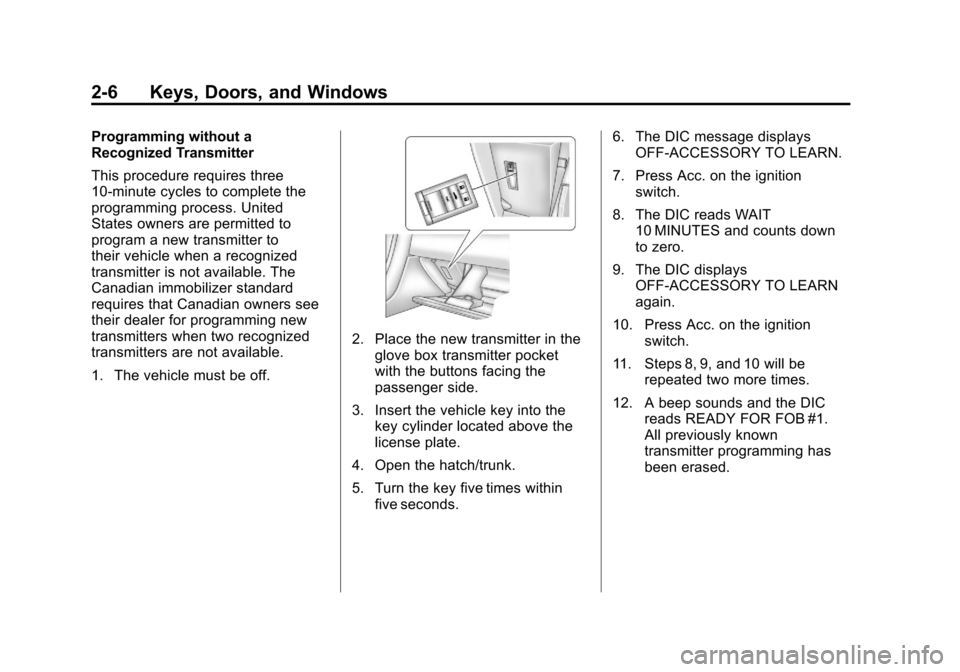
2. Place the new transmitter in theglove box transmitter pocket
with the buttons facing the
passenger side.
3. Insert the vehicle key into the key cylinder located above the
license plate.
4. Open the hatch/trunk.
5. Turn the key five times within five seconds. 6. The DIC message displays
OFF-ACCESSORY TO LEARN.
7. Press Acc. on the ignition switch.
8. The DIC reads WAIT 10 MINUTES and counts down
to zero.
9. The DIC displays OFF-ACCESSORY TO LEARN
again.
10. Press Acc. on the ignition switch.
11. Steps 8, 9, and 10 will be repeated two more times.
12. A beep sounds and the DIC reads READY FOR FOB #1.
All previously known
transmitter programming has
been erased.
Page 39 of 434
Black plate (7,1)Chevrolet Corvette Owner Manual - 2012
Keys, Doors, and Windows 2-7
13. A beep sounds onceprogramming in complete.
The DIC displays READY
FOR FOB #2.
To program additional
transmitters, take transmitter 1
out of the transmitter pocket
and place transmitter 2 in the
pocket. Up to four transmitters
can be programmed. The DIC
then displays MAXIMUM
NUMBER OF FOBS
LEARNED and exits the
programming mode.
Press Acc. on the ignition
switch to complete the process.
14. Press Acc. on the ignition switch if programming is
complete.
15. Press
Kon each newly
programmed transmitter to
complete the process.
Starting the Vehicle with a Low
Transmitter Battery
If the transmitter battery is weak,
the DIC may display NO FOBS
DETECTED when trying to start the
vehicle. To start the vehicle, place
the transmitter in the glove box
transmitter pocket with the buttons
facing the passenger side. Then,
with the vehicle in P (Park) for an
automatic transmission, press the
brake pedal and
/. If the vehicle
has a manual transmission, press
the clutch and
/. Replace the
transmitter battery as soon as
possible. Change the transmitter
battery if the DIC displays FOB
BATTERY LOW.
Battery Replacement
Notice: When replacing the
battery, do not touch any of the
circuitry on the transmitter. Static
from your body could damage the
transmitter.
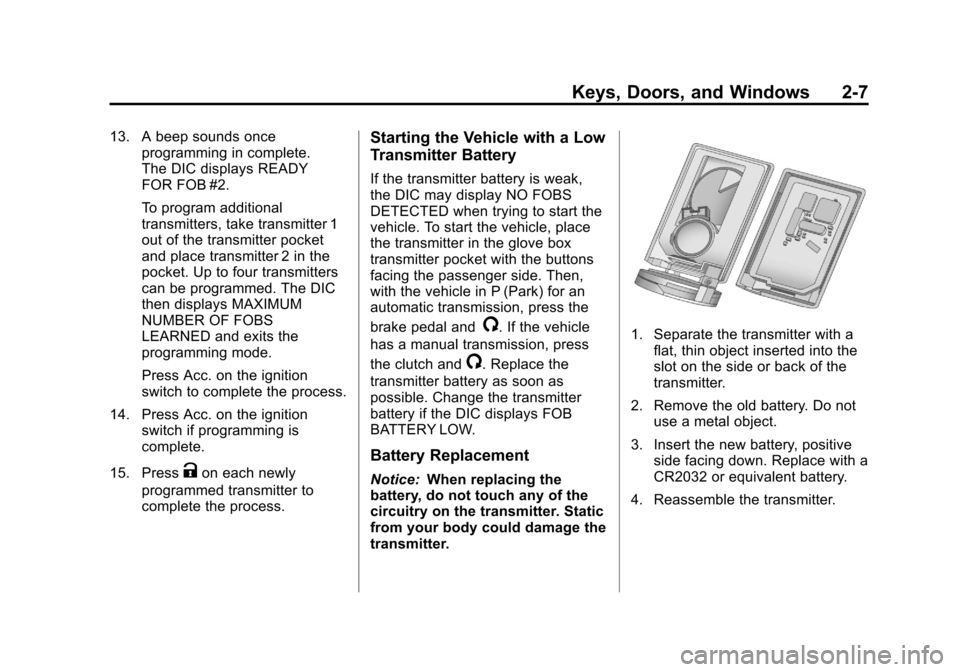
1. Separate the transmitter with a
flat, thin object inserted into the
slot on the side or back of the
transmitter.
2. Remove the old battery. Do not use a metal object.
3. Insert the new battery, positive side facing down. Replace with a
CR2032 or equivalent battery.
4. Reassemble the transmitter.
Page 62 of 434
Black plate (30,1)Chevrolet Corvette Owner Manual - 2012
2-30 Keys, Doors, and Windows
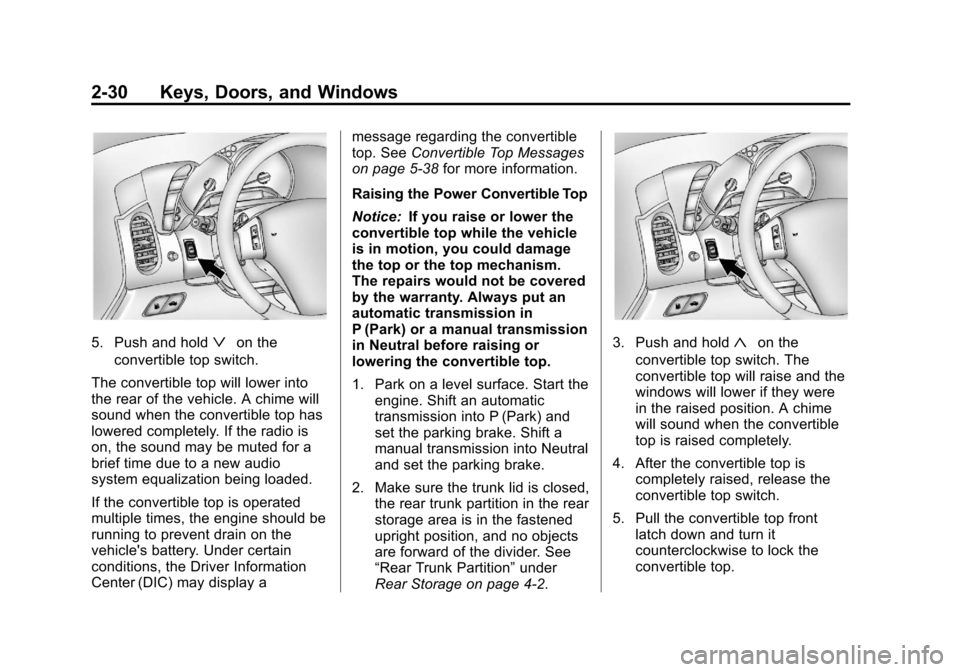
5. Push and holdªon the
convertible top switch.
The convertible top will lower into
the rear of the vehicle. A chime will
sound when the convertible top has
lowered completely. If the radio is
on, the sound may be muted for a
brief time due to a new audio
system equalization being loaded.
If the convertible top is operated
multiple times, the engine should be
running to prevent drain on the
vehicle's battery. Under certain
conditions, the Driver Information
Center (DIC) may display a message regarding the convertible
top. See
Convertible Top Messages
on page 5‑38 for more information.
Raising the Power Convertible Top
Notice: If you raise or lower the
convertible top while the vehicle
is in motion, you could damage
the top or the top mechanism.
The repairs would not be covered
by the warranty. Always put an
automatic transmission in
P (Park) or a manual transmission
in Neutral before raising or
lowering the convertible top.
1. Park on a level surface. Start the engine. Shift an automatic
transmission into P (Park) and
set the parking brake. Shift a
manual transmission into Neutral
and set the parking brake.
2. Make sure the trunk lid is closed, the rear trunk partition in the rear
storage area is in the fastened
upright position, and no objects
are forward of the divider. See
“Rear Trunk Partition” under
Rear Storage on page 4‑2.3. Push and hold«on the
convertible top switch. The
convertible top will raise and the
windows will lower if they were
in the raised position. A chime
will sound when the convertible
top is raised completely.
4. After the convertible top is completely raised, release the
convertible top switch.
5. Pull the convertible top front latch down and turn it
counterclockwise to lock the
convertible top.
Page 64 of 434

Black plate (32,1)Chevrolet Corvette Owner Manual - 2012
2-32 Keys, Doors, and Windows
5. Then follow the steps underraising the manual convertible
top. See “Manual Operation” or
“Power Operation” in this
section.
When power is restored to the
vehicle, the hydraulic bolt must be
tightened, by turning it clockwise.
The convertible top switch can then
be used to lower or raise the
convertible top.
If the convertible top is operated
multiple times, the engine should
be running to prevent drain on the
vehicle's battery. Under certain
conditions, the Driver Information
Center (DIC) may display a
message regarding the convertible
top. See Convertible Top Messages
on page 5‑38 for more information. If the battery has been
disconnected, the power windows
must be initialized for the power
convertible top to operate. See
Power Windows on page 2‑18
for
more information.
Cleaning the Convertible Top
The convertible top should be
cleaned often. However, high
pressure car washes may cause
water to enter the vehicle.
When hand washing the convertible
top, do it in partial shade. Use a
mild soap, lukewarm water, and a
soft sponge. A chamois or cloth may
leave lint on the top, and a brush
can chafe the threads in the top
fabric. Do not use detergents,
harsh cleaners, solvents,
or bleaching agents. Wet the entire vehicle and wash the
top evenly to avoid spots or rings.
Let the soap remain on the fabric
for a few minutes. When the top is
really dirty, use a mild foam-type
cleaner. Thoroughly rinse the
entire vehicle, then let the top dry
in direct sunlight.
To protect the convertible top:
.After washing the vehicle, make
sure the convertible top is
completely dry before lowering it.
.Do not get any cleaner on the
vehicle's painted finish; it could
leave streaks.
Page 108 of 434
Black plate (2,1)Chevrolet Corvette Owner Manual - 2012
4-2 Storage
Rear Storage
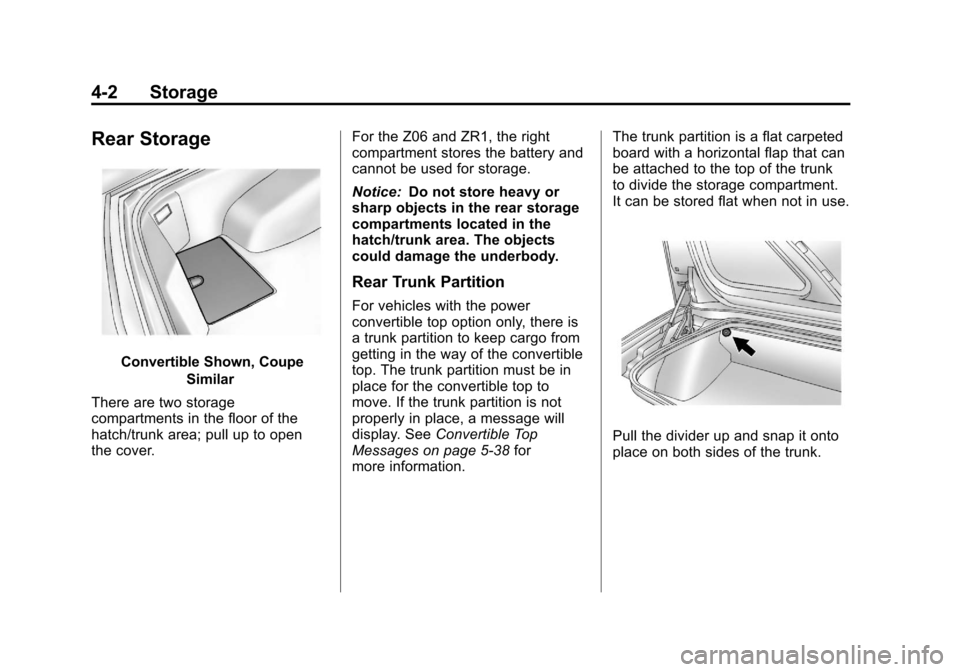
Convertible Shown, CoupeSimilar
There are two storage
compartments in the floor of the
hatch/trunk area; pull up to open
the cover. For the Z06 and ZR1, the right
compartment stores the battery and
cannot be used for storage.
Notice:
Do not store heavy or
sharp objects in the rear storage
compartments located in the
hatch/trunk area. The objects
could damage the underbody.
Rear Trunk Partition
For vehicles with the power
convertible top option only, there is
a trunk partition to keep cargo from
getting in the way of the convertible
top. The trunk partition must be in
place for the convertible top to
move. If the trunk partition is not
properly in place, a message will
display. See Convertible Top
Messages on page 5‑38 for
more information. The trunk partition is a flat carpeted
board with a horizontal flap that can
be attached to the top of the trunk
to divide the storage compartment.
It can be stored flat when not in use.
Pull the divider up and snap it onto
place on both sides of the trunk.
Page 111 of 434
Black plate (1,1)Chevrolet Corvette Owner Manual - 2012
Instruments and Controls 5-1
Instruments and
Controls
Controls
Steering Wheel Adjustment . . . 5-2
Steering Wheel Controls . . . . . . 5-3
Horn . . . . . . . . . . . . . . . . . . . . . . . . . . 5-4
Windshield Wiper/Washer . . . . . 5-4
Compass . . . . . . . . . . . . . . . . . . . . . 5-5
Clock . . . . . . . . . . . . . . . . . . . . . . . . . 5-6
Power Outlets . . . . . . . . . . . . . . . . . 5-6
Cigarette Lighter . . . . . . . . . . . . . . 5-7
Ashtrays . . . . . . . . . . . . . . . . . . . . . . 5-7
Warning Lights, Gauges, and
Indicators
Warning Lights, Gauges, andIndicators . . . . . . . . . . . . . . . . . . . . 5-8
Instrument Cluster . . . . . . . . . . . . 5-9
Speedometer . . . . . . . . . . . . . . . . 5-12
Odometer . . . . . . . . . . . . . . . . . . . . 5-12
Tachometer . . . . . . . . . . . . . . . . . . 5-12
Fuel Gauge . . . . . . . . . . . . . . . . . . 5-13
Boost Gauge (ZR1) . . . . . . . . . . 5-14
Engine Oil Pressure Gauge . . . . . . . . . . . . . . . . . . . . . . 5-14 Engine Coolant Temperature
Gauge . . . . . . . . . . . . . . . . . . . . . . 5-16
Voltmeter Gauge . . . . . . . . . . . . . 5-17
Safety Belt Reminders . . . . . . . 5-17
Airbag Readiness Light . . . . . . 5-18
Passenger Airbag Status Indicator . . . . . . . . . . . . . . . . . . . . 5-18
Malfunction Indicator Lamp . . . . . . . . . . . . . 5-19
Brake System Warning Light . . . . . . . . . . . . . . . . . . . . . . . 5-22
Antilock Brake System (ABS) Warning Light . . . . . . . . . . . . . . 5-22
One-to-Four Shift Light (Manual Transmission) . . . . . 5-23
Traction Off Light . . . . . . . . . . . . 5-24
StabiliTrak
®OFF Light . . . . . . . 5-24
Active Handling System Light . . . . . . . . . . . . . . . . . . . . . . . 5-25
Tire Pressure Light . . . . . . . . . . 5-25
Security Light . . . . . . . . . . . . . . . . 5-26
High-Beam On Light . . . . . . . . . 5-27
Front Fog Lamp Light . . . . . . . . 5-27
Lamps On Reminder . . . . . . . . . 5-27
Information Displays
Driver Information Center (DIC) . . . . . . . . . . . . . . . 5-28
Head-Up Display (HUD) . . . . . 5-32
Vehicle Messages
Vehicle Messages . . . . . . . . . . . 5-36
Battery Voltage and Charging Messages . . . . . . . . . . . . . . . . . . 5-37
Brake System Messages . . . . 5-37
Convertible Top Messages . . . 5-38
Cruise Control Messages . . . . 5-39
Door Ajar Messages . . . . . . . . . 5-40
Engine Cooling System Messages . . . . . . . . . . . . . . . . . . 5-40
Engine Oil Messages . . . . . . . . 5-41
Engine Power Messages . . . . 5-42
Fuel System Messages . . . . . . 5-43
Key and Lock Messages . . . . . 5-43
Lamp Messages . . . . . . . . . . . . . 5-45
Ride Control System Messages . . . . . . . . . . . . . . . . . . 5-45
Safety Belt Messages . . . . . . . 5-49
Anti-theft Alarm System Messages . . . . . . . . . . . . . . . . . . 5-50
Service Vehicle Messages . . . 5-50
Starting the Vehicle Messages . . . . . . . . . . . . . . . . . . 5-50
Tire Messages . . . . . . . . . . . . . . . 5-51
Transmission Messages . . . . . 5-53
Vehicle Reminder Messages . . . . . . . . . . . . . . . . . . 5-54
Washer Fluid Messages . . . . . 5-54