2012 CHEVROLET AVALANCHE steering wheel
[x] Cancel search: steering wheelPage 329 of 508

Black plate (69,1)Chevrolet Avalanche Owner Manual - 2012
Driving and Operating 9-69
Backing Up
Hold the bottom of the steering
wheel with one hand. Then, to move
the trailer to the left, move that hand
to the left. To move the trailer to the
right, move your hand to the right.
Always back up slowly and,
if possible, have someone
guide you.
Making Turns
Notice:Making very sharp turns
while trailering could cause the
trailer to come in contact with the
vehicle. The vehicle could be
damaged. Avoid making very
sharp turns while trailering.
When turning with a trailer, make
wider turns than normal. Do this
so the trailer will not strike soft
shoulders, curbs, road signs, trees
or other objects. Avoid jerky or
sudden maneuvers. Signal well in
advance. If the trailer turn signal bulbs burn
out, the arrows on the instrument
panel will still flash for turns. It is
important to check occasionally to
be sure the trailer bulbs are still
working.
Driving on Grades
Reduce speed and shift to a lower
gear
before starting down a long or
steep downgrade. If the
transmission is not shifted down, the
brakes might get hot and no longer
work well.
Vehicles can tow in D (Drive). Shift
the transmission to a lower gear if
the transmission shifts too often
under heavy loads and/or hilly
conditions.
The tow/haul mode may be used if
the transmission shifts too often.
See Tow/Haul Mode Light on
page 5‑23. When towing at high altitude on
steep uphill grades, consider the
following: Engine coolant will boil at
a lower temperature than at normal
altitudes. If the engine is turned off
immediately after towing at high
altitude on steep uphill grades, the
vehicle may show signs similar to
engine overheating. To avoid this,
let the engine run while parked,
preferably on level ground, with the
automatic transmission in P (Park)
for a few minutes before turning the
engine off. If the overheat warning
comes on, see
Engine Overheating
on page 10‑22.
Page 345 of 508

Black plate (1,1)Chevrolet Avalanche Owner Manual - 2012
Vehicle Care 10-1
Vehicle Care
General Information
General Information . . . . . . . . . . 10-2
California Proposition65 Warning . . . . . . . . . . . . . . . . . 10-2
California Perchlorate Materials Requirements . . . . 10-3
Accessories and Modifications . . . . . . . . . . . . . . . 10-3
Vehicle Checks
Doing Your OwnService Work . . . . . . . . . . . . . . . 10-4
Hood . . . . . . . . . . . . . . . . . . . . . . . . 10-5
Engine Compartment Overview . . . . . . . . . . . . . . . . . . . 10-6
Engine Oil . . . . . . . . . . . . . . . . . . . 10-8
Engine Oil Life System . . . . . 10-11
Automatic Transmission Fluid . . . . . . . . . . . . . . . . . . . . . . 10-13
Engine Air Cleaner/Filter . . . . 10-16
Cooling System . . . . . . . . . . . . 10-18
Engine Coolant . . . . . . . . . . . . . 10-18
Engine Overheating . . . . . . . . 10-22
Overheated Engine Protection
Operating Mode . . . . . . . . . . . 10-24 Engine Fan . . . . . . . . . . . . . . . . . 10-25
Power Steering Fluid . . . . . . . 10-25
Washer Fluid . . . . . . . . . . . . . . . 10-26
Brakes . . . . . . . . . . . . . . . . . . . . . 10-27
Brake Fluid . . . . . . . . . . . . . . . . . 10-28
Battery . . . . . . . . . . . . . . . . . . . . . 10-30
Four-Wheel Drive . . . . . . . . . . . 10-30
Front Axle . . . . . . . . . . . . . . . . . . 10-31
Rear Axle . . . . . . . . . . . . . . . . . . 10-31
Starter Switch Check . . . . . . . 10-33
Automatic Transmission Shift
Lock Control Function
Check . . . . . . . . . . . . . . . . . . . . . 10-33
Ignition Transmission Lock Check . . . . . . . . . . . . . . . . . . . . . 10-34
Park Brake and P (Park) Mechanism Check . . . . . . . . 10-34
Wiper Blade Replacement . . . . . . . . . . . . . . 10-35
Glass Replacement . . . . . . . . 10-35
Headlamp Aiming
Headlamp Aiming . . . . . . . . . . 10-35
Bulb Replacement
Bulb Replacement . . . . . . . . . . 10-38
Halogen Bulbs . . . . . . . . . . . . . . 10-38 Taillamps, Turn Signal,
Sidemarker, Stoplamps,
and Back-Up Lamps . . . . . . 10-38
License Plate Lamp . . . . . . . . 10-39
Replacement Bulbs . . . . . . . . . 10-39
Electrical System
Electrical System Overload . . . . . . . . . . . . . . . . . . 10-40
Fuses and Circuit Breakers . . . . . . . . . . . . . . . . . . 10-41
Engine Compartment Fuse Block . . . . . . . . . . . . . . . . . . . . . 10-41
Instrument Panel Fuse Block . . . . . . . . . . . . . . . . . . . . . 10-46
Wheels and Tires
Tires . . . . . . . . . . . . . . . . . . . . . . . . 10-49
Tire Sidewall Labeling . . . . . . 10-50
Tire Designations . . . . . . . . . . . 10-52
Tire Terminology andDefinitions . . . . . . . . . . . . . . . . 10-53
Tire Pressure . . . . . . . . . . . . . . . 10-56
Tire Pressure Monitor System . . . . . . . . . . . . . . . . . . . 10-58
Tire Pressure Monitor Operation . . . . . . . . . . . . . . . . . 10-59
Tire Inspection . . . . . . . . . . . . . . 10-62
Tire Rotation . . . . . . . . . . . . . . . 10-62
Page 349 of 508

Black plate (5,1)Chevrolet Avalanche Owner Manual - 2012
Vehicle Care 10-5
Hood
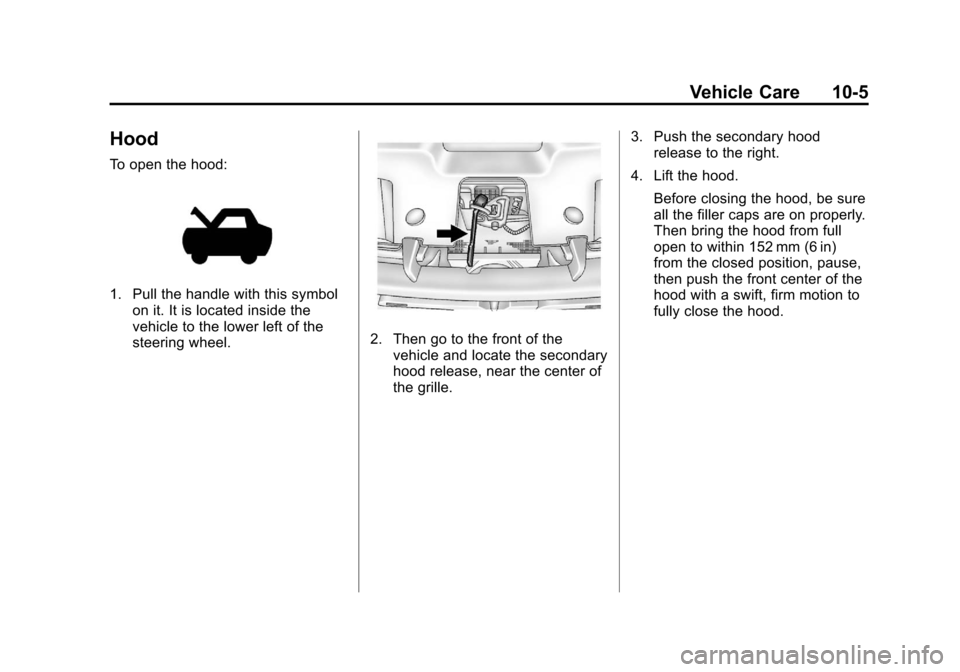
To open the hood:
1. Pull the handle with this symbolon it. It is located inside the
vehicle to the lower left of the
steering wheel.
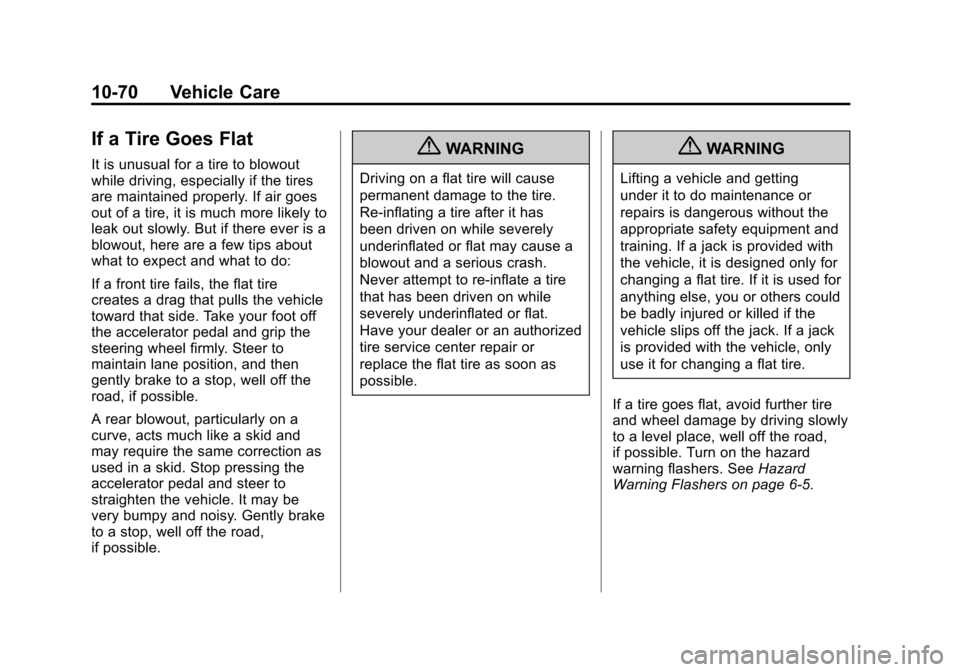
2. Then go to the front of thevehicle and locate the secondary
hood release, near the center of
the grille. 3. Push the secondary hood
release to the right.
4. Lift the hood. Before closing the hood, be sure
all the filler caps are on properly.
Then bring the hood from full
open to within 152 mm (6 in)
from the closed position, pause,
then push the front center of the
hood with a swift, firm motion to
fully close the hood.
Page 390 of 508

Black plate (46,1)Chevrolet Avalanche Owner Manual - 2012
10-46 Vehicle Care
Instrument Panel Fuse
Block
The instrument panel fuse block
access door is located on the driver
side edge of the instrument panel.
Pull off the cover to access the fuse
block.
The vehicle may not be equipped
with all of the fuses, relays, and
features shown.Fuses Usage
1 Rear Seats
2 Rear Accessory
Power Outlet Fuses Usage
3 Steering Wheel
Controls Backlight
4 Driver Door Module
5 Dome Lamps, Driver
Side Turn Signal
Page 414 of 508

Black plate (70,1)Chevrolet Avalanche Owner Manual - 2012
10-70 Vehicle Care
If a Tire Goes Flat
It is unusual for a tire to blowout
while driving, especially if the tires
are maintained properly. If air goes
out of a tire, it is much more likely to
leak out slowly. But if there ever is a
blowout, here are a few tips about
what to expect and what to do:
If a front tire fails, the flat tire
creates a drag that pulls the vehicle
toward that side. Take your foot off
the accelerator pedal and grip the
steering wheel firmly. Steer to
maintain lane position, and then
gently brake to a stop, well off the
road, if possible.
A rear blowout, particularly on a
curve, acts much like a skid and
may require the same correction as
used in a skid. Stop pressing the
accelerator pedal and steer to
straighten the vehicle. It may be
very bumpy and noisy. Gently brake
to a stop, well off the road,
if possible.{WARNING
Driving on a flat tire will cause
permanent damage to the tire.
Re-inflating a tire after it has
been driven on while severely
underinflated or flat may cause a
blowout and a serious crash.
Never attempt to re-inflate a tire
that has been driven on while
severely underinflated or flat.
Have your dealer or an authorized
tire service center repair or
replace the flat tire as soon as
possible.
{WARNING
Lifting a vehicle and getting
under it to do maintenance or
repairs is dangerous without the
appropriate safety equipment and
training. If a jack is provided with
the vehicle, it is designed only for
changing a flat tire. If it is used for
anything else, you or others could
be badly injured or killed if the
vehicle slips off the jack. If a jack
is provided with the vehicle, only
use it for changing a flat tire.
If a tire goes flat, avoid further tire
and wheel damage by driving slowly
to a level place, well off the road,
if possible. Turn on the hazard
warning flashers. See Hazard
Warning Flashers on page 6‑5.
Page 437 of 508

Black plate (93,1)Chevrolet Avalanche Owner Manual - 2012
Vehicle Care 10-93
{WARNING
Shifting a four-wheel-drive
vehicle's transfer case into
N (Neutral) can cause the vehicle
to roll even if the transmission is
in P (Park). The driver or others
could be injured. Make sure the
parking brake is firmly set before
the transfer case is shifted to
N (Neutral).
4. Shift the transfer case to N (Neutral). See “Shifting into
Neutral” under“Four-Wheel
Drive” for the proper procedure
to select the Neutral position for
the vehicle.
5. Release the parking brake only after the vehicle being towed is
firmly attached to the towing
vehicle.
6. Turn the ignition to LOCK/OFF and remove the key —the
steering wheel will still turn. After towing, see
“Shifting Out of
Neutral” under“Four-Wheel Drive”
for the proper procedure to take the
vehicle out of the Neutral position.
Dolly Towing
Front Towing (Front Wheels Off
the Ground) –Two-Wheel-Drive
Vehicles and Four-Wheel Drive
Vehicles with a Single Speed
Automatic Transfer Case
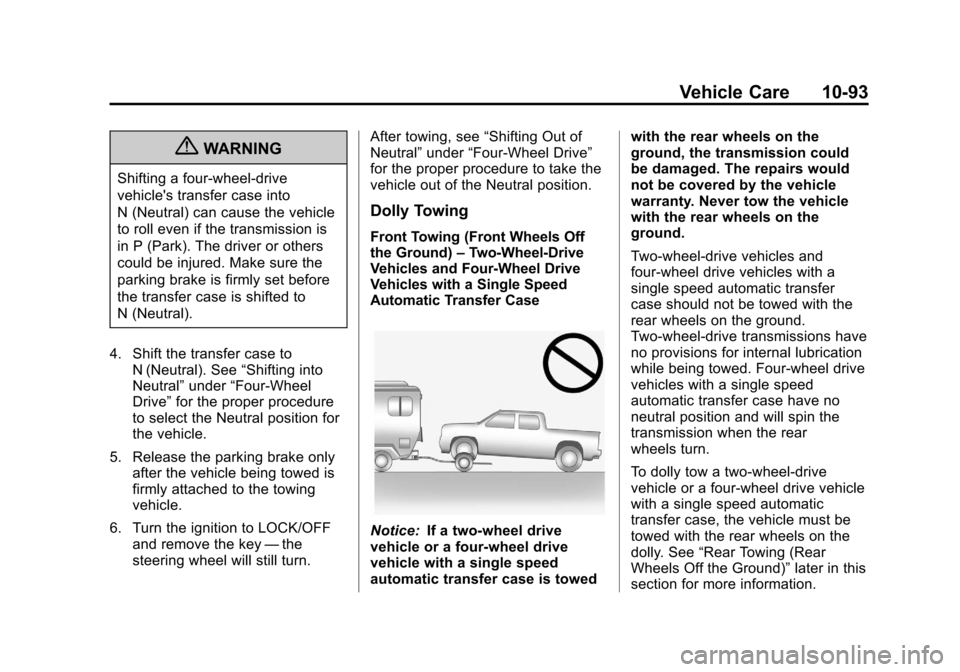
Notice: If a two-wheel drive
vehicle or a four-wheel drive
vehicle with a single speed
automatic transfer case is towed with the rear wheels on the
ground, the transmission could
be damaged. The repairs would
not be covered by the vehicle
warranty. Never tow the vehicle
with the rear wheels on the
ground.
Two-wheel-drive vehicles and
four-wheel drive vehicles with a
single speed automatic transfer
case should not be towed with the
rear wheels on the ground.
Two-wheel-drive transmissions have
no provisions for internal lubrication
while being towed. Four-wheel drive
vehicles with a single speed
automatic transfer case have no
neutral position and will spin the
transmission when the rear
wheels turn.
To dolly tow a two‐wheel‐drive
vehicle or a four-wheel drive vehicle
with a single speed automatic
transfer case, the vehicle must be
towed with the rear wheels on the
dolly. See
“Rear Towing (Rear
Wheels Off the Ground)” later in this
section for more information.
Page 442 of 508

Black plate (98,1)Chevrolet Avalanche Owner Manual - 2012
10-98 Vehicle Care
Weatherstrips
Apply silicone grease on
weatherstrips to make them last
longer, seal better, and not stick or
squeak. SeeRecommended Fluids
and Lubricants on page 11‑12.
Tires
Use a stiff brush with tire cleaner to
clean the tires.
Notice: Using petroleum-based
tire dressing products on the
vehicle may damage the paint
finish and/or tires. When applying
a tire dressing, always wipe off
any overspray from all painted
surfaces on the vehicle.
Wheels and Trim —Aluminum
or Chrome
Use a soft, clean cloth with mild
soap and water to clean the wheels.
After rinsing thoroughly with clean
water, dry with a soft, clean towel.
A wax may then be applied.
Keep the wheels clean using a soft,
clean cloth with mild soap and
water. Rinse with clean water. After
rinsing thoroughly, dry with a soft,
clean towel. A wax may then be
applied.
Notice: Chrome wheels and other
chrome trim may be damaged if
the vehicle is not washed after
driving on roads that have been
sprayed with magnesium,
calcium, or sodium chloride.
These chlorides are used on
roads for conditions such as ice
and dust. Always wash the
chrome with soap and water after
exposure. Notice:
To avoid surface damage,
do not use strong soaps,
chemicals, abrasive polishes,
cleaners, brushes, or cleaners
that contain acid on aluminum or
chrome-plated wheels. Use only
approved cleaners. Also, never
drive a vehicle with aluminum or
chrome-plated wheels through an
automatic car wash that uses
silicone carbide tire cleaning
brushes. Damage could occur
and the repairs would not be
covered by the vehicle warranty.
Steering, Suspension, and
Chassis Components
Visually inspect front and rear
suspension and steering system for
damaged, loose, or missing parts
or signs of wear. Inspect power
steering lines and hoses for proper
hook-up, binding, leaks, cracks,
chafing, etc. Visually check constant
velocity joints, rubber boots, and
axle seals for leaks.
Page 456 of 508

Black plate (10,1)Chevrolet Avalanche Owner Manual - 2012
11-10 Service and Maintenance
Hoses
Hoses transport fluids and should
be regularly inspected to ensure
that there are no cracks or leaks.
With a multi‐point inspection, your
dealer can inspect the hoses and
advise if replacement is needed.
Lamps
Properly working headlamps,
taillamps, and brake lamps are
important to see and be seen on
the road.
.Signs that the headlamps need
attention include dimming, failure
to light, cracking, or damage.
The brake lamps need to be
checked periodically to ensure
that they light when braking.
.With a multi‐point inspection,
your dealer can check the lamps
and note any concerns.Shocks and Struts
Shocks and struts help aid in control
for a smoother ride.
.Signs of wear may include
steering wheel vibration, bounce/
sway while braking, longer
stopping distance, or uneven
tire wear.
.As part of the multi‐point
inspection, trained dealer
technicians can visually inspect
the shocks and struts for signs
of leaking, blown seals,
or damage, and can advise
when service is needed.
Tires
Tires need to be properly inflated,
rotated, and balanced. Maintaining
the tires can save money, fuel, and
can reduce the risk of tire failure.
.Signs that the tires need to be
replaced include three or more
visible treadwear indicators; cord
or fabric showing through the
rubber; cracks or cuts in the
tread or sidewall; or a bulge or
split in the tire.
.Trained dealer technicians can
inspect and recommend the right
tires. Your dealer can also
provide tire/wheel balancing
services to ensure smooth
vehicle operation at all speeds.
Your dealer sells and services
name brand tires.