2012 CHEVROLET AVALANCHE change time
[x] Cancel search: change timePage 241 of 508

Black plate (45,1)Chevrolet Avalanche Owner Manual - 2012
Infotainment System 7-45
Cleaning the RSE Overhead
Console
When cleaning the RSE overhead
console surface, use only a clean
cloth dampened with clean water.
Cleaning the Video Screen
When cleaning the video screen,
use only a clean cloth dampened
with clean water. Use care when
directly touching or cleaning the
screen, as damage could result.
Rear Seat Audio (RSA)
System
Vehicles with this feature allow the
rear seat passengers to listen to
and control any of the music
sources: radio, CDs, DVDs, or other
auxiliary sources. However, the rear
seat passengers can only control
the music sources the front seat
passengers are not listening to,except on some radios where dual
control is allowed. For example, rear
seat passengers can control and
listen to a CD through the
headphones, while the driver listens
to the radio through the front
speakers. The rear seat passengers
have control of the volume for each
set of headphones.
The radio functionality is controlled
by both the RSA and the front radio.
Only one band can be tuned to at
one time. Changing the band on the
RSA or the front radio will change
the band on the other system,
if they are both sourced to the radio.
The RSA functions operate even
when the main radio is off. The front
audio system will display the
headphone icon when the RSA is
on, and will disappear from the
display when it is off.
Audio can be heard through wired
headphones (not included) plugged
into the jacks on the RSA. If the
vehicle has this feature, audio can
also be heard on Channel 2 of the
wireless headphones.
The audio system mutes the rear
speakers when the RSA audio is
active through the headphones.
To listen to an iPod or portable
audio device through the RSA,
attach the iPod or portable audio
device to the front auxiliary input (if
available), located on the front audio
system. Turn the iPod on, then
choose the front auxiliary input with
the RSA SRCE button.
Page 244 of 508

Black plate (48,1)Chevrolet Avalanche Owner Manual - 2012
7-48 Infotainment System
When to Speak:A short tone
sounds after the system responds
indicating when it is waiting for a
voice command. Wait until the tone
and then speak.
How to Speak: Speak clearly in a
calm and natural voice.
Audio System
When using the in‐vehicle Bluetooth
system, sound comes through the
vehicle's front audio system
speakers and overrides the audio
system. Use the audio system
volume knob, during a call, to
change the volume level. The
adjusted volume level remains in
memory for later calls. To prevent
missed calls, a minimum volume
level is used if the volume is turned
down too low.
Bluetooth Controls
Use the buttons located on the
steering wheel to operate the
in‐vehicle Bluetooth system. See
Steering Wheel Controls on
page 5‑3 for more information.
b/g(Mute/Push To Talk): Press
to answer incoming calls, confirm
system information, and start
speech recognition.
c/x(End): Press to end a call,
reject a call, or cancel an operation.
Pairing
A Bluetooth enabled cell phone
must be paired to the Bluetooth
system and then connected to the
vehicle before it can be used. See
the cell phone manufacturer's user
guide for Bluetooth functions before
pairing the cell phone. If a Bluetooth
phone is not connected, calls will be
made using OnStar Hands‐Free
Calling, if equipped. See OnStar
Overview on page 14‑1 for more
information.
Pairing Information
.A Bluetooth phone with MP3
capability cannot be paired to
the vehicle as a phone and an
MP3 player at the same time.
.Up to five cell phones can be
paired to the Bluetooth system.
.The pairing process is disabled
when the vehicle is moving.
.Pairing only needs to be
completed once, unless the
pairing information on the cell
phone changes or the cell phone
is deleted from the system.
.Only one paired cell phone can
be connected to the Bluetooth
system at a time.
.If multiple paired cell phones are
within range of the system, the
system connects to the first
available paired cell phone in the
order that they were first paired
to the system. To connect to a
different paired phone, see
“Connecting to a Different
Phone” later in this section.
Page 245 of 508

Black plate (49,1)Chevrolet Avalanche Owner Manual - 2012
Infotainment System 7-49
Pairing a Phone
1. Press and hold
b/gfor
two seconds.
2. Say “Bluetooth.” This command
can be skipped.
3. Say “Pair.”The system responds
with instructions and a four‐digit
Personal Identification Number
(PIN). The PIN is used in Step 5.
4. Start the pairing process on the cell phone that you want to pair.
For help with this process, see
the cell phone manufacturer's
user guide.
5. Locate the device named “Your
Vehicle” in the list on the cell
phone. Follow the instructions
on the cell phone to enter the
PIN provided in Step 3. After the
PIN is successfully entered, the
system prompts you to provide a
name for the paired cell phone.
This name will be used to
indicate which phones are
paired and connected to the
vehicle. The system responds with
“
successfully paired” after the
pairing process is complete.
6. Repeat Steps 1 through 5 to pair additional phones.
Listing All Paired and Connected
Phones
The system can list all cell phones
paired to it. If a paired cell phone is
also connected to the vehicle, the
system responds with “is connected”
after that phone name.
1. Press and hold
b/gfor
two seconds.
2. Say “Bluetooth.”
3. Say “List.”
Deleting a Paired Phone
If the phone name you want to
delete is unknown, see “Listing All
Paired and Connected Phones.”
1. Press and hold
b/gfor
two seconds.
2. Say “Bluetooth.” 3. Say
“Delete.” The system asks
which phone to delete.
4. Say the name of the phone you want to delete.
Connecting to a Different Phone
To connect to a different cell phone,
the Bluetooth system looks for the
next available cell phone in the
order in which all the available cell
phones were paired. Depending on
which cell phone you want to
connect to, you may have to use
this command several times.
1. Press and hold
b/gfor
two seconds.
2. Say “Bluetooth.”
3. Say “Change phone.”
.If another cell phone is
found, the response will be
“
connected.”
.If another cell phone is not
found, the original phone
remains connected.
Page 247 of 508

Black plate (51,1)Chevrolet Avalanche Owner Manual - 2012
Infotainment System 7-51
To delete all name tags:
1. Press and hold
b/gfor
two seconds.
2. Say “Delete all name tags.”
Listing Stored Numbers
The list command will list all stored
numbers and name tags.
Using the “List”Command
1. Press and hold
b/gfor
two seconds.
2. Say “Directory.”
3. Say “Hands‐Free Calling.”
4. Say “List.”
Making a Call
Calls can be made using the
following commands.
Dial or Call: The dial or call
command can be used
interchangeably to dial a phone
number or a stored name tag. Digit Dial:
This command allows a
phone number to be dialed by
entering the digits one at a time.
Re‐dial: This command is used to
dial the last number used on the cell
phone.
Using the “Dial”or“Call”
Command
1. Press and hold
b/gfor
two seconds.
2. Say “Dial”or“Call.”
3. Say the entire number without pausing, or say the name tag.
Once connected, the person called
will be heard through the audio
speakers.
Using the “Digit Dial” Command
The digit dial command allows a
phone number to be dialed by
entering the digits one at a time.
After each digit is entered, the
system repeats back the digit it
heard followed by a tone. If an unwanted number is
recognized by the system, say
“Clear”
at any time to clear the last
number.
To hear all of the numbers
recognized by the system, say
“Verify” at any time.
1. Press and hold
b/gfor
two seconds.
2. Say “Digit Dial.”
3. Say each digit, one at a time, that you want to dial. After each
digit is entered, the system
repeats back the digit it heard
followed by a tone. After the last
digit has been entered,
say “Dial.”
Once connected, the person called
will be heard through the audio
speakers.
Page 252 of 508

Black plate (2,1)Chevrolet Avalanche Owner Manual - 2012
8-2 Climate Controls
Temperature Control:Move
the thumbwheels up or down
to increase or decrease the
temperature on the driver side or
the passenger side of the vehicle.
A(Fan Control): Turn clockwise
or counterclockwise to increase or
decrease the fan speed. Turn the
knob all the way counterclockwise
to turn the front system off.
Air Delivery Mode Control: Turn
clockwise or counterclockwise to
change the direction of the airflow
inside the vehicle. The knob can be
positioned between two modes, for
a combination of those modes.
To change the current mode, select
one of the following:
H(Vent): Air is directed to the
instrument panel outlets.
)(Bi-Level): Air is divided
between the instrument panel and
floor outlets. Some air is directed
towards the windshield and side window outlets. Cooler air is
directed to the upper outlets and
warmer air to the floor outlets.
6(Floor):
Air is directed to the
floor outlets, with some of the air
directed to the windshield, side
window, and second row floor
outlets. In this mode, the system
automatically selects outside air.
Recirculation cannot be selected
when in Floor Mode.
-(Defog): The defog mode is
used to clear the windows of fog or
moisture. Air is directed to the
windshield, floor outlets, and side
window vents. In this mode, the
system turns off recirculation and
runs the air conditioning compressor
unless the outside temperature is
close to freezing. The recirculation
mode cannot be selected while in
the defog mode.
0(Defrost): The defrost mode is
used to remove fog or frost from
the windshield more quickly. Air is
directed to the windshield and side
window vents, with some directed to the floor vents. In this mode, the
system automatically forces outside
air into the vehicle. The recirculation
mode cannot be selected while
in the defrost mode. The air
conditioning compressor runs
automatically in this setting, unless
the outside temperature is close to
freezing.
Do not drive the vehicle until all the
windows are clear.
#(Air Conditioning):
Press this
button to turn the air conditioning
system on or off. An indicator
light comes on to show that the
air conditioning is on. The air
conditioning can be selected in any
mode as long as the fan control
is on.
On hot days, open the windows to
let hot inside air escape; then close
them. This helps to reduce the time
it takes for the vehicle to cool down.
It also helps the system to operate
more efficiently.
Page 257 of 508

Black plate (7,1)Chevrolet Avalanche Owner Manual - 2012
Climate Controls 8-7
The air delivery mode setting will be
displayed and the AUTO light turns
off. The fan remains under
automatic control.
H(Vent):Air is directed to the
instrument panel outlets.
)(Bi-Level): Air is divided
between the instrument panel and
floor outlets. Some air is directed
towards the windshield and side
window outlets.
6(Floor): Air is directed to the
floor outlets, with some to the
windshield, side window outlets, and
second row floor outlets. In this
mode, the system automatically
selects outside air.
-(Defog): This mode clears the
windows of fog or moisture. Air is
directed to the windshield, floor
outlets, and side window vents. In
this mode, the system turns off
recirculation and runs the air
conditioning compressor unless the
outside temperature is close to freezing. The recirculation mode
cannot be selected while in the
defrost mode.
0(Defrost):
This mode removes
fog or frost from the windshield
more quickly. Air is directed to the
windshield and side window vents,
with some directed to the floor
vents. In this mode, the system
automatically forces outside air into
the vehicle and runs the air
conditioning compressor unless the
outside temperature is close to
freezing. The recirculation mode
cannot be selected while in the
defrost mode.
The passenger temperature control
cannot be activated while in defrost
mode. If the PASS button is
pressed, the button indicator flashes
three times and will not work. If the
passenger temperature buttons are
adjusted, the driver temperature
indicator changes. The passenger
temperature will not be displayed. If vent, bi-level, or floor mode is
selected again, the climate control
system displays the previous
temperature settings.
Do not drive the vehicle until all the
windows are clear.
#(Air Conditioning):
Press to
turn the air conditioning (A/C)
compressor on and off. An indicator
light comes on to show that the air
conditioning is on.
If this button is pressed when the air
conditioning compressor is
unavailable, the indicator flashes
three times and then turns off. If the
air conditioning is on and the
outside temperature drops below a
temperature which is too cool for air
conditioning to be effective, the air
conditioning light turns off to show
that the air conditioning mode has
been canceled.
Page 282 of 508

Black plate (22,1)Chevrolet Avalanche Owner Manual - 2012
9-22 Driving and Operating
Starting and
Operating
New Vehicle Break-In
Notice:The vehicle does not
need an elaborate break-in. But it
will perform better in the long run
if you follow these guidelines:
.Keep the vehicle speed at
88 km/h (55 mph) or less for
the first 805 km (500 miles).
.Do not drive at any one
constant speed, fast or
slow, for the first 805 km
(500 miles). Do not make
full-throttle starts. Avoid
downshifting to brake or
slow the vehicle.
.Avoid making hard stops for
the first 322 km (200 miles) or
so. During this time the new
brake linings are not yet
broken in. Hard stops with
new linings can mean
premature wear and earlier
replacement. Follow this
breaking-in guideline every
time you get new brake
linings.
.Do not tow a trailer during
break-in. See Trailer Towing
on page 9‑71 for the trailer
towing capabilities of the
vehicle and more
information.
Following break‐in, engine speed
and load can be gradually
increased.
Adjustable Throttle and
Brake Pedal
On vehicles with this feature, you
can change the position of the
throttle and brake pedals.
No adjustment to the pedals can
be made when the vehicle is in
R (Reverse) or while using cruise
control.
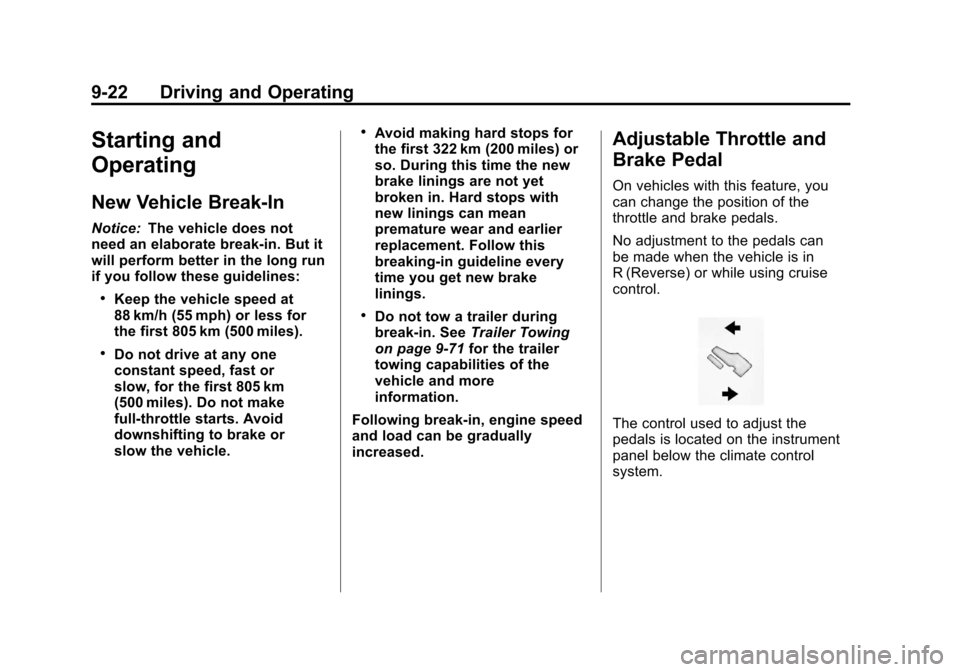
The control used to adjust the
pedals is located on the instrument
panel below the climate control
system.
Page 287 of 508

Black plate (27,1)Chevrolet Avalanche Owner Manual - 2012
Driving and Operating 9-27
Notice:The engine is designed to
work with the electronics in the
vehicle. If you add electrical parts
or accessories, you could change
the way the engine operates.
Before adding electrical
equipment, check with your
dealer. If you do not, the engine
might not perform properly. Any
resulting damage would not be
covered by the vehicle warranty.
Engine Heater
The engine coolant heater can
provide easier starting and better
fuel economy during engine
warm-up in cold weather conditions
at or below −18°C (0°F). Vehicles
with an engine heater should be
plugged in at least four hours before
starting. An internal thermostat in
the plug-end of the cord may exist
which will prevent engine coolant
heater operation at temperatures
above −18°C (0°F).
To Use the Engine Coolant
Heater
1. Turn off the engine.
2. Open the hood and unwrap the
electrical cord. The cord is
secured to the Engine
Compartment Fuse Block with a
clip. Carefully remove the wire
tie which secures the electrical
cord. Do not cut the
electrical cord.
3. Plug the cord into a normal, grounded 110-volt AC outlet.
{WARNING
Plugging the cord into an
ungrounded outlet could cause an
electrical shock. Also, the wrong
kind of extension cord could
overheat and cause a fire. You
could be seriously injured. Plug
the cord into a properly grounded
three-prong 110-volt AC outlet.
(Continued)
WARNING (Continued)
If the cord will not reach, use a
heavy-duty three-prong extension
cord rated for at least 15 amps.
4. Before starting the engine, be sure to unplug and store the
cord as it was before to keep it
away from moving engine parts.
If you do not, it could be
damaged.
The length of time the heater should
remain plugged in depends on
several factors. Ask a dealer in the
area where you will be parking the
vehicle for the best advice on this.