Page 222 of 494

Black plate (42,1)Cadillac Escalade EXT Owner Manual - 2012
7-42 Infotainment System
Navigation
Using the Navigation
System
This section presents basic
information needed to operate the
navigation system.
Use the buttons located on the
navigation system along with the
available touch-sensitive screen
buttons on the navigation screen to
operate the system. SeeOverview
on page 7‑4 for more information.
Once the vehicle is moving, various
functions are disabled to reduce
driver distractions.
Navigation Control Buttons
The following control buttons are
located on the navigation system:
O/n(Power/Volume):
1. Press to turn the system on and off.
2. Turn to increase or decrease the volume to the audio system. 3. Press and hold for more than
two seconds to turn off the
navigation system, the Rear
Seat Entertainment (RSE), and
Rear Seat Audio (RSA). If the
vehicle has not been tuned off,
the RSE and the RSA can be
turned back on by pressing this
knob and continues play of the
last active source.
Z(Eject): Press to eject the
CD/DVD Disc. See CD/DVD Player
on page 7‑18.
w(Tuning Knob): Turn to go to
the next or previous frequency or
disc track or chapter. See CD/DVD
Player on page 7‑18 orMP3 on
page 7‑27 for more information.
AUDIO: Press to display the audio
screen. Press to switch between
AM, FM, or XM, if equipped, DISC,
or AUX (Auxiliary), or press on the
screen button. See CD/DVD Player
on page 7‑18, MP3 on page 7‑27,
and Auxiliary Devices on page 7‑30
for more information. FAV (Favorite):
Press to access
the preset stations. See “Storing
Radio Station Presets” under,
Overview on page 7‑4.
5(Phone): SeeOnStar Overview
on page 14‑1 (if equipped) and
Bluetooth on page 7‑81 (if
equipped) for more information.
e(Sound): Press to access the
Sound menu to adjust the treble,
midrange, bass, fade, balance, and
Digital Signal Processing (DSP).
y/z(Scan Up/Down): Press to
scan the tracks/chapters up or down
on a disc.
y/©or¨/z(Seek/Scan)
(Previous/Next): Press the up or
down arrows to go to the next or
previous station. Press and hold
either arrow for more than
two seconds. The radio goes to a
station, plays for a few seconds,
then goes to the next station.
Page 237 of 494

Black plate (57,1)Cadillac Escalade EXT Owner Manual - 2012
Infotainment System 7-57
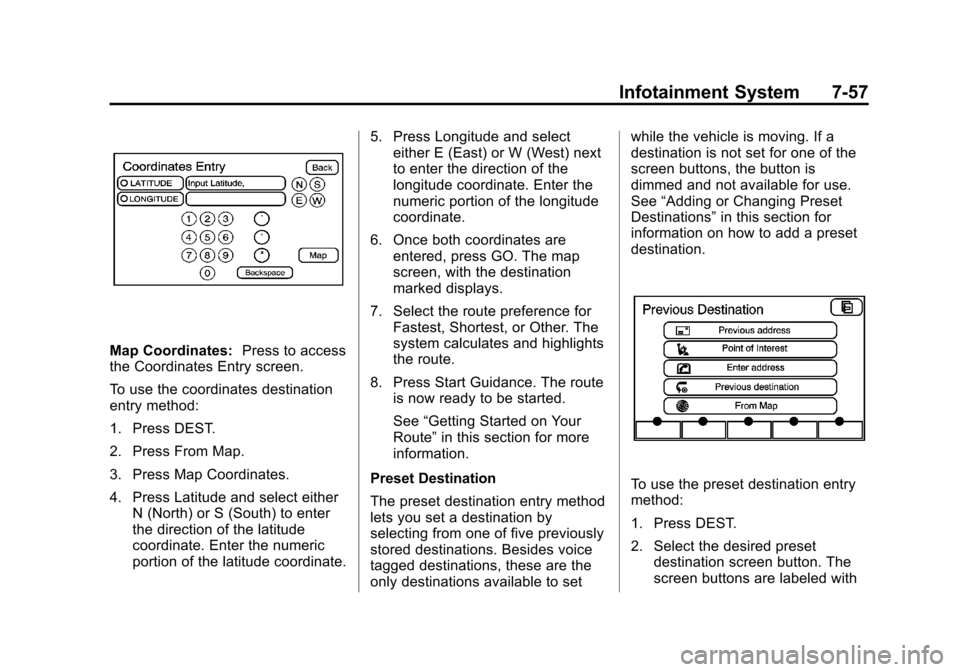
Map Coordinates:Press to access
the Coordinates Entry screen.
To use the coordinates destination
entry method:
1. Press DEST.
2. Press From Map.
3. Press Map Coordinates.
4. Press Latitude and select either N (North) or S (South) to enter
the direction of the latitude
coordinate. Enter the numeric
portion of the latitude coordinate. 5. Press Longitude and select
either E (East) or W (West) next
to enter the direction of the
longitude coordinate. Enter the
numeric portion of the longitude
coordinate.
6. Once both coordinates are entered, press GO. The map
screen, with the destination
marked displays.
7. Select the route preference for Fastest, Shortest, or Other. The
system calculates and highlights
the route.
8. Press Start Guidance. The route is now ready to be started.
See “Getting Started on Your
Route” in this section for more
information.
Preset Destination
The preset destination entry method
lets you set a destination by
selecting from one of five previously
stored destinations. Besides voice
tagged destinations, these are the
only destinations available to set while the vehicle is moving. If a
destination is not set for one of the
screen buttons, the button is
dimmed and not available for use.
See
“Adding or Changing Preset
Destinations” in this section for
information on how to add a preset
destination.
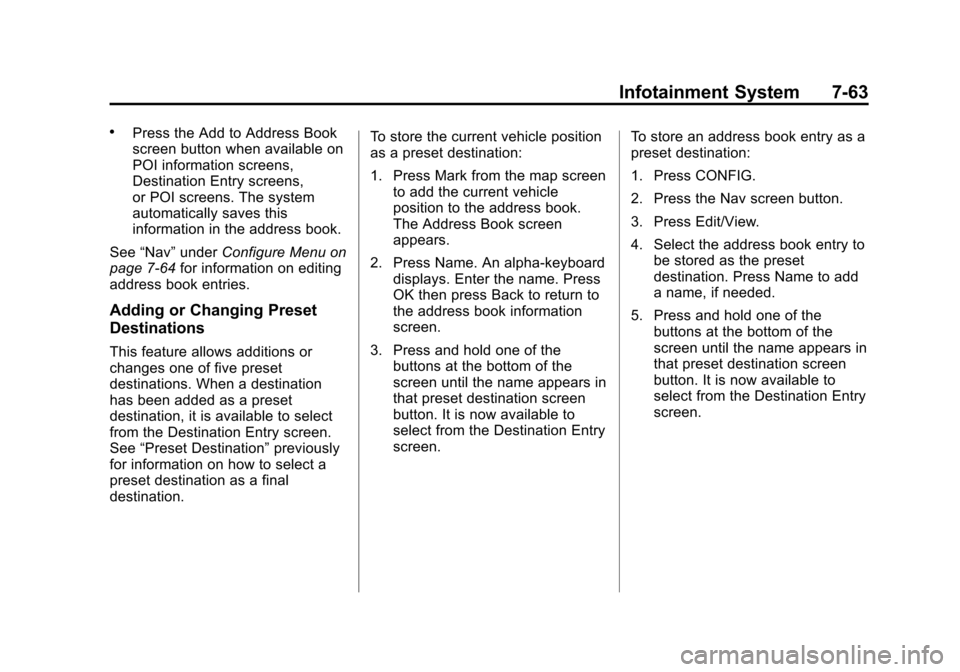
To use the preset destination entry
method:
1. Press DEST.
2. Select the desired preset destination screen button. The
screen buttons are labeled with
Page 243 of 494

Black plate (63,1)Cadillac Escalade EXT Owner Manual - 2012
Infotainment System 7-63
.Press the Add to Address Book
screen button when available on
POI information screens,
Destination Entry screens,
or POI screens. The system
automatically saves this
information in the address book.
See “Nav” under Configure Menu on
page 7‑64 for information on editing
address book entries.
Adding or Changing Preset
Destinations
This feature allows additions or
changes one of five preset
destinations. When a destination
has been added as a preset
destination, it is available to select
from the Destination Entry screen.
See “Preset Destination” previously
for information on how to select a
preset destination as a final
destination. To store the current vehicle position
as a preset destination:
1. Press Mark from the map screen
to add the current vehicle
position to the address book.
The Address Book screen
appears.
2. Press Name. An alpha-keyboard displays. Enter the name. Press
OK then press Back to return to
the address book information
screen.
3. Press and hold one of the buttons at the bottom of the
screen until the name appears in
that preset destination screen
button. It is now available to
select from the Destination Entry
screen. To store an address book entry as a
preset destination:
1. Press CONFIG.
2. Press the Nav screen button.
3. Press Edit/View.
4. Select the address book entry to
be stored as the preset
destination. Press Name to add
a name, if needed.
5. Press and hold one of the buttons at the bottom of the
screen until the name appears in
that preset destination screen
button. It is now available to
select from the Destination Entry
screen.
Page 244 of 494

Black plate (64,1)Cadillac Escalade EXT Owner Manual - 2012
7-64 Infotainment System
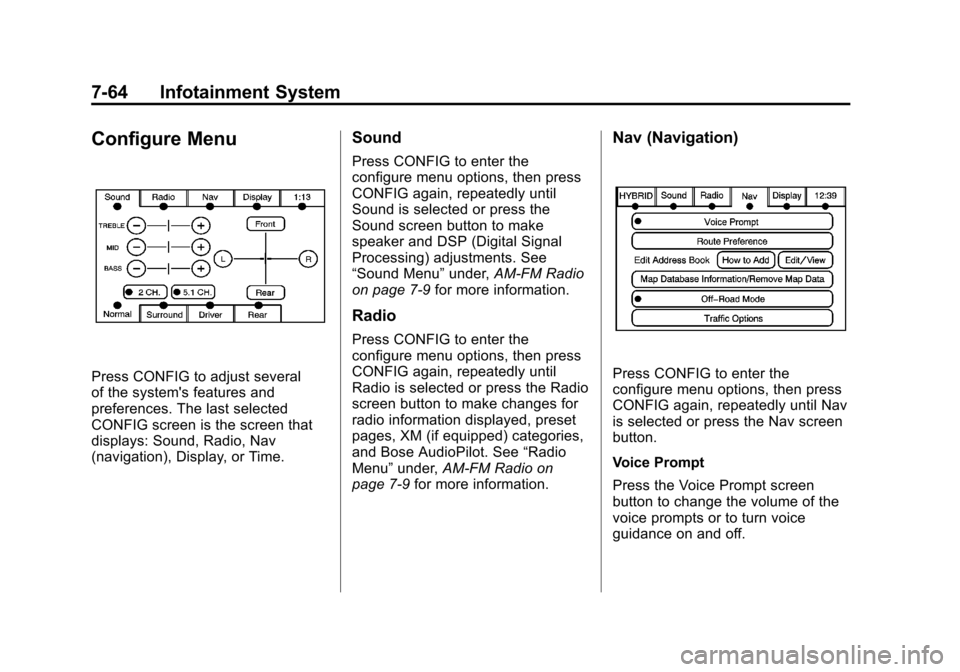
Configure Menu
Press CONFIG to adjust several
of the system's features and
preferences. The last selected
CONFIG screen is the screen that
displays: Sound, Radio, Nav
(navigation), Display, or Time.
Sound
Press CONFIG to enter the
configure menu options, then press
CONFIG again, repeatedly until
Sound is selected or press the
Sound screen button to make
speaker and DSP (Digital Signal
Processing) adjustments. See
“Sound Menu”under,AM-FM Radio
on page 7‑9 for more information.
Radio
Press CONFIG to enter the
configure menu options, then press
CONFIG again, repeatedly until
Radio is selected or press the Radio
screen button to make changes for
radio information displayed, preset
pages, XM (if equipped) categories,
and Bose AudioPilot. See “Radio
Menu” under,AM-FM Radio on
page 7‑9 for more information.
Nav (Navigation)
Press CONFIG to enter the
configure menu options, then press
CONFIG again, repeatedly until Nav
is selected or press the Nav screen
button.
Voice Prompt
Press the Voice Prompt screen
button to change the volume of the
voice prompts or to turn voice
guidance on and off.