2012 BMW Z4 SDRIVE35I audio
[x] Cancel search: audioPage 125 of 220

Loading the CD/DVD compartments
individually1. Press the button.
The LED on the first empty compartment
flashes.2.Select another compartment if necessary.3.Wait for the LEDs on the DVD slot to flash.4.Insert a single CD or DVD in the middle.
The CD/DVD is drawn in automatically and
placed into the selected compartment.
Sliding in CDs/DVDs
Do not insert the CD/DVD until the LEDs
on the DVD slot are flashing; otherwise, the CD/
DVD or the CD/DVD changer could be damaged.
Do not continue to push on the CD/DVD; this
may cause it to jam and prevent it from being
able to eject again.◀
Filling all vacant CD/DVD
compartments
1. Press the button for a longer period.
The LEDs on the empty CD compartments
flash.2.Wait for the LEDs on the DVD slot to begin
flashing and then insert each CD or DVD into
the center of the slot.
The CDs/DVDs are drawn in automatically
and placed into the vacant compartments.
Sliding in CDs/DVDs
Do not insert the CD/DVD until the LEDs
on the DVD slot are flashing; otherwise, the CD/
DVD or the CD/DVD changer could be damaged.
Do not continue to push on the CD/DVD; this
may cause it to jam and prevent it from being
able to eject again.◀
After they are inserted, it may take several mi‐
nutes for the CDs/DVDs to be read in.
Removing a single CD/DVD1. Press the button.2.Select the CD/DVD compartment.
The CD/DVD is partially ejected.3.Remove the CD/DVD.
Removing all CDs/DVDs
1. Press the button for a longer period.2.Remove the CDs/DVDs.
Malfunctions
If all LEDs on the CD/DVD changer flash rapidly,
the system is malfunctioning.
To eliminate the malfunction:
1.Press one of the buttons:▷▷
The CD/DVD last inserted is ejected.
2.Remove the CD/DVD.
If the LEDs stop flashing rapidly, the CD/DVD
changer is functional again.
Audio playback
The audio track of a DVD can be played back
even if video playback is not possible in the ve‐
hicle.
Only the main film without the previews or extras
can be played back.
Starting playback
A DVD is located in the DVD changer.
1. 2."DVD"3.Select the desired DVD.Seite 125Professional RadioEntertainment125
Online Edition for Part no. 01 40 2 609 184 - 09 11 500
Page 126 of 220
Selecting a chapter using the button
Press the button repeatedly until the
desired chapter is played.
Fast forward/reverse
Hold the button down.
Selecting the language
The languages that are available depend on the
DVD.
1."AUDIO"2.Select the desired language with the right
knob.
Operational displays
CD player
▷"Insert CD"
The CD slot is empty.▷"Error CD"
The CD cannot be read or is defective.▷"Temp. CD"
Operating temperature is too high.
CD/DVD changer
▷"Insert DVD"
The CD/DVD is incorrectly inserted or the
compartments are empty.▷"Error DVD"
The CD/DVD cannot be read or is defective.▷"Temp DVD"
Operating temperature is too high.Notes
CD/DVD player and changer Do not remove the cover
BMW CD/DVD players and changers are
officially designated Class 1 laser products. Do
not operate if the cover is damaged; otherwise,
severe eye damage can result.◀
CDs and DVDs Use of CDs/DVDs▷Do not use self-recorded CDs/DVDs
with labels applied, as these can be‐
come detached during playback due
to heat buildup and can cause irrepar‐
able damage to the device.▷Only use round CDs/DVDs with a standard
diameter of 4.7 in/12 cm and do not play
CDs/DVDs with an adapter, e.g., single CDs;
otherwise, the CDs or the adapter may jam
and no longer eject.▷Do not use combined CDs/DVDs, e.g., DVD
Plus, as the CDs/DVDs can jam and will no
longer eject.◀
General malfunctions
▷CD/DVD changers and players have been
optimized for performance in vehicles. In
some instances they may be more sensitive
to faulty CDs/DVDs than stationary devices
would be.▷If a CD/DVD cannot be played, first check
whether it has been inserted correctly.
Humidity
High levels of humidity can lead to condensation
on the CD/DVD or the laser's scan lens, and
temporarily prevent playback.
Seite 126EntertainmentProfessional Radio126
Online Edition for Part no. 01 40 2 609 184 - 09 11 500
Page 127 of 220
Malfunctions involving individual CDs/
DVDs
If malfunctions occur only with particular CDs/
DVDs, this can be due to one of the following
causes:
Self-recorded CDs/DVDs▷Possible reasons for malfunctions with self-
recorded CDs/DVDs are inconsistent data
creation or recording processes, or poor
quality or old age of the blank CD/DVD.▷Only label CDs/DVDs on the upper side with
a pen intended for this purpose.
Damage
▷Avoid fingerprints, dust, scratches and
moisture.▷Store CDs/DVDs in a sleeve.▷Do not subject CDs/DVDs to temperatures
over 122 ℉/50 ℃, high humidity or direct
sunlight.
CDs/DVDs with copy protection
CDs/DVDs are often provided with a copy pro‐
tection feature by the manufacturer. This can
mean that some CDs/DVDs cannot be played or
can only be played to a limited extent.
MACROVISION
This product contains copyrighted technology
that is based on multiple registered US patents
and the intellectual property of the Macrovision
Corporation and other manufacturers. The use
of this copy protection must be approved by
Macrovision. Media protected by this product -
unless otherwise agreed with Macrovision - may
only be used for private purposes. Copying of
this technology is prohibited.
External devices
AUX-IN port
At a glance▷For connecting audio devices, e.g., MP3
player. The sound is output on the vehicle
loudspeakers.▷Recommendation: use medium tone and
volume settings on the audio device. The
tone depends on the quality of the audio
files.
Connecting
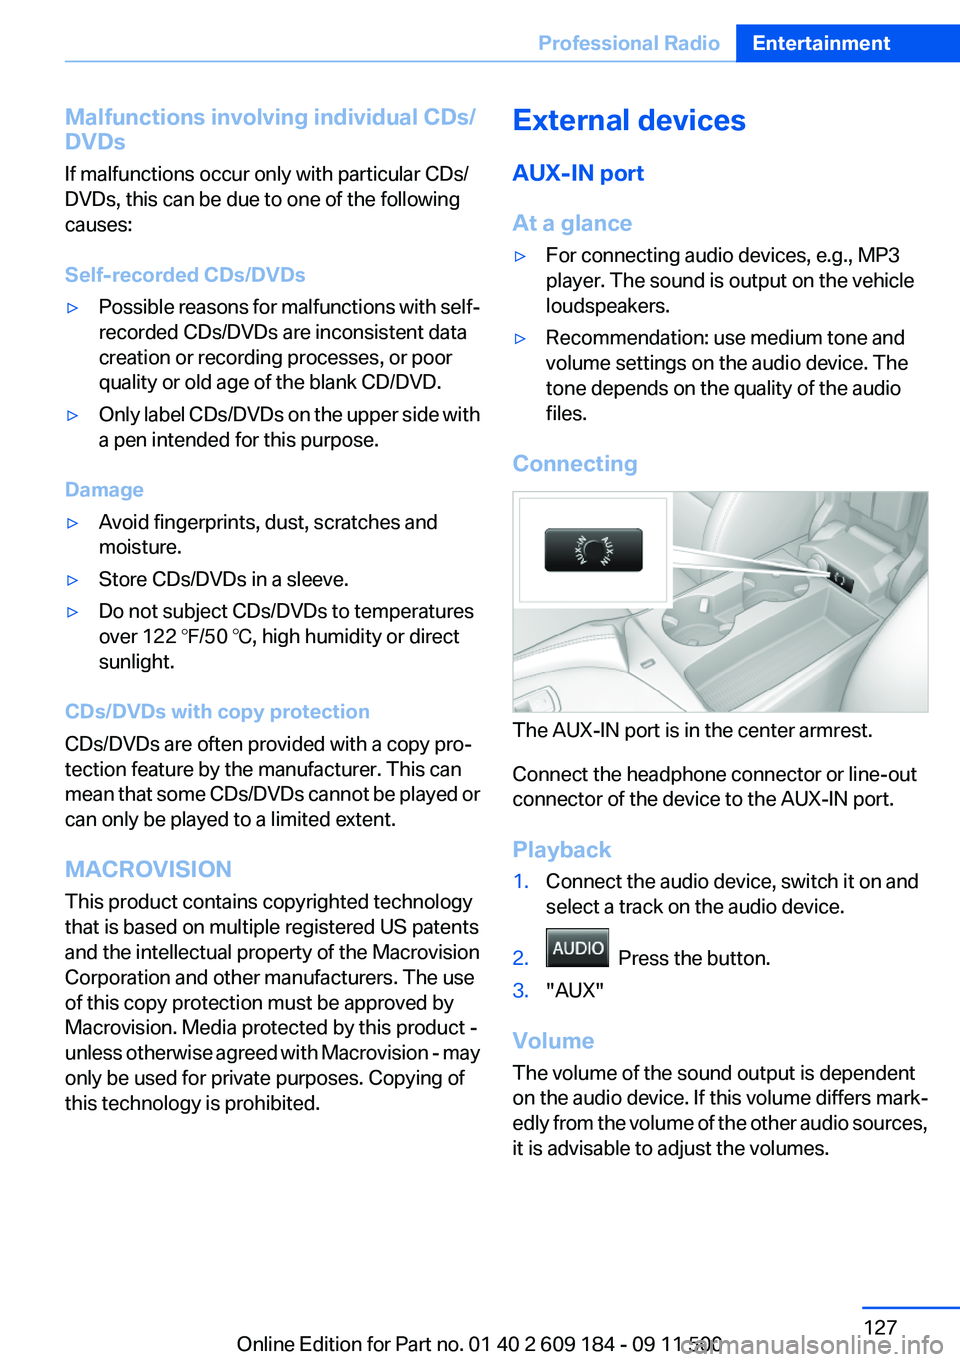
The AUX-IN port is in the center armrest.
Connect the headphone connector or line-out
connector of the device to the AUX-IN port.
Playback
1.Connect the audio device, switch it on and
select a track on the audio device.2. Press the button.3."AUX"
Volume
The volume of the sound output is dependent
on the audio device. If this volume differs mark‐
edly from the volume of the other audio sources,
it is advisable to adjust the volumes.
Seite 127Professional RadioEntertainment127
Online Edition for Part no. 01 40 2 609 184 - 09 11 500
Page 128 of 220
Adjusting the volume1. Press the button.2."AUX"3."Vol-AUX"4.Connect the audio device, switch it on and
select a track on the audio device.
USB audio interface/mobile phone
audio interface
At a glance
It is possible to connect external audio devices.
The sound is output on the vehicle loudspeak‐
ers.
Connectors for external devices
▷Connection via USB audio interface: Apple
iPod/iPhone, USB devices, e.g., MP3 play‐
ers, USB flash drives, or mobile phones that
are supported by the USB audio interface.▷Connection via snap-in adapter, refer to
page 143, when equipped with extended
connectivity of the music player in the mo‐
bile phone: Apple iPhone or mobile phones.
Playback is only possible if no audio device
is connected to the analog AUX-IN port.
Due to the large number of different audio devi‐
ces available on the market, it cannot be ensured
that every audio device/mobile phone is opera‐
ble on the vehicle.
Ask your service center about suitable audio de‐
vices/mobile phones.
Audio files
Standard audio files can be played back:
▷MP3.▷WMA.▷WAV (PCM).▷AAC, M4A.▷Playback lists: M3U, WPL, PLS.File system
Standard file systems for USB devices are sup‐
ported. The FAT 32 format is recommended.
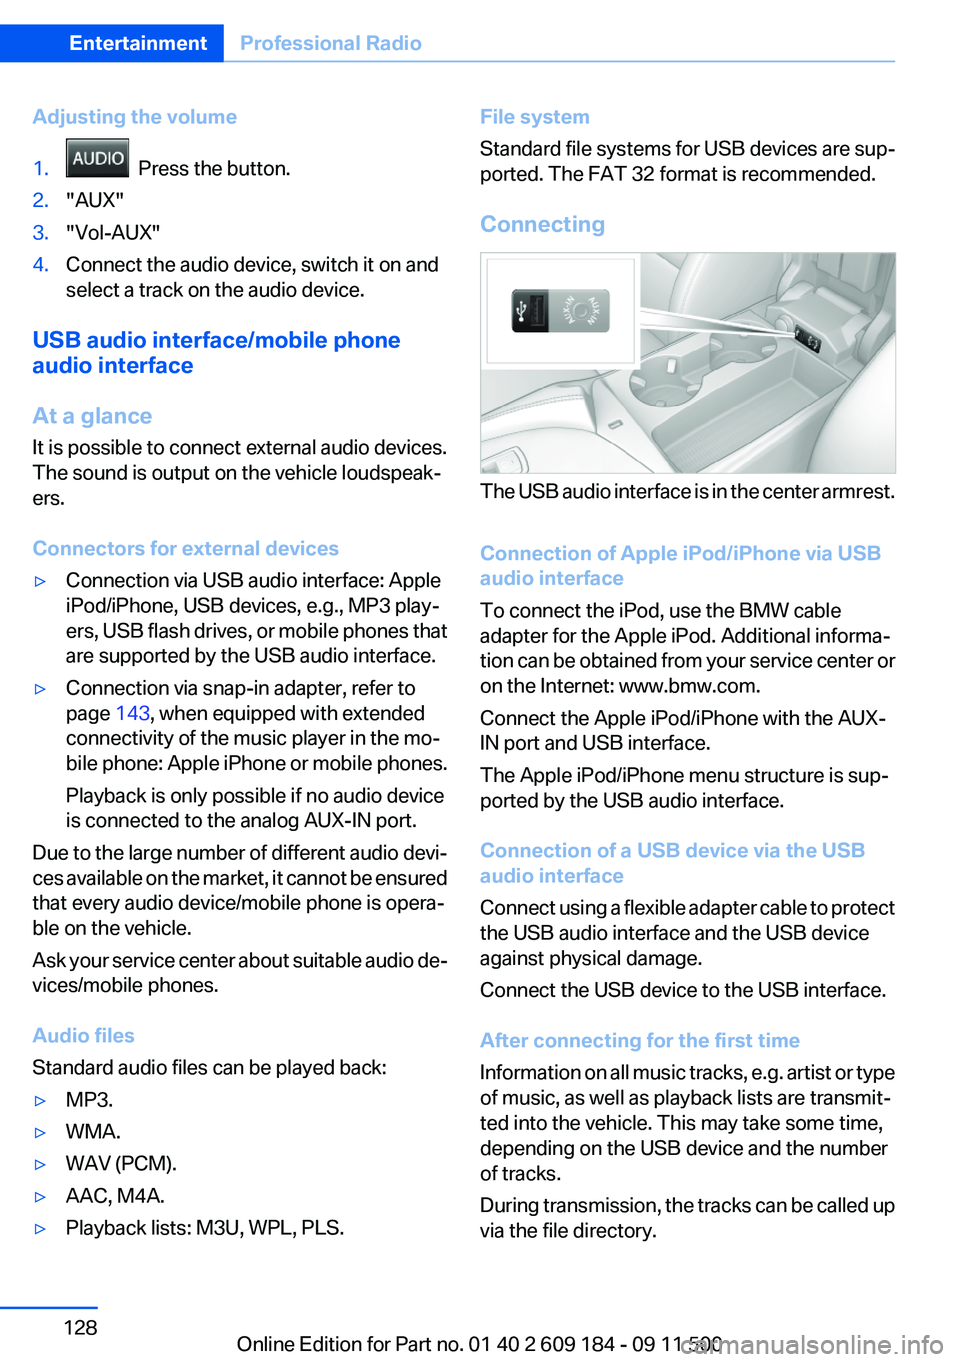
Connecting
The USB audio interface is in the center armrest.
Connection of Apple iPod/iPhone via USB
audio interface
To connect the iPod, use the BMW cable
adapter for the Apple iPod. Additional informa‐
tion can be obtained from your service center or
on the Internet: www.bmw.com.
Connect the Apple iPod/iPhone with the AUX-
IN port and USB interface.
The Apple iPod/iPhone menu structure is sup‐
ported by the USB audio interface.
Connection of a USB device via the USB
audio interface
Connect using a flexible adapter cable to protect
the USB audio interface and the USB device
against physical damage.
Connect the USB device to the USB interface.
After connecting for the first time
Information on all music tracks, e.g. artist or type
of music, as well as playback lists are transmit‐
ted into the vehicle. This may take some time,
depending on the USB device and the number
of tracks.
During transmission, the tracks can be called up
via the file directory.
Seite 128EntertainmentProfessional Radio128
Online Edition for Part no. 01 40 2 609 184 - 09 11 500
Page 129 of 220
Number of tracks
Information from up to four USB devices or for
approx. 20,000 tracks can be stored in the ve‐
hicle. If a fifth device is connected or if more than
20,000 tracks are stored, information on exist‐
ing tracks may be deleted.
Copy protection
Music tracks with integrated Digital Rights Man‐
agement (DRM) cannot be played.
Playback1. Press the button.2."IPOD" or "USB"
Changing the music track
Skipping to another track
It is possible to skip to another track within the
selected directory.
Press the button repeatedly until the
desired track is played.
With the right knob:
Turn the right knob until the desired track is
played back.
Fast forward/reverse
Hold the button down.
Tracks can be heard but are distorted.
Random playback
"RND"
To end random playback: "RND"
Selecting a track
Depending on the connected device, the track
can be selected via the following category:
▷"LIST": playback lists.▷"DIR": device file structure.▷"GEN": musical genre.▷"ART": artist.▷"ALB": album.1.Select the desired category.2.If necessary, select the desired directory us‐
ing the right knob.▷ : press the right knob to open a di‐
rectory.▷ : press the right knob to close a di‐
rectory.3.Select other directories if you wish.4.Highlight the desired track and press the
right knob.
You can scroll through the directories during
playback.
To change to the current track:
"CURR"
Displaying information on the track
Any information stored on the currently selected
track can be displayed.
"TRACK"
Adjusting the volume
The volume of the sound output is dependent
on the audio device. If this volume differs mark‐
edly from the volume of the other audio sources,
it is advisable to adjust the volumes.
1."LEV"2.Turn the right knob until the desired volume
is set and press the knob.
Notes
Do not expose the audio device to extreme en‐
vironmental conditions, such as very high tem‐
peratures; refer to the audio device operating
instructions.
Depending on the configuration of the audio
files, e.g., bit rates greater than 256 kbit/s, the
files may not play back correctly in each case.
Seite 129Professional RadioEntertainment129
Online Edition for Part no. 01 40 2 609 184 - 09 11 500
Page 130 of 220
Information on connection▷The connected audio device is supplied with
a max. power of 500 mA if supported by the
device. Therefore, do not additionally con‐
nect the device to a socket in the vehicle;
otherwise, playback may be compromised.▷Do not use force when plugging the con‐
nector into the USB interface.▷Do not connect devices such as fans or
lamps to the USB audio interface.▷Do not connect USB hard drives.▷Do not use the USB audio interface to re‐
charge external devices.Seite 130EntertainmentProfessional Radio130
Online Edition for Part no. 01 40 2 609 184 - 09 11 500
Page 142 of 220
Redialing
›Redial‹
Voice phone book
Depending on how your vehicle is equipped, it
may be necessary to create your own voice
phone book.
The entries must be entered using voice activa‐
tion and are separate from the memory in the
mobile phone. Up to 50 entries can be set up.
Saving an entry1.›Save name‹2.Say the name. Do not exceed the speaking
duration of approx. 2 seconds.3.Say the phone number after being prompted
to do so by the system.4.›Save‹
Deleting an entry
1.›Delete name‹2.Say the name after being prompted to do so.3.Confirm the prompt: ›Yes‹
Deleting all entries
1.›Delete phonebook‹2.Confirm the prompt: ›Yes‹3.Confirm the prompt again: ›Yes‹
Reading and selecting entries
1.›Read phonebook‹2.When the desired entry is read aloud:
say ›Dial number‹
Selecting an entry
1.›Dial name‹2.Say the name after being prompted to do so.3.Confirm the prompt: ›Yes‹Adjusting the volume
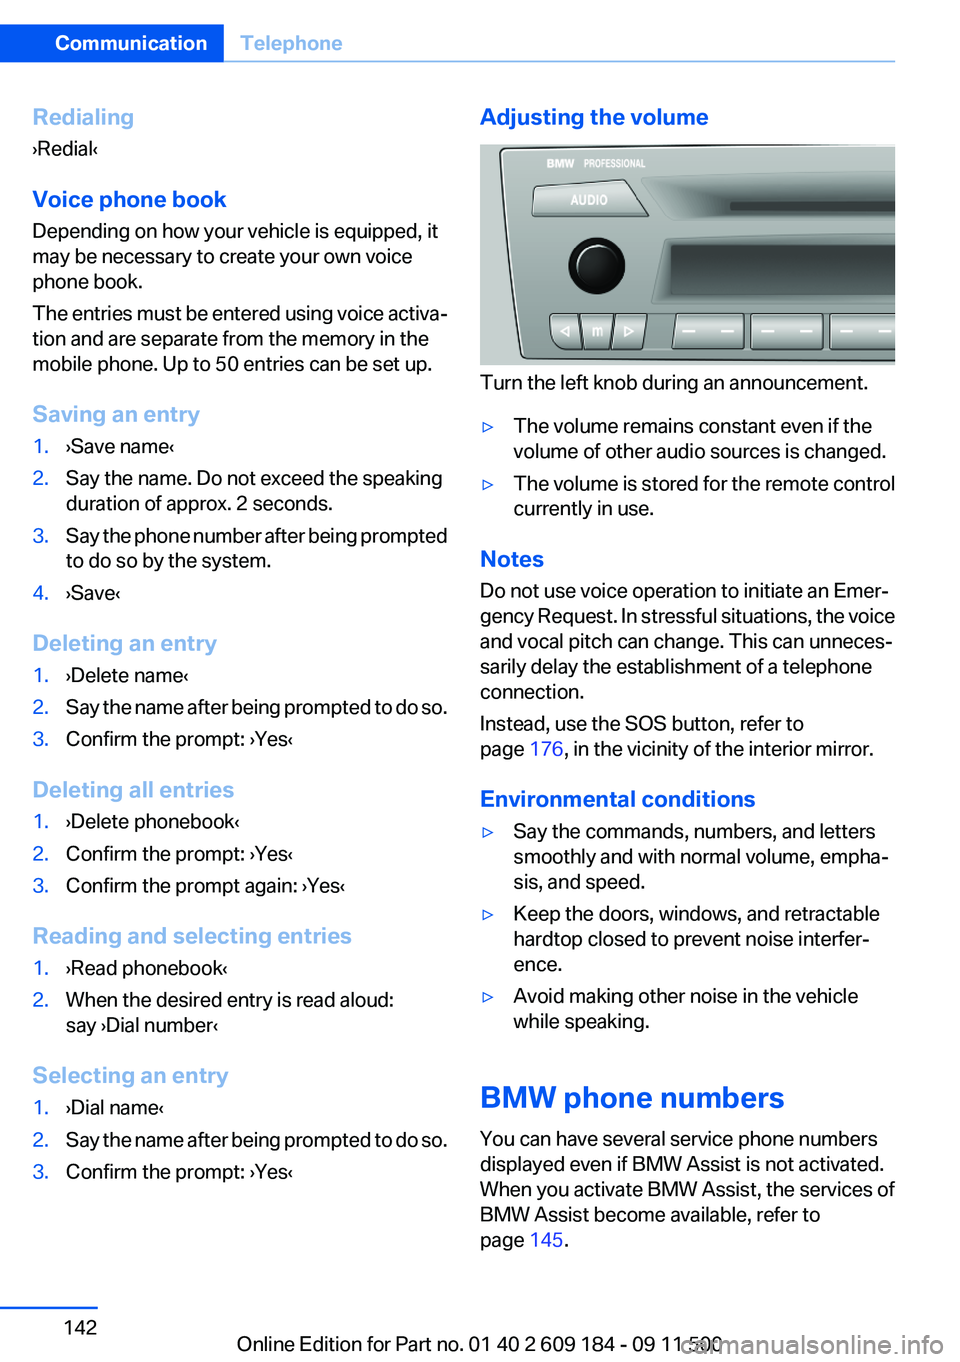
Turn the left knob during an announcement.
▷The volume remains constant even if the
volume of other audio sources is changed.▷The volume is stored for the remote control
currently in use.
Notes
Do not use voice operation to initiate an Emer‐
gency Request. In stressful situations, the voice
and vocal pitch can change. This can unneces‐
sarily delay the establishment of a telephone
connection.
Instead, use the SOS button, refer to
page 176, in the vicinity of the interior mirror.
Environmental conditions
▷Say the commands, numbers, and letters
smoothly and with normal volume, empha‐
sis, and speed.▷Keep the doors, windows, and retractable
hardtop closed to prevent noise interfer‐
ence.▷Avoid making other noise in the vehicle
while speaking.
BMW phone numbers
You can have several service phone numbers
displayed even if BMW Assist is not activated.
When you activate BMW Assist, the services of
BMW Assist become available, refer to
page 145.
Seite 142CommunicationTelephone142
Online Edition for Part no. 01 40 2 609 184 - 09 11 500
Page 208 of 220

Everything from A to Z
IndexA
ABS, Antilock Brake Sys‐ tem 81
Acceleration assistant, Launch Control 58
Accident, refer to Emergency Request, initiating 176
Activated charcoal filter with automatic climate control 95
Adaptive brake light, refer to Brake force display 80
Adaptive light control 70
Additives– Coolant 166
Additives, oil 166
After washing vehicle 183
Airbags 73
Airbags
– Indicator/warning lamps 75
Air circulation, refer to Recir‐
culated air mode 90, 94
Air conditioner 90
Air conditioning mode
– Air conditioner 90– Automatic climate con‐
trol 92– Ventilation 91, 94
Air distribution
– Automatic 93– Individual 90– Manual 90
Air flow rate 90, 93
Airing, refer to Ventila‐ tion 91, 94
Air outlets, refer to Air vents 89
Air pressure, refer to Tire infla‐ tion pressure 155
Air supply– Air conditioner 90– Automatic climate con‐
trol 92– Ventilation 91, 94
Air vents 89
Air vents
– Refer to Ventilation 91, 94
Alarm system 30
Alarm system
– Avoiding unintentional
alarms 31– Ending an alarm 30– Interior motion sensor 31– Tilt alarm sensor 31
All around the headliner 16
All-season tires, refer to Win‐ ter tires 162
Alternating-code hand-held transmitter 97
Alternative oil types 166
Antifreeze
– Coolant 166– Washer fluid 52
Antilock Brake System,
ABS 81
Anti-slip control, refer to DSC 81
Anti-theft protection 22
Anti-theft protection, lug bolts 174
Approved axle loads, refer to Weights 204
Approved engine oils 166
Approved gross vehicle weight, refer to Weights 204
Armrest, refer to Center arm‐ rest 103
Assist 145
Assistance, Roadside Assis‐ tance 177
Assistance systems, refer to
Driving stability control sys‐
tems 81
Assistance when driving off 84
Audio device, external 103
Automatic air distribution 93
Automatic air flow rate 93
Automatic car wash 182
Automatic climate control– Automatic air distribution 93
Automatic cruise control 85
Automatic Curb Monitor 40
Automatic Engine Start/Stop Function 47
Automatic headlamp con‐ trol 69
Automatic recirculated air control 94
Automatic transmission
– 7-gear with dual clutch 55– 8-gear 53
AUTO program with automatic
climate control 93
AUX-IN port 103, 127
Average fuel consumption 62
Average fuel consumption
– Setting the units 63
Average speed 62
Axle loads, refer to Weights 204
B
Backrest curvature, refer to Lumbar support 37
Backrests, refer to Seat ad‐ justment 36
Backrest width adjustment 37
Backup lamps
– Bulb replacement 172, 173Seite 208ReferenceEverything from A to Z208
Online Edition for Part no. 01 40 2 609 184 - 09 11 500