2012 BMW X5M reset
[x] Cancel search: resetPage 92 of 317

Approx. 155 miles/200 km.
▷ With a medium load:
2
persons, cargo area full, or 4 persons with‐
out luggage:
Approx. 94 miles/150 km.
▷ With a full load:
4 or more persons, cargo area full:
Approx. 30 miles/50 km.
The possible driving distance after a loss of tire
inflation pressure depends on the cargo load
and the driving style and conditions.
When the vehicle is driven with a damaged tire,
its handling characteristics change, e.g., re‐
duced lane stability during braking, a longer
braking distance, and altered self-steering
properties. Adjust your driving style accord‐
ingly. Avoid abrupt steering maneuvers or driv‐
ing over obstacles, e. g., curbs, potholes, etc.
Because
the possible driving distance depends
on how the vehicle is used during the trip, the
actual distance may be smaller or greater de‐
pending on the driving speed, road conditions,
external temperature, cargo load, etc.
Continued driving with a flat tire
Drive moderately and do not exceed a
speed of 50 mph/80 km/h.
A loss of tire inflation pressure results in a
change in the handling characteristics, e.g., re‐
duced lane stability during braking, a longer
braking distance and altered self-steering prop‐
erties.◀
Final tire failure
Vibrations or loud noises while driving can
indicate the final failure of the tire. Reduce speed
and stop; otherwise, pieces of the tire could
come loose and cause an accident. Do not con‐
tinue driving, and contact your service center.◀
Message when the system was not
reset
The yellow warning lamp lights up. A
message appears on the Control Dis‐
play. The system detected a wheel change but was
not reset.
Warnings regarding the current tire inflation
pressure are not reliable.
Check the tire inflation pressure and reset the
system.
Malfunction
The
small warning lamp flashes in yel‐
low and then lights up continuously;
the larger warning lamp comes on in
yellow. On the Control Display, the
tires are shown in gray and a message appears.
No flat tire can be detected.
Display in the following situations:
▷ If a wheel without TPM electronics is fitted,
for instance a compact wheel*: have the
service center check it if necessary.
▷ Malfunction: have the system checked by
your service center.
▷ TPM could not be fully reset. Reset the sys‐
tem again.
▷ Disturbance by systems or devices with the
same
radio frequency: after leaving the area
of the disturbance, the system automatically
becomes active again.
Declaration according to NHTSA/
FMVSS 138 Tire Pressure Monitoring
Systems
Each tire, including the spare (if provided)
should be checked monthly when cold and in‐
flated
to the inflation pressure recommended by
the vehicle manufacturer on the vehicle placard
or tire inflation pressure label. (If your vehicle has
tires of a different size than the size indicated on
the vehicle placard or tire inflation pressure la‐
bel, you should determine the proper tire infla‐
tion pressure for those tires.)
As an added safety feature, your vehicle has
been equipped with a tire pressure monitoring
system (TPMS) that illuminates a low tire pres‐
sure telltale when one or more of your tires is
significantly under-inflated. Accordingly, when
the low tire pressure telltale illuminates, you Seite 92
92 Online Edition for Part no. 01 40 2 606 735 - 03 11 500
Safety
Page 126 of 317
The system can be switched on and off at any
external
temperature, either directly or by using
a preset switch-on time. It remains switched on
for 30 minutes.
Since the system uses a substantial amount of
electrical current, refrain from activating it twice
in succession without allowing the battery to be
recharged in normal operation between use.
Open the vents to allow air to flow out.
They can be operated via iDrive.
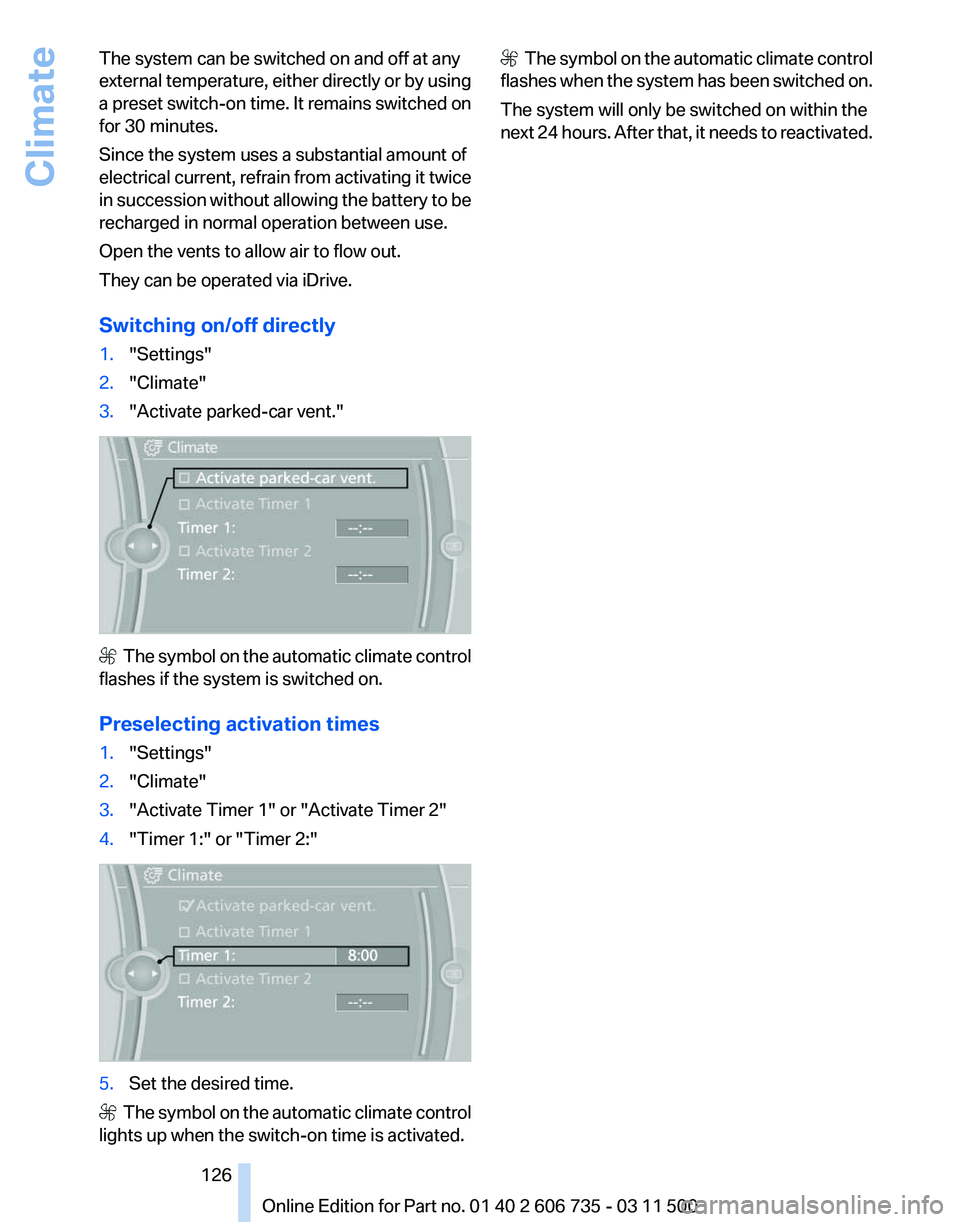
Switching on/off directly
1. "Settings"
2. "Climate"
3. "Activate parked-car vent." The symbol on the automatic climate control
flashes if the system is switched on.
Preselecting activation times
1. "Settings"
2. "Climate"
3. "Activate Timer 1" or "Activate Timer 2"
4. "Timer 1:" or "Timer 2:" 5.
Set the desired time. The symbol on the automatic climate control
lights up when the switch-on time is activated. The symbol on the automatic climate control
flashes when the system has been switched on.
The system will only be switched on within the
next 24 hours. After that, it needs to reactivated.
Seite 126
126 Online Edition for Part no. 01 40 2 606 735 - 03 11 500
Climate
Page 173 of 317
Volume
▷
"Speed volume": speed-dependent volume
control.
▷ "PDC": volume of the PDC signal* com‐
pared to the entertainment sound output.
▷ "Gong": volume of the signal, such as the
safety belt reminder, compared to the en‐
tertainment sound output.
▷ "Microphone": volume of the microphone*
during a phone call.
▷ "Loudspeak.":
volume of the loudspeakers*
during a phone call.
The following volumes are only stored for the
respective paired telephone:
"Microphone",
"Loudspeak.".
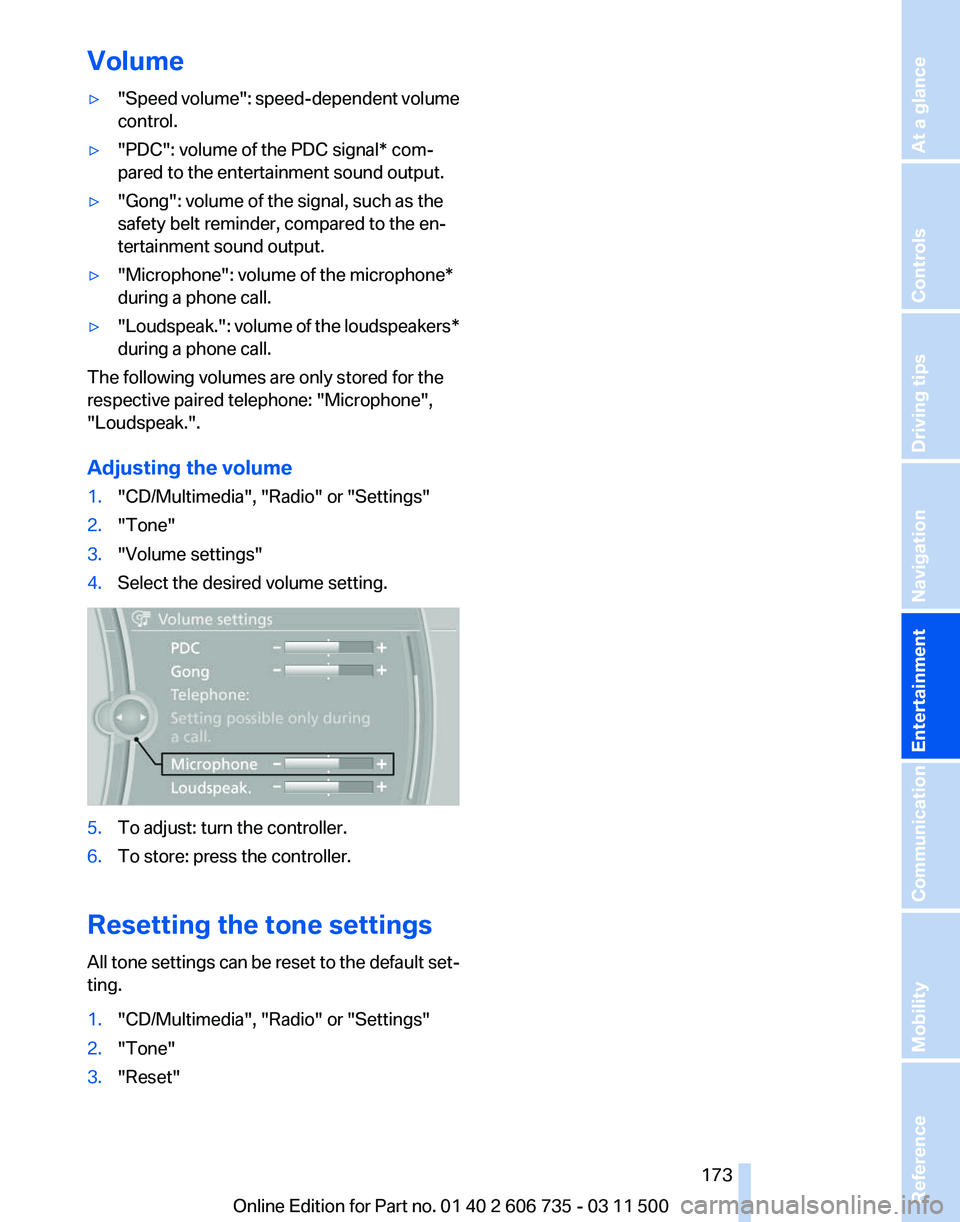
Adjusting the volume
1. "CD/Multimedia", "Radio" or "Settings"
2. "Tone"
3. "Volume settings"
4. Select the desired volume setting. 5.
To adjust: turn the controller.
6. To store: press the controller.
Resetting the tone settings
All
tone settings can be reset to the default set‐
ting.
1. "CD/Multimedia", "Radio" or "Settings"
2. "Tone"
3. "Reset"
Seite 173
173Online Edition for Part no. 01 40 2 606 735 - 03 11 500
Reference Mobility Communication
Entertainment Navigation Driving tips Controls At a glance
Page 180 of 317
Stored stations
General information
It is possible to store up to 40 stations.
Calling up a station
1.
"Radio"
2. "Presets"
3. Select the desired station.
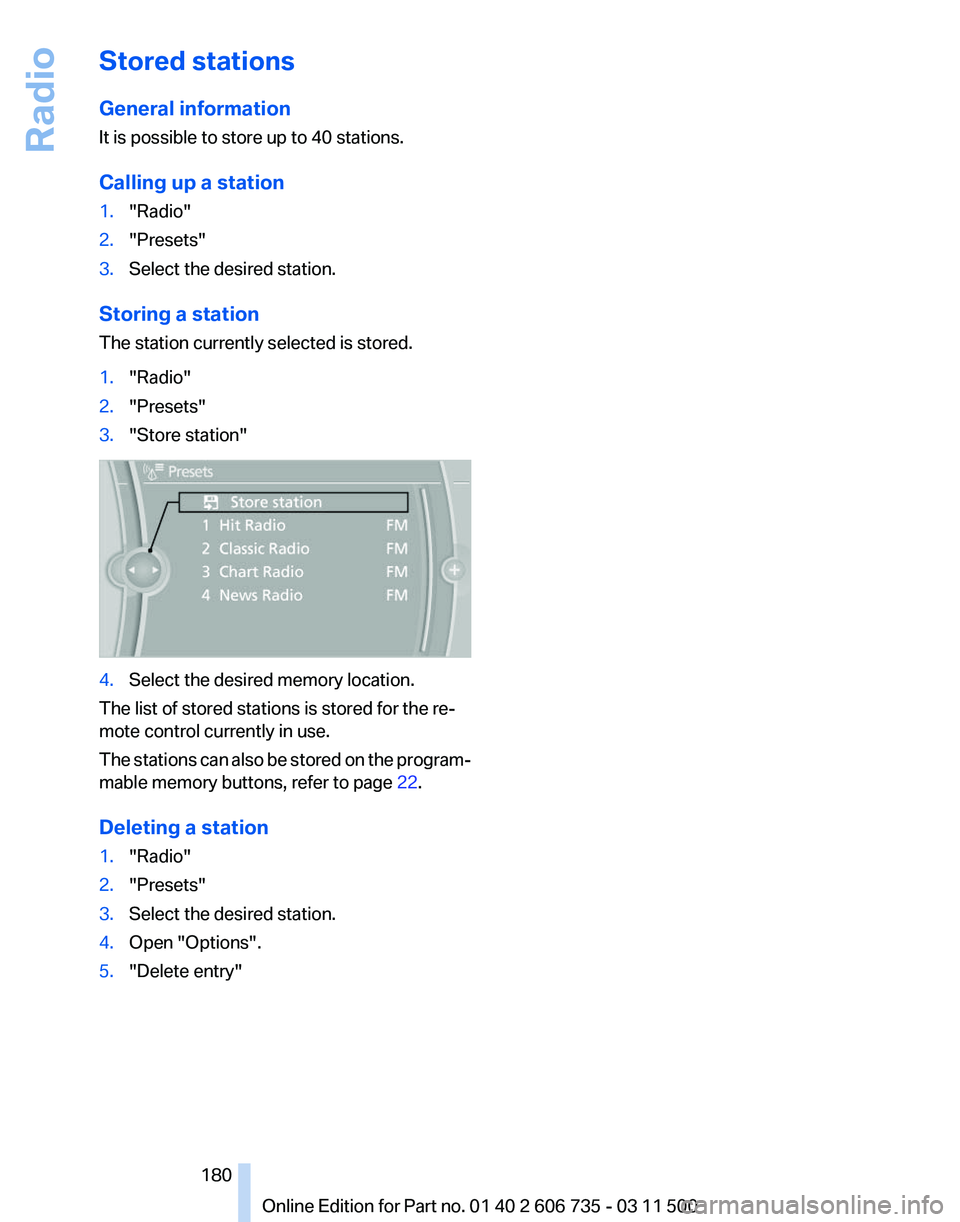
Storing a station
The station currently selected is stored.
1. "Radio"
2. "Presets"
3. "Store station" 4.
Select the desired memory location.
The list of stored stations is stored for the re‐
mote control currently in use.
The
stations can also be stored on the program‐
mable memory buttons, refer to page 22.
Deleting a station
1. "Radio"
2. "Presets"
3. Select the desired station.
4. Open "Options".
5. "Delete entry"
Seite 180
180 Online Edition for Part no. 01 40 2 606 735 - 03 11 500
Radio
Page 196 of 317
Notes
Do not expose the audio device to extreme en‐
vironmental conditions, such as very high tem‐
peratures; refer to the audio device operating
instructions.
Depending on the configuration of the audio
files, e.g., bit rates greater than 256 kbit/s, the
files may not play back correctly in each case.
Information on connection
▷
The connected audio device is supplied with
a
max. power of 500 mA if supported by the
device. Therefore, do not additionally con‐
nect the device to a socket in the vehicle;
otherwise, playback may be compromised.
▷ Do not use force when plugging the con‐
nector into the USB interface.
▷ Do not connect devices such as fans or
lamps to the USB audio interface.
▷ Do not connect USB hard drives.
▷ Do not use the USB audio interface to re‐
charge external devices.
Bluetooth audio*
At a glance
▷ Music files on external devices such as audio
devices or mobile phones can be played
back via Bluetooth.
Use of a mobile phone as an audio source,
refer to page 217.
▷ Bluetooth® is a registered trademark of
Bluetooth® SIG, Inc.
▷ The sound is output on the vehicle loud‐
speakers.
▷ The volume of the sound output is depend‐
ent on the device. If necessary, adjust the
volume on the device.
▷ Up to four external devices can be paired
with the vehicle.
Requirements
▷ The device is suitable. Details can be found
at www.bmw.com/bluetooth. ▷
The device is ready for operation.
▷ The ignition is switched on.
▷ Bluetooth is activated on the vehicle, refer to
page 217, and on the device.
▷ Bluetooth presettings must be made on the
device, such as for a connection without
confirmation or visibility; refer to the device
operating instructions.
▷ A number with at least four and a maximum
of
16 digits is defined as the Bluetooth pass‐
key. It is only required once for pairing.
Pairing and connecting Pairing a device
To
avoid becoming distracted and posing
an unnecessary hazard both to your own vehi‐
cle's occupants and to other road users, only
pair the device while the vehicle is stationary.◀
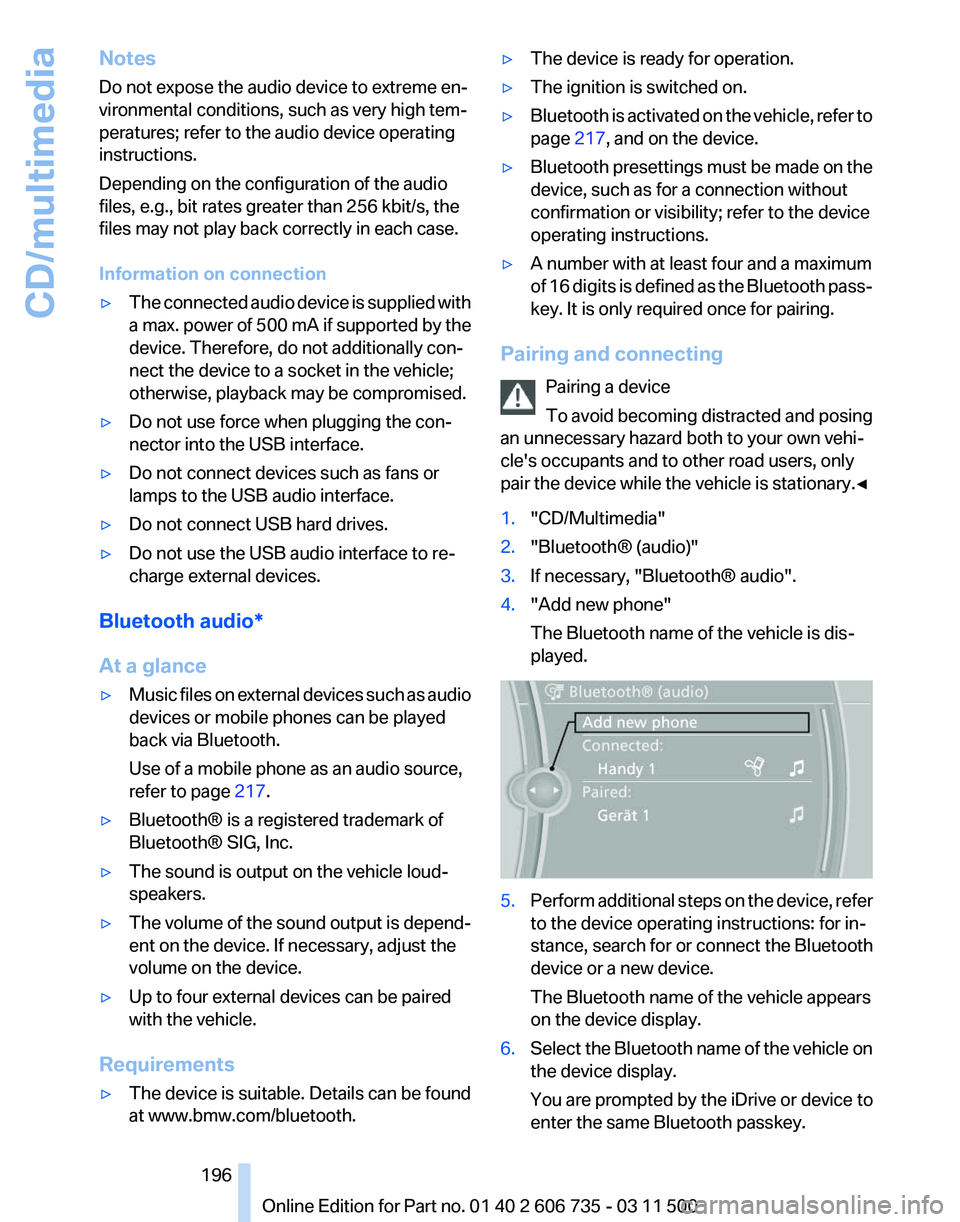
1. "CD/Multimedia"
2. "Bluetooth® (audio)"
3. If necessary, "Bluetooth® audio".
4. "Add new phone"
The Bluetooth name of the vehicle is dis‐
played. 5.
Perform additional steps on the device, refer
to the device operating instructions: for in‐
stance, search for or connect the Bluetooth
device or a new device.
The Bluetooth name of the vehicle appears
on the device display.
6. Select the Bluetooth name of the vehicle on
the device display.
You are prompted by the iDrive or device to
enter the same Bluetooth passkey. Seite 196
196 Online Edition for Part no. 01 40 2 606 735 - 03 11 500
CD/multimedia
Page 205 of 317
▷
"Tone":
▷"Treble / Bass" and "Balance": sepa‐
rately adjustable for the left and right
headphones and the infrared head‐
phones.
▷ "Reset": the settings are reset to the de‐
fault values.
▷ "DVD format":
▷"Standard"
▷ "Zoom": full-screen playback.
▷ "Language":
language of the DVD playback.
The language advances one setting each
time the menu item is selected.
▷ "Subtitles":
language of the subtitles or turn
off the subtitles.
▷ "Title": select individual tracks on the DVD.
▷ "Angle of view": camera angle.
Information or symbols that appear during
the
playback of a film generally point out dif‐
ferent camera angles. These are usually only
briefly available.
▷ "Menu": open the DVD-specific menu.
▷ "Return": exit the menu, or: Press the buttons on the remote con‐
trol.
Many DVDs offer dialogs and subtitles in various
languages
or scene descriptions for the hearing
impaired. These functions are stored on the
DVD.
With some DVDs, it is only possible to select
language, subtitles, camera angle, or title by us‐
ing the DVD-specific menu. Consult the infor‐
mation accompanying your DVD.
Opening the DVD-specific menu
Additional functions may be available on DVDs.
It is thus possible, for example, to select from
among several possible actions or to access in‐
formation about the film.
1. Press the button on the remote control
during playback.
2. Select "Menu".
3. Press the button. On some DVDs, you can use "Main menu"
and "Title" to access additional menus in
which you can select music scenes, for ex‐
ample.
To make a selection:
1. Select the symbol.
2. Press the button until the desired func‐
tion is selected.
3. Select the arrow.
4. Press the button.
To return to the start menu:
1. Select the arrow.
2. Press the button.
You can also select language, subtitles, camera
angle,
or title in the DVD-specific menu. Consult
the information accompanying your DVD.
Compressed video files
Playback
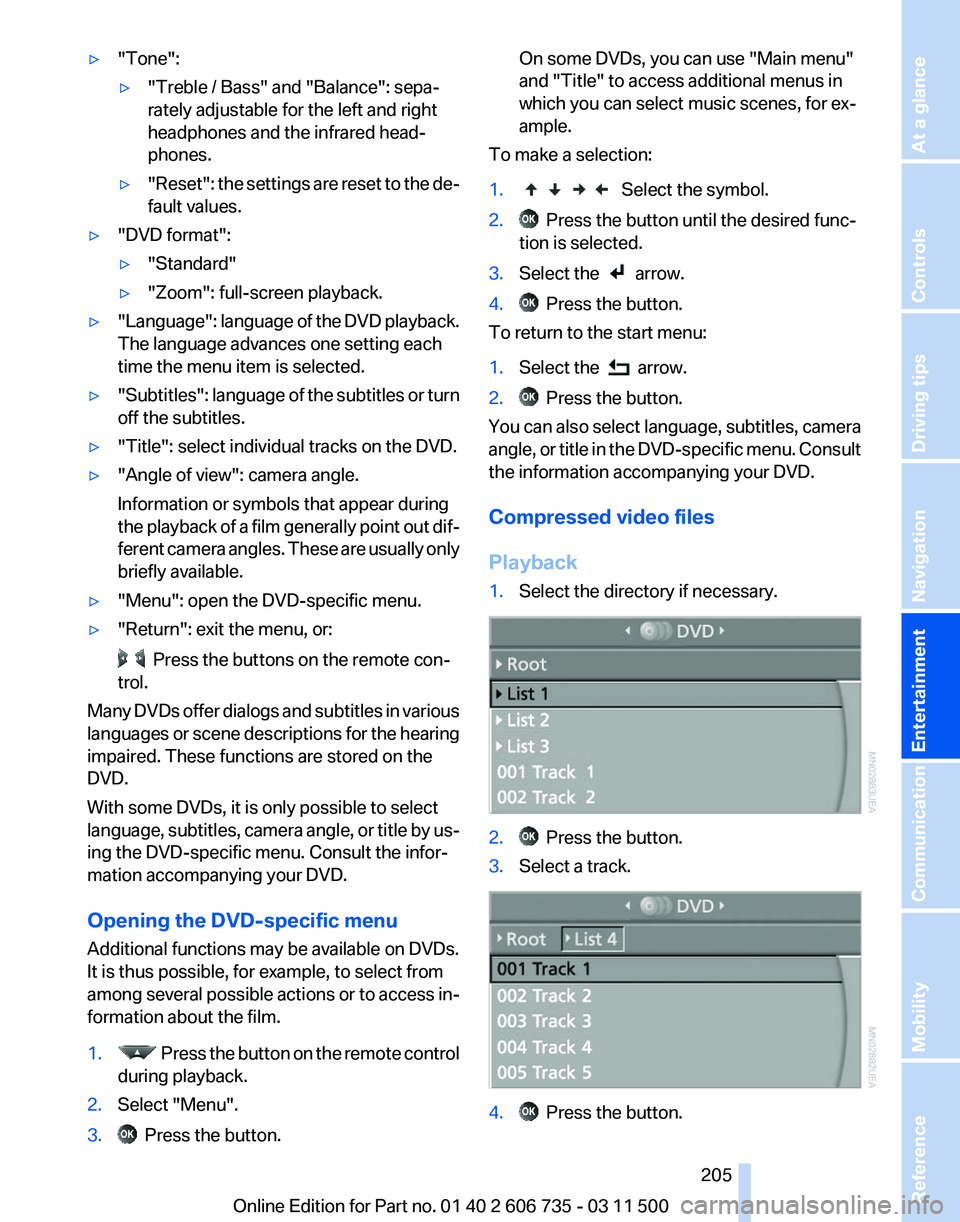
1. Select the directory if necessary. 2. Press the button.
3. Select a track. 4. Press the button.
Seite 205
205Online Edition for Part no. 01 40 2 606 735 - 03 11 500
Reference Mobility Communication
Entertainment Navigation Driving tips Controls At a glance
Page 207 of 317
Settings and playback functions for
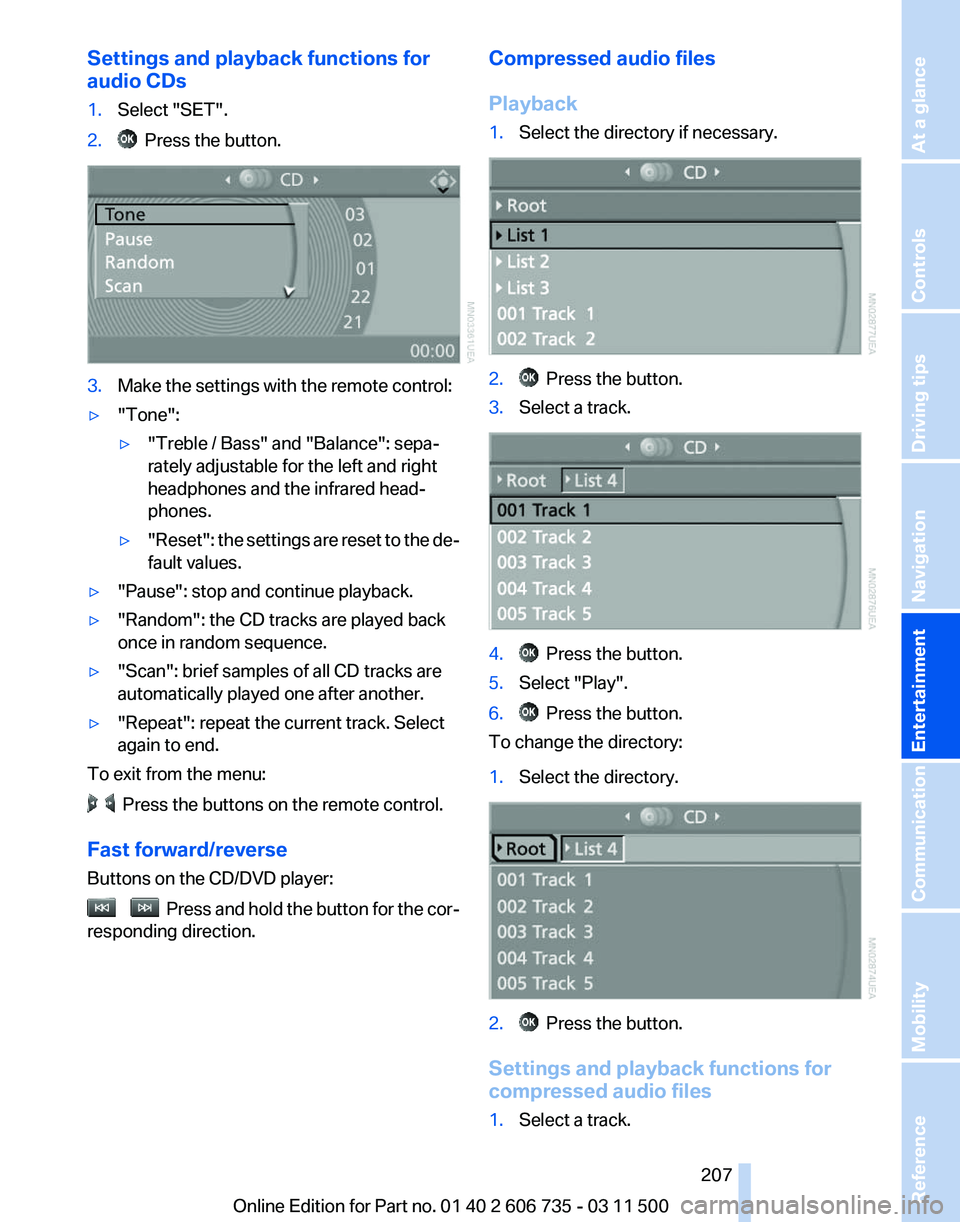
audio CDs
1.
Select "SET".
2. Press the button.
3.
Make the settings with the remote control:
▷ "Tone":
▷"Treble / Bass" and "Balance": sepa‐
rately adjustable for the left and right
headphones and the infrared head‐
phones.
▷ "Reset": the settings are reset to the de‐
fault values.
▷ "Pause": stop and continue playback.
▷ "Random": the CD tracks are played back
once in random sequence.
▷ "Scan": brief samples of all CD tracks are
automatically played one after another.
▷ "Repeat": repeat the current track. Select
again to end.
To exit from the menu: Press the buttons on the remote control.
Fast forward/reverse
Buttons on the CD/DVD player: Press and hold the button for the cor‐
responding direction. Compressed audio files
Playback
1.
Select the directory if necessary. 2. Press the button.
3. Select a track. 4. Press the button.
5. Select "Play".
6. Press the button.
To change the directory:
1. Select the directory. 2. Press the button.
Settings and playback functions for
compressed audio files
1. Select a track.
Seite 207
207Online Edition for Part no. 01 40 2 606 735 - 03 11 500
Reference Mobility Communication
Entertainment Navigation Driving tips Controls At a glance
Page 208 of 317
2. Press the button.
3. Make the settings with the remote control:
▷ "Tone":
▷"Treble / Bass" and "Balance": sepa‐
rately adjustable for the left and right
headphones and the infrared head‐
phones.
▷ "Reset": the settings are reset to the de‐
fault values.
▷ "Pause": stop and continue playback.
▷ "Scan directory": briefly sample the tracks
in the current directory.
▷ "Scan all": briefly sample all tracks.
▷ "Random directory": play the tracks in the
current directory in a random sequence.
▷ "Random
all": play all tracks in a random se‐
quence.
▷ "Repeat track": repeat the selected track.
▷ "Repeat directory": repeat the tracks in the
current directory.
▷ "Details": display any stored information on
the current track.
To exit from the menu: Press the buttons on the remote control.
Displaying images from CD/
DVD
1. Push the CD/DVD into the drive with the la‐
beled side facing upward. The CD/DVD is
automatically pulled in.
2. Open the start menu with the remote con‐
trol.
3. Select "Photo".
4. Press the button.
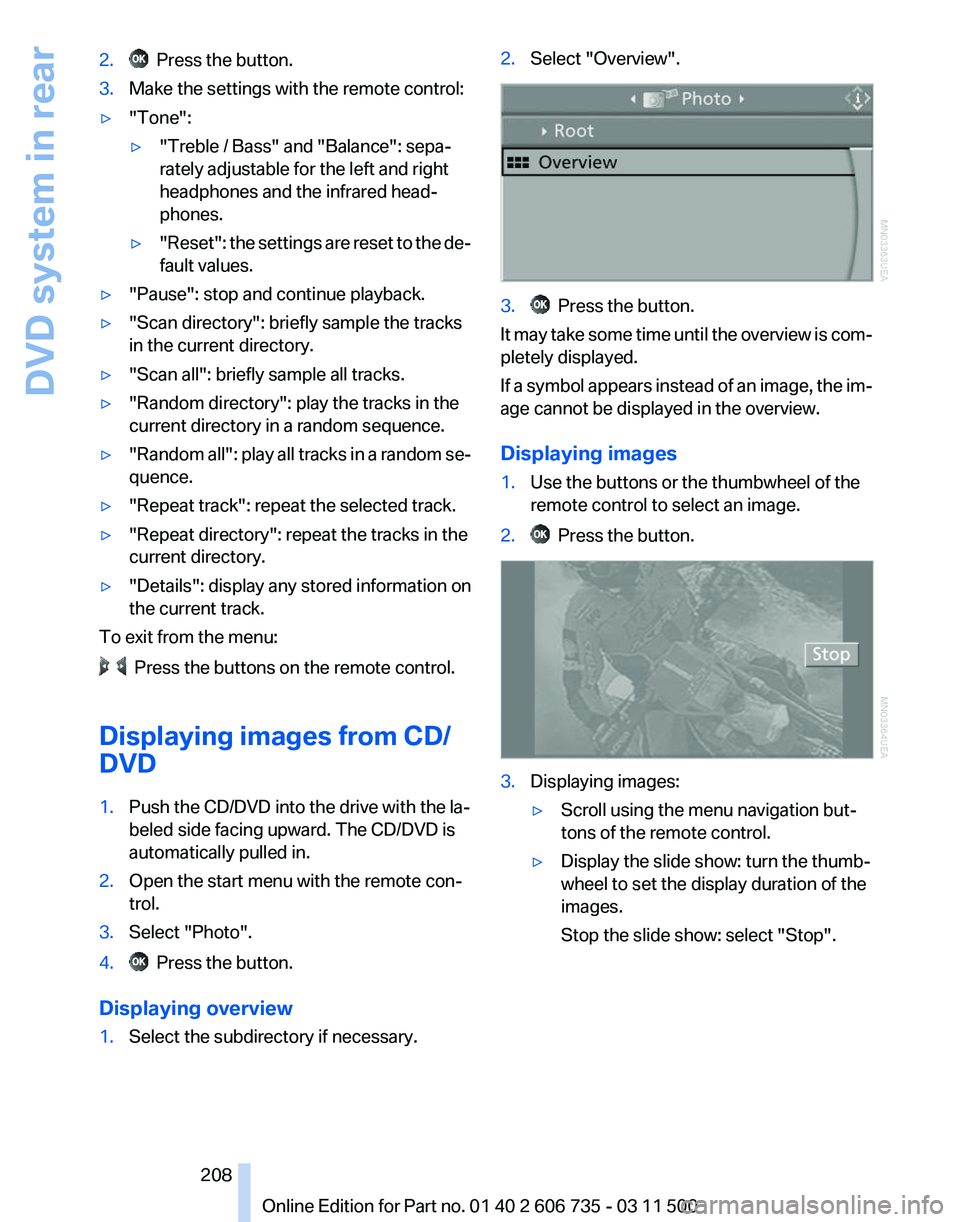
Displaying overview
1. Select the subdirectory if necessary. 2.
Select "Overview". 3. Press the button.
It may take some time until the overview is com‐
pletely displayed.
If
a symbol appears instead of an image, the im‐
age cannot be displayed in the overview.
Displaying images
1. Use the buttons or the thumbwheel of the
remote control to select an image.
2. Press the button.
3.
Displaying images:
▷Scroll using the menu navigation but‐
tons of the remote control.
▷ Display the slide show: turn the thumb‐
wheel to set the display duration of the
images.
Stop the slide show: select "Stop".
Seite 208
208 Online Edition for Part no. 01 40 2 606 735 - 03 11 500
DVD system in rear