2012 BMW 650I XDRIVE COUPE light
[x] Cancel search: lightPage 257 of 303
Engine oilVehicle equipment
All standard, country-specific and optional
equipment that is offered in the model series is
described in this chapter. Therefore, equipment
is also described that is not available in a vehicle,
e. g., because of the selected optional equip‐
ment or country variant. This also applies for
safety-related functions and systems.
General information
The engine oil consumption is dependent on the
driving style and driving conditions.
Therefore, regularly check the engine oil level
after refueling.
Check oil level
The concept
The oil level is monitored electronically and dis‐
played on the Control Display.
Requirements▷The engine must be running and warm after
the vehicle has been driven for at least
6 miles/10 km.▷The vehicle is stopped or being driven on a
level roadway.
Displaying the oil level
1."Vehicle Info"2."Vehicle status"3. "Engine oil level"
Possible messages
▷"Engine oil level OK"▷"Measurement not possible at this time."▷"Measuring engine oil level..."Duration with the engine running: ap‐
prox. 3 minutes.
Duration while driving: approx. 5 minutes.▷"Engine oil level below minimum. Add 1
quart!"
Add oil within the next 125 miles/200 km.▷"Engine oil level too high! Have this
checked."
Have the vehicle checked immediately.
Too much engine oil
Have the vehicle checked immedi‐
ately; otherwise, surplus oil can lead to en‐
gine damage.◀▷"Measurement inactive. Have this
checked."
Note the newly calculated remaining mile‐
age until the next oil service. Have the sys‐
tem checked as soon as possible.
Adding engine oil
Filler neck
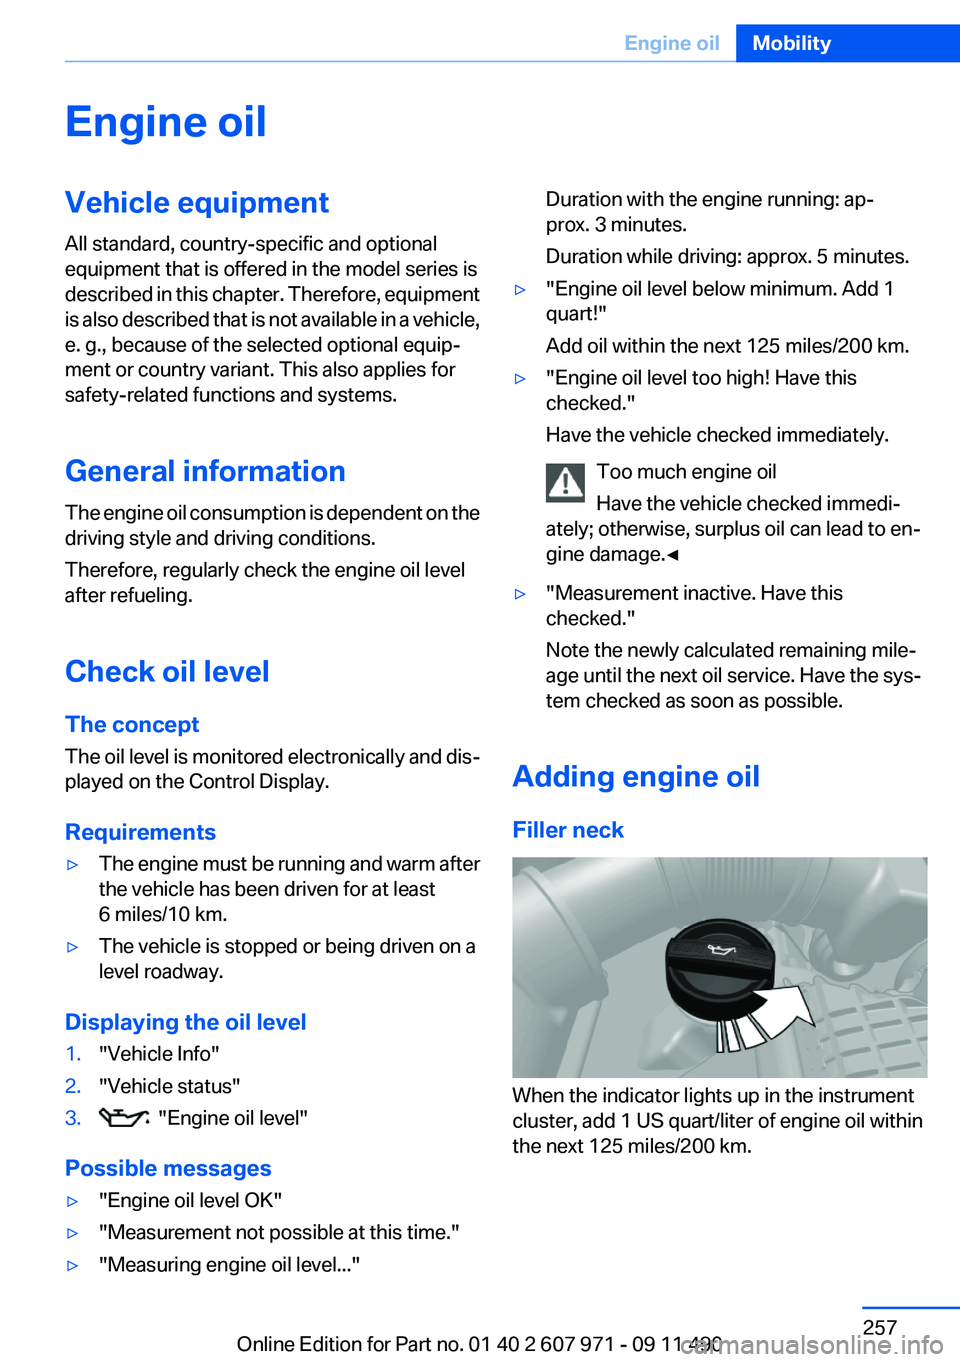
When the indicator lights up in the instrument
cluster, add 1 US quart/liter of engine oil within
the next 125 miles/200 km.
Seite 257Engine oilMobility257
Online Edition for Part no. 01 40 2 607 971 - 09 11 490
Page 259 of 303
Coolant level
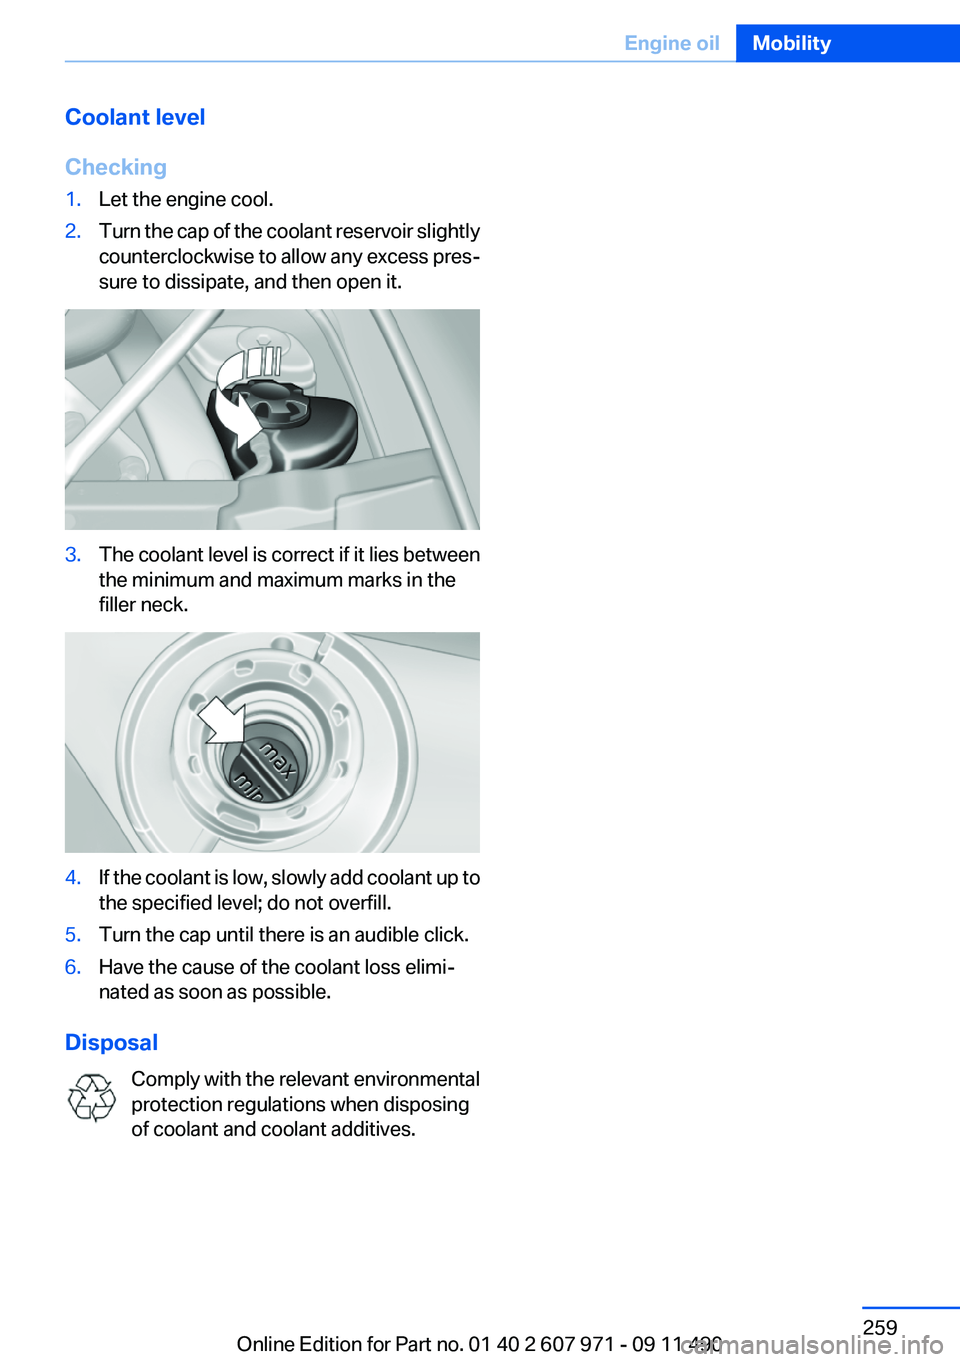
Checking1.Let the engine cool.2.Turn the cap of the coolant reservoir slightly
counterclockwise to allow any excess pres‐
sure to dissipate, and then open it.3.The coolant level is correct if it lies between
the minimum and maximum marks in the
filler neck.4.If the coolant is low, slowly add coolant up to
the specified level; do not overfill.5.Turn the cap until there is an audible click.6.Have the cause of the coolant loss elimi‐
nated as soon as possible.
Disposal
Comply with the relevant environmental
protection regulations when disposing
of coolant and coolant additives.
Seite 259Engine oilMobility259
Online Edition for Part no. 01 40 2 607 971 - 09 11 490
Page 261 of 303
Socket for OBD Onboard
Diagnosis
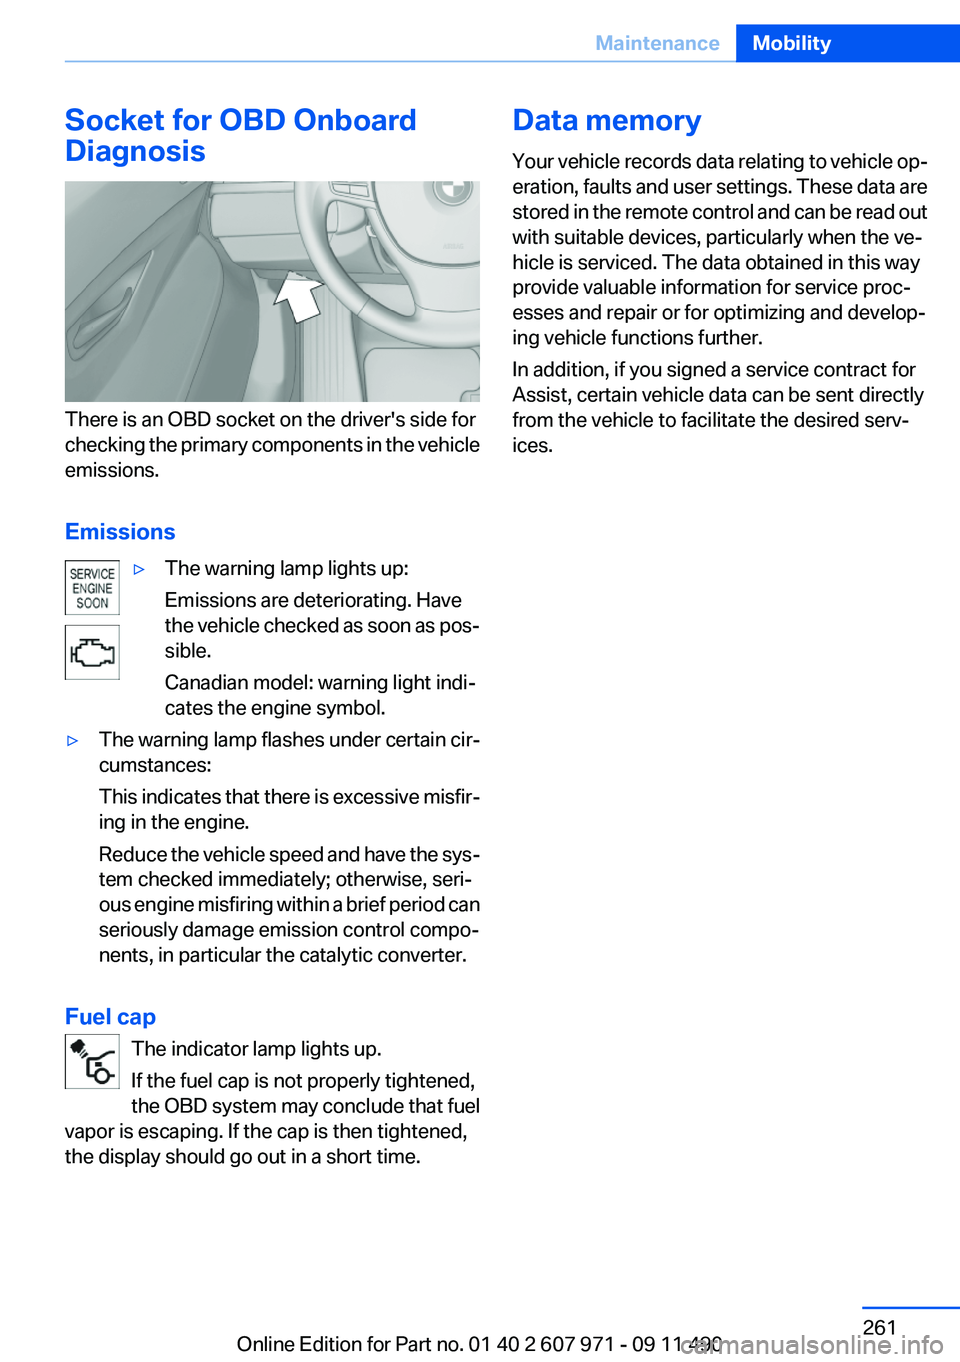
There is an OBD socket on the driver's side for
checking the primary components in the vehicle
emissions.
Emissions
▷The warning lamp lights up:
Emissions are deteriorating. Have
the vehicle checked as soon as pos‐
sible.
Canadian model: warning light indi‐
cates the engine symbol.▷The warning lamp flashes under certain cir‐
cumstances:
This indicates that there is excessive misfir‐
ing in the engine.
Reduce the vehicle speed and have the sys‐
tem checked immediately; otherwise, seri‐
ous engine misfiring within a brief period can
seriously damage emission control compo‐
nents, in particular the catalytic converter.
Fuel cap
The indicator lamp lights up.
If the fuel cap is not properly tightened,
the OBD system may conclude that fuel
vapor is escaping. If the cap is then tightened,
the display should go out in a short time.
Data memory
Your vehicle records data relating to vehicle op‐
eration, faults and user settings. These data are
stored in the remote control and can be read out
with suitable devices, particularly when the ve‐
hicle is serviced. The data obtained in this way
provide valuable information for service proc‐
esses and repair or for optimizing and develop‐
ing vehicle functions further.
In addition, if you signed a service contract for
Assist, certain vehicle data can be sent directly
from the vehicle to facilitate the desired serv‐
ices.Seite 261MaintenanceMobility261
Online Edition for Part no. 01 40 2 607 971 - 09 11 490
Page 263 of 303
Danger of burns
Only change bulbs when they are cool;
otherwise, there is the danger of getting
burned.◀
Working on the lighting system
When working on the lighting system, you
should always switch off the lights affected to
prevent short circuits.
To avoid possible injury or equipment damage
when replacing bulbs, observe any instructions
provided by the bulb manufacturer.◀
Do not perform work/bulb replacement on
xenon headlamps
Have any work on the xenon lighting system, in‐
cluding bulb replacement, performed only by a
service center. Due to the high voltage present
in the system, there is the danger of fatal injuries
if work is carried out improperly.◀
Do not touch the bulbs
Do not touch the glass of new bulbs with
your bare hands, as even minute amounts of
contamination will burn into the bulb's surface
and reduce its service life.
Use a clean tissue, cloth or something similar, or
hold the bulb by its base.◀
Light-emitting diodes (LEDs)
Light-emitting diodes installed behind a cover
serve as the light source for controls, display el‐
ements and other equipment.
These light-emitting diodes, which are related
to conventional lasers, are officially designated
as Class 1 light-emitting diodes.
Do not remove the covers
Do not remove the covers, and never stare
into the unfiltered light for several hours; other‐
wise, irritation of the retina could result.◀Headlamp glass
Condensation can form on the inside of the ex‐
ternal lamps in cool or humid weather. When
driving with the light switched on, the conden‐
sation evaporates after a short time. The head‐
lamp glasses do not need to be changed.
If the headlamps do not dim despite driving with
the light switched on, increasing humidity forms,
e. g. water droplets in the light, have the service
center check this.
Front lamps, bulb replacement
Xenon headlamps
Because of the long life of these bulbs, the like‐
lihood of failure is very low. Switching the lamps
on and off frequently shortens their life.
If a bulb fails, switch on the front fog lamps and
continue the trip with great care. Comply with
local regulations.
Do not perform work/bulb replacement on
xenon headlamps
Have any work on the xenon lighting system, in‐
cluding bulb replacement, performed only by a
service center. Due to the high voltage present
in the system, there is the danger of fatal injuries
if work is carried out improperly.◀
Low beams and high beams are designed with
xenon technology.
For checking and adjusting headlamp aim,
please contact your BMW center.
LED headlamps, Light-emitting diodes
(LEDs) or light modules
With Xenon-headlamps, the following lamps are
designed with LED technology or as a light mod‐
ule:▷Parking lamps and roadside parking lamps▷Turn signal lamps▷Front fog lamps▷Daytime running lightsSeite 263Replacing componentsMobility263
Online Edition for Part no. 01 40 2 607 971 - 09 11 490
Page 264 of 303
With LED headlamps, all front lamps are de‐
signed with LED technology or as a light module.
Contact your service center in the event of a
malfunction.
Follow the General instructions on lamps and
bulbs., refer to page 262
Turning lamp on the Xenon headlamp
Follow the General instructions on lamps and
bulbs., refer to page 262
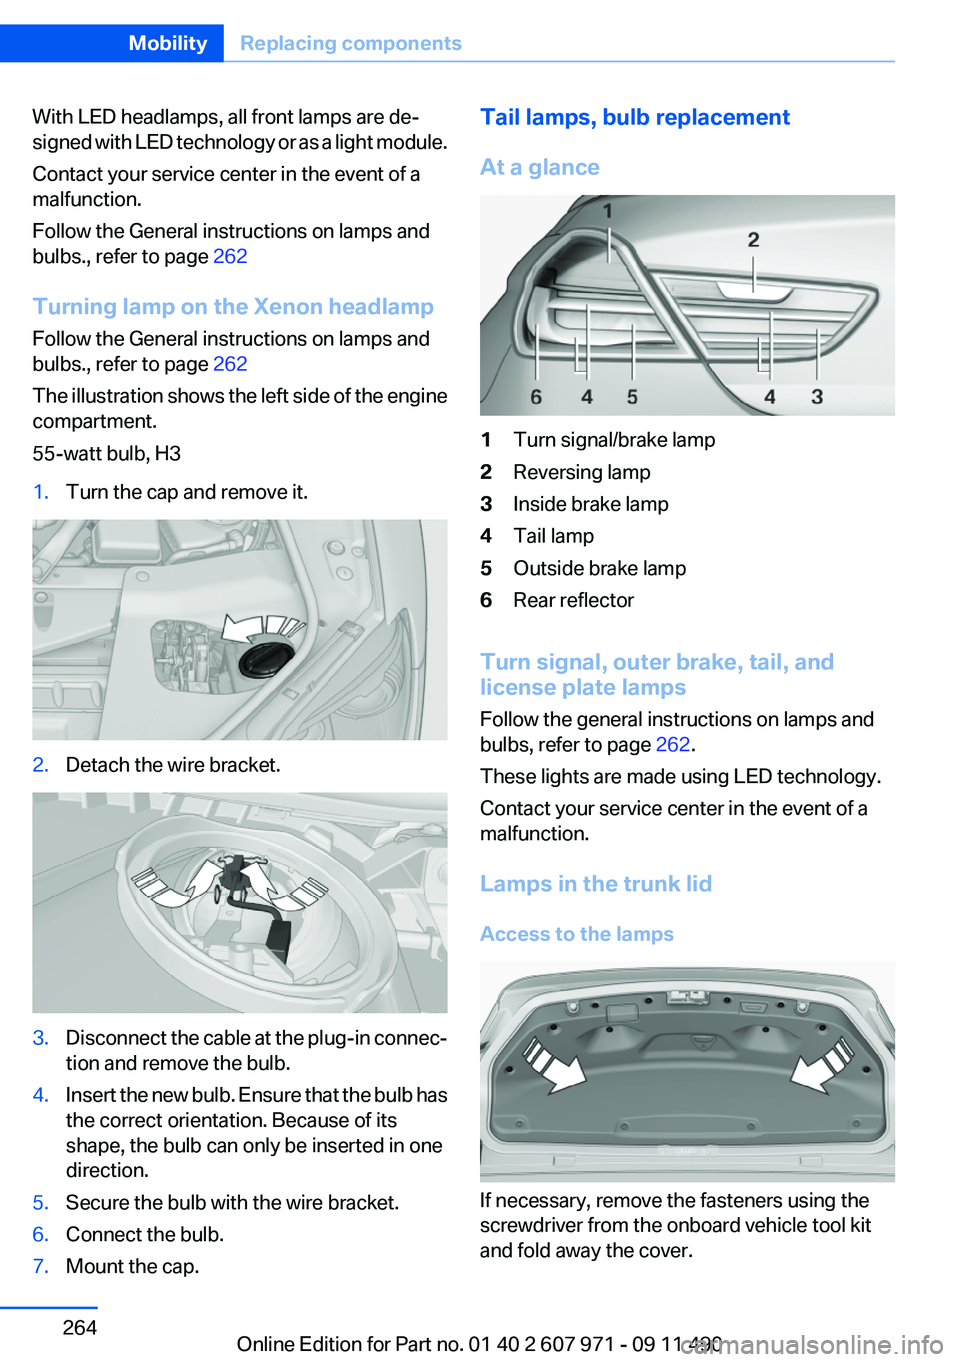
The illustration shows the left side of the engine
compartment.
55-watt bulb, H31.Turn the cap and remove it.2.Detach the wire bracket.3.Disconnect the cable at the plug-in connec‐
tion and remove the bulb.4.Insert the new bulb. Ensure that the bulb has
the correct orientation. Because of its
shape, the bulb can only be inserted in one
direction.5.Secure the bulb with the wire bracket.6.Connect the bulb.7.Mount the cap.Tail lamps, bulb replacement
At a glance1Turn signal/brake lamp2Reversing lamp3Inside brake lamp4Tail lamp5Outside brake lamp6Rear reflector
Turn signal, outer brake, tail, and
license plate lamps
Follow the general instructions on lamps and
bulbs, refer to page 262.
These lights are made using LED technology.
Contact your service center in the event of a
malfunction.
Lamps in the trunk lid
Access to the lamps
If necessary, remove the fasteners using the
screwdriver from the onboard vehicle tool kit
and fold away the cover.
Seite 264MobilityReplacing components264
Online Edition for Part no. 01 40 2 607 971 - 09 11 490
Page 267 of 303
Breakdown assistanceVehicle equipment
All standard, country-specific and optional
equipment that is offered in the model series is
described in this chapter. Therefore, equipment
is also described that is not available in a vehicle,
e. g., because of the selected optional equip‐
ment or country variant. This also applies for
safety-related functions and systems.
Hazard warning flashers
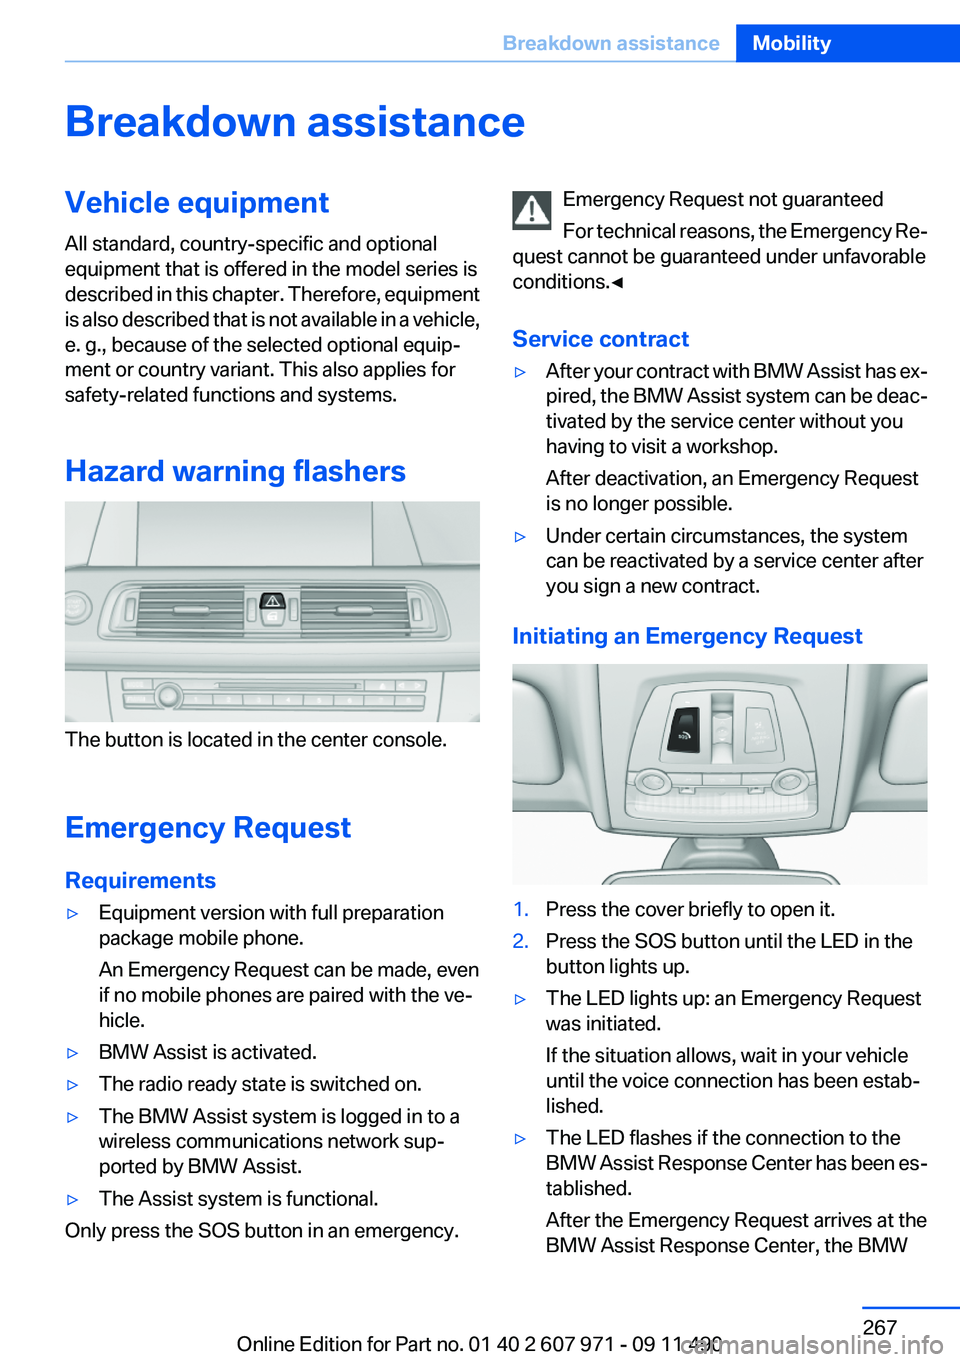
The button is located in the center console.
Emergency Request
Requirements
▷Equipment version with full preparation
package mobile phone.
An Emergency Request can be made, even
if no mobile phones are paired with the ve‐
hicle.▷BMW Assist is activated.▷The radio ready state is switched on.▷The BMW Assist system is logged in to a
wireless communications network sup‐
ported by BMW Assist.▷The Assist system is functional.
Only press the SOS button in an emergency.
Emergency Request not guaranteed
For technical reasons, the Emergency Re‐
quest cannot be guaranteed under unfavorable
conditions.◀
Service contract▷After your contract with BMW Assist has ex‐
pired, the BMW Assist system can be deac‐
tivated by the service center without you
having to visit a workshop.
After deactivation, an Emergency Request
is no longer possible.▷Under certain circumstances, the system
can be reactivated by a service center after
you sign a new contract.
Initiating an Emergency Request
1.Press the cover briefly to open it.2.Press the SOS button until the LED in the
button lights up.▷The LED lights up: an Emergency Request
was initiated.
If the situation allows, wait in your vehicle
until the voice connection has been estab‐
lished.▷The LED flashes if the connection to the
BMW Assist Response Center has been es‐
tablished.
After the Emergency Request arrives at the
BMW Assist Response Center, the BMWSeite 267Breakdown assistanceMobility267
Online Edition for Part no. 01 40 2 607 971 - 09 11 490
Page 271 of 303
Tow truck
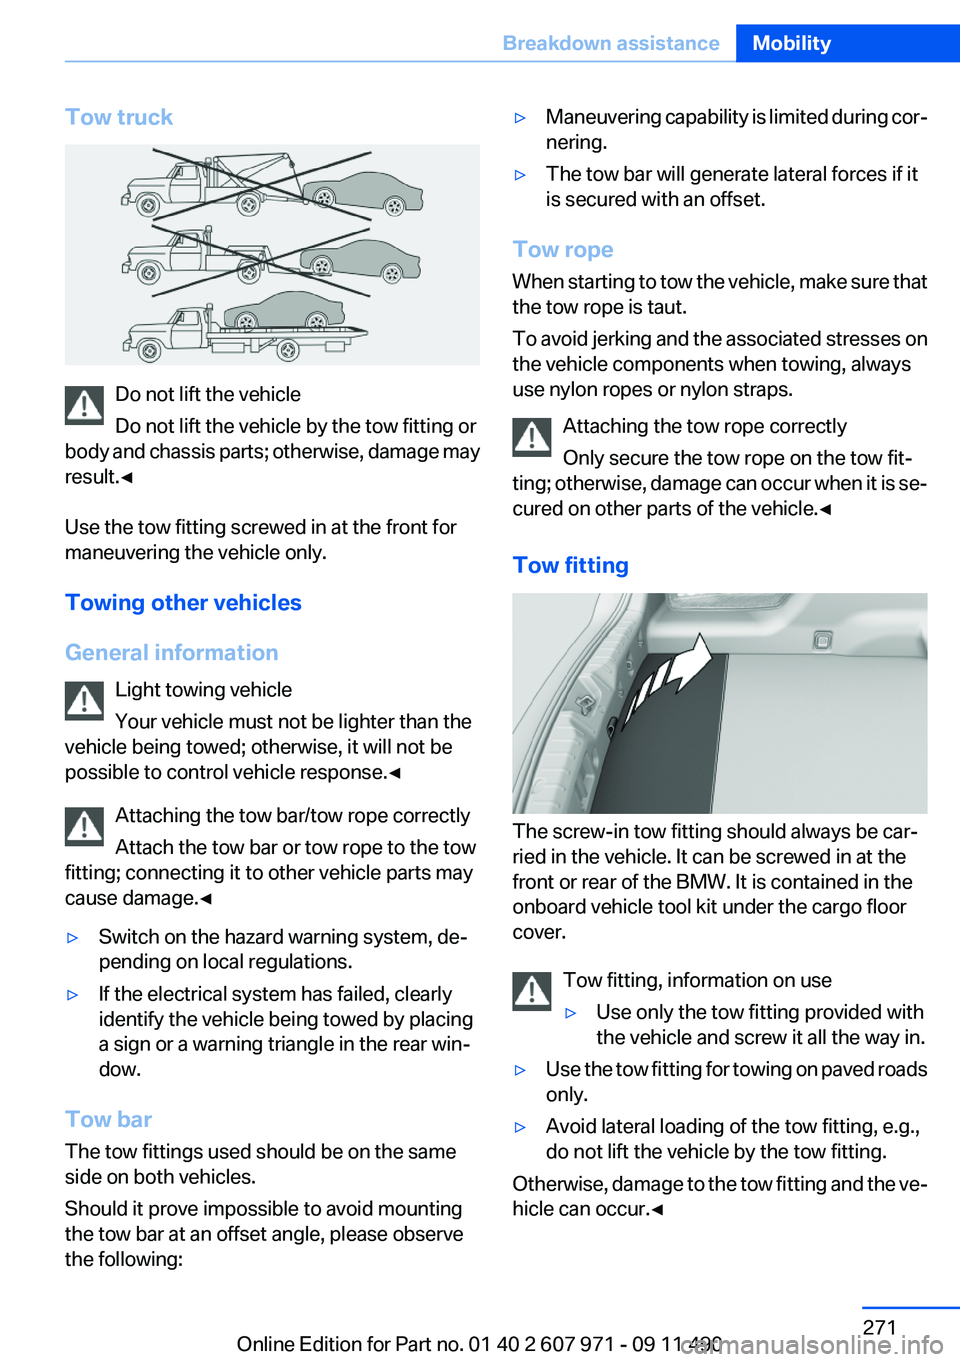
Do not lift the vehicle
Do not lift the vehicle by the tow fitting or
body and chassis parts; otherwise, damage may
result.◀
Use the tow fitting screwed in at the front for
maneuvering the vehicle only.
Towing other vehicles
General information Light towing vehicle
Your vehicle must not be lighter than the
vehicle being towed; otherwise, it will not be
possible to control vehicle response.◀
Attaching the tow bar/tow rope correctly
Attach the tow bar or tow rope to the tow
fitting; connecting it to other vehicle parts may
cause damage.◀
▷Switch on the hazard warning system, de‐
pending on local regulations.▷If the electrical system has failed, clearly
identify the vehicle being towed by placing
a sign or a warning triangle in the rear win‐
dow.
Tow bar
The tow fittings used should be on the same
side on both vehicles.
Should it prove impossible to avoid mounting
the tow bar at an offset angle, please observe
the following:
▷Maneuvering capability is limited during cor‐
nering.▷The tow bar will generate lateral forces if it
is secured with an offset.
Tow rope
When starting to tow the vehicle, make sure that
the tow rope is taut.
To avoid jerking and the associated stresses on
the vehicle components when towing, always
use nylon ropes or nylon straps.
Attaching the tow rope correctly
Only secure the tow rope on the tow fit‐
ting; otherwise, damage can occur when it is se‐
cured on other parts of the vehicle.◀
Tow fitting
The screw-in tow fitting should always be car‐
ried in the vehicle. It can be screwed in at the
front or rear of the BMW. It is contained in the
onboard vehicle tool kit under the cargo floor
cover.
Tow fitting, information on use
▷Use only the tow fitting provided with
the vehicle and screw it all the way in.▷Use the tow fitting for towing on paved roads
only.▷Avoid lateral loading of the tow fitting, e.g.,
do not lift the vehicle by the tow fitting.
Otherwise, damage to the tow fitting and the ve‐
hicle can occur.◀
Seite 271Breakdown assistanceMobility271
Online Edition for Part no. 01 40 2 607 971 - 09 11 490
Page 274 of 303
Automatic transmission:1.Release the parking brake, refer to page 61,
and deactivate Automatic Hold, refer to
page 62.2.Drive into the car wash.3.Depress the brake pedal as needed.4.Engage transmission position N.5.Switch the engine off. In this way, the igni‐
tion remains switched on, and a Check-Con‐
trol message is displayed.
Transmission position P with the igni‐
tion off
When the ignition is switched off, position P
is engaged automatically. When in an auto‐
matic car wash, for example, ensure that the
ignition is not switched off accidentally.◀
The vehicle cannot be locked from the outside
when in transmission position N.
A signal is sounded when an attempt is made to
lock the vehicle.
Transmission position
Transmission position P is engaged automati‐
cally:
▷When the ignition is switched off.▷After approx. 15 minutes.
Headlamps
▷Do not rub dry and do not use abrasive or
caustic cleansers.▷Soak areas that have been soiled e.g. due to
insects, with shampoo and wash off with
water.▷Thaw ice with deicing spray; do not use an
ice scraper.
After washing the vehicle
After washing the vehicle, apply the brakes
briefly to dry them; otherwise, braking action can
be reduced and corrosion of the brake discs can
occur.
Vehicle care
Car care products
BMW recommends using cleaning and care
products from BMW, since these have been
tested and approved.
Car care and cleaning products
Follow the instructions on the container.
When cleaning the interior, open the doors or
windows.
Only use products intended for cleaning vehi‐
cles.
Cleansers can contain substances that are dan‐
gerous and harmful to your health.◀
Vehicle paint
Regular care contributes to driving safety and
value retention.
Environmental influences can act on the vehicle
paint. Tailor the frequency and extent of your car
care to these influences.
Leather care
Remove dust from the leather often, using a
cloth or vacuum cleaner.
Otherwise, particles of dust and road grime
chafe in pores and folds, and lead to increased
wear and premature degradation of the leather
surface.
To guard against discoloration, such as from
clothing, provide leather care roughly every two
months.
Clean light-colored leather more frequently be‐
cause soiling on such surfaces is substantially
more visible.
Use leather care products; otherwise, dirt and
grease will gradually break down the protective
layer of the leather surface.
Suitable care products are available from the
service center.Seite 274MobilityCare274
Online Edition for Part no. 01 40 2 607 971 - 09 11 490