2012 BMW 650I XDRIVE COUPE light
[x] Cancel search: lightPage 218 of 303
5.Complete the entries if necessary.6.If necessary, "Store contact in vehicle".
Received calls
Displaying calls
The 20 calls that were last received are dis‐
played.
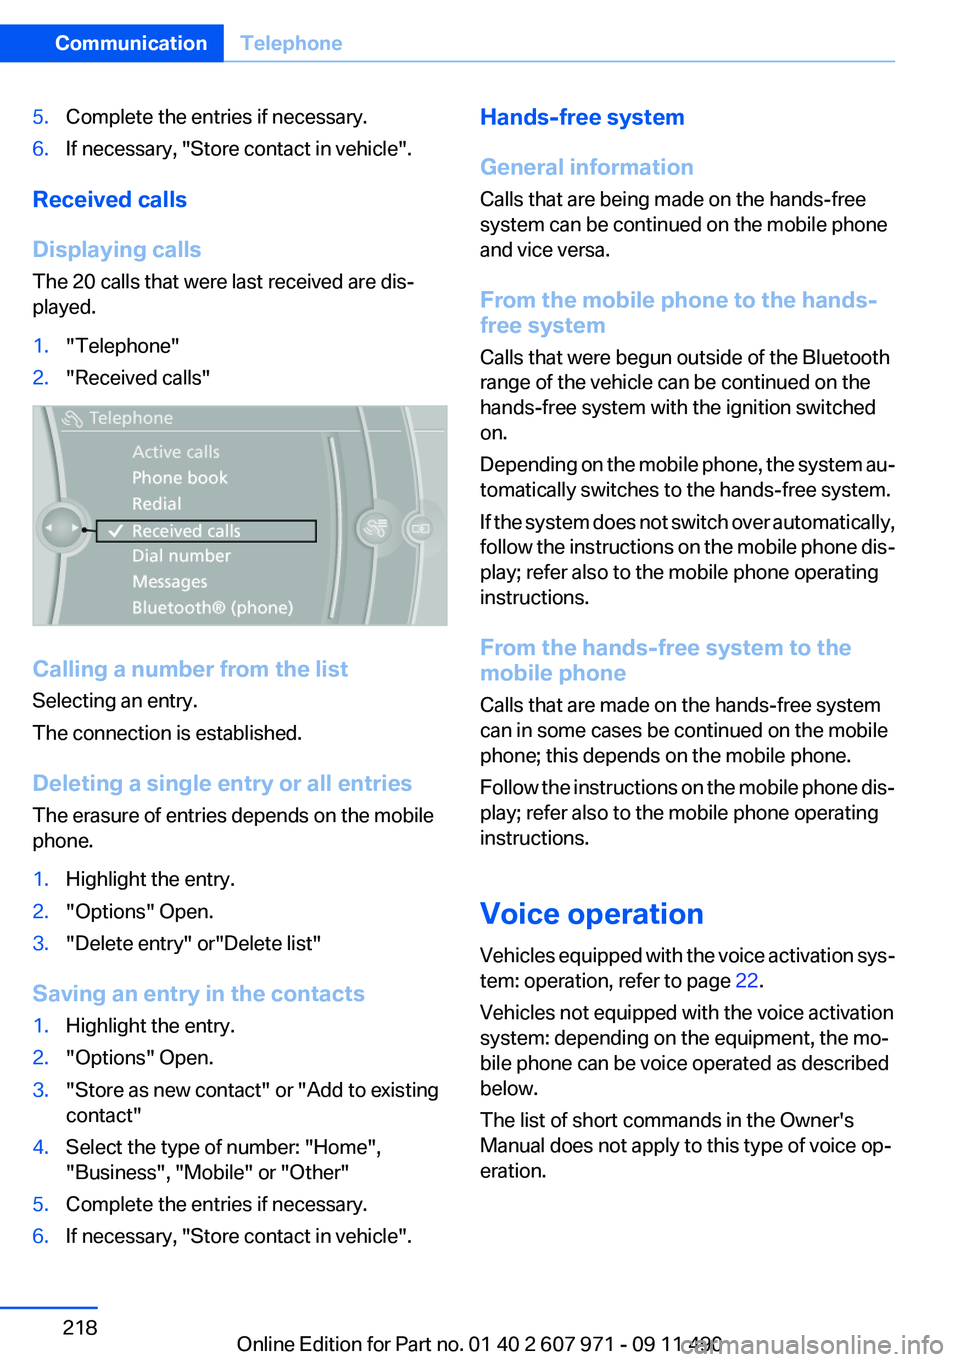
1."Telephone"2."Received calls"
Calling a number from the list
Selecting an entry.
The connection is established.
Deleting a single entry or all entries
The erasure of entries depends on the mobile
phone.
1.Highlight the entry.2."Options" Open.3."Delete entry" or"Delete list"
Saving an entry in the contacts
1.Highlight the entry.2."Options" Open.3."Store as new contact" or "Add to existing
contact"4.Select the type of number: "Home",
"Business", "Mobile" or "Other"5.Complete the entries if necessary.6.If necessary, "Store contact in vehicle".Hands-free system
General information
Calls that are being made on the hands-free
system can be continued on the mobile phone
and vice versa.
From the mobile phone to the hands-
free system
Calls that were begun outside of the Bluetooth
range of the vehicle can be continued on the
hands-free system with the ignition switched
on.
Depending on the mobile phone, the system au‐
tomatically switches to the hands-free system.
If the system does not switch over automatically,
follow the instructions on the mobile phone dis‐
play; refer also to the mobile phone operating
instructions.
From the hands-free system to the
mobile phone
Calls that are made on the hands-free system
can in some cases be continued on the mobile
phone; this depends on the mobile phone.
Follow the instructions on the mobile phone dis‐
play; refer also to the mobile phone operating
instructions.
Voice operation
Vehicles equipped with the voice activation sys‐
tem: operation, refer to page 22.
Vehicles not equipped with the voice activation
system: depending on the equipment, the mo‐
bile phone can be voice operated as described
below.
The list of short commands in the Owner's
Manual does not apply to this type of voice op‐
eration.Seite 218CommunicationTelephone218
Online Edition for Part no. 01 40 2 607 971 - 09 11 490
Page 224 of 303
tained in the vehicle. The address can be
checked for this purpose.1.Select the desired contact and highlight the
address.2.Open "Options".3."Check as destination"4.Correct and store the address if necessary.
If the address is corrected and stored, a copy of
it is stored in the vehicle. The address is not
changed on the mobile phone.
New contact
General information
A contact can have up to 8 phone numbers,
2 addresses, 3 e-mail addresses and one Inter‐
net address.
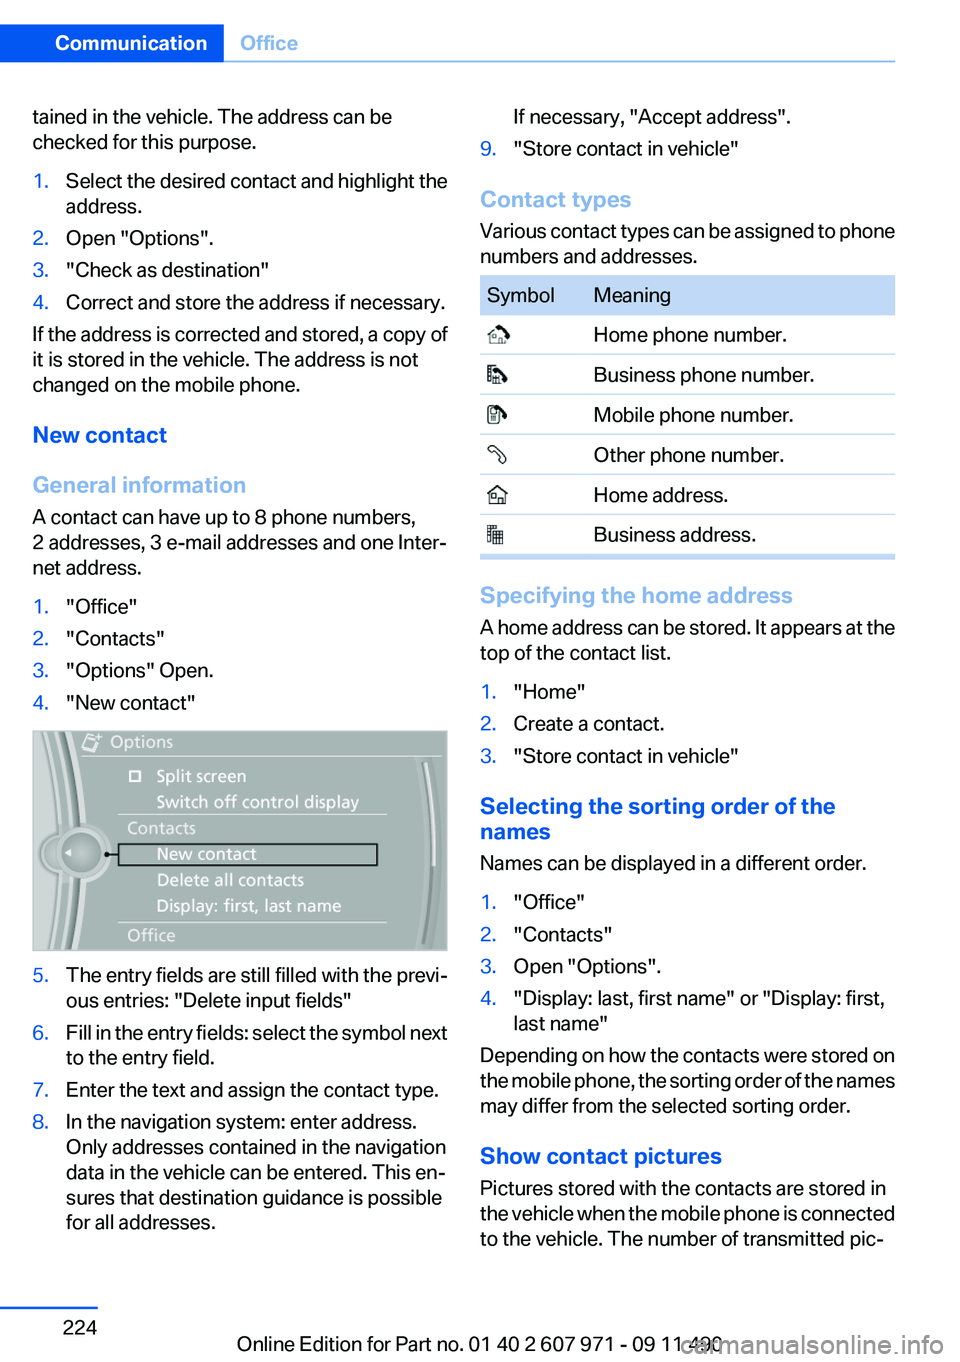
1."Office"2."Contacts"3."Options" Open.4."New contact"5.The entry fields are still filled with the previ‐
ous entries: "Delete input fields"6.Fill in the entry fields: select the symbol next
to the entry field.7.Enter the text and assign the contact type.8.In the navigation system: enter address.
Only addresses contained in the navigation
data in the vehicle can be entered. This en‐
sures that destination guidance is possible
for all addresses.If necessary, "Accept address".9."Store contact in vehicle"
Contact types
Various contact types can be assigned to phone
numbers and addresses.
SymbolMeaning Home phone number. Business phone number. Mobile phone number. Other phone number. Home address. Business address.
Specifying the home address
A home address can be stored. It appears at the
top of the contact list.
1."Home"2.Create a contact.3."Store contact in vehicle"
Selecting the sorting order of the
names
Names can be displayed in a different order.
1."Office"2."Contacts"3.Open "Options".4."Display: last, first name" or "Display: first,
last name"
Depending on how the contacts were stored on
the mobile phone, the sorting order of the names
may differ from the selected sorting order.
Show contact pictures
Pictures stored with the contacts are stored in
the vehicle when the mobile phone is connected
to the vehicle. The number of transmitted pic‐
Seite 224CommunicationOffice224
Online Edition for Part no. 01 40 2 607 971 - 09 11 490
Page 225 of 303
tures depends on the mobile phone. The mobile
phone must support this function.1."Office"2."Contacts"3."Options" Open.4."Configure Bluetooth®"5."Show images"
Display of all contact pictures is activated or de‐
activated.
Exporting/importing contacts
Contacts can be exported and imported via the
Personal Profile, refer to page 31. The contacts
stored in the vehicle are exported, but not those
from the mobile phone.
Deleting contacts
Only contacts that are stored in the vehicle are
deleted. The contacts on the mobile phone can‐
not be deleted.
1."Office"2."Contacts"3.Highlight the contact.4.Open "Options".5."Delete contact"or "Delete all contacts".6.If necessary. "Yes"
Messages
General information
Whether or not text messages and e-mails from
the mobile phone are displayed depends on
whether transmission from the mobile phone to
the vehicle is supported. Text messages and e-
mails may not be supported by the service pro‐
vider, or the function may need to be enabled
separately. After the mobile phone is first paired,
transmission may take several minutes. Mes‐
sages are only displayed in full length when the
vehicle is stationary. Messages from the addi‐
tional telephone are not transmitted.
Displaying messages1."Office"2."Messages"
A symbol identifies the type of message.
SymbolMessage type Text messages. My Info Message from the Concierge serv‐
ice. Message from BMW Info. E-mail from mobile phone.
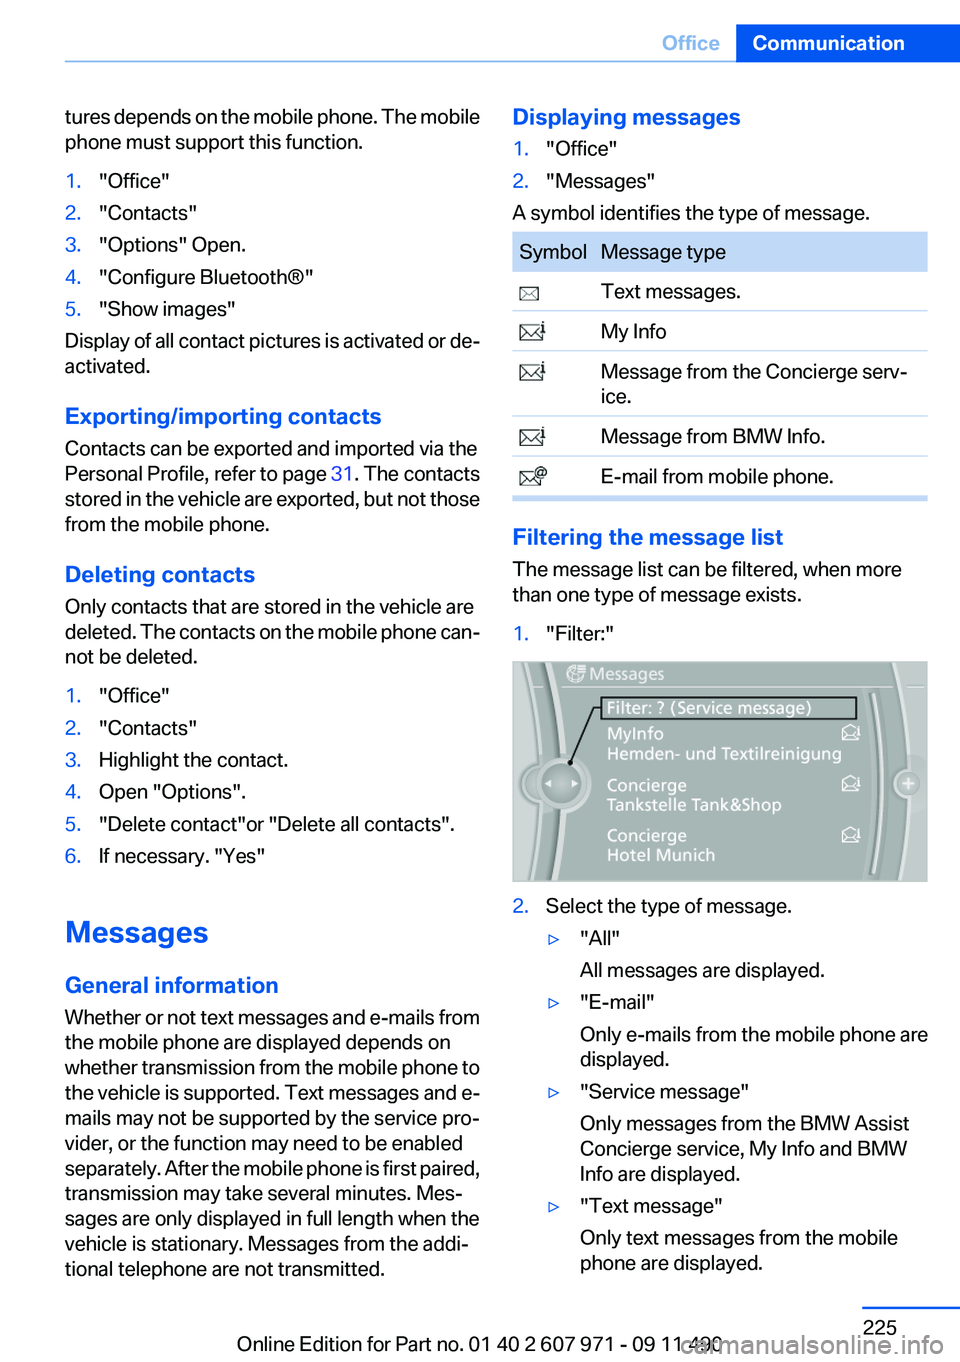
Filtering the message list
The message list can be filtered, when more
than one type of message exists.
1."Filter:"2.Select the type of message.▷"All"
All messages are displayed.▷"E-mail"
Only e-mails from the mobile phone are
displayed.▷"Service message"
Only messages from the BMW Assist
Concierge service, My Info and BMW
Info are displayed.▷"Text message"
Only text messages from the mobile
phone are displayed.Seite 225OfficeCommunication225
Online Edition for Part no. 01 40 2 607 971 - 09 11 490
Page 226 of 303
Deleting messages
Messages from the Concierge service, My Info,
and BMW Info can be deleted.
Delete a message:1."Office"2."Messages"3.Select the desired message.4."Options" Open.5."Delete message"
Delete all messages:
1."Office"2."Messages"3."Options" Open.4."Delete all messages" or"Delete service
messages"
Text messages
Calling the sender of a text message
1.Select the desired message.2. Select the symbol.
Saving the sender in the contacts
1.Highlight the desired message.2.Open "Options".3."Store as new contact" or "Add to existing
contact"
Using contact data
Contact data from appointments, tasks, text
messages, e-mails and notes can be saved or
selected, refer to page 229.
Reading the text message out loud
Read the text messages out loud, refer to
page 230.
My Info
Starting destination guidance1.Select the message.2."Start guidance" or "Add as another
destination"
Dialing the number in the message
Up to 4 phone numbers can be transmitted with
a message.
1.Select the desired message.2. "Call":
If the message contains a number, the con‐
nection is established.
"Select phone number":
If the message contains more than one num‐
ber, select the desired number from the list.
The connection is established.
Message from the Concierge service
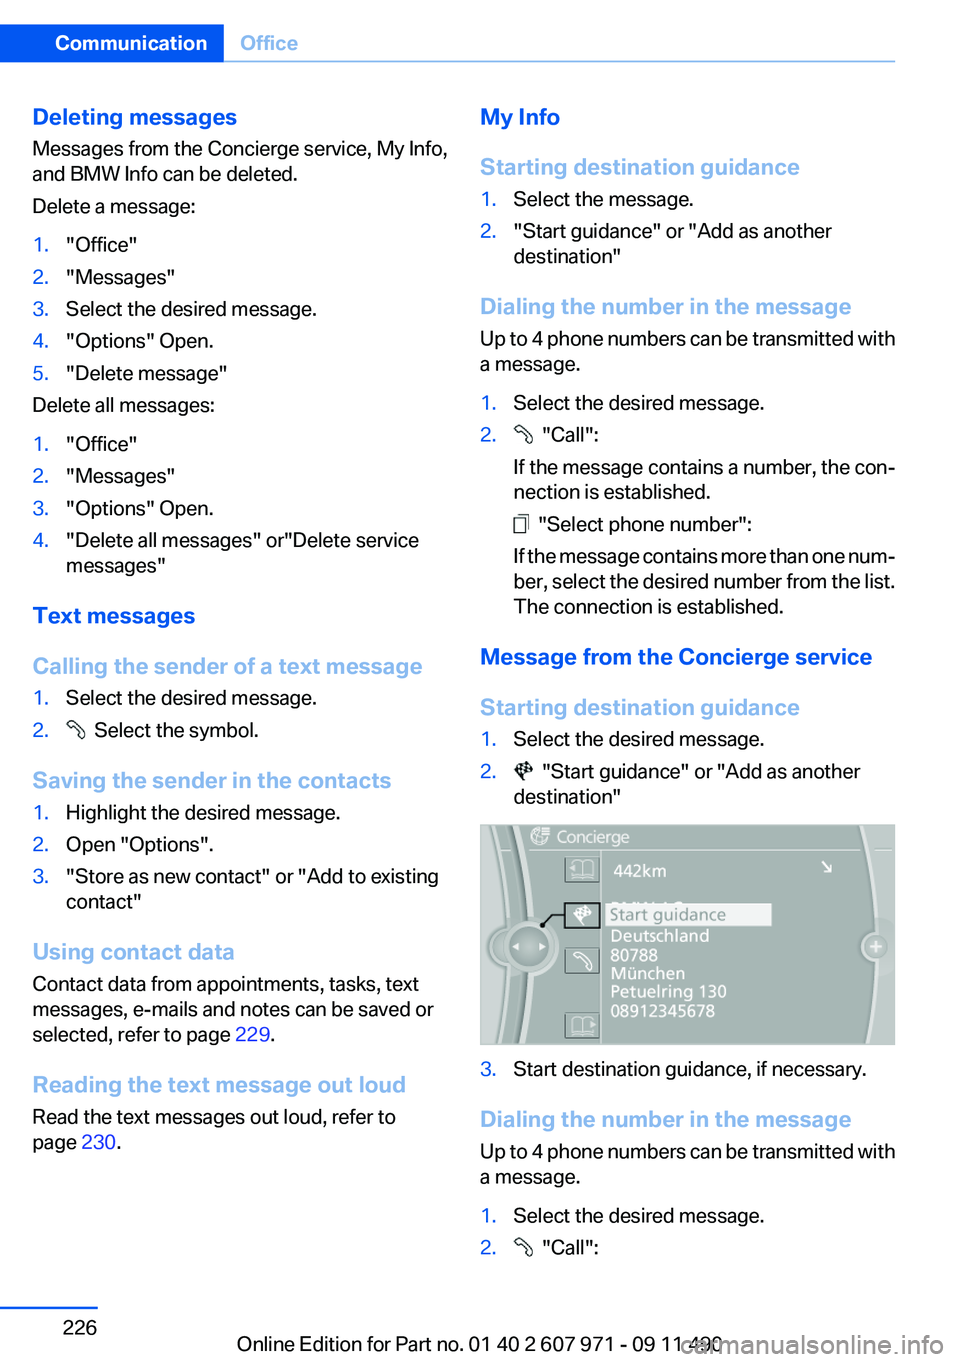
Starting destination guidance
1.Select the desired message.2. "Start guidance" or "Add as another
destination"3.Start destination guidance, if necessary.
Dialing the number in the message
Up to 4 phone numbers can be transmitted with
a message.
1.Select the desired message.2. "Call":Seite 226CommunicationOffice226
Online Edition for Part no. 01 40 2 607 971 - 09 11 490
Page 229 of 303
Using contact data
Contact data from appointments, tasks, text
messages, e-mails and notes can be saved or
selected, refer to page 229.
Reading the task out loud
Read the task out loud, refer to page 230.
Notes
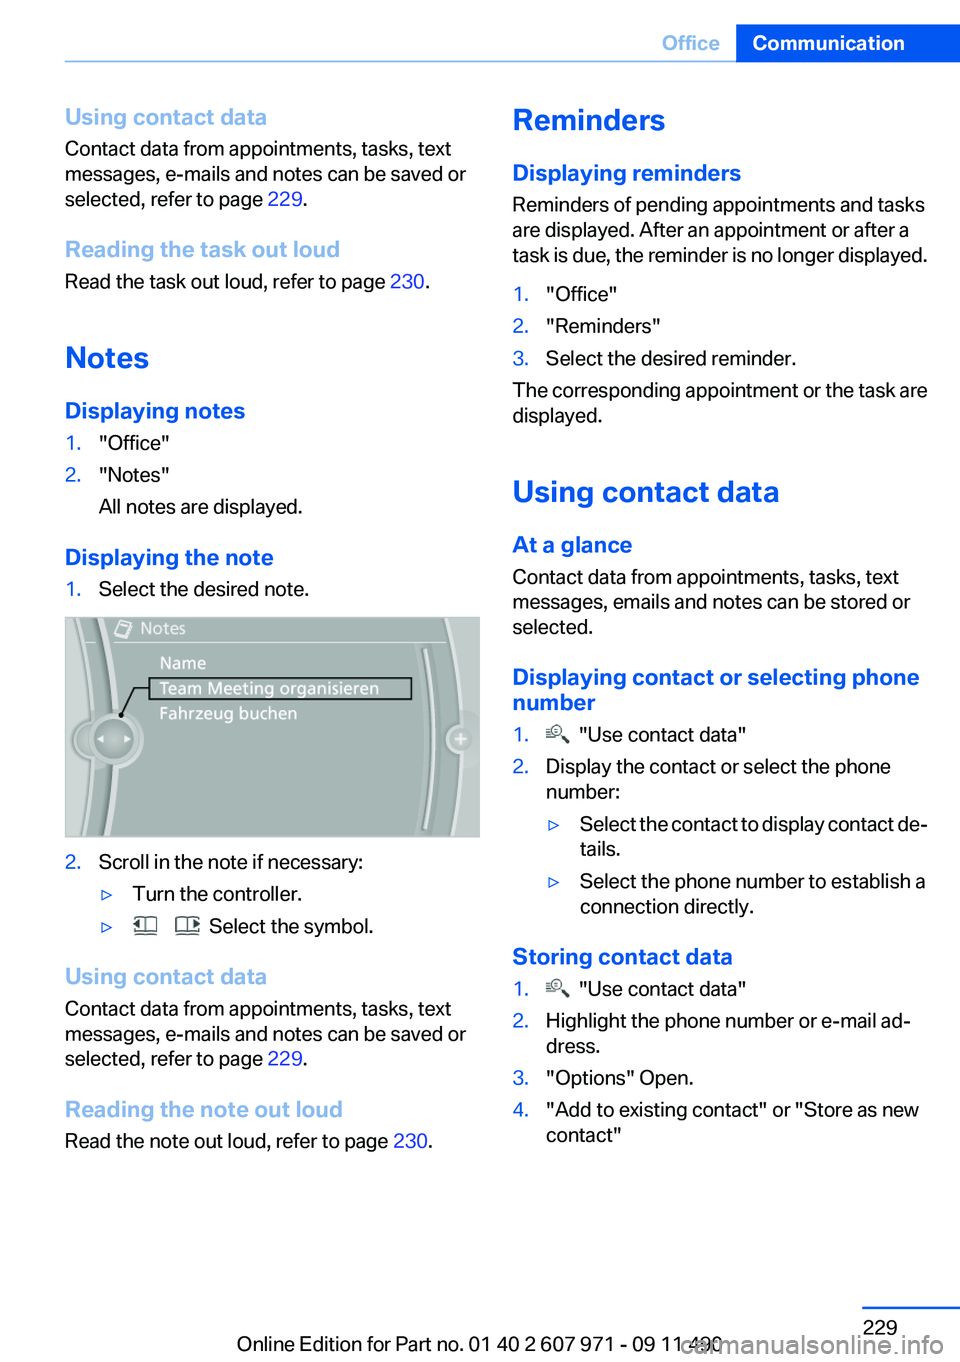
Displaying notes1."Office"2."Notes"
All notes are displayed.
Displaying the note
1.Select the desired note.2.Scroll in the note if necessary:▷Turn the controller.▷ Select the symbol.
Using contact data
Contact data from appointments, tasks, text
messages, e-mails and notes can be saved or
selected, refer to page 229.
Reading the note out loud
Read the note out loud, refer to page 230.
Reminders
Displaying reminders
Reminders of pending appointments and tasks
are displayed. After an appointment or after a
task is due, the reminder is no longer displayed.1."Office"2."Reminders"3.Select the desired reminder.
The corresponding appointment or the task are
displayed.
Using contact data
At a glance
Contact data from appointments, tasks, text
messages, emails and notes can be stored or
selected.
Displaying contact or selecting phone
number
1. "Use contact data"2.Display the contact or select the phone
number:▷Select the contact to display contact de‐
tails.▷Select the phone number to establish a
connection directly.
Storing contact data
1. "Use contact data"2.Highlight the phone number or e-mail ad‐
dress.3."Options" Open.4."Add to existing contact" or "Store as new
contact"Seite 229OfficeCommunication229
Online Edition for Part no. 01 40 2 607 971 - 09 11 490
Page 232 of 303
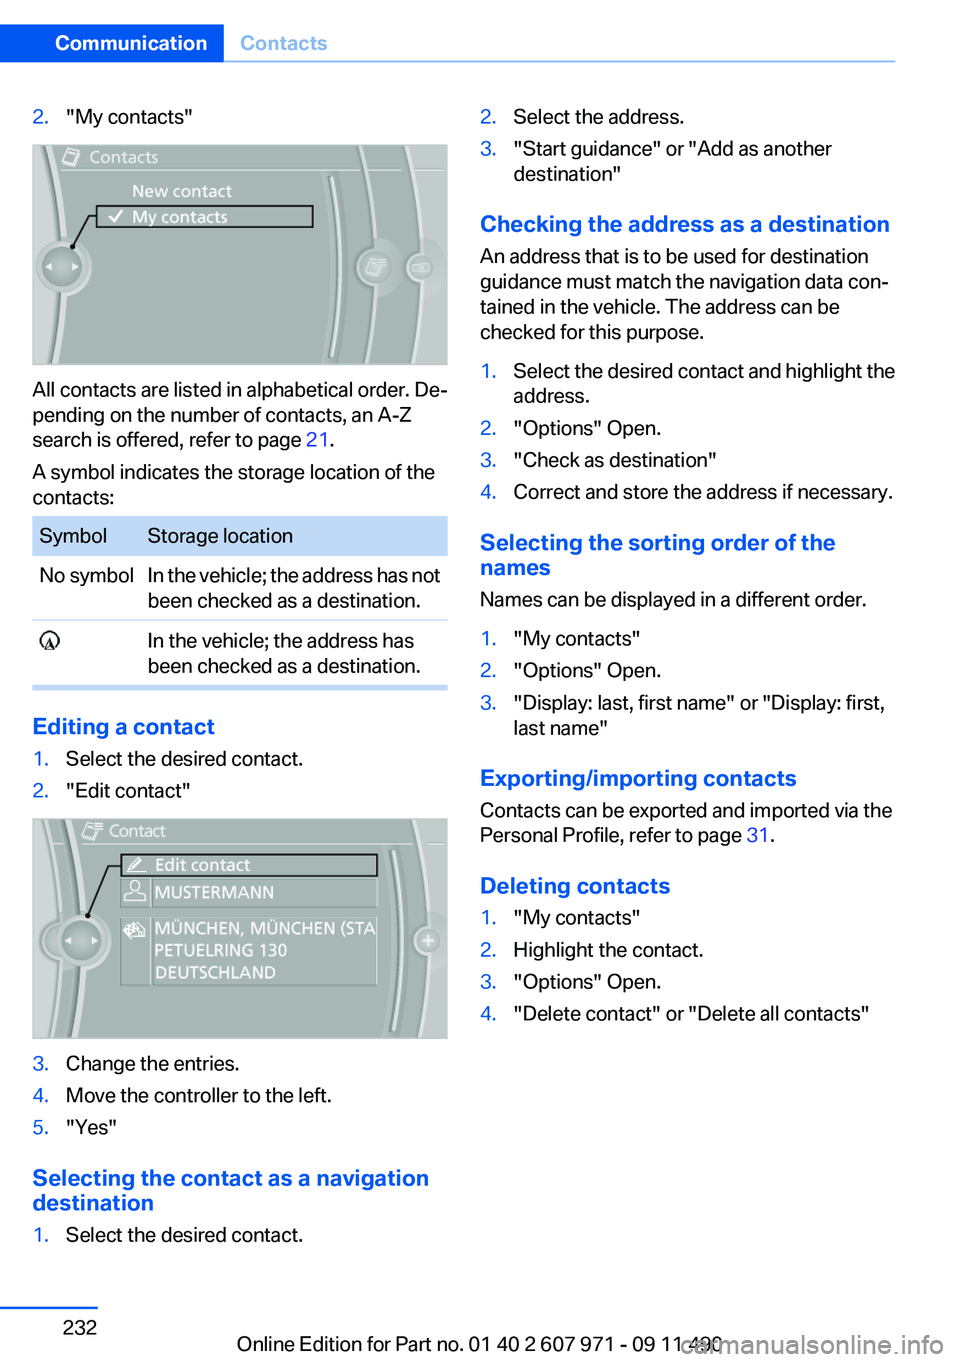
2."My contacts"
All contacts are listed in alphabetical order. De‐
pending on the number of contacts, an A-Z
search is offered, refer to page 21.
A symbol indicates the storage location of the
contacts:
SymbolStorage locationNo symbolIn the vehicle; the address has not
been checked as a destination. In the vehicle; the address has
been checked as a destination.
Editing a contact
1.Select the desired contact.2."Edit contact"3.Change the entries.4.Move the controller to the left.5."Yes"
Selecting the contact as a navigation
destination
1.Select the desired contact.2.Select the address.3."Start guidance" or "Add as another
destination"
Checking the address as a destination
An address that is to be used for destination
guidance must match the navigation data con‐
tained in the vehicle. The address can be
checked for this purpose.
1.Select the desired contact and highlight the
address.2."Options" Open.3."Check as destination"4.Correct and store the address if necessary.
Selecting the sorting order of the
names
Names can be displayed in a different order.
1."My contacts"2."Options" Open.3."Display: last, first name" or "Display: first,
last name"
Exporting/importing contacts
Contacts can be exported and imported via the
Personal Profile, refer to page 31.
Deleting contacts
1."My contacts"2.Highlight the contact.3."Options" Open.4."Delete contact" or "Delete all contacts"Seite 232CommunicationContacts232
Online Edition for Part no. 01 40 2 607 971 - 09 11 490
Page 235 of 303
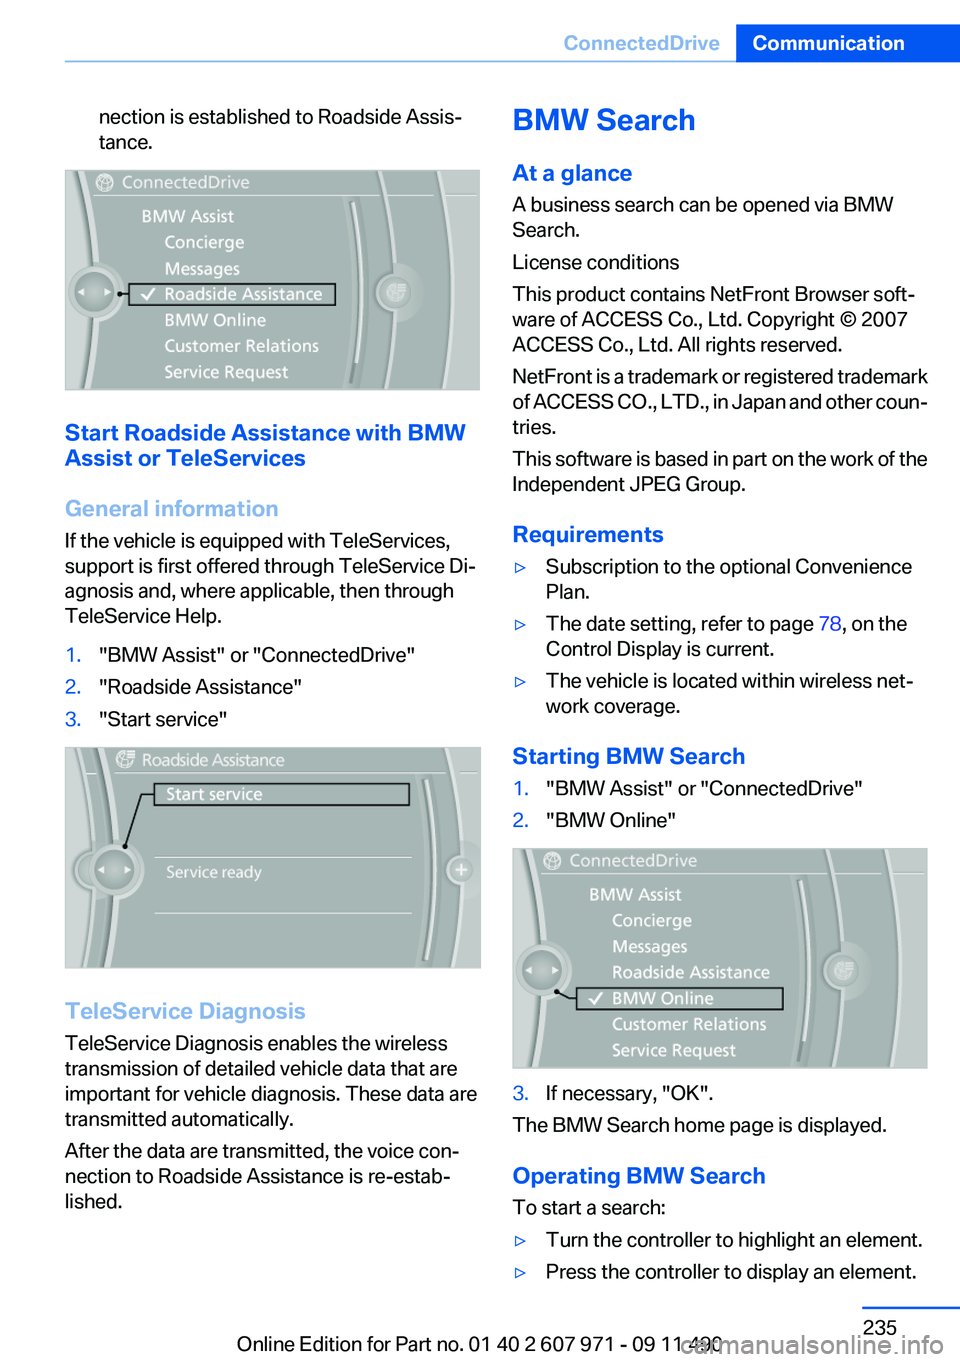
nection is established to Roadside Assis‐
tance.
Start Roadside Assistance with BMW
Assist or TeleServices
General information
If the vehicle is equipped with TeleServices,
support is first offered through TeleService Di‐
agnosis and, where applicable, then through
TeleService Help.
1."BMW Assist" or "ConnectedDrive"2."Roadside Assistance"3."Start service"
TeleService Diagnosis
TeleService Diagnosis enables the wireless
transmission of detailed vehicle data that are
important for vehicle diagnosis. These data are
transmitted automatically.
After the data are transmitted, the voice con‐
nection to Roadside Assistance is re-estab‐
lished.
BMW Search
At a glance
A business search can be opened via BMW
Search.
License conditions
This product contains NetFront Browser soft‐
ware of ACCESS Co., Ltd. Copyright © 2007
ACCESS Co., Ltd. All rights reserved.
NetFront is a trademark or registered trademark
of ACCESS CO., LTD., in Japan and other coun‐
tries.
This software is based in part on the work of the
Independent JPEG Group.
Requirements▷Subscription to the optional Convenience
Plan.▷The date setting, refer to page 78, on the
Control Display is current.▷The vehicle is located within wireless net‐
work coverage.
Starting BMW Search
1."BMW Assist" or "ConnectedDrive"2."BMW Online"3.If necessary, "OK".
The BMW Search home page is displayed.
Operating BMW Search
To start a search:
▷Turn the controller to highlight an element.▷Press the controller to display an element.Seite 235ConnectedDriveCommunication235
Online Edition for Part no. 01 40 2 607 971 - 09 11 490
Page 253 of 303
Rotating wheels between axles
The manufacturer of your vehicle advises
against swapping wheels between the front and
rear axles.
This can impair the handling characteristics.
Storage
Store wheels and tires in a cool, dry place with
as little exposure to light as possible.
Always protect tires against all contact with oil,
grease and fuels.
Do not exceed the maximum tire inflation pres‐
sure indicated on the side wall of the tire.
Run-flat tires
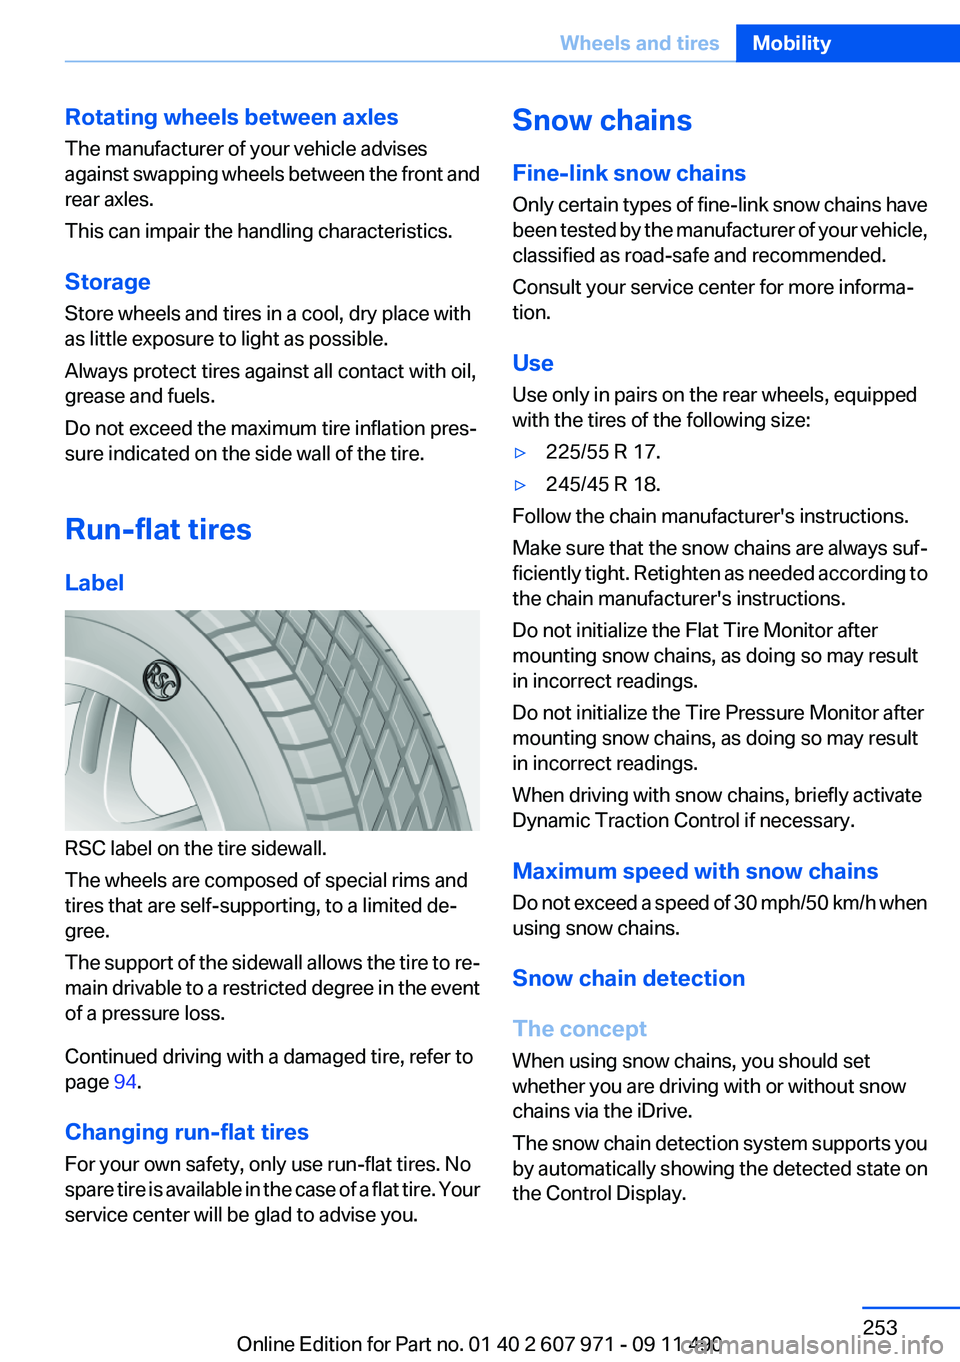
Label
RSC label on the tire sidewall.
The wheels are composed of special rims and
tires that are self-supporting, to a limited de‐
gree.
The support of the sidewall allows the tire to re‐
main drivable to a restricted degree in the event
of a pressure loss.
Continued driving with a damaged tire, refer to
page 94.
Changing run-flat tires
For your own safety, only use run-flat tires. No
spare tire is available in the case of a flat tire. Your
service center will be glad to advise you.
Snow chains
Fine-link snow chains
Only certain types of fine-link snow chains have
been tested by the manufacturer of your vehicle,
classified as road-safe and recommended.
Consult your service center for more informa‐
tion.
Use
Use only in pairs on the rear wheels, equipped
with the tires of the following size:▷225/55 R 17.▷245/45 R 18.
Follow the chain manufacturer's instructions.
Make sure that the snow chains are always suf‐
ficiently tight. Retighten as needed according to
the chain manufacturer's instructions.
Do not initialize the Flat Tire Monitor after
mounting snow chains, as doing so may result
in incorrect readings.
Do not initialize the Tire Pressure Monitor after
mounting snow chains, as doing so may result
in incorrect readings.
When driving with snow chains, briefly activate
Dynamic Traction Control if necessary.
Maximum speed with snow chains
Do not exceed a speed of 30 mph/50 km/h when
using snow chains.
Snow chain detection
The concept
When using snow chains, you should set
whether you are driving with or without snow
chains via the iDrive.
The snow chain detection system supports you
by automatically showing the detected state on
the Control Display.
Seite 253Wheels and tiresMobility253
Online Edition for Part no. 01 40 2 607 971 - 09 11 490