2012 BMW 650I XDRIVE CONVERTIBLE radio controls
[x] Cancel search: radio controlsPage 89 of 282
▷
Make sure that the front passenger is sitting
correctly, i.e., keeps his or her feet and legs
in the footwell; otherwise, leg injuries can
occur if the front airbag is triggered.
▷ Do not place slip covers, seat cushions or
other objects on the front passenger seat
that are not approved specifically for seats
with integrated side airbags.
▷ Do not hang pieces of clothing, such as jack‐
ets, over the backrests.
▷ Make sure that occupants keep their heads
away from the side airbag; otherwise, inju‐
ries can occur if the airbags are deployed.
▷ Do not remove the airbag restraint system.
▷ Do not remove the steering wheel.
▷ Do not apply adhesive materials to the air‐
bag cover panels, cover them or modify
them in any way.
▷ Never modify either the individual compo‐
nents
or the wiring in the airbag system. This
also applies to steering wheel covers, the
dashboard, and the seats.◀
Even when all instructions are followed closely,
injury from contact with the airbags cannot be
ruled out in certain situations.
The ignition and inflation noise may lead to
short-term
and, in most cases, temporary hear‐
ing impairment in sensitive individuals.
In the case of a malfunction, deactivation
and after triggering of the airbags
Do not touch the individual components imme‐
diately after the system has been triggered; oth‐
erwise, there is the danger of burns.
Only have the airbags checked, repaired or dis‐
mantled and the airbag generator scrapped by
your service center or a workshop that has the
necessary authorization for handling explosives.
Non-professional attempts to service the sys‐
tem could lead to failure in an emergency or un‐
desired triggering of the airbag, either of which
could result in injury.◀
Warnings and information on the airbags are
also found on the sun visors. Functional readiness of the airbag
system
When
the ignition is switch on, the warn‐
ing lamp in the instrument cluster lights
up briefly and thereby indicates the op‐
erational readiness of the entire airbag system
and the belt tensioner.
Airbag system malfunctioning
▷ In radio ready state, the warning lamp does
not come on.
▷ The warning lamp lights up continuously.
When there is a malfunction, have the air‐
bag system checked immediately
When there is a malfunction, have the airbag
system checked immediately; otherwise, there
is
a risk that the system does not function as ex‐
pected in the event of an accident despite cor‐
responding severity of the accident.◀
Automatic deactivation of the front
passenger airbags
The system determines whether the front pas‐
senger seat is occupied by measuring the re‐
sistance of the human body.
The front, knee, and side airbag on the front
passenger side are activated or deactivated ac‐
cordingly.
Leave feet in the footwell
Make sure that the front passenger keeps
his or her feet in the footwell; otherwise, the front
passenger airbags may not function properly.◀
Child restraint fixing system in the front
passenger seat
Before transporting a child on the front passen‐
ger seat, see the safety notes and instructions
under Children on the front passenger seat.◀
Malfunction of the automatic
deactivation system
When transporting older children and adults, the
front passenger airbags may be deactivated in
certain sitting positions. In this case, the indica‐ Seite 89
89Online Edition for Part no. 01 40 2 606 521 - 03 11 490
Reference Mobility Communication Entertainment Navigation Driving tips
Controls At a glance
Page 157 of 282
Settings for the map view
The settings are stored for the remote control
currently in use.
1.
"Navigation"
2. "Map"
3. Open "Options".
4. "Settings"
Set the map view.
▷ "Day/night mode"
Select and create the necessary settings
depending on the light conditions.
"Traffic conditions/gray map" active: the
setting is disregarded.
▷ "Satellite images"
Depending on availability and resolution,
satellite images* are displayed in a scale of
approx. 1 mile to 600 miles/2 km to
1,000 km.
▷ "Perspective view in 3D"
Prominent areas that are contained in the
navigation data are displayed on the map in
3D.
▷ "Traffic conditions/gray map"
The map is optimized for displaying traffic
bulletins,
refer to page 157. Symbols for the
special destinations are no longer displayed.
Map view for split screen
The map view can be selected for the split
screen independently from the main screen.
1. Open "Options".
2. "Split screen"
3. Move the controller to the right repeatedly
until the split screen is selected.
4. Select "Split screen content" or the scale.
5. Select the map view.
▷"Arrow display"
▷ "Map facing north"
▷ "Map direction of travel"
▷ "Map view with perspective"
▷ "Position" ▷
"Exit ramp view": selected blind drive‐
ways
are displayed three dimensionally.
Setting in some cases will affect the dis‐
play in the Head-Up Display*.
▷ "Traffic conditions/gray map"
6. To change the scale: select the split screen
and turn the controller.
Traffic bulletins*
At a glance
▷ Display the traffic bulletins from radio sta‐
tions that broadcast the TI Traffic Informa‐
tion
of a traffic information service. Informa‐
tion on traffic obstructions and hazards is
updated continuously.
Certain BMW models equipped with navi‐
gation have the capability to display real-
time traffic information. If your system has
this capability the following additional terms
and conditions apply:
An End-User shall no longer have the right
to use the Traffic Data in the event that the
End-User is in material breach of the terms
and conditions contained herein.
A. Total Traffic Network, a division of Clear
Channel Broadcasting, Inc. (“Total Traffic
Network”) holds the rights to the traffic in‐
cident data and RDS-TMC network through
which it is delivered. You may not modify,
copy, scan or use any other method to re‐
produce, duplicate, republish, transmit or
distribute in any way any portion of traffic in‐
cident data. You agree to indemnify, defend
and hold harmless BMW of North America,
LLC. (“BMW NA”) and Total Traffic Net‐
work, Inrix, Inc (and their affiliates) against
any and all claims, damages, costs or other
expenses that arise directly or indirectly out
of (a) your unauthorized use of the traffic in‐
cident data or the RDS-TMC network, (b)
your violation of this directive and/or (c) any
unauthorized or unlawful activities by you in
connection herewith.
Seite 157
157Online Edition for Part no. 01 40 2 606 521 - 03 11 490
Reference Mobility Communication Entertainment
Navigation Driving tips Controls At a glance
Page 165 of 282
When surround is activated, multi-channel play‐
back is simulated when a stereo audio track is
played.
Volume
▷
"Speed volume": speed-dependent volume
control.
▷ "PDC": volume of the PDC signal* com‐
pared to the entertainment sound output.
▷ "Gong": volume of the signal, such as the
safety belt reminder, compared to the en‐
tertainment sound output.
▷ "Microphone": volume of the microphone*
during a phone call.
▷ "Loudspeak.":
volume of the loudspeakers*
during a phone call.
The following volumes are only stored for the
respective paired telephone:
"Microphone",
"Loudspeak.".
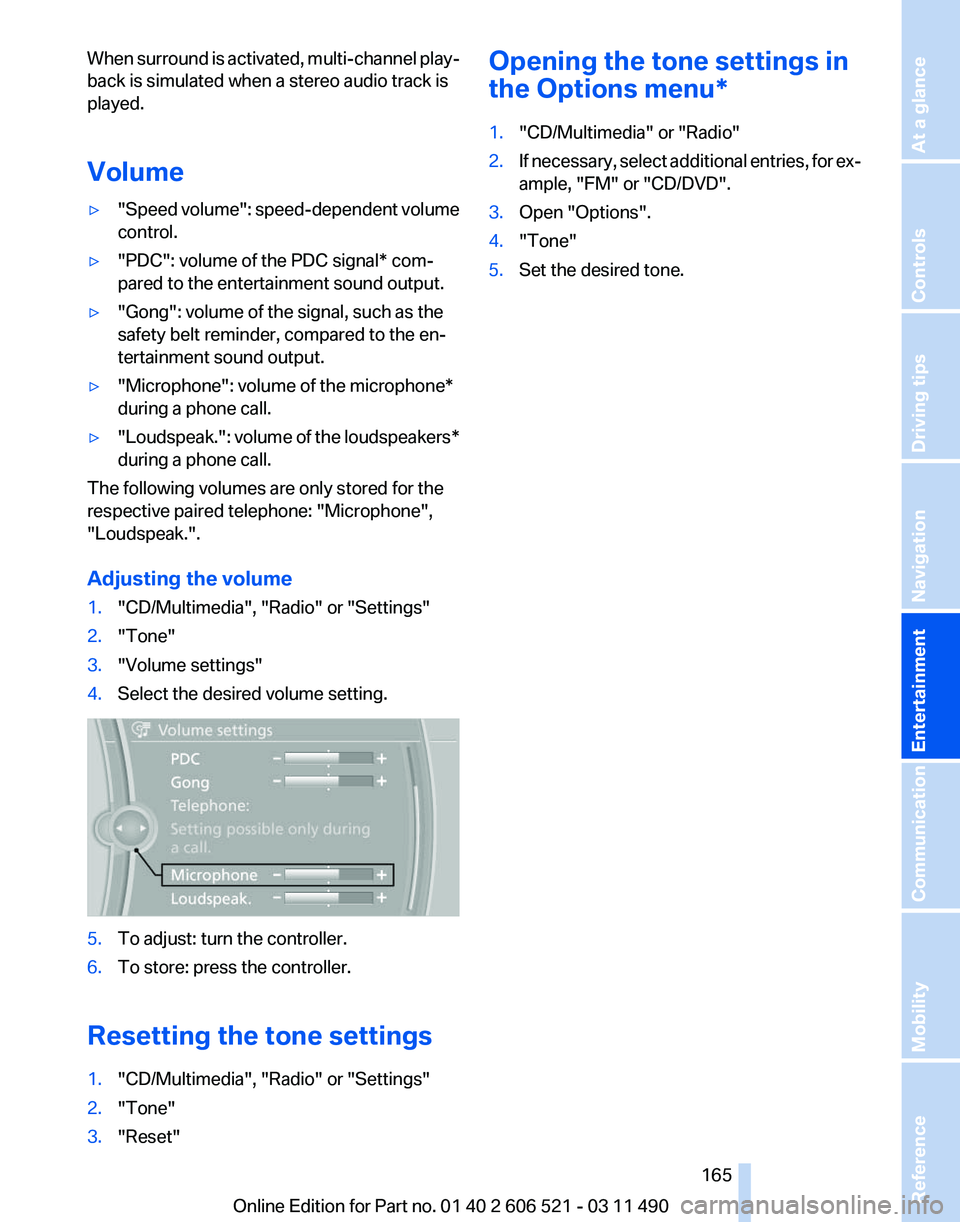
Adjusting the volume
1. "CD/Multimedia", "Radio" or "Settings"
2. "Tone"
3. "Volume settings"
4. Select the desired volume setting. 5.
To adjust: turn the controller.
6. To store: press the controller.
Resetting the tone settings
1. "CD/Multimedia", "Radio" or "Settings"
2. "Tone"
3. "Reset" Opening the tone settings in
the Options menu
*
1. "CD/Multimedia" or "Radio"
2. If necessary, select additional entries, for ex‐
ample, "FM" or
"CD/DVD".
3. Open "Options".
4. "Tone"
5. Set the desired tone.
Seite 165
165Online Edition for Part no. 01 40 2 606 521 - 03 11 490
Reference Mobility Communication
Entertainment Navigation Driving tips Controls At a glance
Page 166 of 282
Radio
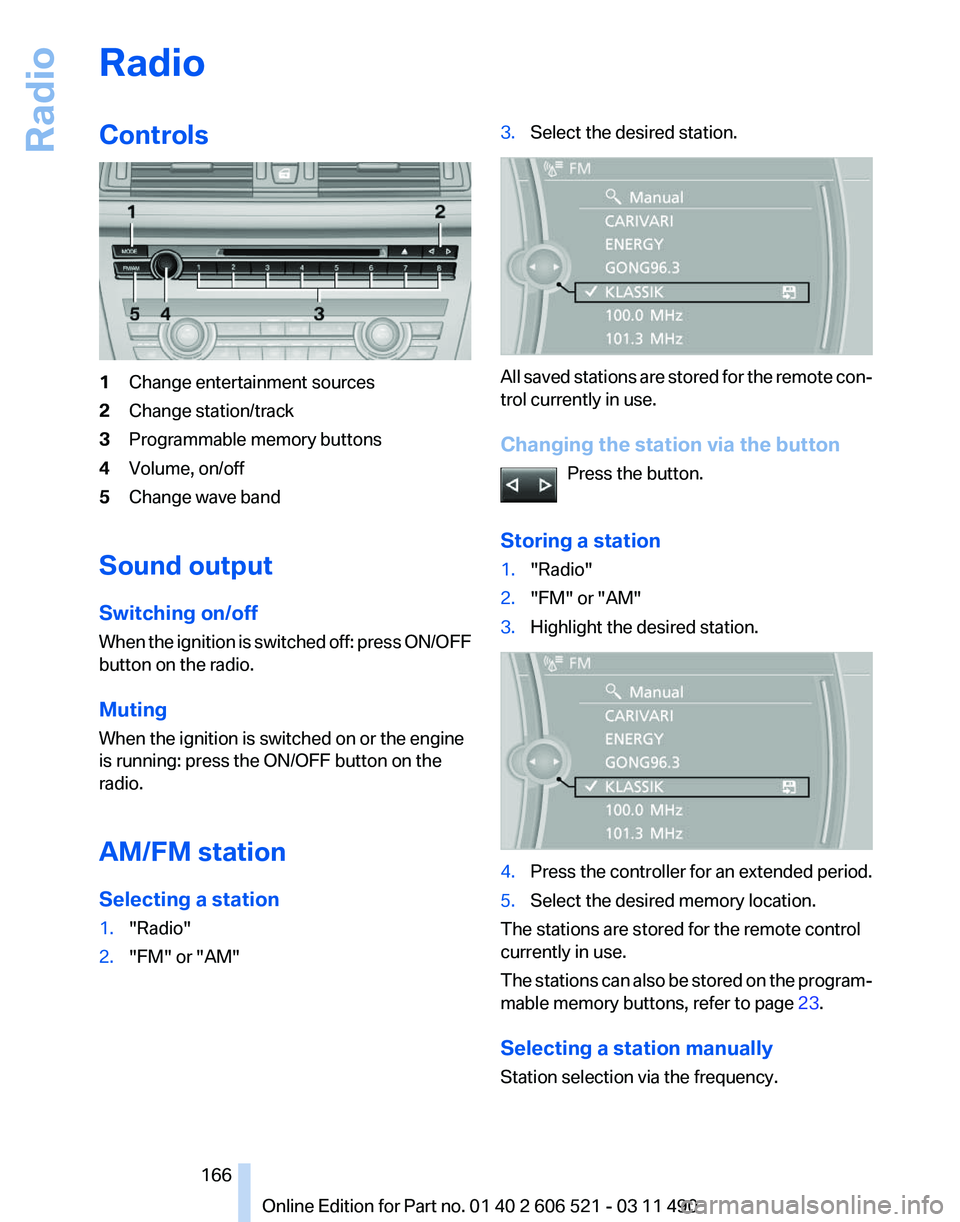
Controls
1
Change entertainment sources
2 Change station/track
3 Programmable memory buttons
4 Volume, on/off
5 Change wave band
Sound output
Switching on/off
When
the ignition is switched off: press ON/OFF
button on the radio.
Muting
When the ignition is switched on or the engine
is running: press the ON/OFF button on the
radio.
AM/FM station
Selecting a station
1. "Radio"
2. "FM" or "AM" 3.
Select the desired station. All saved stations are stored for the remote con‐
trol currently in use.
Changing the station via the button
Press the button.
Storing a station
1. "Radio"
2. "FM" or "AM"
3. Highlight the desired station. 4.
Press the controller for an extended period.
5. Select the desired memory location.
The stations are stored for the remote control
currently in use.
The
stations can also be stored on the program‐
mable memory buttons, refer to page 23.
Selecting a station manually
Station selection via the frequency. Seite 166
166 Online Edition for Part no. 01 40 2 606 521 - 03 11 490
Radio
Page 167 of 282
1.
"Radio"
2. "FM" or "AM"
3. "Manual"
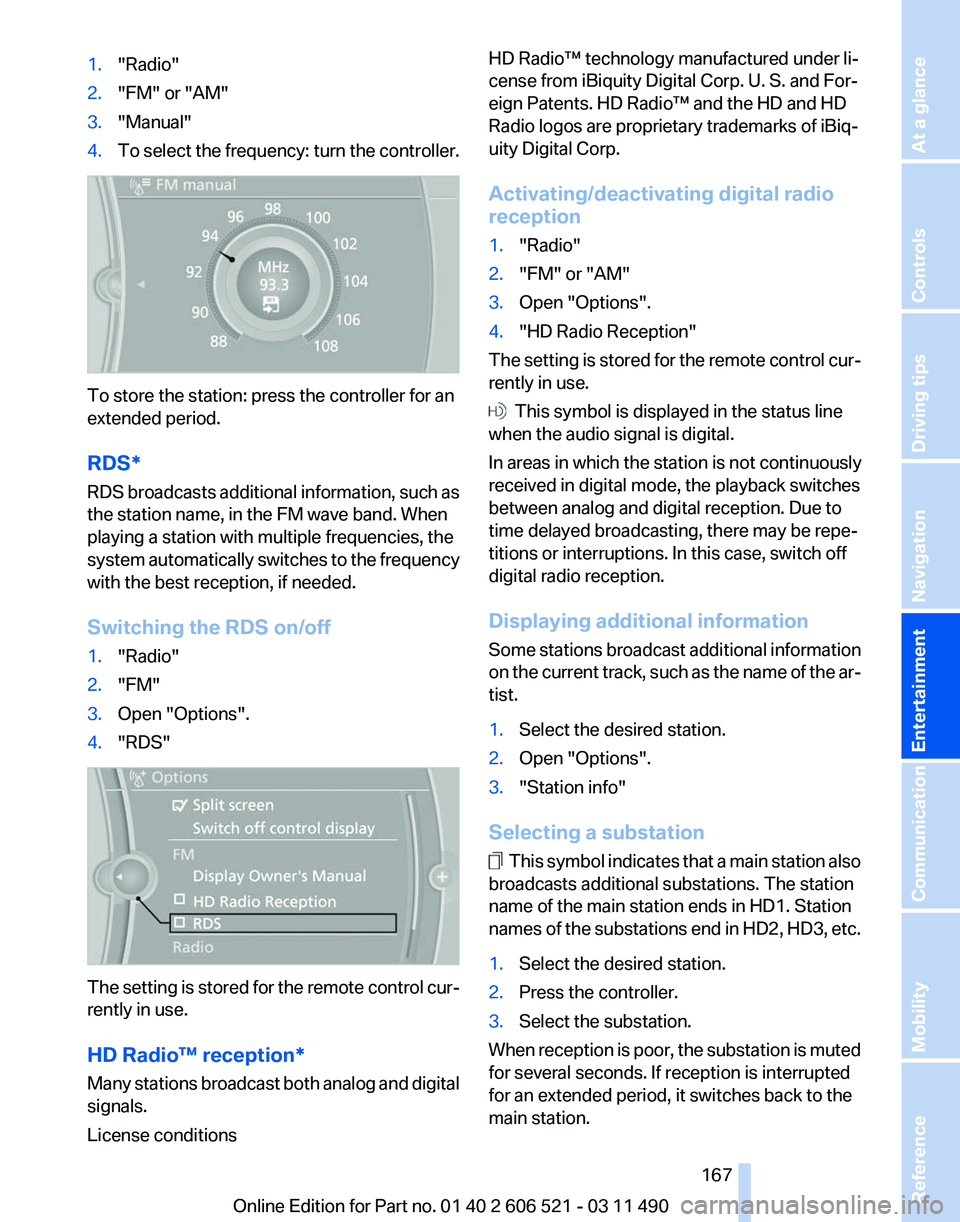
4. To select the frequency: turn the controller. To store the station: press the controller for an
extended period.
RDS*
RDS
broadcasts additional information, such as
the station name, in the FM wave band. When
playing a station with multiple frequencies, the
system automatically switches to the frequency
with the best reception, if needed.
Switching the RDS on/off
1. "Radio"
2. "FM"
3. Open "Options".
4. "RDS" The setting is stored for the remote control cur‐
rently in use.
HD Radio™ reception
*
Many stations broadcast both analog and digital
signals.
License conditions HD Radio™ technology manufactured under li‐
cense from iBiquity Digital Corp. U. S. and For‐
eign Patents. HD Radio™ and the HD and HD
Radio logos are proprietary trademarks of iBiq‐
uity Digital Corp.
Activating/deactivating digital radio
reception
1.
"Radio"
2. "FM" or "AM"
3. Open "Options".
4. "HD Radio Reception"
The setting is stored for the remote control cur‐
rently in use. This symbol is displayed in the status line
when the audio signal is digital.
In areas in which the station is not continuously
received in digital mode, the playback switches
between analog and digital reception. Due to
time delayed broadcasting, there may be repe‐
titions or interruptions. In this case, switch off
digital radio reception.
Displaying additional information
Some
stations broadcast additional information
on the current track, such as the name of the ar‐
tist.
1. Select the desired station.
2. Open "Options".
3. "Station info"
Selecting a substation This symbol indicates that a main station also
broadcasts additional substations. The station
name of the main station ends in HD1. Station
names
of the substations end in HD2, HD3, etc.
1. Select the desired station.
2. Press the controller.
3. Select the substation.
When reception is poor, the substation is muted
for several seconds. If reception is interrupted
for an extended period, it switches back to the
main station.
Seite 167
167Online Edition for Part no. 01 40 2 606 521 - 03 11 490
Reference Mobility Communication
Entertainment Navigation Driving tips Controls At a glance
Page 169 of 282
3.
Open "Options".
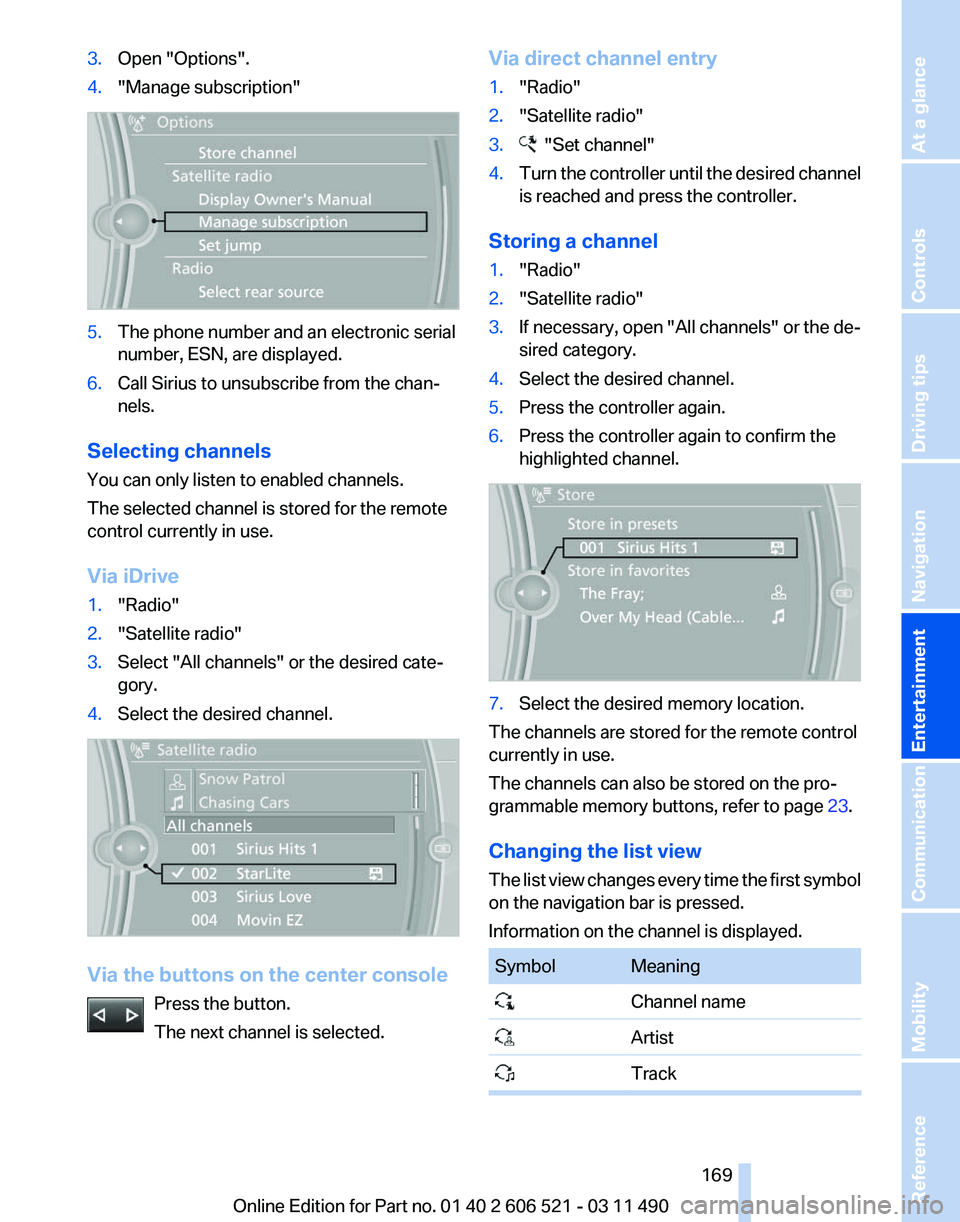
4. "Manage subscription" 5.
The phone number and an electronic serial
number, ESN, are displayed.
6. Call Sirius to unsubscribe from the chan‐
nels.
Selecting channels
You can only listen to enabled channels.
The selected channel is stored for the remote
control currently in use.
Via iDrive
1. "Radio"
2. "Satellite radio"
3. Select "All channels" or the desired cate‐
gory.
4. Select the desired channel. Via the buttons on the center console
Press the button.
The next channel is selected. Via direct channel entry
1.
"Radio"
2. "Satellite radio"
3. "Set channel"
4. Turn the controller until the desired channel
is reached and press the controller.
Storing a channel
1. "Radio"
2. "Satellite radio"
3. If necessary, open "All channels" or the de‐
sired category.
4. Select the desired channel.
5. Press the controller again.
6. Press the controller again to confirm the
highlighted channel. 7.
Select the desired memory location.
The channels are stored for the remote control
currently in use.
The channels can also be stored on the pro‐
grammable memory buttons, refer to page 23.
Changing the list view
The
list view changes every time the first symbol
on the navigation bar is pressed.
Information on the channel is displayed. Symbol Meaning
Channel name
Artist
Track Seite 169
169Online Edition for Part no. 01 40 2 606 521 - 03 11 490
Reference Mobility Communication
Entertainment Navigation Driving tips Controls At a glance
Page 171 of 282
Storing the league or team
Leagues
or teams can be added to the favorites
from a selection list.
1. "Radio"
2. "Satellite radio"
3. "Manage favorites"
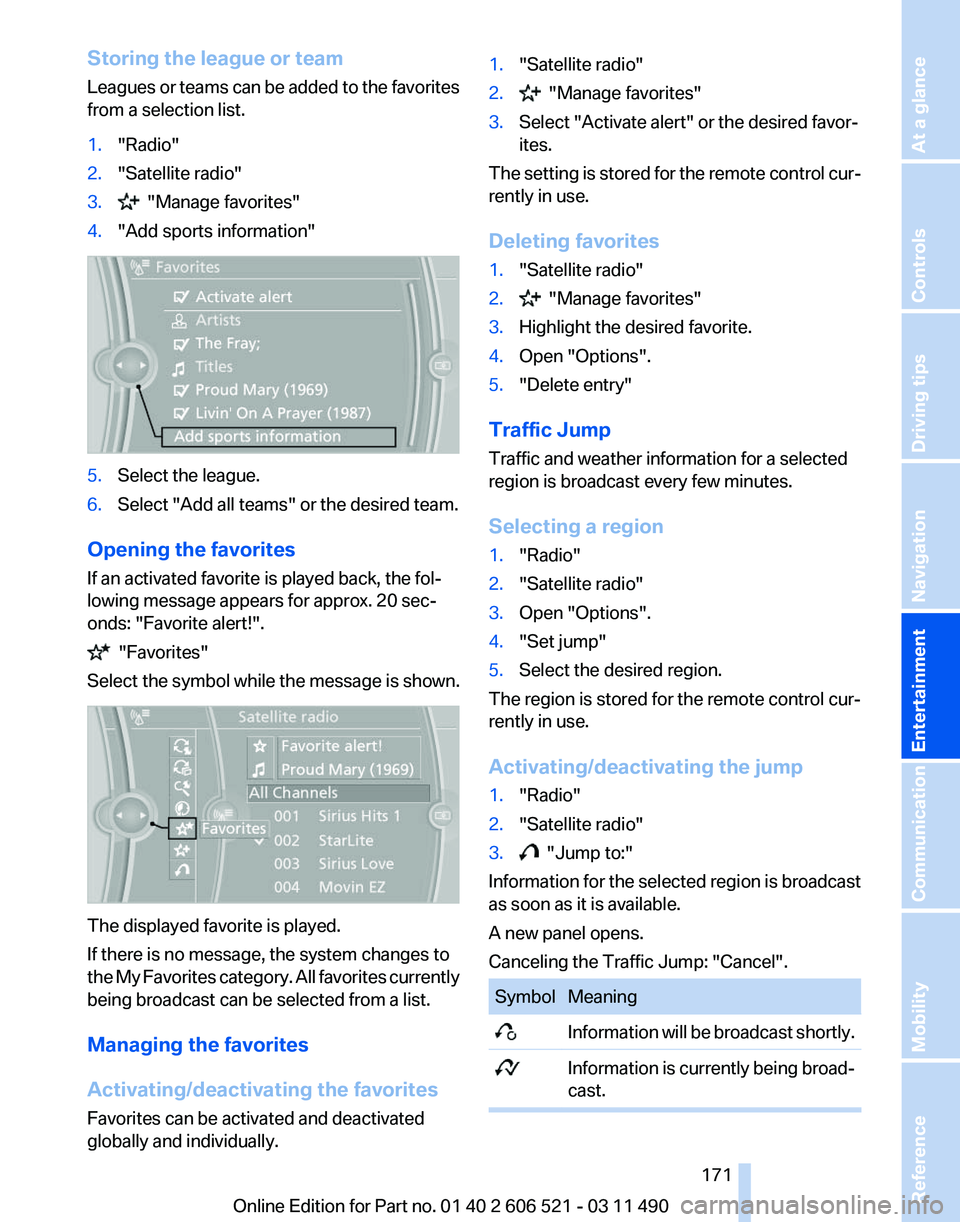
4. "Add sports information" 5.
Select the league.
6. Select "Add all teams" or the desired team.
Opening the favorites
If an activated favorite is played back, the fol‐
lowing message appears for approx. 20 sec‐
onds: "Favorite alert!". "Favorites"
Select the symbol while the message is shown. The displayed favorite is played.
If there is no message, the system changes to
the
My Favorites category. All favorites currently
being broadcast can be selected from a list.
Managing the favorites
Activating/deactivating the favorites
Favorites can be activated and deactivated
globally and individually. 1.
"Satellite radio"
2. "Manage favorites"
3. Select "Activate alert" or the desired favor‐
ites.
The setting is stored for the remote control cur‐
rently in use.
Deleting favorites
1. "Satellite radio"
2. "Manage favorites"
3. Highlight the desired favorite.
4. Open "Options".
5. "Delete entry"
Traffic Jump
Traffic and weather information for a selected
region is broadcast every few minutes.
Selecting a region
1. "Radio"
2. "Satellite radio"
3. Open "Options".
4. "Set jump"
5. Select the desired region.
The region is stored for the remote control cur‐
rently in use.
Activating/deactivating the jump
1. "Radio"
2. "Satellite radio"
3. "Jump to:"
Information for the selected region is broadcast
as soon as it is available.
A new panel opens.
Canceling the Traffic Jump: "Cancel". Symbol Meaning
Information will be broadcast shortly.
Information is currently being broad‐
cast. Seite 171
171Online Edition for Part no. 01 40 2 606 521 - 03 11 490
Reference Mobility Communication
Entertainment Navigation Driving tips Controls At a glance
Page 173 of 282
CD/multimedia
Controls
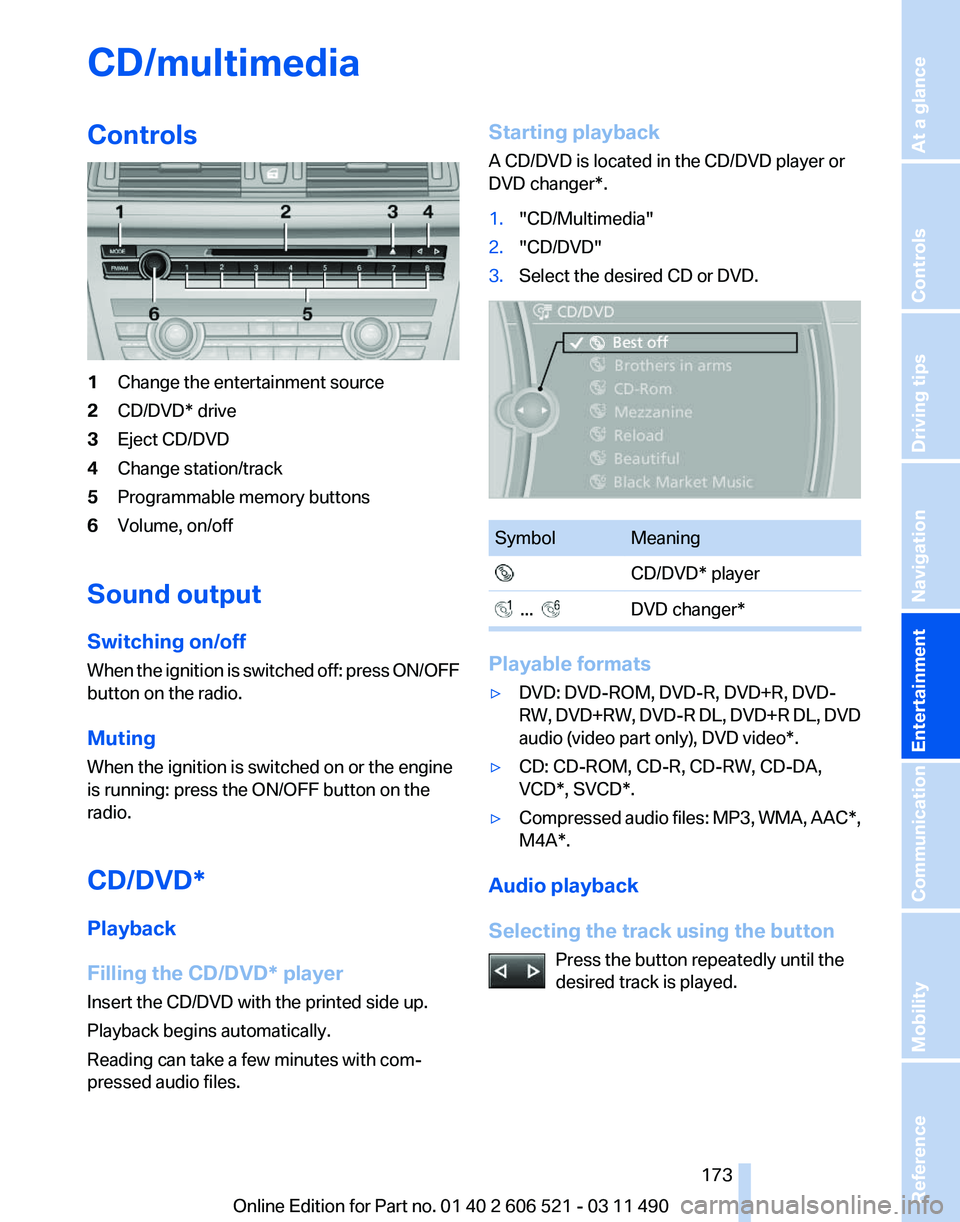
1
Change the entertainment source
2 CD/DVD* drive
3 Eject CD/DVD
4 Change station/track
5 Programmable memory buttons
6 Volume, on/off
Sound output
Switching on/off
When
the ignition is switched off: press ON/OFF
button on the radio.
Muting
When the ignition is switched on or the engine
is running: press the ON/OFF button on the
radio.
CD/DVD*
Playback
Filling the CD/DVD* player
Insert the CD/DVD with the printed side up.
Playback begins automatically.
Reading can take a few minutes with com‐
pressed audio files. Starting playback
A CD/DVD is located in the CD/DVD player or
DVD changer*.
1.
"CD/Multimedia"
2. "CD/DVD"
3. Select the desired CD or DVD. Symbol Meaning
CD/DVD* player ... DVD changer*
Playable formats
▷
DVD: DVD-ROM, DVD-R, DVD+R, DVD-
RW,
DVD+RW, DVD-R DL, DVD+R DL, DVD
audio (video part only), DVD video*.
▷ CD: CD-ROM, CD-R, CD-RW, CD-DA,
VCD*, SVCD*.
▷ Compressed audio files: MP3, WMA, AAC*,
M4A*.
Audio playback
Selecting the track using the button Press the button repeatedly until the
desired track is played. Seite 173
173Online Edition for Part no. 01 40 2 606 521 - 03 11 490
Reference Mobility Communication
Entertainment Navigation Driving tips Controls At a glance