2012 BMW 650I instrument cluster
[x] Cancel search: instrument clusterPage 104 of 282

To increase vehicle stability, activate DSC again
as soon as possible.
Activating DSC OFF
Press and hold the button, but not lon‐
ger than approx. 10 seconds, until the
indicator lamp for the DSC lights up in the in‐
strument cluster and DSC OFF is displayed in
the tachometer.
The DSC system is switched off.
Deactivating DSC OFF
Press the button.
DSC OFF and the DSC indicator lamp
go out.
Indicator/warning lamps
When DSC OFF is activated, DSC OFF is dis‐
played in the tachometer.
The indicator lamp lights up: DSC OFF
is activated.
TRACTION
Maximum traction on loose road surfaces. DTC
Dynamic Traction Control is switched on. Driv‐
ing stability is limited during acceleration and
when driving in bends.
Activating TRACTION Press the button.
TRACTION
is displayed in the tachom‐
eter.
The DSC indicator lamp in the instrument clus‐
ter lights up.
Deactivating TRACTION
Press the button again.
TRACTION and the DSC indicator lamp
go out.
Indicator/warning lamps
When TRACTION is activated, TRACTION is
displayed in the tachometer. The indicator lamp lights up: TRACTION
is activated.
SPORT+
Sporty driving with optimized chassis and sus‐
pension during limited driving stabilization.
Dynamic Traction Control is switched on.
The driver handles several of the stabilization
tasks.
Activating SPORT+ Press the button repeatedly until
SPORT+ appears in the tachometer
and the DSC indicator lamp lights up in the in‐
strument cluster.
Indicator/warning lamps
SPORT+ is displayed in the instrument cluster.
The indicator lamp lights up: DTC Dy‐
namic Traction Control is activated.
SPORT
Consistently
sporty tuning of the suspension for
greater driving agility with maximum driving sta‐
bilization.
The program can be configured to individual
specifications.
The configuration is stored for the remote con‐
trol currently in use.
Activating SPORT
Press the button repeatedly until
SPORT appears in the tachometer.
Configuring SPORT
When the display is activated on the Control
Display, refer to page 105, the sport program
can be set to individual specifications.
After the sport program is activated, select
"Configure SPORT mode" on the displayed
panel and configure the program.
Optionally, the sport program can be configured
before it is activated: Seite 104
104 Online Edition for Part no. 01 40 2 606 521 - 03 11 490
Driving stability control systems
Page 105 of 282
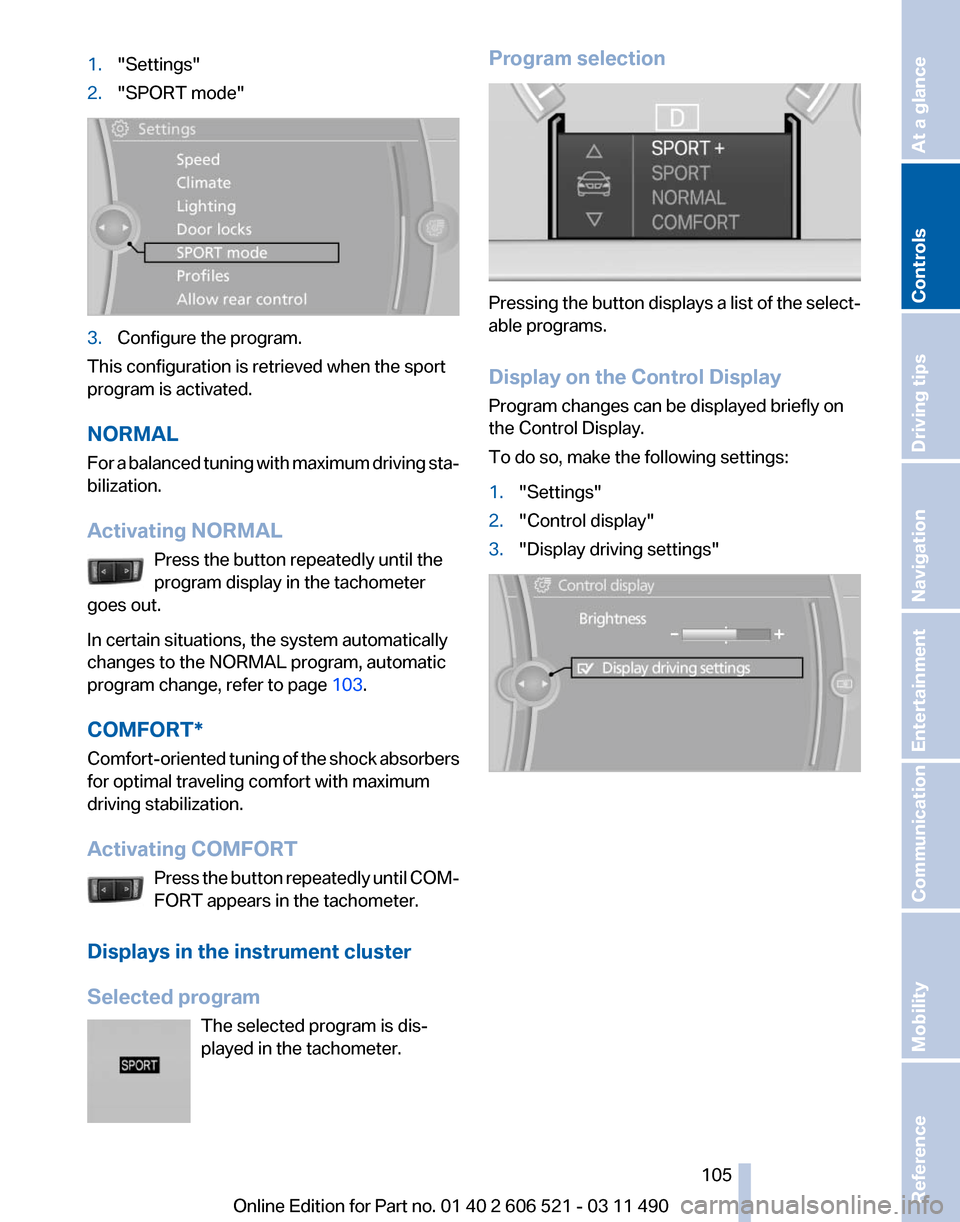
1.
"Settings"
2. "SPORT mode" 3.
Configure the program.
This configuration is retrieved when the sport
program is activated.
NORMAL
For
a balanced tuning with maximum driving sta‐
bilization.
Activating NORMAL
Press the button repeatedly until the
program display in the tachometer
goes out.
In certain situations, the system automatically
changes to the NORMAL program, automatic
program change, refer to page 103.
COMFORT*
Comfort-oriented tuning of the shock absorbers
for optimal traveling comfort with maximum
driving stabilization.
Activating COMFORT Press the button repeatedly until COM‐
FORT appears in the tachometer.
Displays in the instrument cluster
Selected program The selected program is dis‐
played in the tachometer. Program selection
Pressing the button displays a list of the select‐
able programs.
Display on the Control Display
Program changes can be displayed briefly on
the Control Display.
To do so, make the following settings:
1.
"Settings"
2. "Control display"
3. "Display driving settings" Seite 105
105Online Edition for Part no. 01 40 2 606 521 - 03 11 490
Reference Mobility Communication Entertainment Navigation Driving tips
Controls At a glance
Page 106 of 282
Driving comfort
Cruise control
The concept
The
system is functional at speeds beginning at
approx. 20 mph/30 km/h.
It maintains the speed that was set using the
control elements on the steering wheel.
The system brakes on downhill gradients if en‐
gine braking action is insufficient.
Unfavorable conditions
Do not use the system if unfavorable con‐
ditions make it impossible to drive at a constant
speed, for instance:
▷ On curvy roads.
▷ In heavy traffic.
▷ On slippery roads, in fog, snow or rain, or on
a loose road surface.
Otherwise, you could lose control of the vehicle
and cause an accident.◀
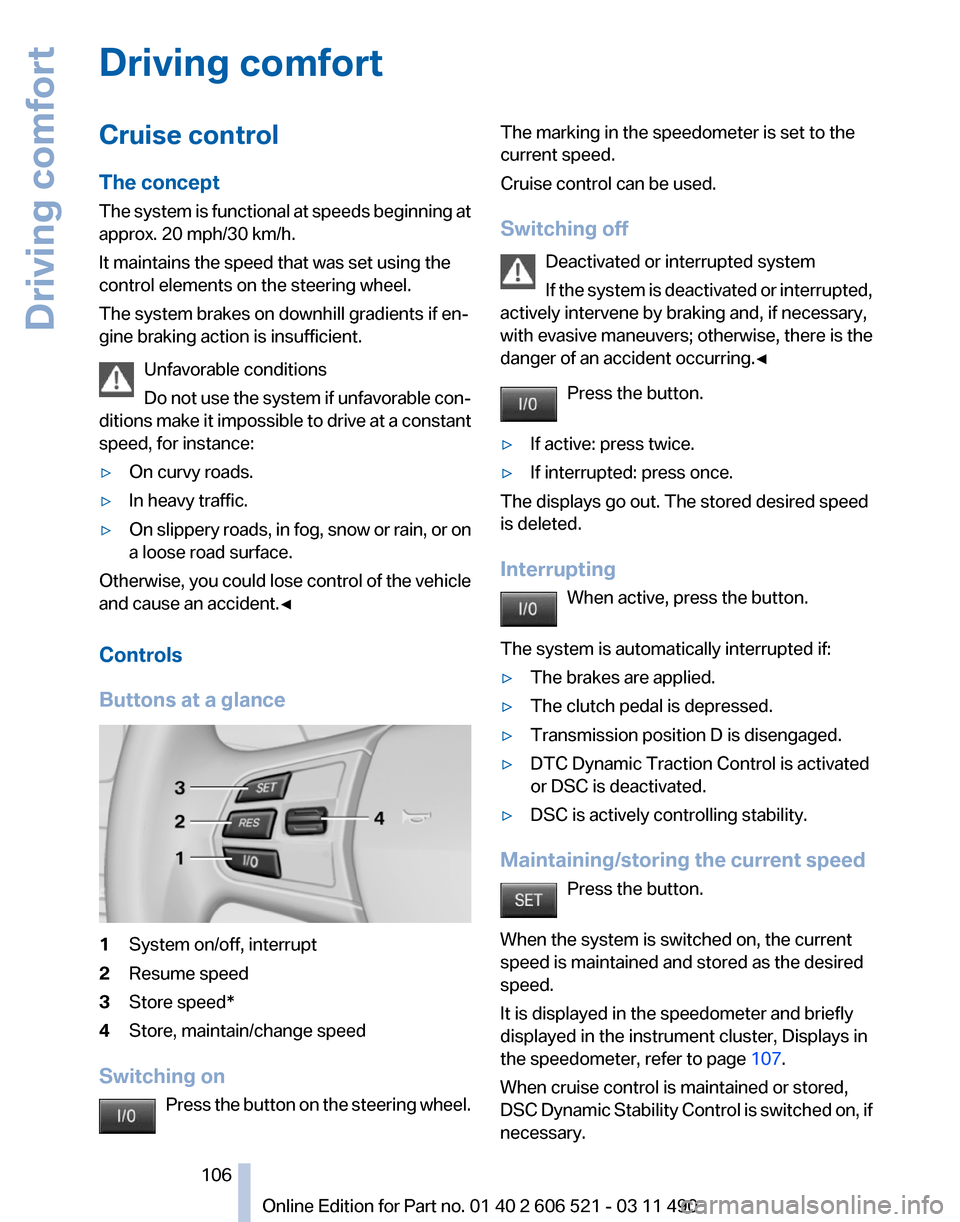
Controls
Buttons at a glance 1
System on/off, interrupt
2 Resume speed
3 Store speed*
4 Store, maintain/change speed
Switching on Press
the button on the steering wheel. The marking in the speedometer is set to the
current speed.
Cruise control can be used.
Switching off
Deactivated or interrupted system
If
the system is deactivated or interrupted,
actively intervene by braking and, if necessary,
with evasive maneuvers; otherwise, there is the
danger of an accident occurring.◀
Press the button.
▷ If active: press twice.
▷ If interrupted: press once.
The displays go out. The stored desired speed
is deleted.
Interrupting When active, press the button.
The system is automatically interrupted if:
▷ The brakes are applied.
▷ The clutch pedal is depressed.
▷ Transmission position D is disengaged.
▷ DTC Dynamic Traction Control is activated
or DSC is deactivated.
▷ DSC is actively controlling stability.
Maintaining/storing the current speed Press the button.
When the system is switched on, the current
speed is maintained and stored as the desired
speed.
It is displayed in the speedometer and briefly
displayed in the instrument cluster, Displays in
the speedometer, refer to page 107.
When cruise control is maintained or stored,
DSC
Dynamic Stability Control is switched on, if
necessary. Seite 106
106 Online Edition for Part no. 01 40 2 606 521 - 03 11 490
Driving comfort
Page 107 of 282
Change, maintain speed
The rocker switch can be pressed while inter‐
rupted to maintain and store the current speed.
Adapting the desired speed
Adapt the desired speed to the road con‐
ditions
and be ready to brake at all times; other‐
wise, there is the danger of an accident occur‐
ring.◀ Press the rocker switch up or down repeatedly
until the desired speed is set.
If active, the displayed speed is stored and the
vehicle reaches the stored speed if the road is
clear.
▷
Each time the rocker switch is pressed to the
point of resistance, the desired speed in‐
creases or decreases by approx. 1 mph/
1 km/h.
▷ Each time the rocker switch is pressed past
the point of resistance, the desired speed
increases or decreases by a maximum of
5 mph/10 km/h.
▷ Pressing the rocker switch to the resistance
point and holding it accelerates or deceler‐
ates the vehicle without requiring pressure
on
the accelerator. After the rocker switch is
released, the vehicle maintains its final
speed. Pressing the switch beyond the re‐
sistance point causes the vehicle to accel‐
erate more rapidly.
Resuming the desired speed Press the button.
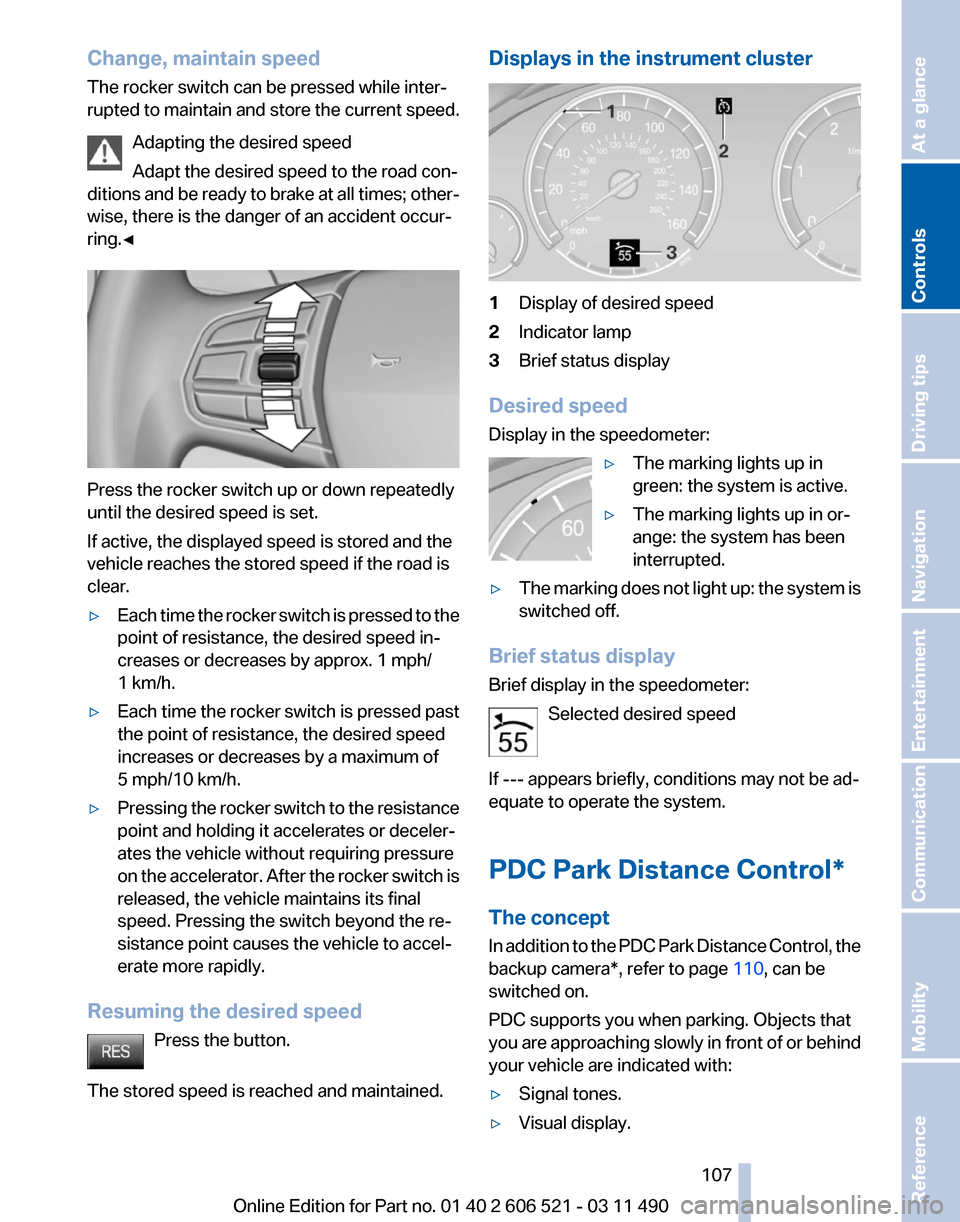
The stored speed is reached and maintained. Displays in the instrument cluster
1
Display of desired speed
2 Indicator lamp
3 Brief status display
Desired speed
Display in the speedometer: ▷The marking lights up in
green: the system is active.
▷ The marking lights up in or‐
ange: the system has been
interrupted.
▷ The marking does not light up: the system is
switched off.
Brief status display
Brief display in the speedometer: Selected desired speed
If --- appears briefly, conditions may not be ad‐
equate to operate the system.
PDC Park Distance Control*
The concept
In
addition to the PDC Park Distance Control, the
backup camera*, refer to page 110, can be
switched on.
PDC supports you when parking. Objects that
you are approaching slowly in front of or behind
your vehicle are indicated with:
▷ Signal tones.
▷ Visual display. Seite 107
107Online Edition for Part no. 01 40 2 606 521 - 03 11 490
Reference Mobility Communication Entertainment Navigation Driving tips
Controls At a glance
Page 153 of 282
Store the trip
Up to 30 trips can be stored in the trip list. If
necessary, delete existing trips to be able to
store new trips.
1.
Open "Options".
2. "Store trip"
3. Enter the name.
4. "OK"
Select the stored trip
1. "Navigation"
2. "Stored trips"
3. Select a stored trip.
4. "Start guidance"
Reversing the direction of travel
Intermediate destinations are displayed in re‐
verse order in the list.
1. "Map"
2. "Guidance"
3. Open "Options".
4. "Reverse order of trip dest."
Intermediate destination options
1. "Map"
2. "Guidance"
3. "Display all trip destinations"
4. Select an intermediate destination.
▷"Edit destination"
▷ "Reposition dest. in the trip": move an
intermediate destination to another po‐
sition in the list.
▷ "Delete dest. in the trip"
▷ "Go to next dest. in the trip"
Some options are not available for certain trips.
Delete the stored trip
1. "Stored trips"
2. Highlight the desired trip.
3. Open "Options".
4. "Delete all trips" or "Delete trip" Open the last trip
1.
"Navigation"
2. "Stored trips"
3. "Last trip"
4. "Start guidance"
Destination guidance
Starting destination guidance
1. "Navigation"
2. Make a destination entry, refer to page 146.
3. "Accept destination"
4. "Start guidance"
▷ The route is shown on the Control Display.
▷ The distance to the destination/intermedi‐
ate
destination and the estimated time of ar‐
rival are displayed in the map view.
▷ The arrow view is shown in the instrument
cluster,
in the Head-up Display*, and on the
Control Display where appropriate.
Terminating destination guidance
1. "Navigation"
2. "Map"
3. "Guidance"
4. "Stop guidance"
Continuing destination guidance
If
the destination was not reached during the last
trip, destination guidance can be resumed.
"Resume guidance"
Route criteria
General information
▷ The route calculated can be influenced by
selecting certain criteria.
▷ The route criteria can be changed when the
destination is entered and during destina‐
tion guidance.
Seite 153
153Online Edition for Part no. 01 40 2 606 521 - 03 11 490
Reference Mobility Communication Entertainment
Navigation Driving tips Controls At a glance
Page 154 of 282
▷
Road types are part of the navigation data
and
are taken into consideration when plan‐
ning a route, e.g., avoid highways.
▷ The recommended route may differ from the
route
you would take based on personal ex‐
perience.
▷ The settings are stored for the remote con‐
trol currently in use.
▷ Destination guidance with traffic bulletins,
refer to page 159.
Changing the route criteria
1. "Navigation"
2. "Map"
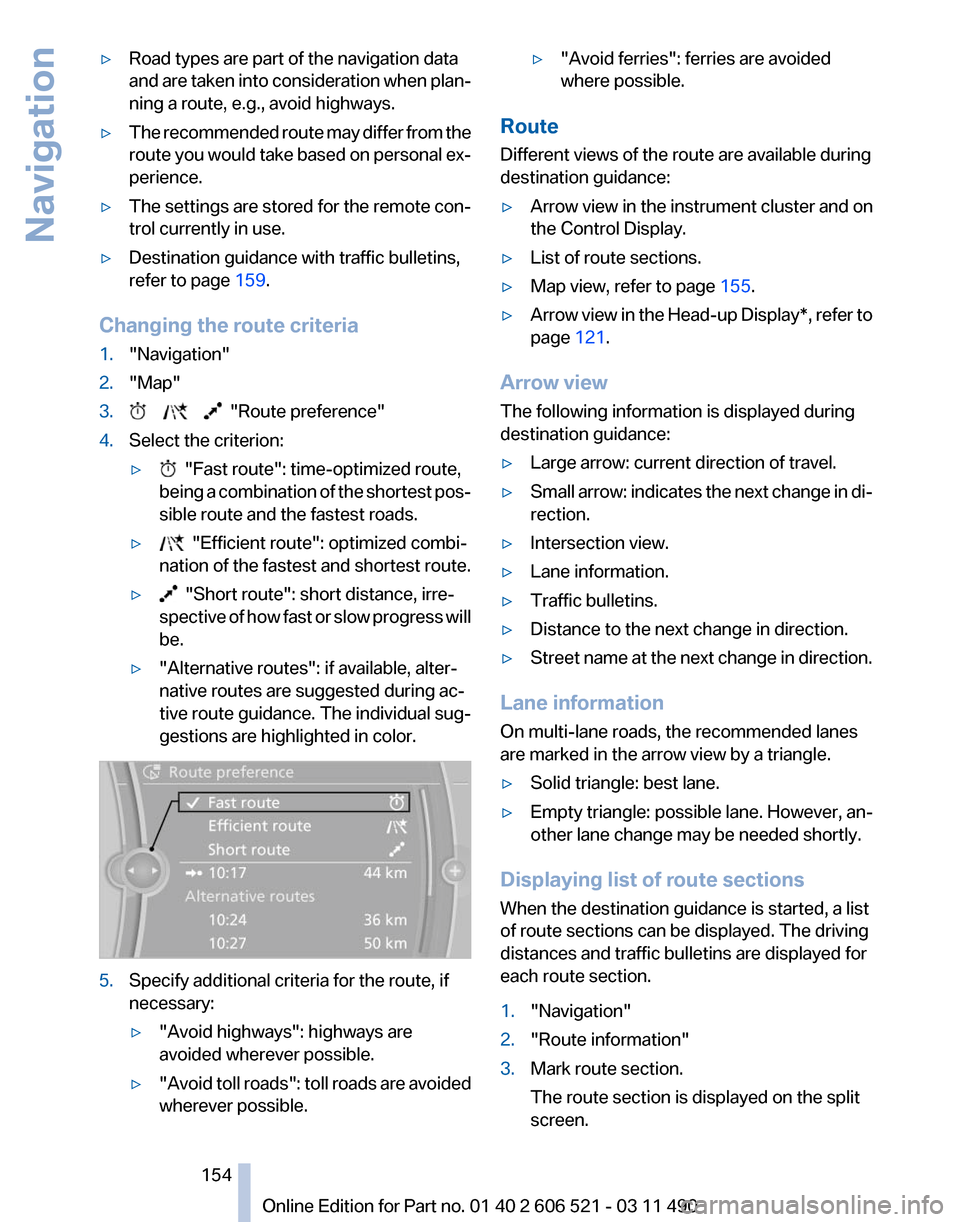
3. "Route preference"
4. Select the criterion:
▷ "Fast route": time-optimized route,
being
a combination of the shortest pos‐
sible route and the fastest roads.
▷ "Efficient route": optimized combi‐
nation of the fastest and shortest route.
▷ "Short route": short distance, irre‐
spective
of how fast or slow progress will
be.
▷ "Alternative routes": if available, alter‐
native routes are suggested during ac‐
tive route guidance. The individual sug‐
gestions are highlighted in color. 5.
Specify additional criteria for the route, if
necessary:
▷"Avoid highways": highways are
avoided wherever possible.
▷ "Avoid
toll roads": toll roads are avoided
wherever possible. ▷
"Avoid ferries": ferries are avoided
where possible.
Route
Different views of the route are available during
destination guidance:
▷ Arrow view in the instrument cluster and on
the Control Display.
▷ List of route sections.
▷ Map view, refer to page 155.
▷ Arrow view in the Head-up Display*, refer to
page 121.
Arrow view
The following information is displayed during
destination guidance:
▷ Large arrow: current direction of travel.
▷ Small arrow: indicates the next change in di‐
rection.
▷ Intersection view.
▷ Lane information.
▷ Traffic bulletins.
▷ Distance to the next change in direction.
▷ Street name at the next change in direction.
Lane information
On multi-lane roads, the recommended lanes
are marked in the arrow view by a triangle.
▷ Solid triangle: best lane.
▷ Empty triangle: possible lane. However, an‐
other lane change may be needed shortly.
Displaying list of route sections
When the destination guidance is started, a list
of route sections can be displayed. The driving
distances and traffic bulletins are displayed for
each route section.
1. "Navigation"
2. "Route information"
3. Mark route section.
The route section is displayed on the split
screen.
Seite 154
154 Online Edition for Part no. 01 40 2 606 521 - 03 11 490
Navigation
Page 200 of 282
Incoming call
Receiving calls
If
the number of the caller is stored in the phone
book and is transmitted by the network, the
name of the contact is displayed. Otherwise,
only the phone number is displayed.
If more than one phone number is assigned to a
contact, only the name of the contact is dis‐
played.
For calls on the additional telephone, the num‐
ber is only displayed if it is transmitted by the
network.
An incoming call to the additional telephone is
automatically rejected if there is an active call on
the other telephone.
Accepting a call
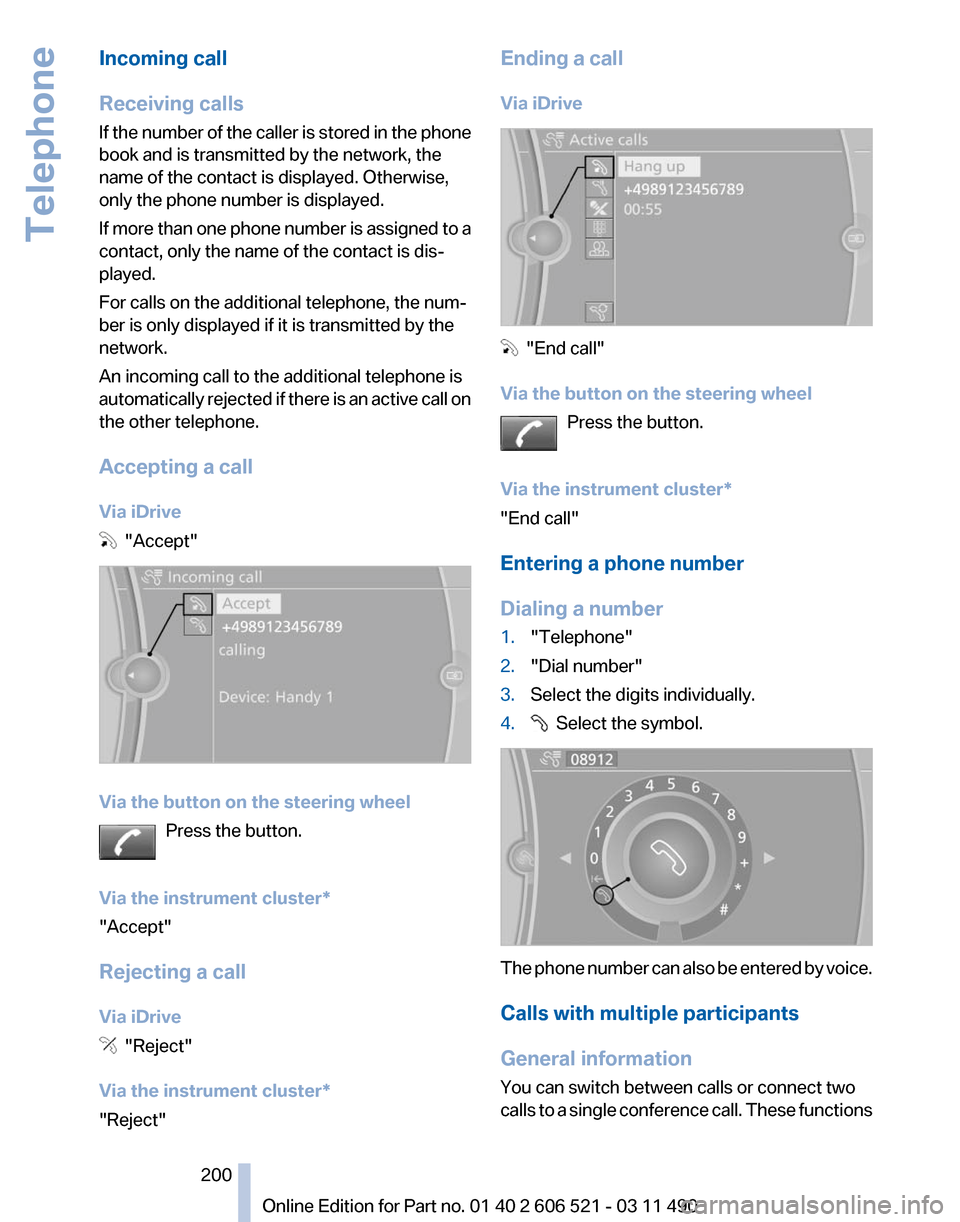
Via iDrive "Accept"
Via the button on the steering wheel
Press the button.
Via the instrument cluster
*
"Accept"
Rejecting a call
Via iDrive "Reject"
Via the instrument cluster
*
"Reject" Ending a call
Via iDrive
"End call"
Via the button on the steering wheel Press the button.
Via the instrument cluster
*
"End call"
Entering a phone number
Dialing a number
1. "Telephone"
2. "Dial number"
3. Select the digits individually.
4. Select the symbol.
The phone number can also be entered by voice.
Calls with multiple participants
General information
You can switch between calls or connect two
calls
to a single conference call. These functions Seite 200
200 Online Edition for Part no. 01 40 2 606 521 - 03 11 490
Telephone
Page 202 of 282
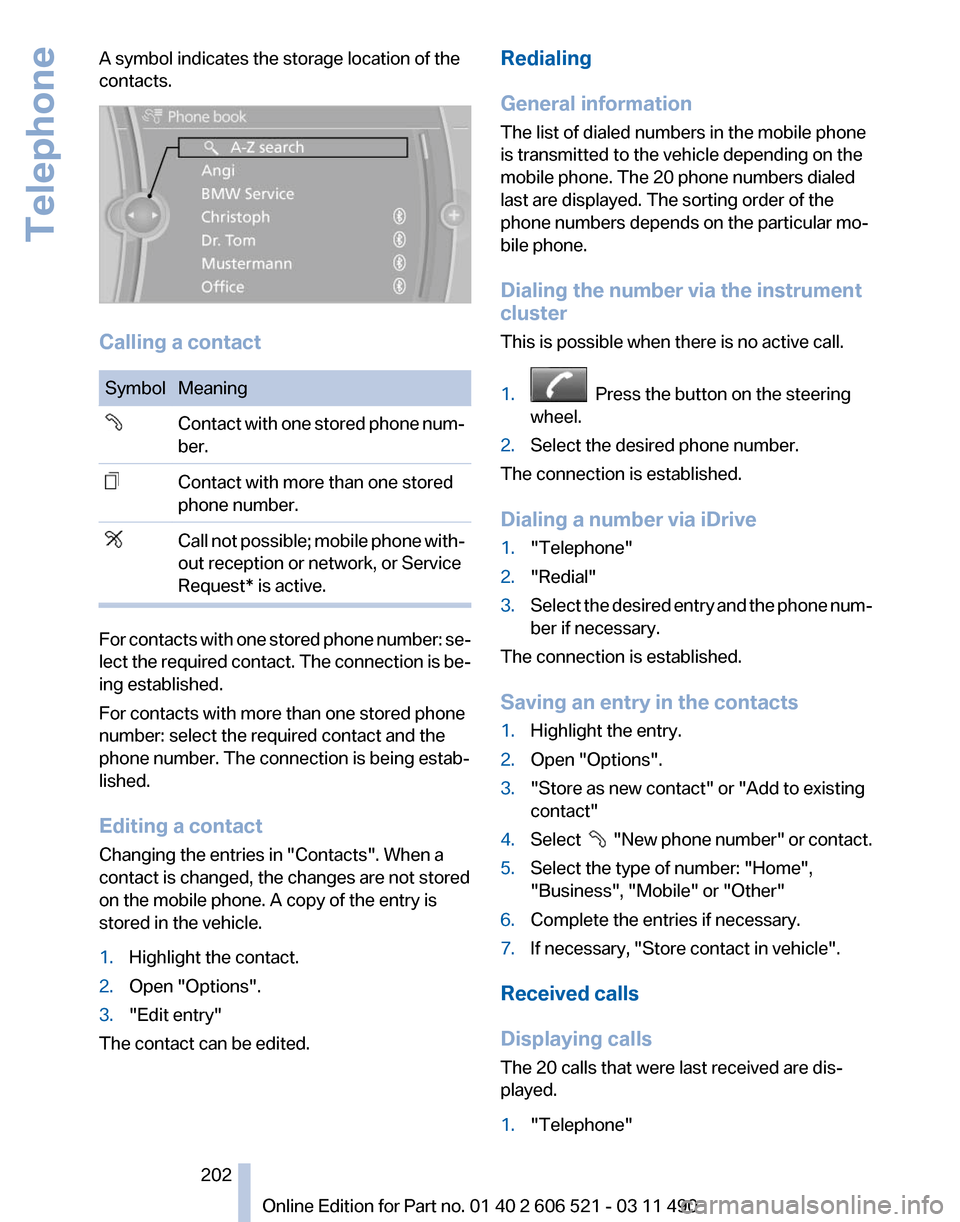
A symbol indicates the storage location of the
contacts.
Calling a contact
Symbol Meaning
Contact with one stored phone num‐
ber.
Contact with more than one stored
phone number.
Call not possible; mobile phone with‐
out reception or network, or Service
Request* is active.
For contacts with one stored phone number: se‐
lect
the required contact. The connection is be‐
ing established.
For contacts with more than one stored phone
number: select the required contact and the
phone number. The connection is being estab‐
lished.
Editing a contact
Changing the entries in "Contacts". When a
contact is changed, the changes are not stored
on the mobile phone. A copy of the entry is
stored in the vehicle.
1. Highlight the contact.
2. Open "Options".
3. "Edit entry"
The contact can be edited. Redialing
General information
The list of dialed numbers in the mobile phone
is transmitted to the vehicle depending on the
mobile phone. The 20 phone numbers dialed
last are displayed. The sorting order of the
phone numbers depends on the particular mo‐
bile phone.
Dialing the number via the instrument
cluster
This is possible when there is no active call.
1.
Press the button on the steering
wheel.
2. Select the desired phone number.
The connection is established.
Dialing a number via iDrive
1. "Telephone"
2. "Redial"
3. Select the desired entry and the phone num‐
ber if necessary.
The connection is established.
Saving an entry in the contacts
1. Highlight the entry.
2. Open "Options".
3. "Store as new contact" or "Add to existing
contact"
4. Select
"New phone number" or contact.
5. Select the type of number: "Home",
"Business", "Mobile" or "Other"
6. Complete the entries if necessary.
7. If necessary, "Store contact in vehicle".
Received calls
Displaying calls
The 20 calls that were last received are dis‐
played.
1. "Telephone"
Seite 202
202 Online Edition for Part no. 01 40 2 606 521 - 03 11 490
Telephone