2012 BMW 650I phone
[x] Cancel search: phonePage 26 of 282

Example: playing back a CD
1.
Switch on the Entertainment sound output
if necessary.
2. Press the button on the steering
wheel.
3. ›C D and multimedia‹
The medium last played is played back.
4. Press the button on the steering
wheel.
5. ›C D track ...‹ e.g., CD track 4.
Setting the voice dialog
You can set whether the system should use the
standard dialog or a shorter version.
In the shorter variant of the voice dialog, the an‐
nouncements from the system are issued in an
abbreviated form.
On the Control Display:
1. "Settings"
2. "Language/Units"
3. "Speech mode:"
4. Select the setting. Adjusting the volume
Turn
the volume button while giving an instruc‐
tion until the desired volume is set.
▷ The volume remains constant even if the
volume of other audio sources is changed. ▷
The volume is stored for the remote control
currently in use.
Notes on Emergency
Requests
Do
not use the voice activation system to initiate
an Emergency Request. In stressful situations,
the voice and vocal pitch can change. This can
unnecessarily delay the establishment of a tel‐
ephone connection.
Instead, use the SOS button*, refer to
page 248, in the vicinity of the interior mirror.
Environmental conditions
▷ Say the commands, numbers, and letters
smoothly and with normal volume, empha‐
sis, and speed.
▷ Always say commands in the language of
the voice activation system.
▷ When selecting a radio station, use the com‐
mon pronunciation of the station name.
▷ Keep the doors, windows, and convertible
top closed to prevent noise interference.
▷ Avoid making other noise in the vehicle
while speaking.
Seite 26
26 Online Edition for Part no. 01 40 2 606 521 - 03 11 490
Voice activation system
Page 38 of 282

Pinch hazard when moving back the seat
If
this function is used, first make sure that
the footwell behind the driver's seat is empty.
Otherwise, people can be injured or objects
damaged when the seat is moved back.◀
The adjustment procedure is interrupted:
▷ When a seat position switch is pressed.
▷ When a button of the seat, mirror, and steer‐
ing wheel memory is pressed briefly.
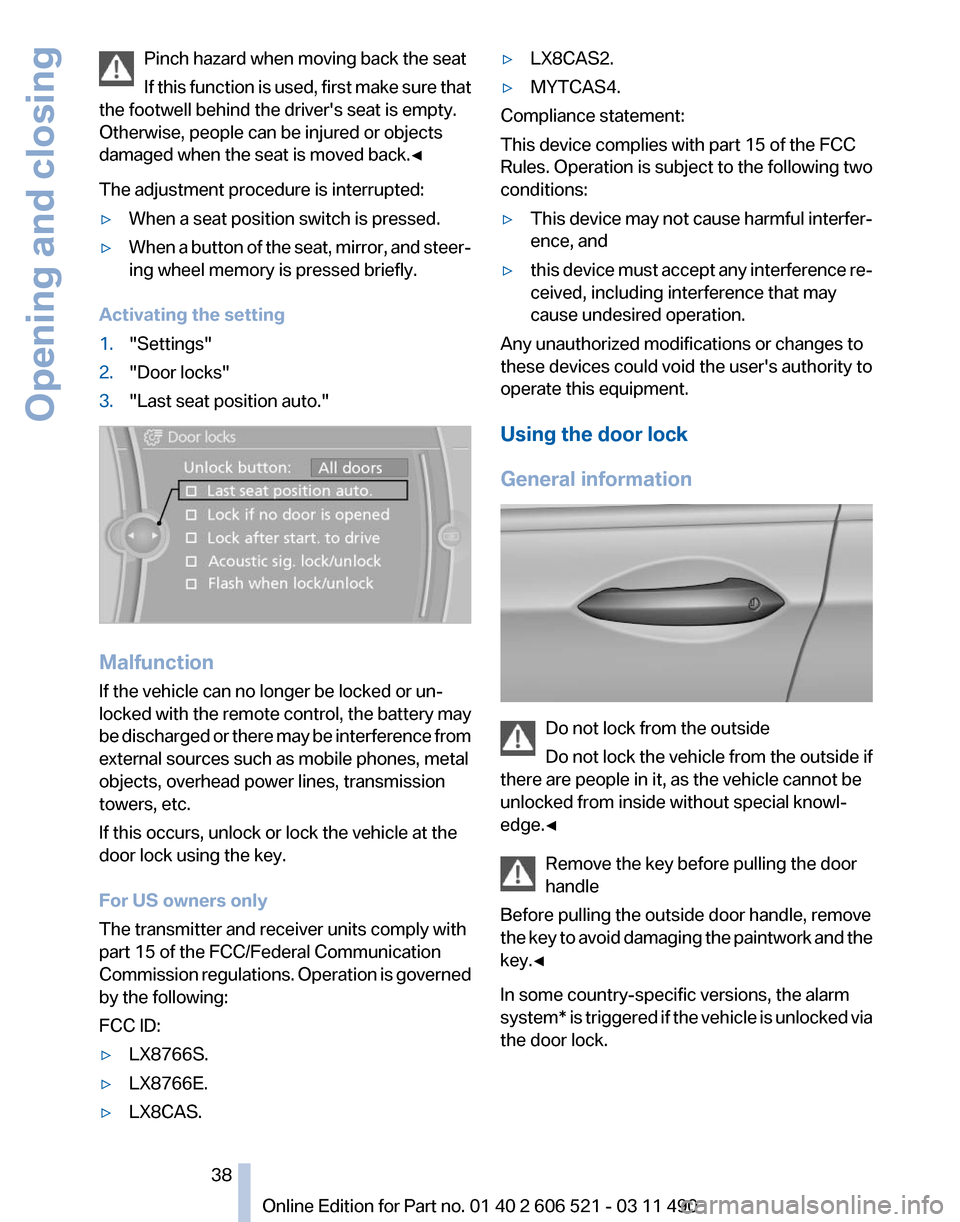
Activating the setting
1. "Settings"
2. "Door locks"
3. "Last seat position auto." Malfunction
If the vehicle can no longer be locked or un‐
locked
with the remote control, the battery may
be discharged or there may be interference from
external sources such as mobile phones, metal
objects, overhead power lines, transmission
towers, etc.
If this occurs, unlock or lock the vehicle at the
door lock using the key.
For US owners only
The transmitter and receiver units comply with
part 15 of the FCC/Federal Communication
Commission regulations. Operation is governed
by the following:
FCC ID:
▷ LX8766S.
▷ LX8766E.
▷ LX8CAS. ▷
LX8CAS2.
▷ MYTCAS4.
Compliance statement:
This device complies with part 15 of the FCC
Rules. Operation is subject to the following two
conditions:
▷ This device may not cause harmful interfer‐
ence, and
▷ this device must accept any interference re‐
ceived, including interference that may
cause undesired operation.
Any unauthorized modifications or changes to
these devices could void the user's authority to
operate this equipment.
Using the door lock
General information Do not lock from the outside
Do
not lock the vehicle from the outside if
there are people in it, as the vehicle cannot be
unlocked from inside without special knowl‐
edge.◀
Remove the key before pulling the door
handle
Before pulling the outside door handle, remove
the key to avoid damaging the paintwork and the
key.◀
In some country-specific versions, the alarm
system* is triggered if the vehicle is unlocked via
the door lock. Seite 38
38 Online Edition for Part no. 01 40 2 606 521 - 03 11 490
Opening and closing
Page 42 of 282

sumers are switched off before locking the ve‐
hicle.
Convenient closing
Press the area, arrow 2, with your finger and
hold.
In addition to locking, the convertible top, the
side
windows, and the rear window close as well.
Press the area, arrow 2, and hold until the con‐
vertible top is fully closed.
Monitor the closing process
Monitor the closing process to ensure that
no one becomes trapped.◀
Releasing the area, arrow 2, stops the motion.
After a short period, the convertible top and the
convertible top well storage cover are lowered
slowly. The convertible top and the convertible
top well storage cover are not locked. Press the
area, arrow 2, again until the convertible top op‐
eration is completed.
Unlocking the trunk lid separately
Press on the top half of the BMW emblem on the
trunk lid.
This corresponds to pressing the button.
Do not place the remote control in the
cargo area
Take the remote control with you and do not
leave
it in the cargo area; otherwise, the remote
control may be locked inside the vehicle when
the trunk lid is closed.◀
Malfunction
Comfort Access may not function properly if it
experiences interference from external sources
such as mobile phones, metal objects, overhead
power lines, transmission towers, etc.
If this occurs, open or close the vehicle using the
buttons on the remote control or use a key in the
door lock.
To subsequently start the engine, hold the re‐
mote control against the marked area on the
steering column, refer to page 33. Alarm system*
The concept
The vehicle alarm system responds to:
▷
Opening of a door, the hood or the trunk lid.
▷ Movements in the vehicle: interior motion
sensor, refer to page 43.
▷ Changes in the vehicle tilt, e.g., during at‐
tempts to steal a wheel or when towing the
car.
▷ Interruptions in battery voltage.
The alarm system briefly indicates tampering:
▷ By sounding an acoustic alarm.
▷ By switching on the hazard warning system.
▷ By flashing the high beams.
Arming and disarming the alarm
system
General information
When
you lock or unlock the vehicle, either with
the remote control or at the door lock*, the alarm
system is armed or disarmed at the same time.
Door lock and armed alarm system
Unlocking via the door lock will trigger the alarm
on some country-specific versions.
Trunk lid and armed alarm system
The trunk lid can be opened using the remote
control, even if the alarm system is armed.
Press the button on the remote control
for approx. 1 second and release.
After the trunk lid is closed, it is locked and
monitored again by the alarm system. The haz‐
ard warning system flashes once.
In some vehicle equipment variants, the trunk lid
can only be opened using the remote control if
the vehicle was unlocked first.
Panic mode* Press the button on the remote control
for at least 3 seconds. Seite 42
42 Online Edition for Part no. 01 40 2 606 521 - 03 11 490
Opening and closing
Page 76 of 282

The bar display for the current fuel consumption
is displayed in the instrument cluster.
Energy recovery
The energy of motion of the ve‐
hicle
is converted to electrical en‐
ergy while coasting. The vehicle
battery is partially charged and
fuel consumption can be low‐
ered.
Odometer and trip odometer ▷Odometer, arrow 1.
▷ Trip odometer, arrow 2.
Display/reset miles Press the knob.
▷When the ignition is switched
off,
the time, external temper‐
ature and odometer are dis‐
played.
▷ When the ignition is switched on, the trip
odometer is reset.
Time The time is displayed at the bot‐
tom of the instrument cluster.
Setting
the time and time format,
refer to page 79.
Date The date is displayed in the in‐
strument cluster.
Setting the date and date format,
refer to page 80. Selection lists in the
instrument cluster
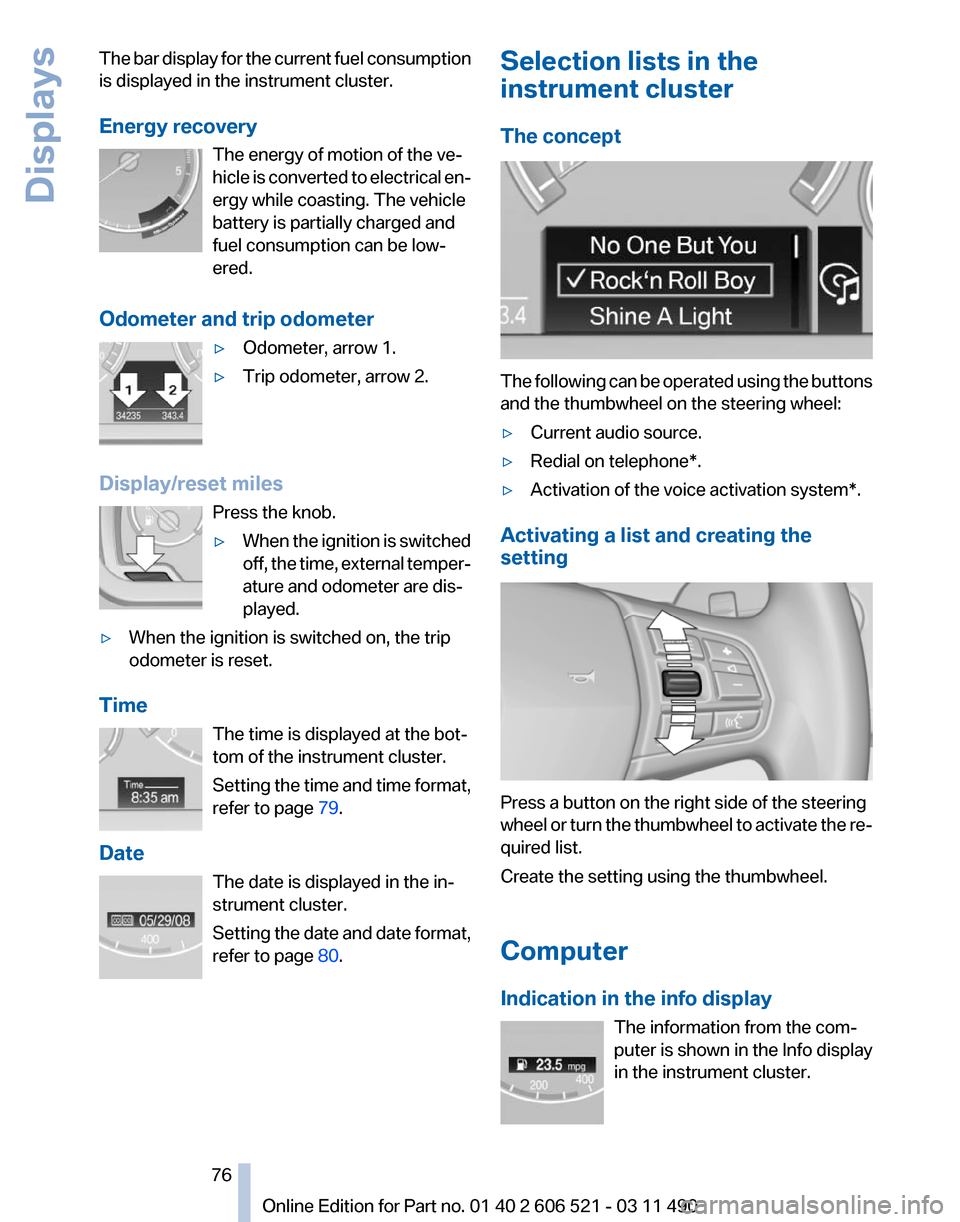
The concept
The following can be operated using the buttons
and the thumbwheel on the steering wheel:
▷
Current audio source.
▷ Redial on telephone*.
▷ Activation of the voice activation system*.
Activating a list and creating the
setting Press a button on the right side of the steering
wheel
or turn the thumbwheel to activate the re‐
quired list.
Create the setting using the thumbwheel.
Computer
Indication in the info display
The information from the com‐
puter is shown in the Info display
in the instrument cluster. Seite 76
76 Online Edition for Part no. 01 40 2 606 521 - 03 11 490
Displays
Page 88 of 282

Safety
Airbags
1
Front airbag, driver
2 Front airbag, front passenger 3
Side airbag
4 Knee airbags
Front airbags
Front airbags help protect the driver and front
passenger by responding to frontal impacts in
which safety belts alone cannot provide ade‐
quate restraint.
Side airbags
In a lateral impact, the side airbag supports the
side
of the body in the chest, lap, and head area.
Knee airbag
The knee airbag supports the legs in a frontal
impact.
Protective action
Airbags are not triggered in every impact situa‐
tion, e.g., in less severe accidents or rear-end
collisions. Information on how to ensure the optimal
protective effect of the airbags
▷ Keep at a distance from the airbags.
▷ Always grasp the steering wheel on the
steering wheel rim, holding your hands at
the
3 o'clock and 9 o'clock positions, to keep
the danger of injury to your hands or arms as
low as possible if the airbag is triggered.
▷ There should be no people, animals, or ob‐
jects between an airbag and a person.
▷ Do not use the cover of the front airbag on
the front passenger side as a storage area.
▷ Keep the dashboard and window on the
front
passenger side clear, i.e., do not cover
with adhesive labels or coverings, and do not
attach holders such as for navigation instru‐
ments and mobile phones. Seite 88
88 Online Edition for Part no. 01 40 2 606 521 - 03 11 490
Safety
Page 139 of 282

Climate control windshield*
The marked area is not covered with heat re‐
flective coating.
Use this area for garage door openers, devices
for electronic toll collection, etc.
Mobile communication devices in the
vehicle
Mobile communication devices in the ve‐
hicle
It
is advised that you do not use mobile commu‐
nication devices, e.g., mobile phones, inside the
vehicle without connecting them directly to the
external antenna. Otherwise, the vehicle elec‐
tronics and mobile communication devices can
interfere with each other. In addition, there is no
assurance that the radiation generated during
transmission will be discharged from the vehicle
interior.◀
Hydroplaning
On wet or slushy roads, a wedge of water can
form between the tires and road surface.
This phenomenon is referred to as hydroplan‐
ing. It is characterized by a partial or complete
loss of contact between the tires and the road
surface, ultimately undermining your ability to
steer and brake the vehicle.
Hydroplaning
When driving on wet or slushy roads, re‐
duce your speed to prevent hydroplaning.◀ Driving through water
Drive though calm water only if it is not deeper
than 9.8 inches/25 cm and at this height, no
faster
than walking speed, up to 6 mph/10 km/h.
Adhere to water depth and speed limita‐
tions
Do not exceed this water depth and walking
speed; otherwise, the vehicle's engine, the elec‐
trical systems and the transmission may be
damaged.◀
Braking safely
Your vehicle is equipped with ABS as a standard
feature.
Applying the brakes fully is the most effective
way of braking in situations when this is neces‐
sary.
The vehicle maintains steering responsiveness.
You can still avoid any obstacles with a minimum
of steering effort.
Pulsation of the brake pedal and sounds from
the hydraulic circuits indicate that ABS is in its
active mode.
Objects in the area around the pedals
No objects in the area around the pedals
Keep floor mats, carpets, and any other
objects out of the area of motion of the pedals;
otherwise, the function of the pedals could be
impeded while driving
Do not place additional floor mats over existing
mats or other objects.
Only use floor mats that have been approved for
the vehicle and can be properly fixed in place.
Ensure that the floor mats are securely fastened
again after they were removed for cleaning, for
example.◀
Driving in wet conditions
When roads are wet or there is heavy rain, briefly
exert gentle pressure on the brake pedal every
few miles.
Ensure that this action does not endanger other
road users. Seite 139
139Online Edition for Part no. 01 40 2 606 521 - 03 11 490
Reference Mobility Communication Entertainment Navigation
Driving tips Controls At a glance
Page 147 of 282

3.
Select the numbers.
4. Change to the list of postal codes and towns/
cities.
5. Highlight the entry.
6. Selecting an entry.
Entering a street and intersection
1. Select "Street" or the displayed street.
2. Enter a street and intersection in the same
way as you would enter a town/city.
If there are several streets with the same name:
1. Change to the list of street names.
2. Highlight the street.
3. Select the street.
Alternative: enter the street address
and house number
1. Select "Street" or the displayed street.
2. Enter the street as you would the town/city.
3. "House number"
4. Select the numbers.
5. Change to the list of house numbers.
6. Select a house number or range of house
numbers.
Street does not exist in the destination
city/town
The
desired street does not exist in the specified
city/town because it belongs to another part of
the city/town.
1. "Navigation"
2. "Enter address"
3. Select "Street" or the displayed street.
4. Change to the list of street names.
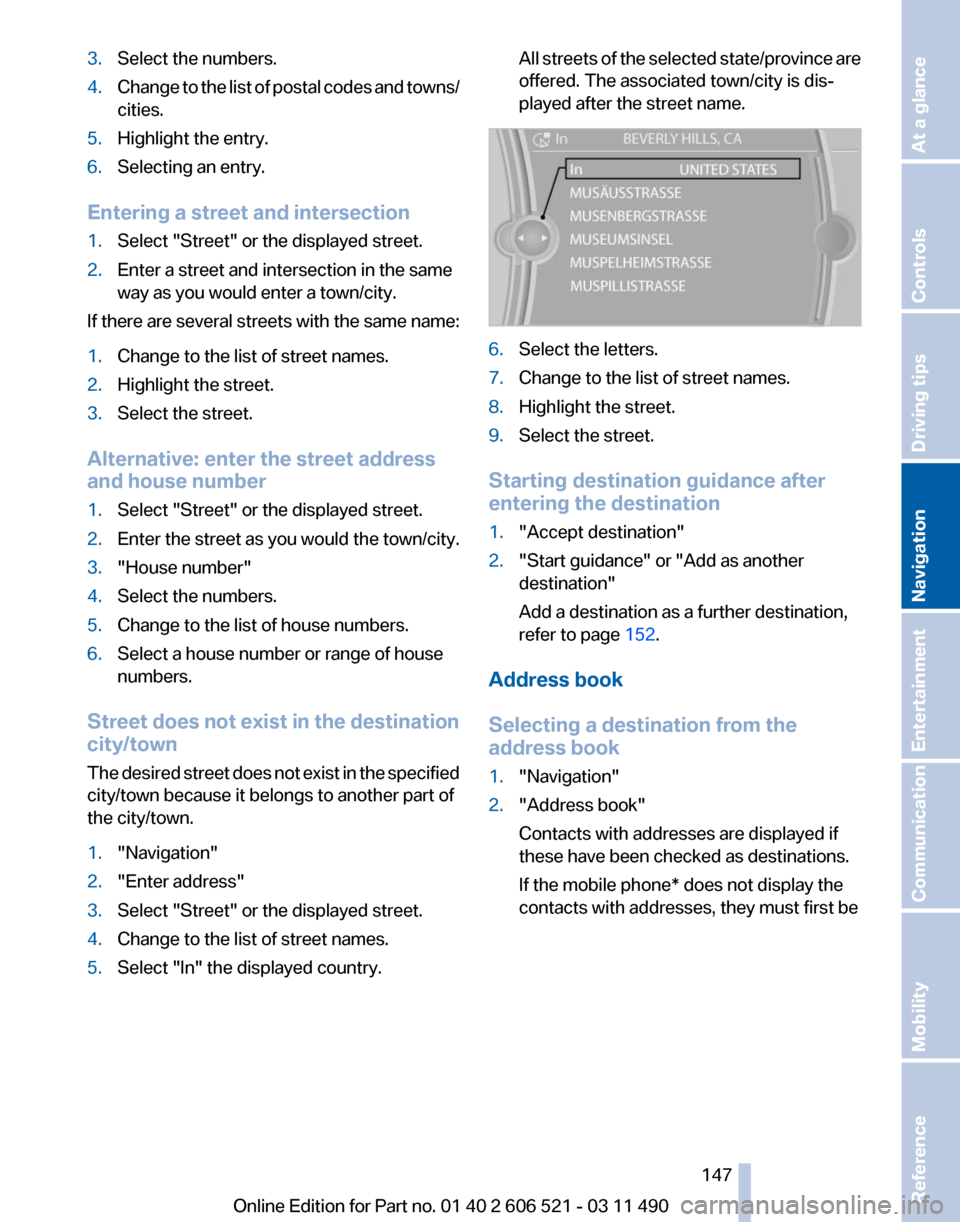
5. Select "In" the displayed country. All streets of the selected state/province are
offered. The associated town/city is dis‐
played after the street name.
6.
Select the letters.
7. Change to the list of street names.
8. Highlight the street.
9. Select the street.
Starting destination guidance after
entering the destination
1. "Accept destination"
2. "Start guidance" or "Add as another
destination"
Add a destination as a further destination,
refer to page 152.
Address book
Selecting a destination from the
address book
1. "Navigation"
2. "Address book"
Contacts with addresses are displayed if
these have been checked as destinations.
If the mobile phone* does not display the
contacts with addresses, they must first be
Seite 147
147Online Edition for Part no. 01 40 2 606 521 - 03 11 490
Reference Mobility Communication Entertainment
Navigation Driving tips Controls At a glance
Page 149 of 282

Last destinations
At a glance
The destinations previously entered are stored
automatically.
The
destinations can be called up and used as a
destination for destination guidance.
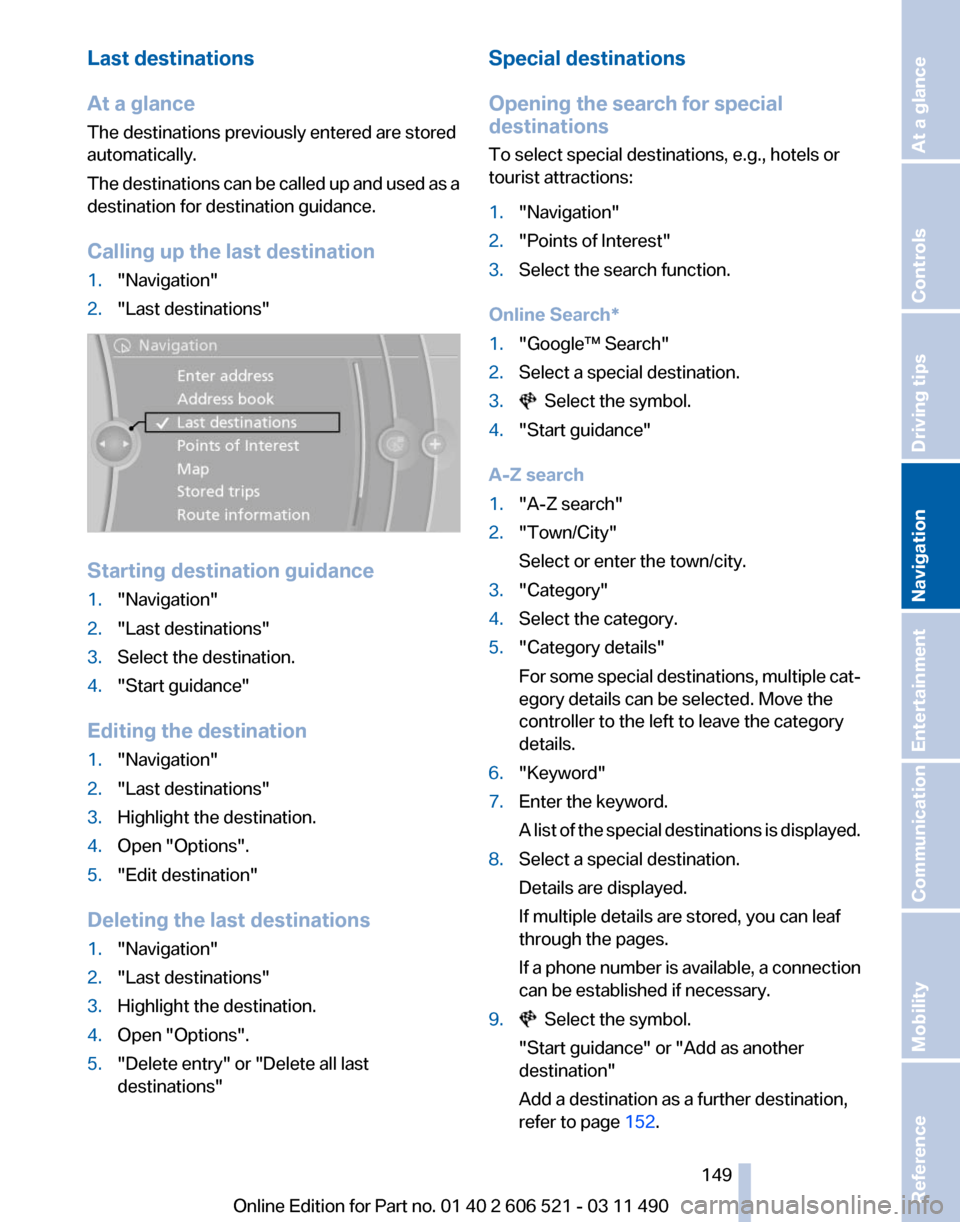
Calling up the last destination
1. "Navigation"
2. "Last destinations" Starting destination guidance
1.
"Navigation"
2. "Last destinations"
3. Select the destination.
4. "Start guidance"
Editing the destination
1. "Navigation"
2. "Last destinations"
3. Highlight the destination.
4. Open "Options".
5. "Edit destination"
Deleting the last destinations
1. "Navigation"
2. "Last destinations"
3. Highlight the destination.
4. Open "Options".
5. "Delete entry" or "Delete all last
destinations" Special destinations
Opening the search for special
destinations
To select special destinations, e.g., hotels or
tourist attractions:
1.
"Navigation"
2. "Points of Interest"
3. Select the search function.
Online Search*
1. "Google™ Search"
2. Select a special destination.
3. Select the symbol.
4. "Start guidance"
A-Z search
1. "A-Z search"
2. "Town/City"
Select or enter the town/city.
3. "Category"
4. Select the category.
5. "Category details"
For
some special destinations, multiple cat‐
egory details can be selected. Move the
controller to the left to leave the category
details.
6. "Keyword"
7. Enter the keyword.
A
list of the special destinations is displayed.
8. Select a special destination.
Details are displayed.
If multiple details are stored, you can leaf
through the pages.
If
a phone number is available, a connection
can be established if necessary.
9. Select the symbol.
"Start guidance" or "Add as another
destination"
Add a destination as a further destination,
refer to page 152.
Seite 149
149Online Edition for Part no. 01 40 2 606 521 - 03 11 490
Reference Mobility Communication Entertainment
Navigation Driving tips Controls At a glance