2012 BMW 335IS CONVERTIBLE ESP
[x] Cancel search: ESPPage 108 of 314
107
Technology for driving comfort and safety
Controls
Airbags
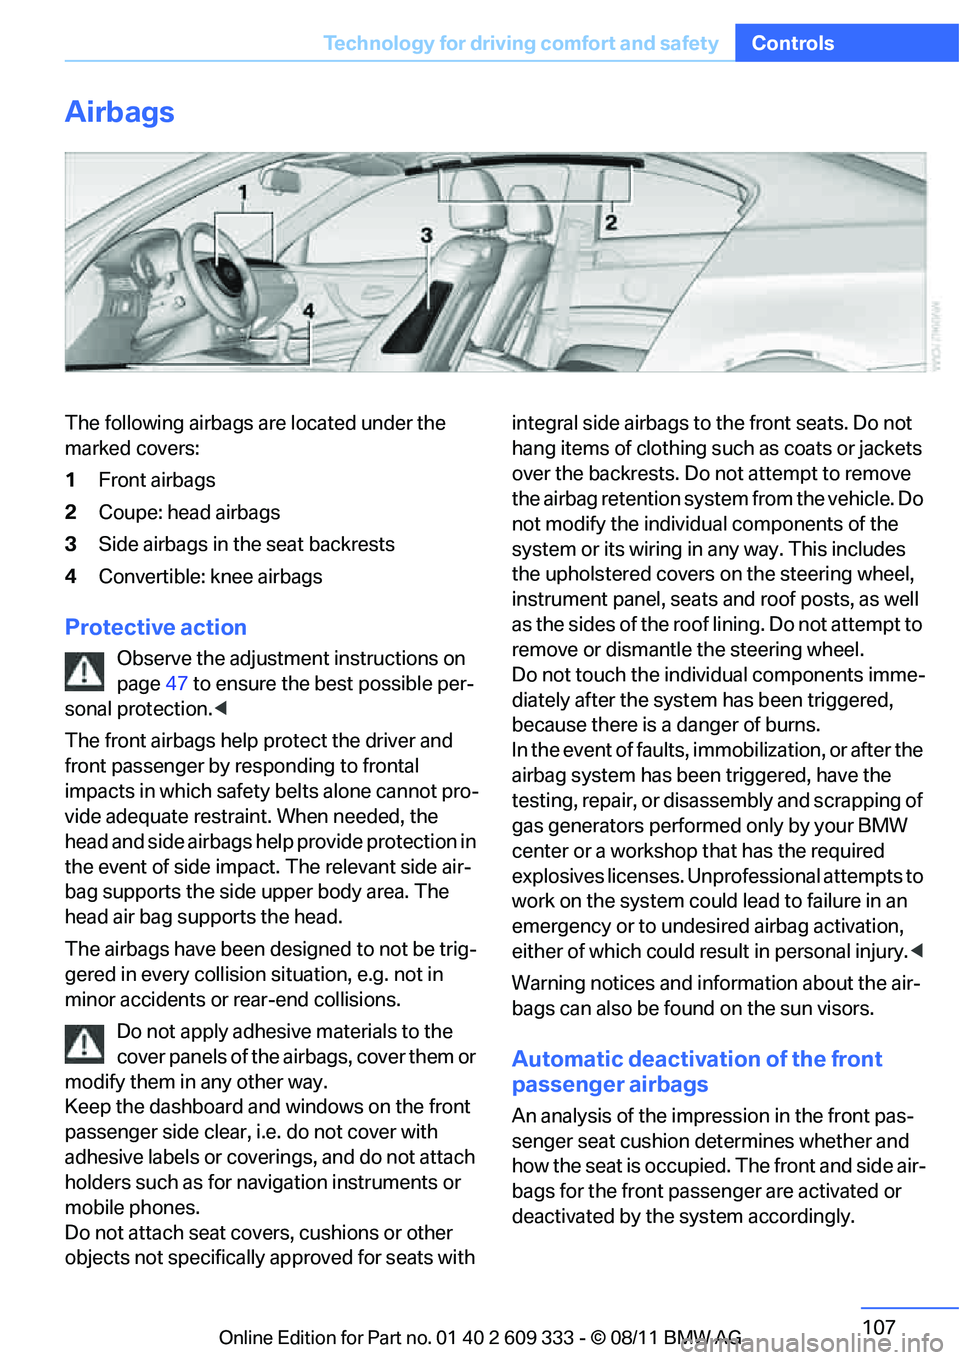
The following airbags are located under the
marked covers:
1
Front airbags
2 Coupe: head airbags
3 Side airbags in the seat backrests
4 Convertible: knee airbags
Protective action
Observe the adjustment instructions on
page 47 to ensure the best possible per-
sonal protection. <
The front airbags help protect the driver and
front passenger by responding to frontal
impacts in which safety belts alone cannot pro-
vide adequate restrain t. When needed, the
head and side airbags help provide protection in
the event of side impact. The relevant side air-
bag supports the side upper body area. The
head air bag supports the head.
The airbags have been designed to not be trig-
gered in every collision si tuation, e.g. not in
minor accidents or rear-end collisions.
Do not apply adhesive materials to the
cover panels of the airbags, cover them or
modify them in any other way.
Keep the dashboard and windows on the front
passenger side clear, i. e. do not cover with
adhesive labels or coveri ngs, and do not attach
holders such as for navi gation instruments or
mobile phones.
Do not attach seat cove rs, cushions or other
objects not specifically approved for seats with integral side airbags to the front seats. Do not
hang items of clothing such as coats or jackets
over the backrests. Do
not attempt to remove
the airbag retention system from the vehicle. Do
not modify the individu al components of the
system or its wiring in any way. This includes
the upholstered covers on the steering wheel,
instrument panel, seats and roof posts, as well
as the sides of the roof lining. Do not attempt to
remove or dismantle the steering wheel.
Do not touch the individual components imme-
diately after the system has been triggered,
because there is a danger of burns.
In the event of faults, immobilization, or after the
airbag system has been triggered, have the
testing, repair, or disassembly and scrapping of
gas generators performe d only by your BMW
center or a workshop that has the required
explosives licenses. Unprofessional attempts to
work on the system could lead to failure in an
emergency or to undesired airbag activation,
either of which could resu lt in personal injury.<
Warning notices and information about the air-
bags can also be found on the sun visors.
Automatic deactivation of the front
passenger airbags
An analysis of the impr ession in the front pas-
senger seat cushion determines whether and
how the seat is occupied. The front and side air-
bags for the front passe nger are activated or
deactivated by the system accordingly.
Online Edition for Part no. 01 40 2 609 333 - \251 08/11 BMW AG
Page 111 of 314
110
ControlsLamps
Lamps
Vehicle equipment
In this chapter, all pr oduction, country, and
optional equipment that is offered in the model
range is described. For this reason, descrip-
tions will be given of some equipment that may
not be available in a vehi cle, for example due to
the special options or national-market version
selected. This also app lies to safety related
functions and systems.
At a glance
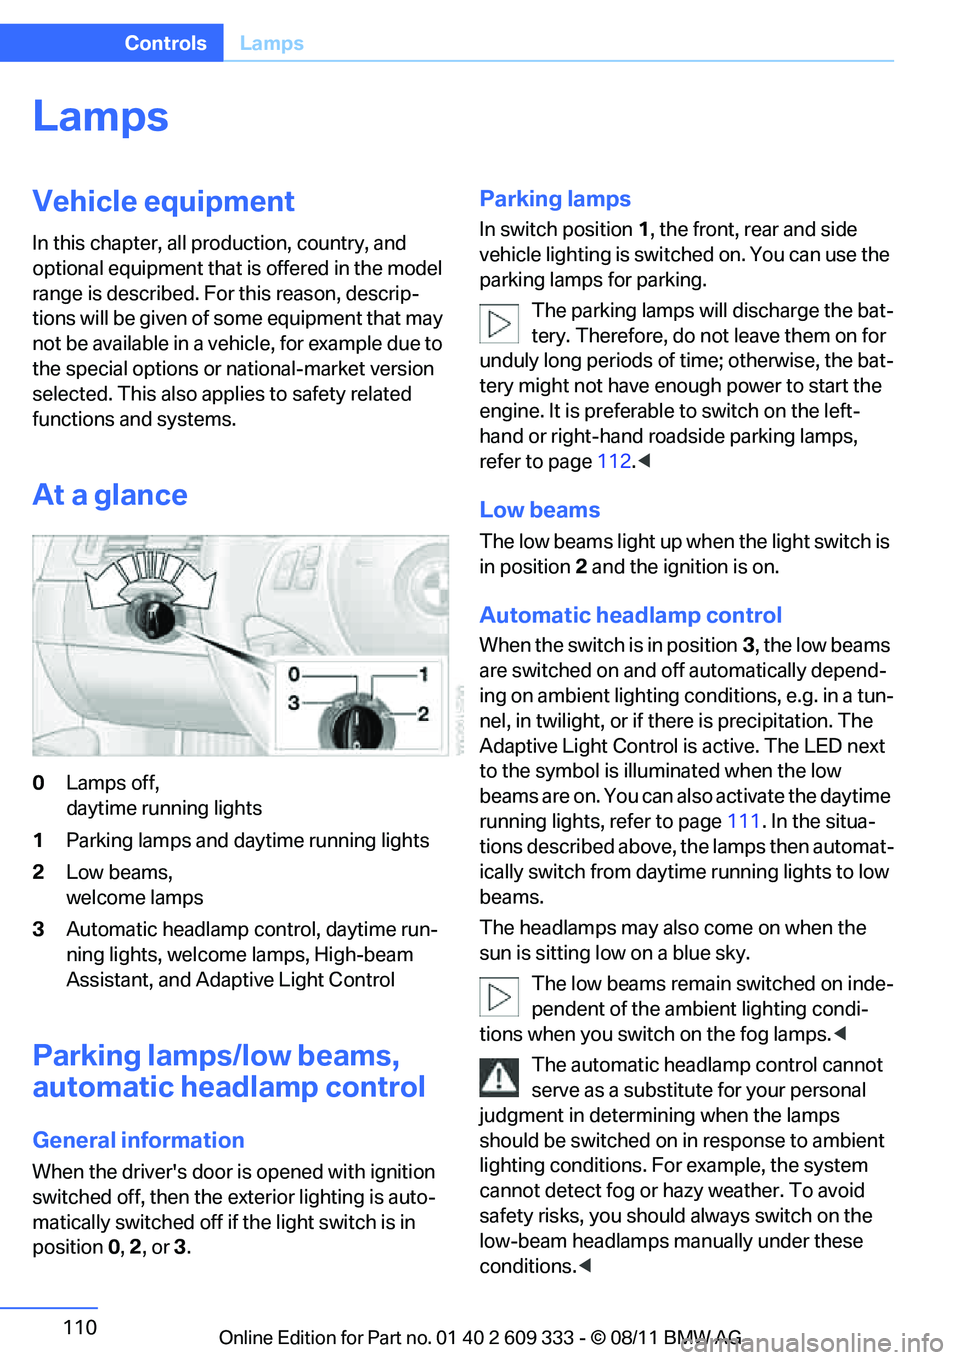
0 Lamps off,
daytime running lights
1 Parking lamps and daytime running lights
2 Low beams,
welcome lamps
3 Automatic headlamp control, daytime run-
ning lights, welcome lamps, High-beam
Assistant, and Adaptive Light Control
Parking lamps/low beams,
automatic headlamp control
General information
When the driver's door is opened with ignition
switched off, then the exterior lighting is auto-
matically switched off if the light switch is in
position 0, 2 , or 3.
Parking lamps
In switch position 1, the front, rear and side
vehicle lighting is switch ed on. You can use the
parking lamps for parking.
The parking lamps will discharge the bat-
tery. Therefore, do not leave them on for
unduly long periods of time; otherwise, the bat-
tery might not have enou gh power to start the
engine. It is preferable to switch on the left-
hand or right-hand roadside parking lamps,
refer to page 112.<
Low beams
The low beams light up wh en the light switch is
in position 2 and the ignition is on.
Automatic headlamp control
When the switch is in position 3, the low beams
are switched on and off automatically depend-
ing on ambient lighting conditions, e.g. in a tun-
nel, in twilight, or if there is precipitation. The
Adaptive Light Control is active. The LED next
to the symbol is illu minated when the low
beams are on. You can also activate the daytime
running lights, refer to page 111. In the situa-
tions described above, the lamps then automat-
ically switch from daytime running lights to low
beams.
The headlamps may also come on when the
sun is sitting low on a blue sky.
The low beams remain switched on inde-
pendent of the ambient lighting condi-
tions when you switch on the fog lamps. <
The automatic headlamp control cannot
serve as a substitute for your personal
judgment in determining when the lamps
should be switched on in response to ambient
lighting conditions. For example, the system
cannot detect fog or ha zy weather. To avoid
safety risks, you should always switch on the
low-beam headlamps ma nually under these
conditions. <
Online Edition for Part no. 01 40 2 609 333 - \251 08/11 BMW AG
Page 114 of 314
113
Lamps
Controls
High-beam Assistant
The concept
This system automatica
lly switches the high
beams on and off. The procedure is controlled
by a sensor on the front of the interior rearview
mirror. The assistant ensures that the high
beams are switched on whenever the traffic sit-
uation allows. It handle s this task for you and
gives you the benefit of the best possible view.
You can intervene at any time and switch the
high beams on and off as usual.
Activating the system
1. Turn the light switch to position 3, refer to
page 110.
2. With the low beams switched on, briefly
push the turn signal/high beam lever in the
direction of the high beam.
The indicator lamp in the instrument
cluster lights up when the high beams
are activated. The system automati-
cally switches from hi gh beams to low beams
and vice versa in response to oncoming traffic,
traffic ahead of you, and adequate ambient
lighting, e.g. on city streets.
Switching the high beams on and off
manually
Whenever you wish, or when the situation
requires, you can intervene:
> If the High-beam Assistant switches on the
high beams, but you would like to drive with
the low beams, simply switch off the high
beams using the turn signal/high beam
lever. This deacti vates the High-beam
Assistant.
To reactivate the syst em, briefly push the
turn signal/high beam lever toward the high
beams again. >
If the High-beam Assistant switches on the
low beams, but you would like to drive with
the high beams, switch on the high beams
as usual. This deacti vates the system and
the high beams need to be switched off
manually, if necessary.
To reactivate the system, briefly push the
turn signal/high beam lever toward the high
beams again.
> Use the headlamp flasher as usual with the
low beams switched on.
System limitations
The High-beam Assistant cannot serve
as a substitute for the driver's personal
judgment of when to use the high beams.
Therefore, manually switch off the high beams
in situations where this is required to avoid a
safety risk.<
The system is not fully fu nctional in situations
such as the following, and driver intervention
may be necessary:
> In very unfavorable weather conditions,
such as fog or heavy precipitation
> In detecting poorly-lit road users, such as
pedestrians, cyclists, horseback riders and
wagons; when driving close to train or ship
traffic; and at animal crossings
> In tight curves, on hilltops or in depressions,
in cross traffic or half-obscured oncoming
traffic on highways
> In poorly lit towns and cities and in the pres-
ence of highly reflective signs
> At low speeds
> When the windshield in front of the interior
rearview mirror is fogged over, dirty or cov-
ered with stickers, etc.
> If the sensor is dirty. Clean the sensor on
the front of the interior rearview mirror using
a cloth moistened with a small amount of
glass cleaner.
Online Edition for Part no. 01 40 2 609 333 - \251 08/11 BMW AG
Page 119 of 314
118
ControlsClimate
AUTO program
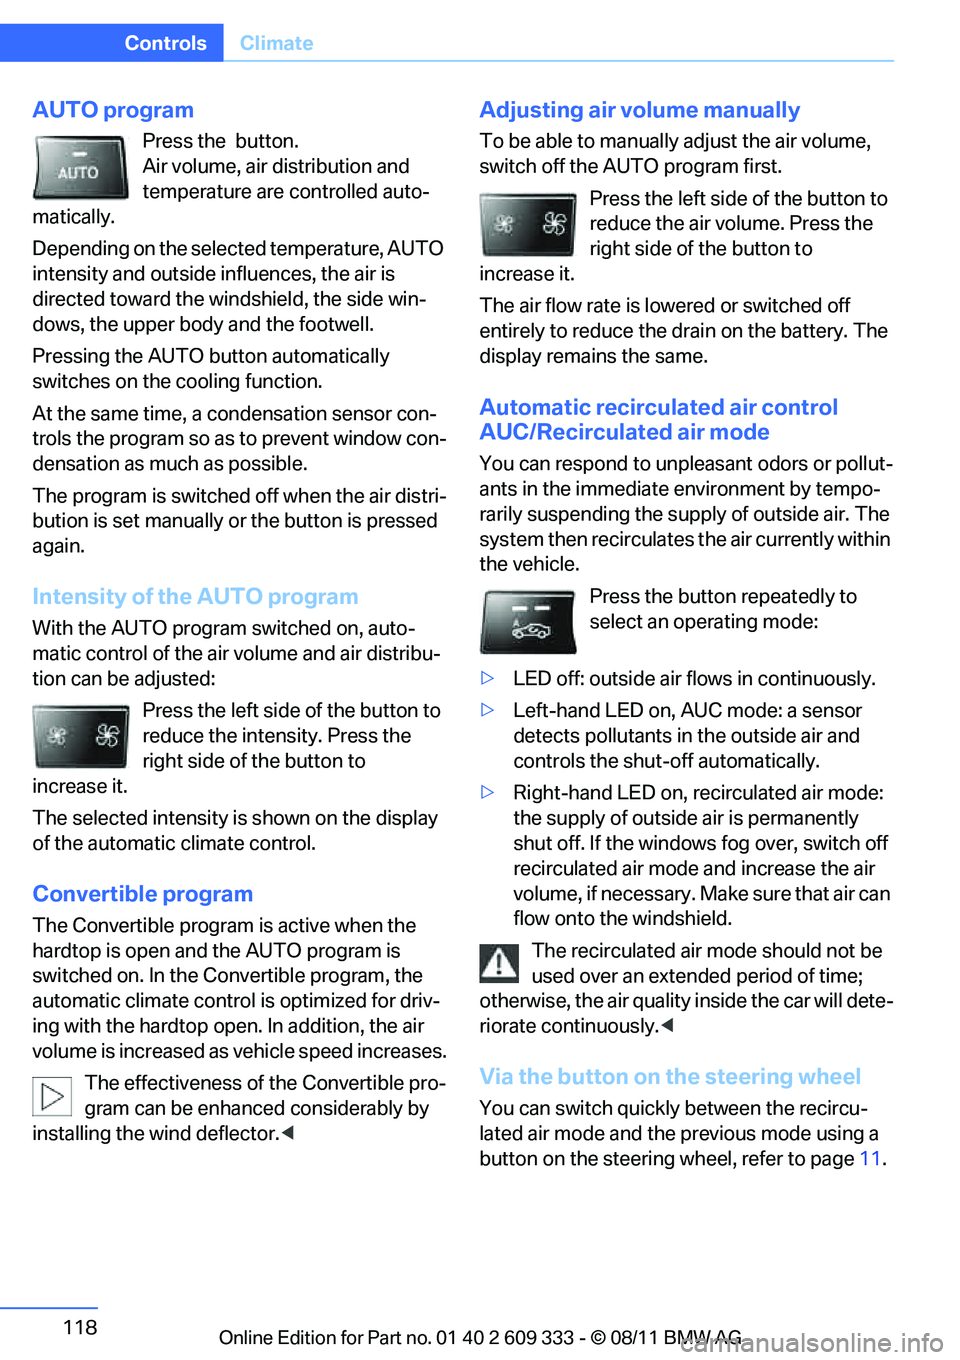
Press the button.
Air volume, air distribution and
temperature are controlled auto-
matically.
Depending on the selected temperature, AUTO
intensity and outside influences, the air is
directed toward the wi ndshield, the side win-
dows, the upper body and the footwell.
Pressing the AUTO button automatically
switches on the cooling function.
At the same time, a condensation sensor con-
trols the program so as to prevent window con-
densation as much as possible.
The program is switched off when the air distri-
bution is set manually or the button is pressed
again.
Intensity of the AUTO program
With the AUTO progra m switched on, auto-
matic control of the air volume and air distribu-
tion can be adjusted:
Press the left side of the button to
reduce the intensity. Press the
right side of the button to
increase it.
The selected intensity is shown on the display
of the automatic climate control.
Convertible program
The Convertible program is active when the
hardtop is open and the AUTO program is
switched on. In the Convertible program, the
automatic climate control is optimized for driv-
ing with the hardtop open . In addition, the air
volume is increased as vehicle speed increases.
The effectiveness of the Convertible pro-
gram can be enhanced considerably by
installing the wind deflector. <
Adjusting air volume manually
To be able to manually adjust the air volume,
switch off the AUTO program first.
Press the left side of the button to
reduce the air volume. Press the
right side of the button to
increase it.
The air flow rate is lowered or switched off
entirely to reduce the drain on the battery. The
display remains the same.
Automatic recirculated air control
AUC/Recirculated air mode
You can respond to unpleasant odors or pollut-
ants in the immediate environment by tempo-
rarily suspending the supply of outside air. The
system then recirculates the air currently within
the vehicle.
Press the button repeatedly to
select an operating mode:
> LED off: outside air fl ows in continuously.
> Left-hand LED on, AUC mode: a sensor
detects pollutants in the outside air and
controls the shut-off automatically.
> Right-hand LED on, recirculated air mode:
the supply of outside air is permanently
shut off. If the windows fog over, switch off
recirculated air mode and increase the air
volume, if necessary. Ma ke sure that air can
flow onto the windshield.
The recirculated air mode should not be
used over an extended period of time;
otherwise, the air quality inside the car will dete-
riorate continuously. <
Via the button on the steering wheel
You can switch quickly between the recircu-
lated air mode and the previous mode using a
button on the steering wheel, refer to page 11.
Online Edition for Part no. 01 40 2 609 333 - \251 08/11 BMW AG
Page 122 of 314
121
Climate
Controls
7.
Turn the controller: set the minutes.
8. Press the controller: the setting is
accepted.
The symbol on the automatic climate Control
Display lights up.
The symbol on the automatic climate Control
Display flashes when the system has switched
on.
The respective system is switched on
within the next 24 hours only. After these
have elapsed, it must be reactivated. <
Online Edition for Part no. 01 40 2 609 333 - \251 08/11 BMW AG
Page 123 of 314
122
ControlsPractical interior accessories
Practical interior accessories
Vehicle equipment
In this chapter, all pr oduction, country, and
optional equipment that is offered in the model
range is described. For this reason, descrip-
tions will be given of some equipment that may
not be available in a vehi cle, for example due to
the special options or national-market version
selected. This also app lies to safety related
functions and systems.
Integrated universal remote
control
The concept
The Integrated universal remote control can be
used to operate up to 3 functions of remote-
controlled devices such as garage door open-
ers or lighting systems. The Integrated univer-
sal remote control thus replaces as many as
three different hand-held transmitters. To oper-
ate them, the buttons on the interior rearview
mirror must be programmed with the desired
functions. Programming requires the hand-held
transmitter for the respective device.
To prevent possible damage or injury,
before programming or using the inte-
grated universal remote control to operate a
device, always inspect the immediate area to
make certain that no people, animals or objects
are within the pivoting or travel range of the
device being operated.
Also follow the safety in structions supplied with
the hand-held transmitter. <
For security reasons, ma ke sure to delete the
stored functions before selling the vehicle, refer
to page 124.
Compatibility
If this symbol appears on the package
or in the instructions supplied with the
device to be operated, you can gener-
ally assume that the devi ce is compatible with
the Integrated univer sal remote control.
For additional questions, please consult:
> Your BMW center.
> www.homelink.com on the Internet.
HomeLink is a registered trademark of Johnson
Controls, Inc.
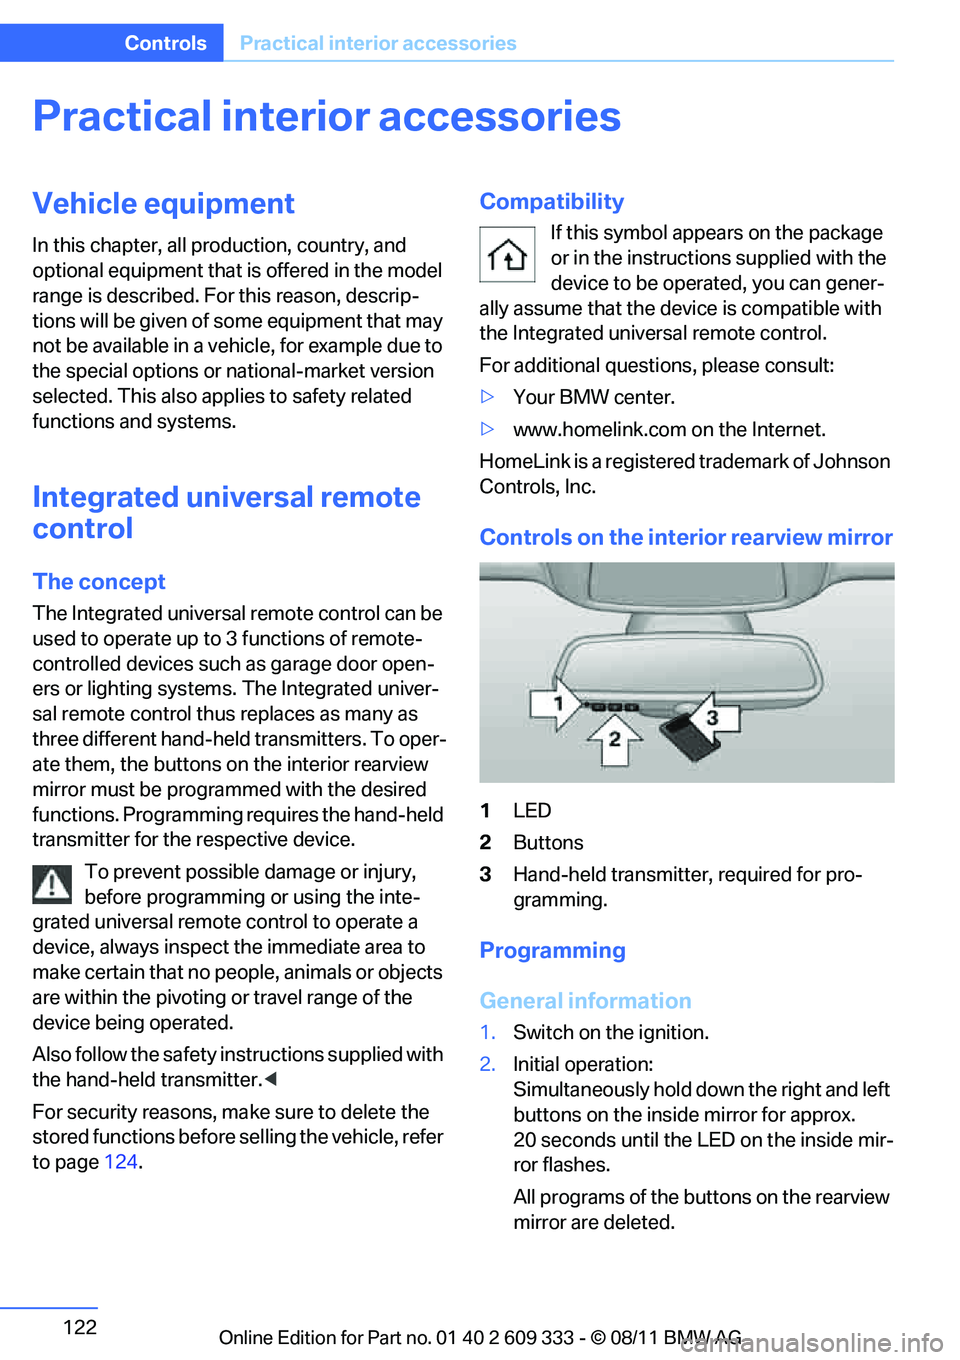
Controls on the interior rearview mirror
1 LED
2 Buttons
3 Hand-held transmitter, required for pro-
gramming.
Programming
General information
1.Switch on the ignition.
2. Initial operation:
Simultaneously hold down the right and left
buttons on the inside mirror for approx.
20 seconds until the LED on the inside mir-
ror flashes.
All programs of the bu ttons on the rearview
mirror are deleted.
Online Edition for Part no. 01 40 2 609 333 - \251 08/11 BMW AG
Page 126 of 314
125
Practical interior accessories
Controls
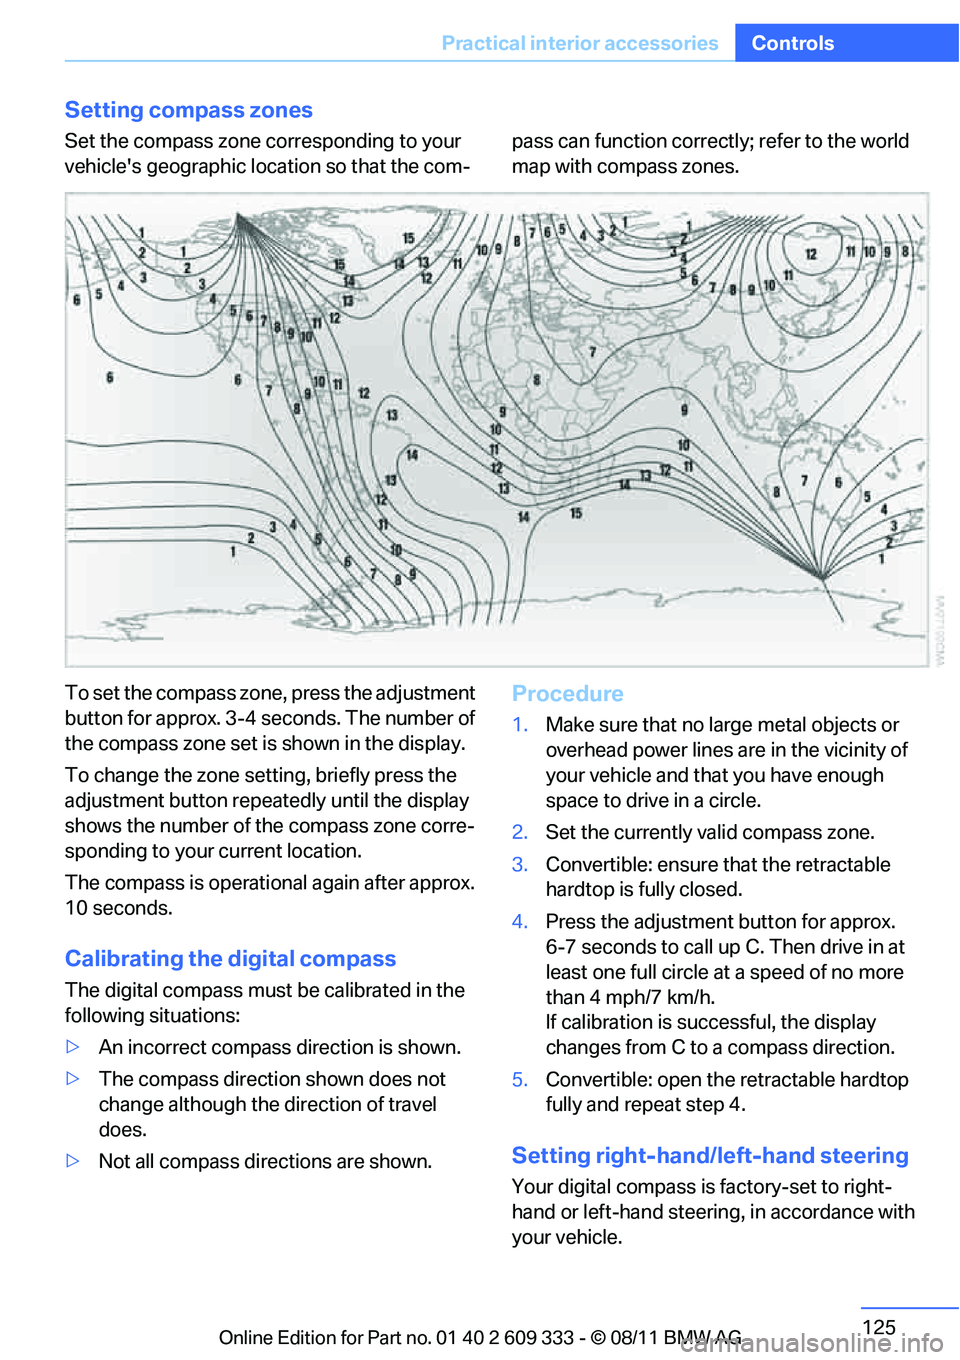
Setting compass zones
Set the compass zone co
rresponding to your
vehicle's geographic location so that the com- pass can function correc
tly; refer to the world
map with compass zones.
To set the compass zone, press the adjustment
button for approx. 3-4 seconds. The number of
the compass zone set is shown in the display.
To change the zone se tting, briefly press the
adjustment button repeat edly until the display
shows the number of the compass zone corre-
sponding to your current location.
The compass is operational again after approx.
10 seconds.
Calibrating the digital compass
The digital compass must be calibrated in the
following situations:
> An incorrect compass direction is shown.
> The compass direction shown does not
change although the direction of travel
does.
> Not all compass directions are shown.
Procedure
1.Make sure that no large metal objects or
overhead power lines are in the vicinity of
your vehicle and that you have enough
space to drive in a circle.
2. Set the currently valid compass zone.
3. Convertible: ensure that the retractable
hardtop is fully closed.
4. Press the adjustment button for approx.
6-7 seconds to call up C. Then drive in at
least one full circle at a speed of no more
than 4 mph/7 km/h.
If calibration is successful, the display
changes from C to a compass direction.
5. Convertible: open the retractable hardtop
fully and repeat step 4.
Setting right-hand/left-hand steering
Your digital compass is factory-set to right-
hand or left-hand steering, in accordance with
your vehicle.
Online Edition for Part no. 01 40 2 609 333 - \251 08/11 BMW AG
Page 131 of 314
130
ControlsPractical interior accessories
Coupe:
Through-loading system
Opening
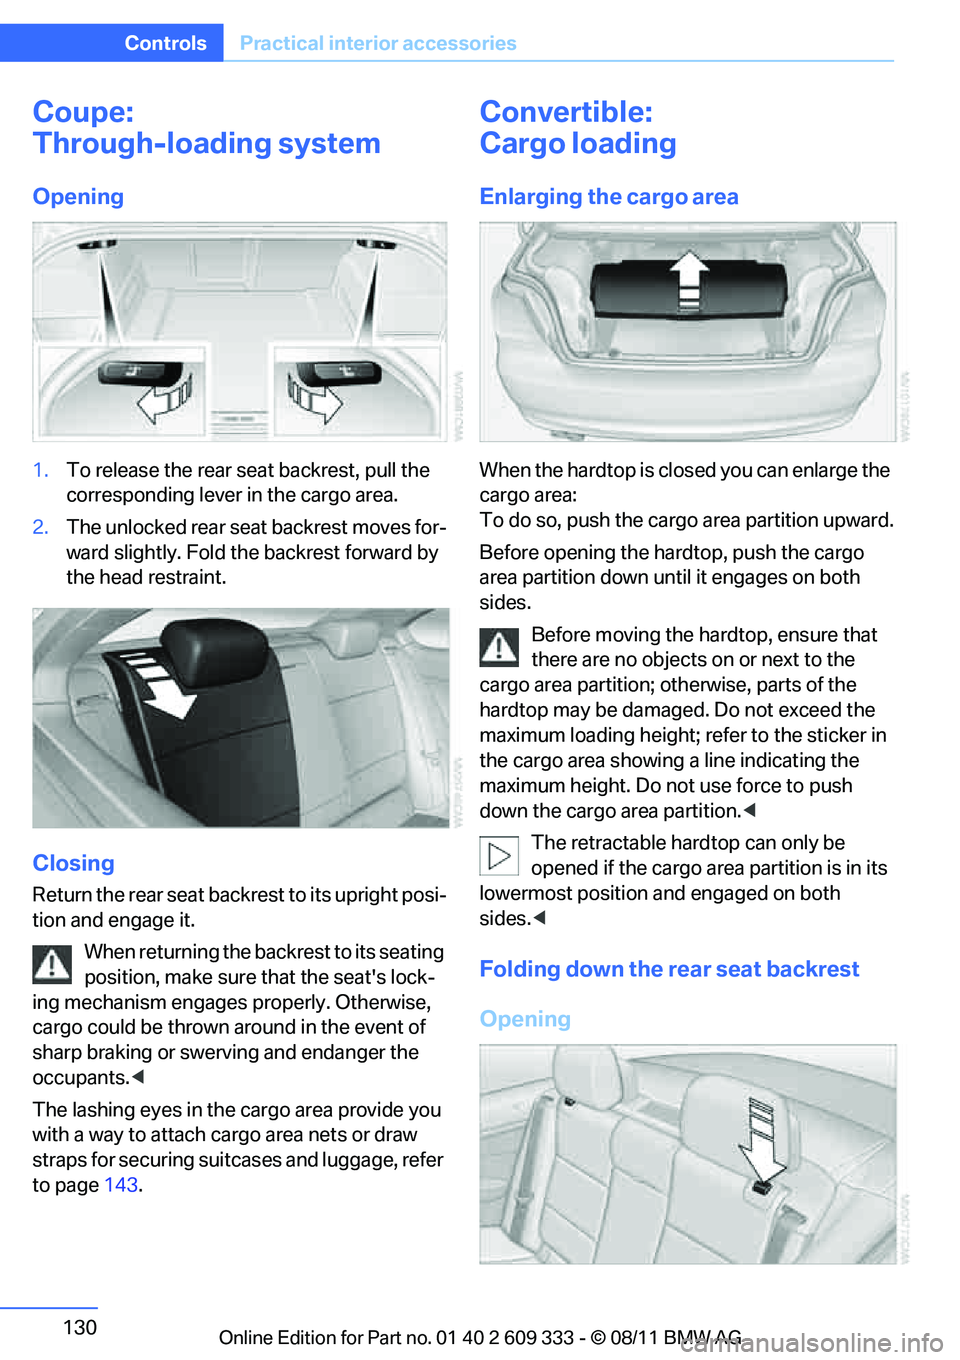
1.To release the rear seat backrest, pull the
corresponding lever in the cargo area.
2. The unlocked rear seat backrest moves for-
ward slightly. Fold th e backrest forward by
the head restraint.
Closing
Return the rear seat back rest to its upright posi-
tion and engage it.
When returning the backrest to its seating
position, make sure th at the seat's lock-
ing mechanism engages properly. Otherwise,
cargo could be thrown around in the event of
sharp braking or swervi ng and endanger the
occupants. <
The lashing eyes in the cargo area provide you
with a way to attach ca rgo area nets or draw
straps for securing suitcases and luggage, refer
to page 143.
Convertible:
Cargo loading
Enlarging the cargo area
When the hardtop is closed you can enlarge the
cargo area:
To do so, push the cargo area partition upward.
Before opening the hardtop, push the cargo
area partition down until it engages on both
sides.
Before moving the ha rdtop, ensure that
there are no objects on or next to the
cargo area partition; otherwise, parts of the
hardtop may be damaged. Do not exceed the
maximum loading height; re fer to the sticker in
the cargo area showing a line indicating the
maximum height. Do not use force to push
down the cargo area partition. <
The retractable hard top can only be
opened if the cargo area partition is in its
lowermost position and engaged on both
sides. <
Folding down the rear seat backrest
Opening
Online Edition for Part no. 01 40 2 609 333 - \251 08/11 BMW AG