Page 188 of 325
ToneVehicle equipment
All standard, country-specific and optional
equipment that is offered in the model series is
described in this chapter. Therefore, equipment
is also described that is not available in a vehicle,
e. g., because of the selected optional equip‐
ment or country variant. This also applies for
safety-related functions and systems.
General information
The sound settings are stored for the remote
control currently in use.
Treble, bass, balance, and
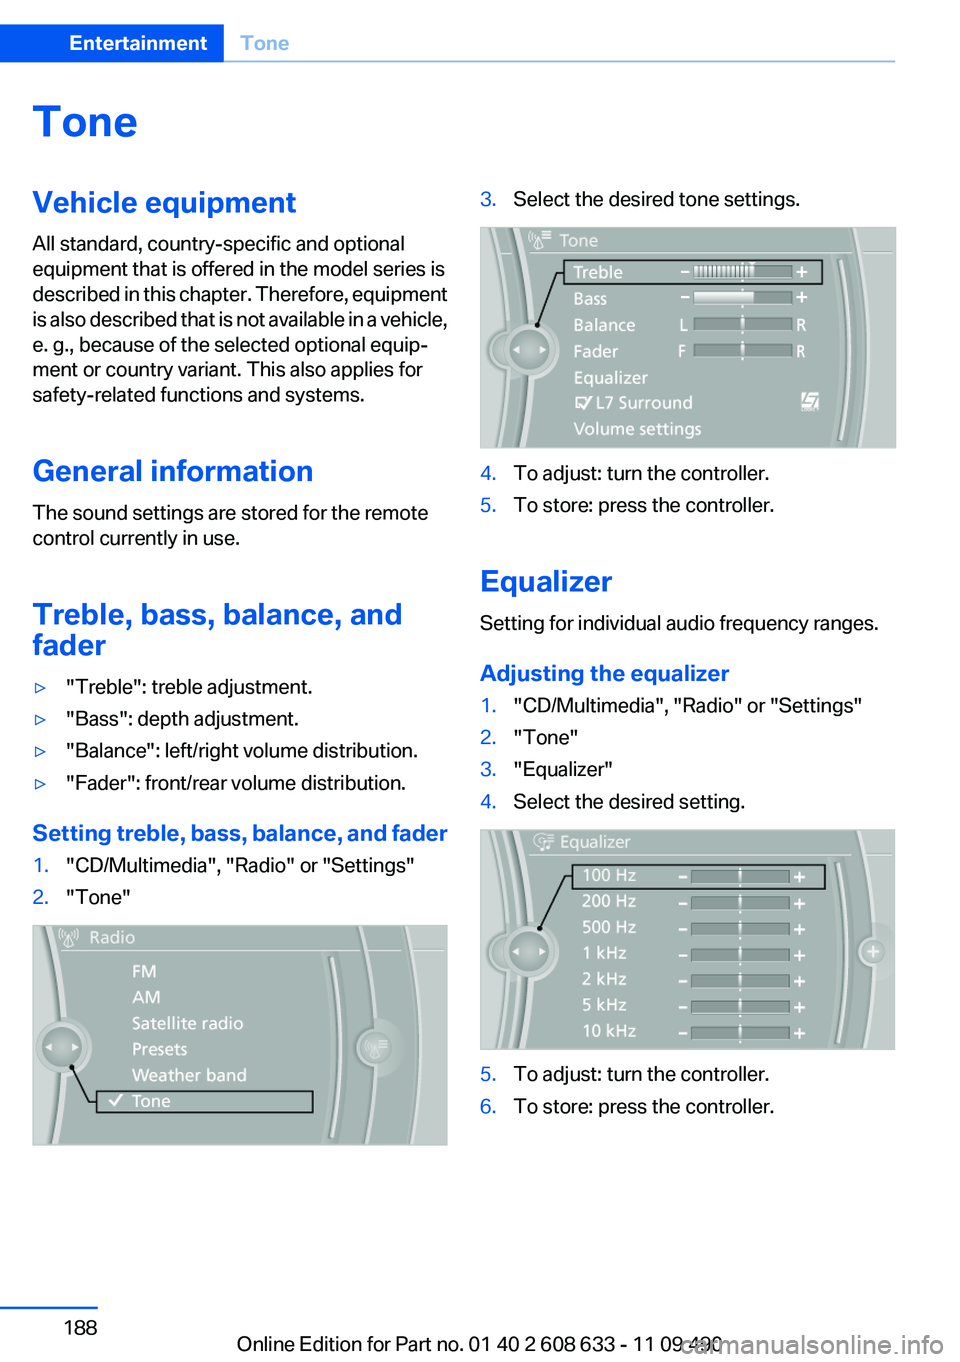
fader▷"Treble": treble adjustment.▷"Bass": depth adjustment.▷"Balance": left/right volume distribution.▷"Fader": front/rear volume distribution.
Setting treble, bass, balance, and fader
1."CD/Multimedia", "Radio" or "Settings"2."Tone"3.Select the desired tone settings.4.To adjust: turn the controller.5.To store: press the controller.
Equalizer
Setting for individual audio frequency ranges.
Adjusting the equalizer
1."CD/Multimedia", "Radio" or "Settings"2."Tone"3."Equalizer"4.Select the desired setting.5.To adjust: turn the controller.6.To store: press the controller.Seite 188EntertainmentTone188
Online Edition for Part no. 01 40 2 608 633 - 11 09 490
Page 189 of 325
Multi-channel playback,
surround
Choose between stereo and multi-channel play‐
back, surround.
Setting multi-channel playback,
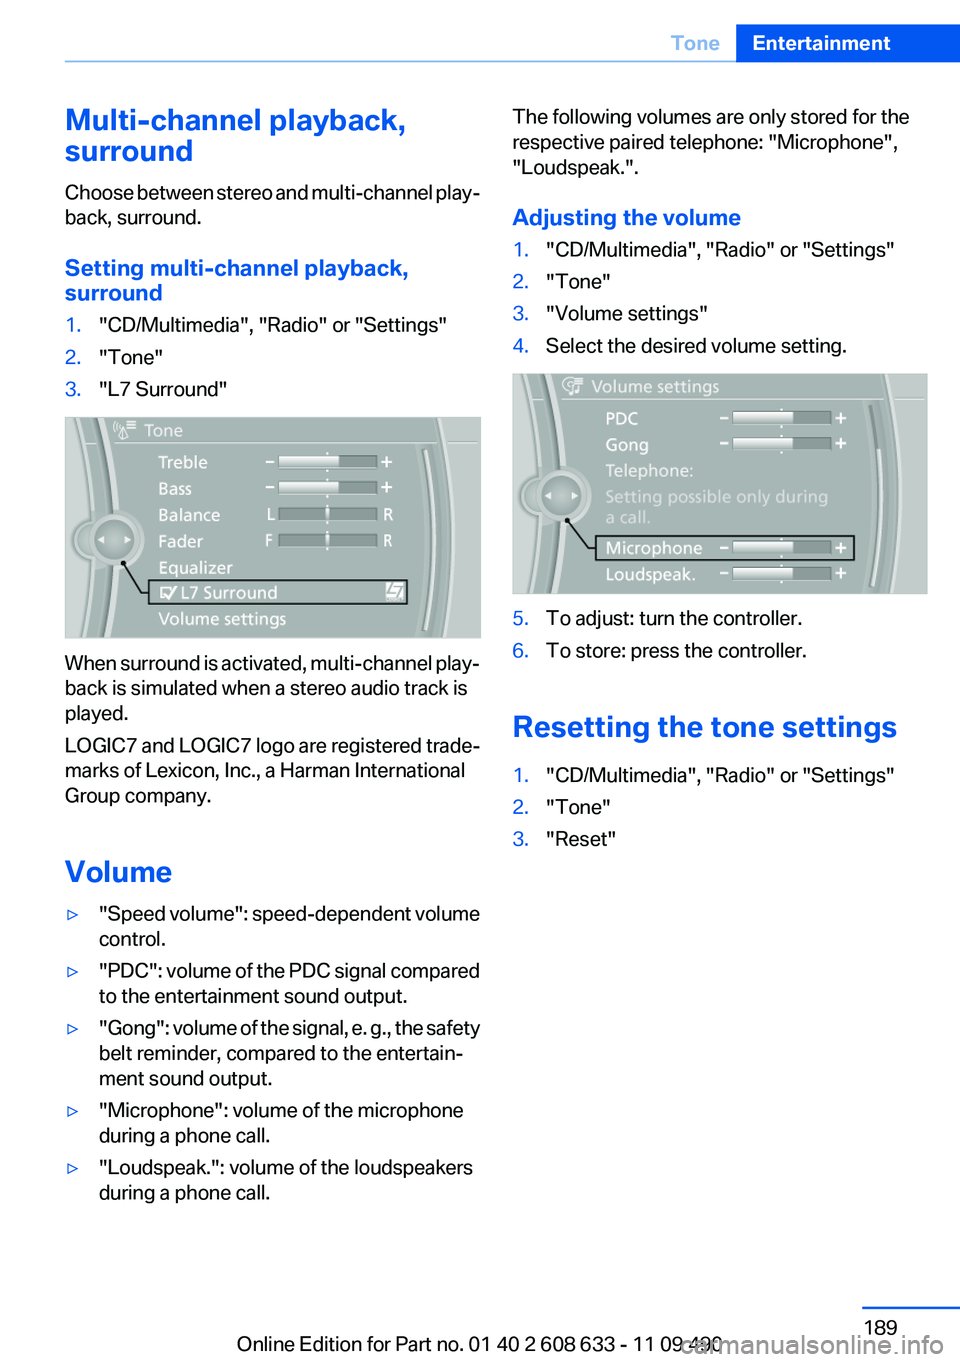
surround1."CD/Multimedia", "Radio" or "Settings"2."Tone"3."L7 Surround"
When surround is activated, multi-channel play‐
back is simulated when a stereo audio track is
played.
LOGIC7 and LOGIC7 logo are registered trade‐
marks of Lexicon, Inc., a Harman International
Group company.
Volume
▷" Speed volume": speed-dependent volume
control.▷"PDC" : volume of the PDC signal compared
to the entertainment sound output.▷"Gong" : volume of the signal, e. g., the safety
belt reminder, compared to the entertain‐
ment sound output.▷"Microphone": volume of the microphone
during a phone call.▷"Loudspeak.": volume of the loudspeakers
during a phone call.The following volumes are only stored for the
respective paired telephone: "Microphone",
"Loudspeak.".
Adjusting the volume1."CD/Multimedia", "Radio" or "Settings"2."Tone"3."Volume settings"4.Select the desired volume setting.5.To adjust: turn the controller.6.To store: press the controller.
Resetting the tone settings
1."CD/Multimedia", "Radio" or "Settings"2."Tone"3."Reset"Seite 189ToneEntertainment189
Online Edition for Part no. 01 40 2 608 633 - 11 09 490
Page 190 of 325
RadioVehicle equipment
All standard, country-specific and optional
equipment that is offered in the model series is
described in this chapter. Therefore, equipment
is also described that is not available in a vehicle,
e. g., because of the selected optional equip‐
ment or country variant. This also applies for
safety-related functions and systems.
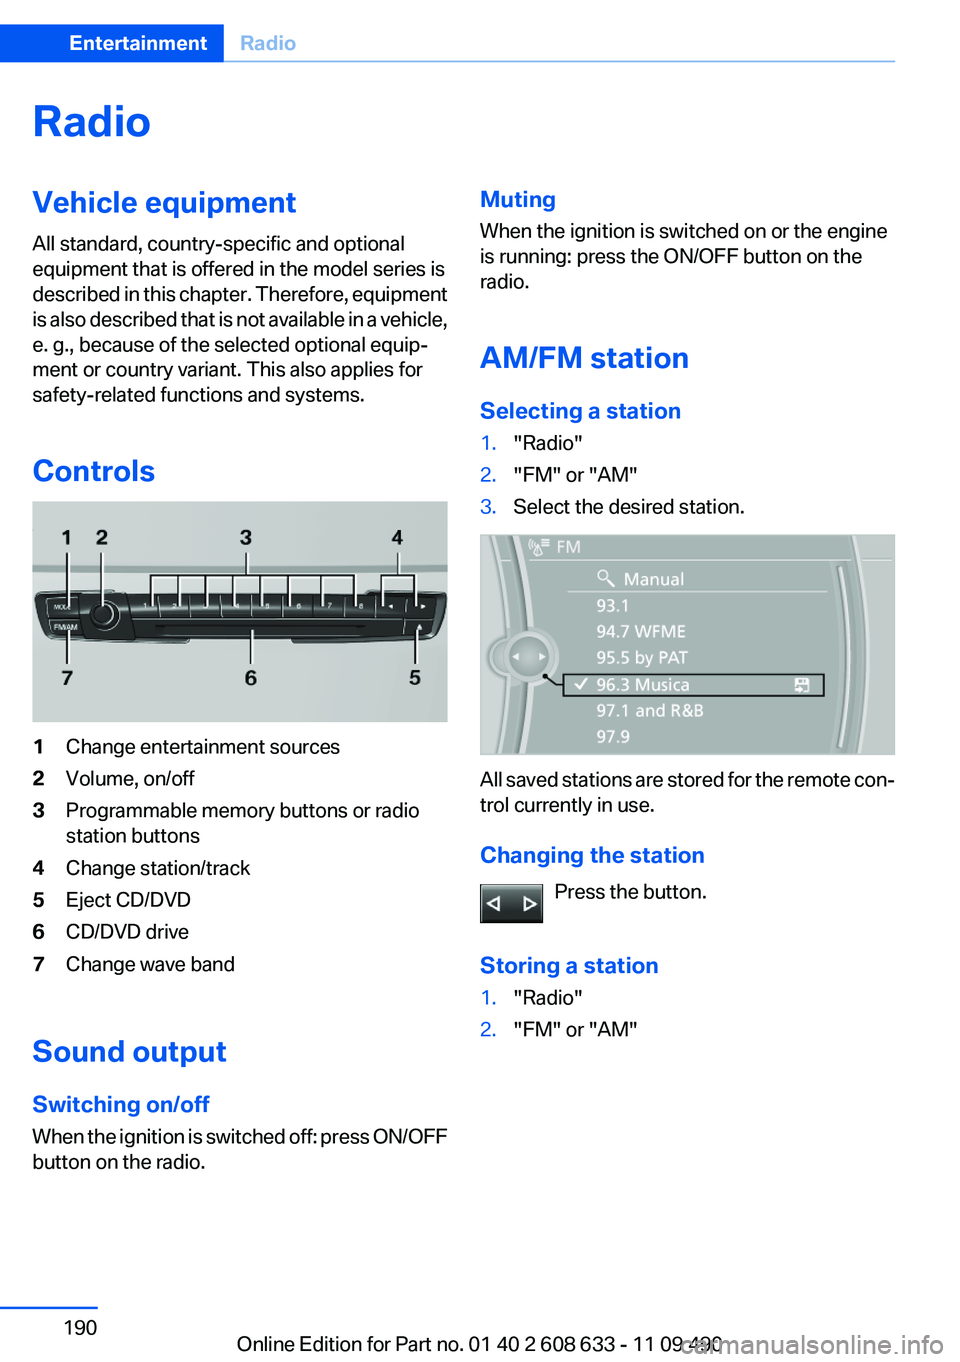
Controls1Change entertainment sources2Volume, on/off3Programmable memory buttons or radio
station buttons4Change station/track5Eject CD/DVD6CD/DVD drive7Change wave band
Sound output
Switching on/off
When the ignition is switched off: press ON/OFF
button on the radio.
Muting
When the ignition is switched on or the engine
is running: press the ON/OFF button on the
radio.
AM/FM station
Selecting a station1."Radio"2."FM" or "AM"3.Select the desired station.
All saved stations are stored for the remote con‐
trol currently in use.
Changing the station Press the button.
Storing a station
1."Radio"2."FM" or "AM"Seite 190EntertainmentRadio190
Online Edition for Part no. 01 40 2 608 633 - 11 09 490
Page 191 of 325
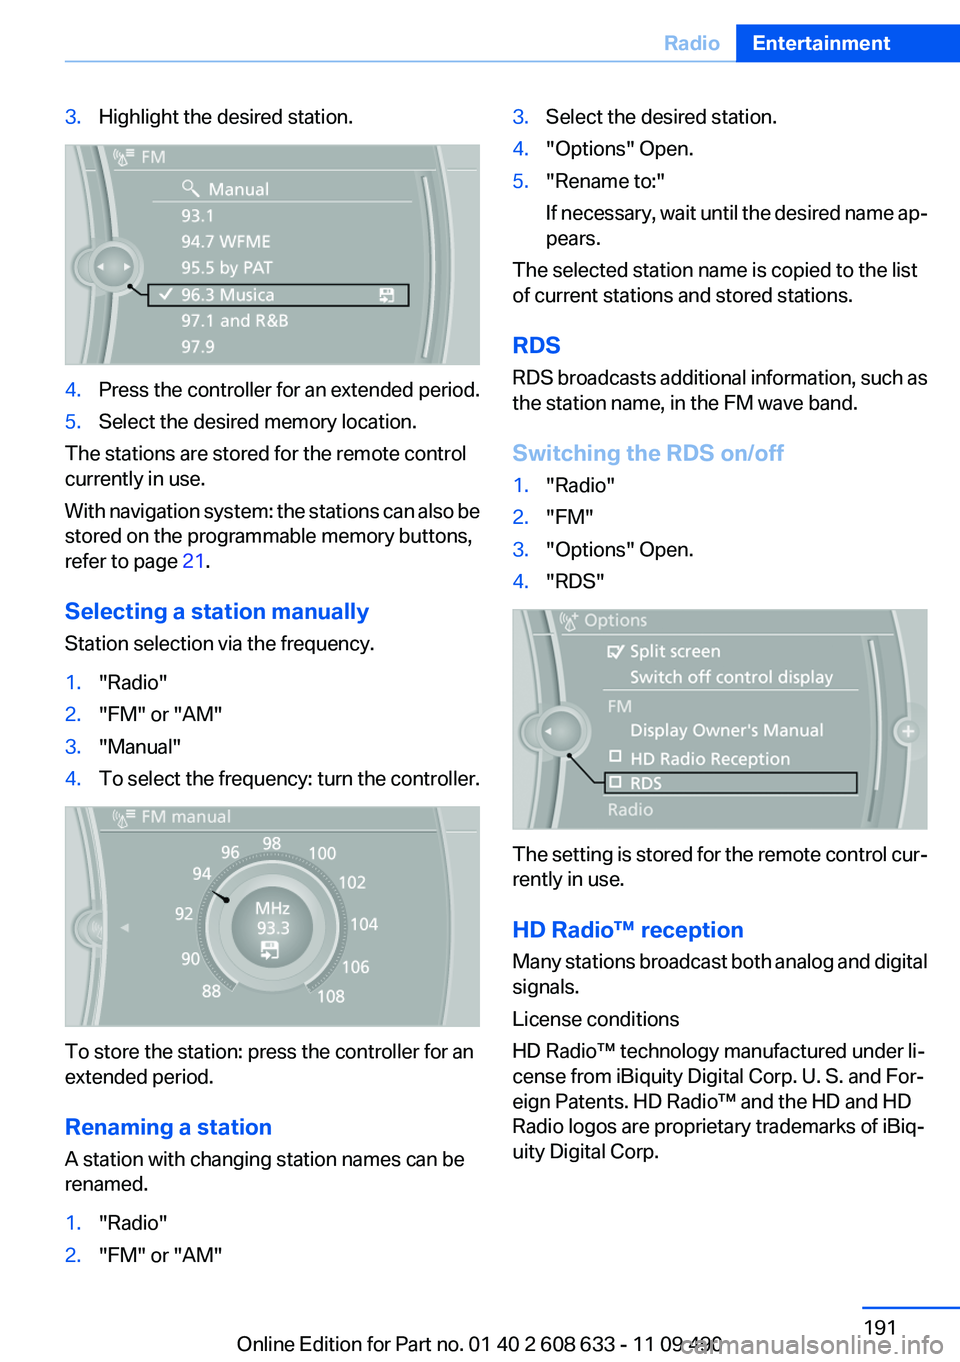
3.Highlight the desired station.4.Press the controller for an extended period.5.Select the desired memory location.
The stations are stored for the remote control
currently in use.
With navigation system: the stations can also be
stored on the programmable memory buttons,
refer to page 21.
Selecting a station manually
Station selection via the frequency.
1."Radio"2."FM" or "AM"3."Manual"4.To select the frequency: turn the controller.
To store the station: press the controller for an
extended period.
Renaming a station
A station with changing station names can be
renamed.
1."Radio"2."FM" or "AM"3.Select the desired station.4."Options" Open.5."Rename to:"
If necessary, wait until the desired name ap‐
pears.
The selected station name is copied to the list
of current stations and stored stations.
RDS
RDS broadcasts additional information, such as
the station name, in the FM wave band.
Switching the RDS on/off
1."Radio"2."FM"3."Options" Open.4."RDS"
The setting is stored for the remote control cur‐
rently in use.
HD Radio™ reception
Many stations broadcast both analog and digital
signals.
License conditions
HD Radio™ technology manufactured under li‐
cense from iBiquity Digital Corp. U. S. and For‐
eign Patents. HD Radio™ and the HD and HD
Radio logos are proprietary trademarks of iBiq‐
uity Digital Corp.
Seite 191RadioEntertainment191
Online Edition for Part no. 01 40 2 608 633 - 11 09 490
Page 192 of 325

Activating/deactivating digital radio
reception1."Radio"2."FM" or "AM"3."Options" Open.4."HD Radio Reception"
The setting is stored for the remote control cur‐
rently in use.
This symbol is displayed in the status line
when the audio signal is digital.
When setting a station with a digital signal, it may
take a few seconds before the station plays in
HD quality.
In areas in which the station is not continuously
received in digital mode, the playback switches
between analog and digital reception. In this
case, switch off digital radio reception.
Displaying additional information
Some stations broadcast additional information
on the current track, such as the name of the ar‐
tist.
1.Select the desired station.2."Options" Open.3."Station info"
Selecting a substation
This symbol indicates that a main station also
broadcasts additional substations. The station
name of the main station ends in HD1. Station
names of the substations end in HD2, HD3, etc.
1.Select the desired station.2.Press the controller.3.Select the substation.
When reception is poor, the substation is muted.
Satellite radio
General information
The channels are offered in predefined pack‐
ages. The packages must be enabled by tele‐
phone.
Navigation bar overviewSymbolFunction Change the list view. Select the category. Direct channel entry Timeshift Open the My Favorites category/
open a favorite. Manage the favorites. Traffic Jump
With navigation system: the functions of the
navigation bar symbols can also be stored on the
programmable memory buttons, refer to
page 21.
They are stored.
Managing a subscription
To be able to enable or unsubscribe from the
channels, you must have reception. It is usually
at its best when you have an unobstructed view
of the sky. The channel name is displayed in the
status line.
Enabling channels
The Unsubscribed Channels category contains
all disabled channels.
1."Radio"2."Satellite radio"Seite 192EntertainmentRadio192
Online Edition for Part no. 01 40 2 608 633 - 11 09 490
Page 193 of 325
3. "Category"4.Select the Unsubscribed Channels cate‐
gory.5.Select the desired channel.
The phone number and an electronic serial
number, ESN, are displayed.6.Call the phone number to have the channel
enabled.
You can unsubscribe from the channels again
via this phone number.
Unsubscribing from channels
1."Radio"2."Satellite radio"3."Options" Open.4."Manage subscription"5.The phone number and an electronic serial
number, ESN, are displayed.6.Call Sirius to unsubscribe from the chan‐
nels.
Selecting channels
You can only listen to enabled channels.
The selected channel is stored for the remote
control currently in use.
Via iDrive
1."Radio"2."Satellite radio"3.Select "All channels" or the desired cate‐
gory.4.Select the desired channel.
Via the buttons on the center console
Press the button.
The next channel is selected.
Seite 193RadioEntertainment193
Online Edition for Part no. 01 40 2 608 633 - 11 09 490
Page 194 of 325

Via direct channel entry1."Radio"2."Satellite radio"3. "Set channel"4.Turn the controller until the desired channel
is reached and press the controller.
Storing a channel
1."Radio"2."Satellite radio"3.If necessary, open "All channels" or the de‐
sired category.4.Select the desired channel.5.Press the controller again.6.Press the controller again to confirm the
highlighted channel.7.Select the desired memory location.
The channels are stored for the remote control
currently in use.
With navigation system: the stations can also be
stored on the programmable memory buttons,
refer to page 21.
Changing the list view
The list view changes every time the first symbol
on the navigation bar is pressed.
Information on the channel is displayed.
SymbolMeaning Channel name Artist Track
Selecting a category
1."Radio"2."Satellite radio"3. "Category"4.Select the desired category.
Timeshift
Approx. one hour of the program being broad‐
cast on the channel currently being listened to
is stored in a buffer. Prerequisite: the signal must
be available.
The stored audio track can be played with a de‐
lay following the live broadcast. When the buffer
is full, the older tracks are overwritten. The buf‐
fer is cleared when a new channel is selected.
Opening the timeshift function
1."Radio"2."Satellite radio"3. "Replay - Time shift"▷The red arrow shows the current playback
position.▷The time difference to the live broadcast is
displayed next to the buffer bar.
For live transmissions: "live".Seite 194EntertainmentRadio194
Online Edition for Part no. 01 40 2 608 633 - 11 09 490
Page 195 of 325
Timeshift menuSymbolFunction Go to the live broadcast Playback/pause Next track Previous track Fast forward Reverse Automatic timeshift deactivated/ac‐
tivated
Automatic timeshift
When the function is activated, audio playback
is stopped automatically in the event of:
▷Incoming and outgoing telephone calls.▷Activation of the voice activation system.▷Muting.
The audio playback then continues with a time
delay.
To activate:
1."Radio"2."Satellite radio"3. "Replay - Time shift"4. "Automatic time shift"
To deactivate: "Automatic time shift".
Storing favorites
Up to 30 favorites can be stored in the favorites
list. Available favorites are artist, track, game,
league, and team.
Storing the artist, track, or game
It is only possible to store favorites that are cur‐
rently being broadcast. The channel information
must be available.1."Radio"2."Satellite radio"3.If necessary, open "All channels" or the de‐
sired category.4.Select the desired channel.5.Press the controller again.6.Select the artist, track, or game.
Storing the league or team
Leagues or teams can be added to the favorites
from a selection list.
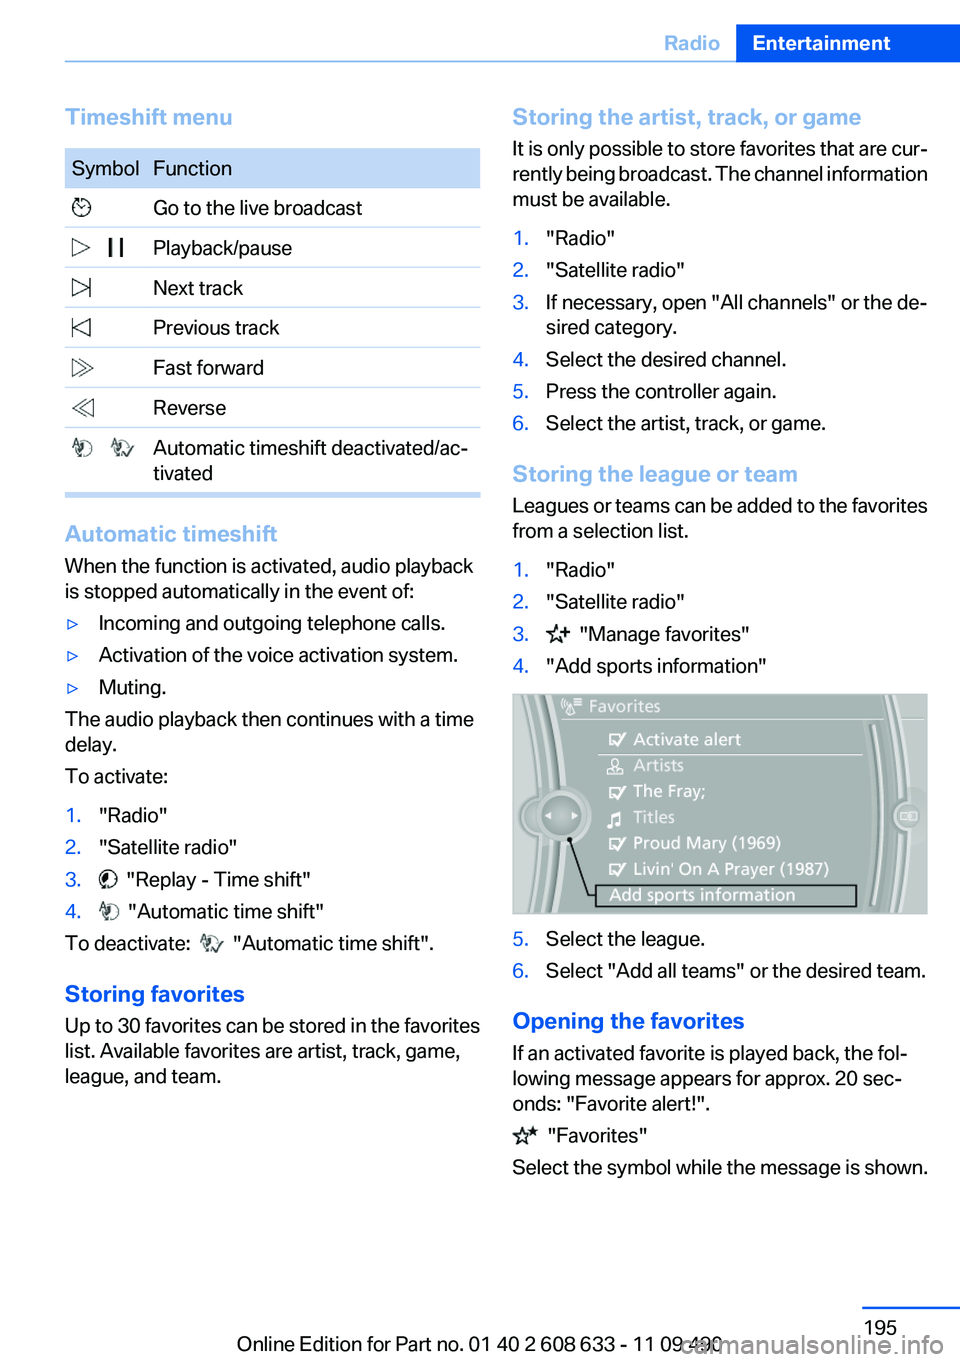
1."Radio"2."Satellite radio"3. "Manage favorites"4."Add sports information"5.Select the league.6.Select "Add all teams" or the desired team.
Opening the favorites
If an activated favorite is played back, the fol‐
lowing message appears for approx. 20 sec‐
onds: "Favorite alert!".
"Favorites"
Select the symbol while the message is shown.
Seite 195RadioEntertainment195
Online Edition for Part no. 01 40 2 608 633 - 11 09 490