2012 BMW 135I CONVERTIBLE ECO mode
[x] Cancel search: ECO modePage 8 of 272
Notes
6
California Proposition 65 warning
California law requires us to issue the following
warning:
Engine exhaust and a wide variety of
automobile components and parts,
including components found in the interior fur-
nishings in a vehicle, contain or emit chemicals
known to the State of California to cause cancer
and birth defects and reproductive harm. In
addition, certain fluids contained in vehicles and
certain products of component wear contain or
emit chemicals known to the State of California
to cause cancer and birth defects or other
reproductive harm.
Battery posts, terminals and related accesso-
ries contain lead and lead compounds. Wash
your hands after handling.
Used engine oil contains chemicals that have
caused cancer in laboratory animals. Always
protect your skin by washing thoroughly with
soap and water.<
Service and warranty
We recommend that you read this publication
thoroughly.
Your BMW is covered by the following warran-
ties:
>New Vehicle Limited Warranty
>Rust Perforation Limited Warranty
>Federal Emissions System Defect Warranty
>Federal Emissions Performance Warranty
>California Emission Control System Limited
Warranty
Detailed information about these warranties is
listed in the Service and Warranty Information
Booklet for US models or in the Warranty and
Service Guide Booklet for Canadian models.
Your vehicle has been specifically adapted and
designed to meet the particular operating con-
ditions and homologation requirements in your
country and continental region in order to
deliver the full driving pleasure while the vehicle
is operated under those conditions. If you wish
to operate your vehicle in another country or
region, you may be required to adapt your vehi-
cle to meet different prevailing operating condi-
tions and homologation requirements. You
should also be aware of any applicable warranty
limitations or exclusions for such country or
region. In such case, please contact Customer
Relations for further information.
Page 9 of 272

7Reference
At a glance
Controls
Driving tips
Communications
Navigation
Entertainment
Mobility
Maintenance
Maintain the vehicle regularly to sustain the
road safety, operational reliability and the New
Vehicle Limited Warranty.
Specifications for required maintenance mea-
sures:
>BMW Maintenance system
>Service and Warranty Information Booklet
for US models
>Service and Warranty Information Booklet
for US models
If the vehicle is not maintained according to
these specifications, this could result in serious
damage to the vehicle. Such damage is not cov-
ered by the BMW New Vehicle Limited War-
ranty.
Reporting safety defects
For US customers
The following only applies to vehicles owned
and operated in the US.
If you believe that your vehicle has a defect
which could cause a crash or could cause injury
or death, you should immediately inform the
National Highway Traffic Safety Administration,
NHTSA, in addition to notifying BMW of North
America, LLC, P.O. Box 1227, Westwood, New
Jersey 07675-1227, Telephone 1-800-831-
1117.
If NHTSA receives similar complaints, it may
open an investigation, and if it finds that a safety
defect exists in a group of vehicles, it may order
a recall and remedy campaign. However,
NHTSA cannot become involved in individual
problems between you, your center, or BMW of
North America, LLC.
To contact NHTSA, you may call the Vehicle
Safety Hotline toll-free at 1-888-327-4236
(TTY: 1-800-424-9153); go to
http://www.safercar.gov; or write to: Adminis-
trator, NHTSA, 400 Seventh Street, SW.,
Washington, DC 20590. You can also obtain
other information about motor vehicle safety
from http://www.safercar.gov
For Canadian customers
Canadian customers who wish to report a
safety-related defect to Transport Canada,
Defect Investigations and Recalls, may tele-
phone the toll-free hotline 1-800-333-0510.
You can also obtain other information about
motor vehicle safety from http://www.tc.gc.ca/
roadsafety
Page 36 of 272
Opening and closing
34
Locking separately
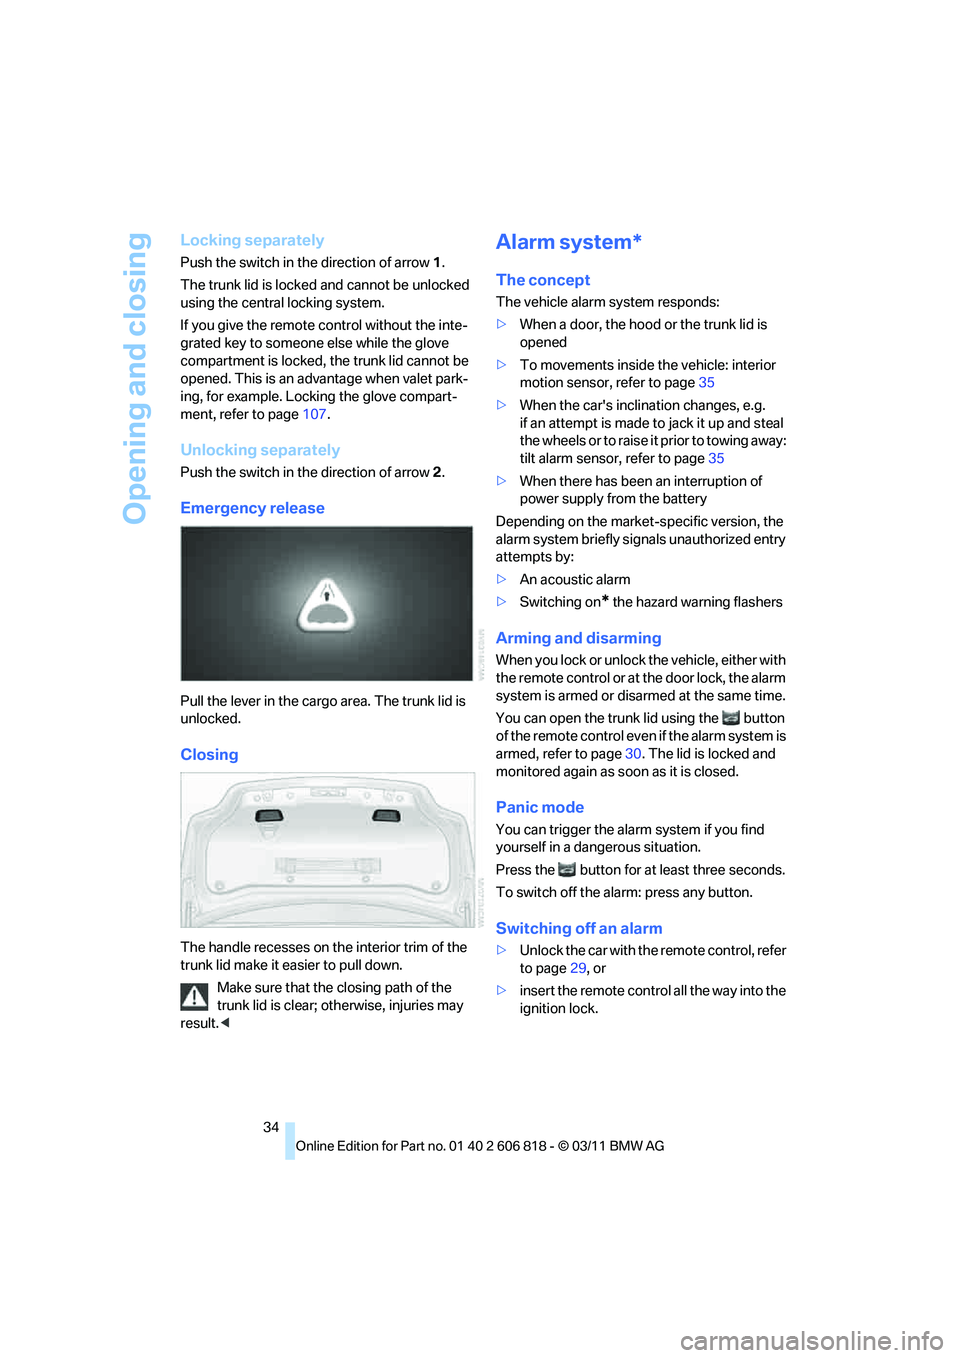
Push the switch in the direction of arrow 1.
The trunk lid is locked and cannot be unlocked
using the central locking system.
If you give the remote control without the inte-
grated key to someone else while the glove
compartment is locked, the trunk lid cannot be
opened. This is an advantage when valet park-
ing, for example. Locking the glove compart-
ment, refer to page107.
Unlocking separately
Push the switch in the direction of arrow 2.
Emergency release
Pull the lever in the cargo area. The trunk lid is
unlocked.
Closing
The handle recesses on the interior trim of the
trunk lid make it easier to pull down.
Make sure that the closing path of the
trunk lid is clear; otherwise, injuries may
result.<
Alarm system*
The concept
The vehicle alarm system responds:
>When a door, the hood or the trunk lid is
opened
>To movements inside the vehicle: interior
motion sensor, refer to page35
>When the car's inclination changes, e.g.
if an attempt is made to jack it up and steal
the wheels or to raise it prior to towing away:
tilt alarm sensor, refer to page35
>When there has been an interruption of
power supply from the battery
Depending on the market-specific version, the
alarm system briefly signals unauthorized entry
attempts by:
>An acoustic alarm
>Switching on
* the hazard warning flashers
Arming and disarming
When you lock or unlock the vehicle, either with
the remote control or at the door lock, the alarm
system is armed or disarmed at the same time.
You can open the trunk lid using the button
of the remote control even if the alarm system is
armed, refer to page30. The lid is locked and
monitored again as soon as it is closed.
Panic mode
You can trigger the alarm system if you find
yourself in a dangerous situation.
Press the button for at least three seconds.
To switch off the alarm: press any button.
Switching off an alarm
>Unlock the car with the remote control, refer
to page29, or
>insert the remote control all the way into the
ignition lock.
Page 63 of 272
Controls
61Reference
At a glance
Driving tips
Communications
Navigation
Entertainment
Mobility
Sport program and manual operation
M/S
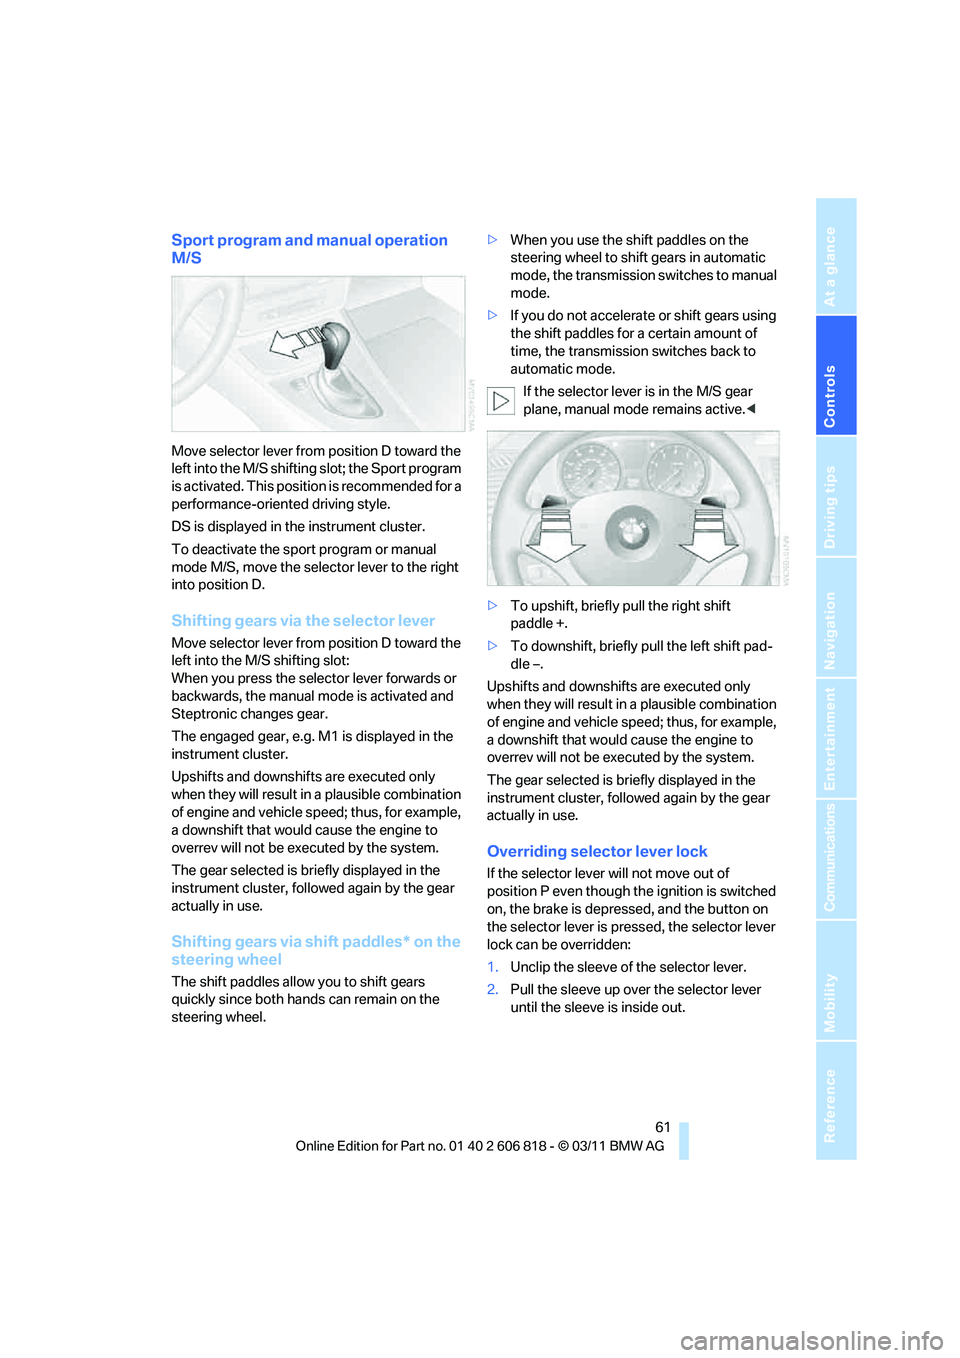
Move selector lever from position D toward the
left into the M/S shifting slot; the Sport program
is activated. This position is recommended for a
performance-oriented driving style.
DS is displayed in the instrument cluster.
To deactivate the sport program or manual
mode M/S, move the selector lever to the right
into position D.
Shifting gears via the selector lever
Move selector lever from position D toward the
left into the M/S shifting slot:
When you press the selector lever forwards or
backwards, the manual mode is activated and
Steptronic changes gear.
The engaged gear, e.g. M1 is displayed in the
instrument cluster.
Upshifts and downshifts are executed only
when they will result in a plausible combination
of engine and vehicle speed; thus, for example,
a downshift that would cause the engine to
overrev will not be executed by the system.
The gear selected is briefly displayed in the
instrument cluster, followed again by the gear
actually in use.
Shifting gears via shift paddles* on the
steering wheel
The shift paddles allow you to shift gears
quickly since both hands can remain on the
steering wheel.>When you use the shift paddles on the
steering wheel to shift gears in automatic
mode, the transmission switches to manual
mode.
>If you do not accelerate or shift gears using
the shift paddles for a certain amount of
time, the transmission switches back to
automatic mode.
If the selector lever is in the M/S gear
plane, manual mode remains active.<
>To upshift, briefly pull the right shift
paddle +.
>To downshift, briefly pull the left shift pad-
dle –.
Upshifts and downshifts are executed only
when they will result in a plausible combination
of engine and vehicle speed; thus, for example,
a downshift that would cause the engine to
overrev will not be executed by the system.
The gear selected is briefly displayed in the
instrument cluster, followed again by the gear
actually in use.
Overriding selector lever lock
If the selector lever will not move out of
position P even though the ignition is switched
on, the brake is depressed, and the button on
the selector lever is pressed, the selector lever
lock can be overridden:
1.Unclip the sleeve of the selector lever.
2.Pull the sleeve up over the selector lever
until the sleeve is inside out.
Page 64 of 272

Driving
62 3.Using the screwdriver from the onboard
vehicle tool kit, refer to page227, press the
red lever, see arrow, while moving the
selector lever to the desired position.
7-gear Sport automatic
transmission with double
clutch*
The concept
The 7-gear Sport automatic transmission with
double clutch is an automated manual trans-
mission with two clutches and secondary gear
sets in which the clutching and shifting is han-
dled by an electrohydraulic system.
With the 7-gear Sport automatic transmission
with double clutch, the gears are shifted without
an interruption in driving power.
You operate the 7-gear Sport automatic trans-
mission with double clutch using the selector
lever and two shift paddles on the steering
wheel.
It offers you the following functions:
>Either manual or automatic mode: sequen-
tial mode or drive mode
>Automatic downshifting and protection
against incorrect gear selection, even in
sequential mode
>Acceleration assistant, Launch Control,
refer to page66
>Automatic intermediate throttle application
System limitations
The 7-gear Sport automatic transmission with
double clutch has an overheating protection
that protects the clutch from extreme loads.
The indicator lamp lights up in yellow if
the transmission becomes too warm.
Avoid high engine loads and frequent
accelerations from zero. If the transmission is
overheated, the indicator lamp lights up in red
and the power flow to the motor is interrupted. It
is only possible to continue driving once the
transmission has cooled down.
Avoid frequent powerful accelerations from
zero and do not hold the vehicle on inclines by
pressing lightly on the accelerator while letting
the clutch slip, as this may cause the transmis-
sion to overheat.
Selector lever positions
P R N D M/S + –
The selector lever position and the engaged
gear are displayed, e.g. M4.
Engaging selector lever positions
>The selector lever can be moved out of
position P only with the engine running:
interlock.
>Before moving the lever away from P or N
with the vehicle stationary, first depress the
brake; otherwise, the desired shift will not
be executed: shiftlock.
Page 65 of 272
Controls
63Reference
At a glance
Driving tips
Communications
Navigation
Entertainment
Mobility
Shifting into N, D, R
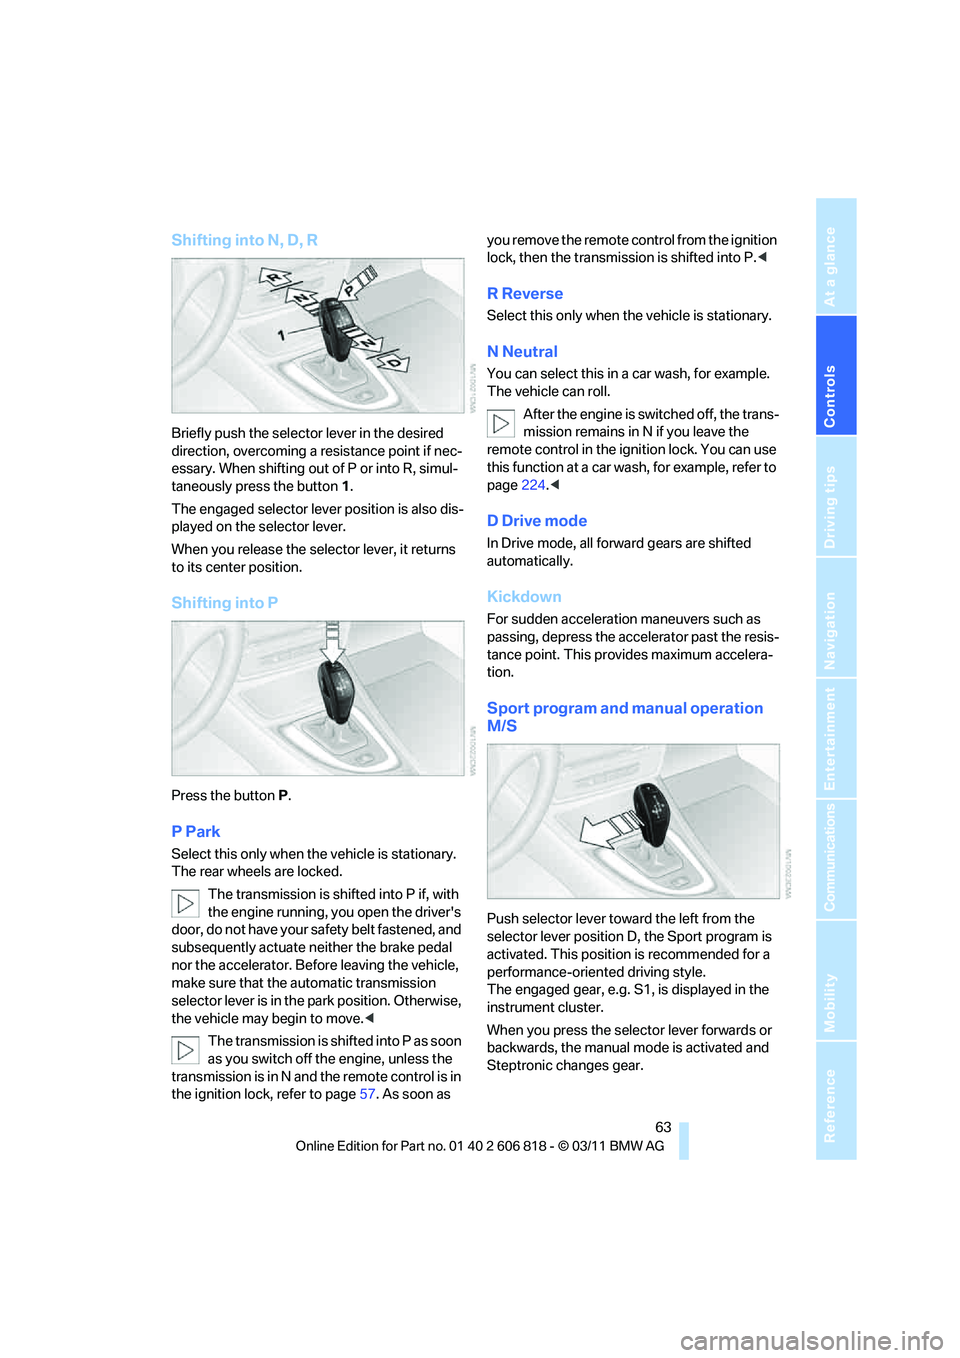
Briefly push the selector lever in the desired
direction, overcoming a resistance point if nec-
essary. When shifting out of P or into R, simul-
taneously press the button 1.
The engaged selector lever position is also dis-
played on the selector lever.
When you release the selector lever, it returns
to its center position.
Shifting into P
Press the buttonP.
P Park
Select this only when the vehicle is stationary.
The rear wheels are locked.
The transmission is shifted into P if, with
the engine running, you open the driver's
door, do not have your safety belt fastened, and
subsequently actuate neither the brake pedal
nor the accelerator. Before leaving the vehicle,
make sure that the automatic transmission
selector lever is in the park position. Otherwise,
the vehicle may begin to move.<
The transmission is shifted into P as soon
as you switch off the engine, unless the
transmission is in N and the remote control is in
the ignition lock, refer to page57. As soon as you remove the remote control from the ignition
lock, then the transmission is shifted into P.<
R Reverse
Select this only when the vehicle is stationary.
N Neutral
You can select this in a car wash, for example.
The vehicle can roll.
After the engine is switched off, the trans-
mission remains in N if you leave the
remote control in the ignition lock. You can use
this function at a car wash, for example, refer to
page224.<
D Drive mode
In Drive mode, all forward gears are shifted
automatically.
Kickdown
For sudden acceleration maneuvers such as
passing, depress the accelerator past the resis-
tance point. This provides maximum accelera-
tion.
Sport program and manual operation
M/S
Push selector lever toward the left from the
selector lever position D, the Sport program is
activated. This position is recommended for a
performance-oriented driving style.
The engaged gear, e.g. S1, is displayed in the
instrument cluster.
When you press the selector lever forwards or
backwards, the manual mode is activated and
Steptronic changes gear.
Page 118 of 272
Things to remember when driving
116
Things to remember when driving
Break-in period
Moving parts need breaking-in time to adjust to
each other. Please follow the instructions below
in order to achieve the optimal service life and
economy of operation for your vehicle.
Engine and differential
Always obey all official speed limits.
Up to 1,200 miles/2,000 km
Drive at varying engine and road speeds, but do
not exceed an engine speed of 4,500 rpm or a
road speed of 100 mph/160 km/h.
Avoid full-throttle operation and use of the
transmission's kickdown mode.
After driving 1,200 miles/2,000 km
Engine and vehicle speeds can be gradually
increased.
Tires
Due to technical factors associated with their
manufacture, tires do not achieve their full trac-
tion potential until after an initial break-in
period. Therefore, drive cautiously during the
first 200 miles/300 km.
Brake system
Brakes require an initial break-in period of
approx. 300 miles/500 km to achieve optimized
contact and wear patterns between brake pads
and rotors. Drive cautiously during this break-in
period.
Clutch
The function of the clutch reaches its optimal
level only after a distance driven of approx.
300 miles/500 km. During this break-in period,
engage the clutch gently.
Following part replacement
The same break-in procedures should be
observed if any of the components mentioned
above have to be renewed in the course of the
vehicle's operating life.
Saving fuel
The fuel consumption of your vehicle depends
on several factors. You can lower fuel consump-
tion and the environmental impact by taking
certain measures, adjusting your driving style
and having the vehicle serviced regularly.
Remove any unneeded cargo
Additional weight increases fuel consumption.
Remove any mounted parts after you
have finished using them
Remove unneeded additional mirrors, the roof
rack and the rear luggage rack after use.
Mounted parts affect the vehicle's aerodynam-
ics and increase fuel consumption.
Close the windows and glass roof
An open glass roof or window causes higher air
resistance and thus increases fuel consump-
tion.
Check tire inflation pressure regularly
Check the tire inflation pressure at least twice a
month and before embarking on a long journey,
and correct it if necessary.
Low tire inflation pressure causes higher rolling
resistance and thus increases fuel consumption
and tire wear.
Set off immediately
Do not let the engine warm up while the car is
still standing, but set off immediately at moder-
ate engine speed. This is the fastest way for the
cold engine to reach its operating temperature.
Page 173 of 272
Navigation
Entertainment
Driving tips
171Reference
At a glance
Controls
Communications
Mobility
>Playback is interrupted if a data exchange is
taking place with a mobile phone that is
connected via Bluetooth.
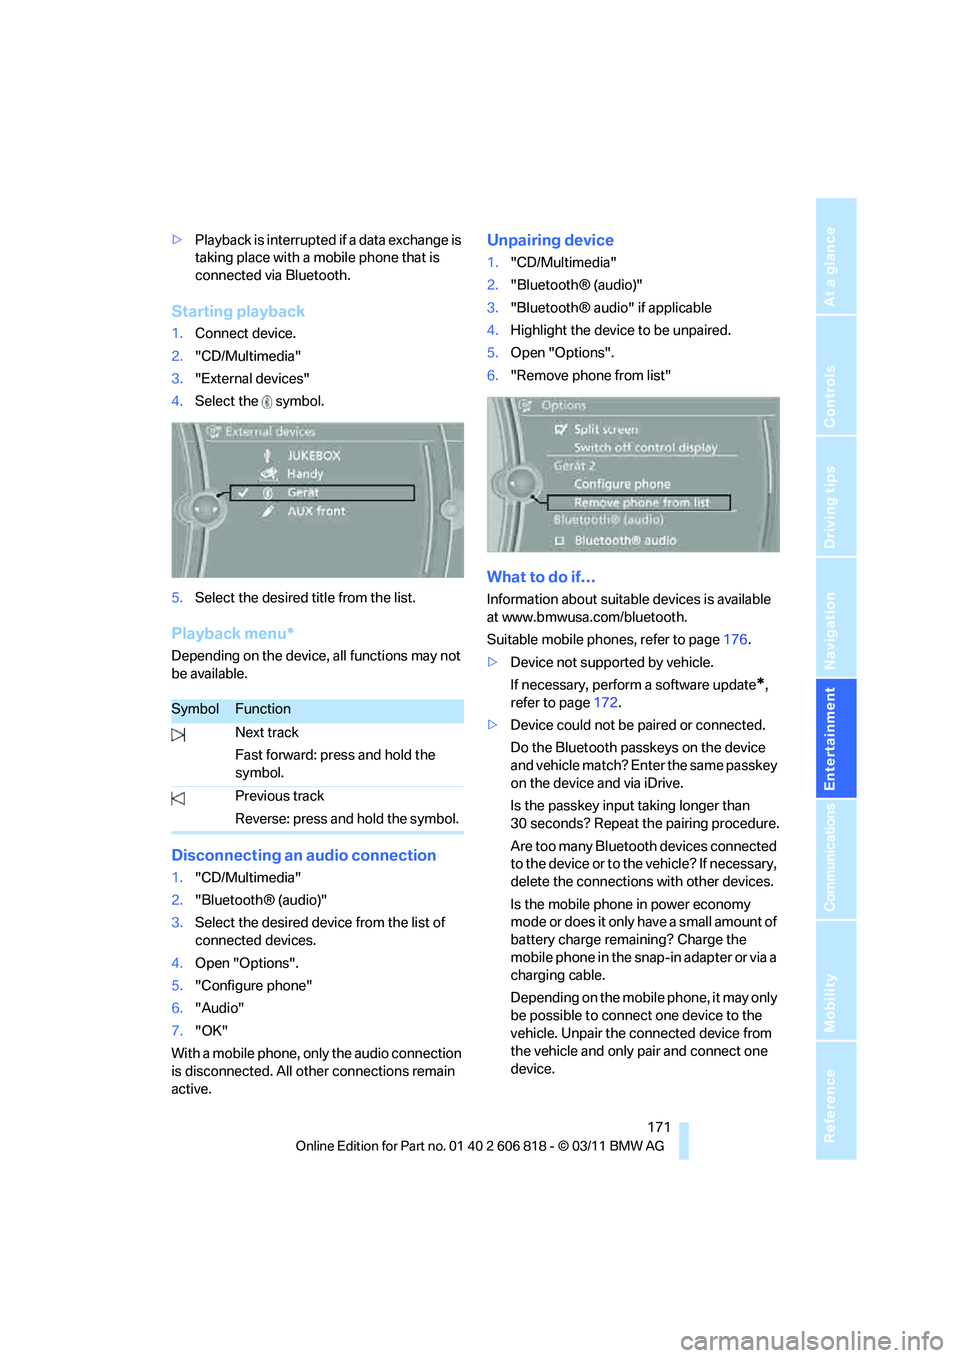
Starting playback
1.Connect device.
2."CD/Multimedia"
3."External devices"
4.Select the symbol.
5.Select the desired title from the list.
Playback menu*
Depending on the device, all functions may not
be available.
Disconnecting an audio connection
1."CD/Multimedia"
2."Bluetooth® (audio)"
3.Select the desired device from the list of
connected devices.
4.Open "Options".
5."Configure phone"
6."Audio"
7."OK"
With a mobile phone, only the audio connection
is disconnected. All other connections remain
active.
Unpairing device
1."CD/Multimedia"
2."Bluetooth® (audio)"
3."Bluetooth® audio" if applicable
4.Highlight the device to be unpaired.
5.Open "Options".
6."Remove phone from list"
What to do if…
Information about suitable devices is available
at www.bmwusa.com/bluetooth.
Suitable mobile phones, refer to page176.
>Device not supported by vehicle.
If necessary, perform a software update
*,
refer to page172.
>Device could not be paired or connected.
Do the Bluetooth passkeys on the device
and vehicle match? Enter the same passkey
on the device and via iDrive.
Is the passkey input taking longer than
30 seconds? Repeat the pairing procedure.
Are too many Bluetooth devices connected
to the device or to the vehicle? If necessary,
delete the connections with other devices.
Is the mobile phone in power economy
mode or does it only have a small amount of
battery charge remaining? Charge the
mobile phone in the snap-in adapter or via a
charging cable.
Depending on the mobile phone, it may only
be possible to connect one device to the
vehicle. Unpair the connected device from
the vehicle and only pair and connect one
device.
SymbolFunction
Next track
Fast forward: press and hold the
symbol.
Previous track
Reverse: press and hold the symbol.