Page 164 of 650

When you unlock the driver’s
door with your remote
transmitter, each remote
transmitter activates the
customized settings related to
that remote.When you unlock and open the
driver’s door with the remote, the
driver’s seat (except power lumbar)
and outside mirrors move to the
positions stored in memory. An
indicator on one of the driving
position memory buttons on the
driver’s door also comes on.
You will also see the ‘‘DRIVER 1’’
or ‘‘DRIVER 2’’ message on the
multi- information display,
depending on which linked remote
transmitter is used.
Driving position memory
(see page ). Customized settings
(see page ).
Here are the settings activated with
the remote: The driving position memory
activated (Driver 1, Driver 2) is
shownonthebackof each
transmitter. Make sure you store
your desired driving position in the
memory that is activated by the
transmitter you normally carry.
Audio system settings
(see page ).
Climate control settings
(see page ). 170
236 226 94
Remote Transmitter
Recalling a Memorized Driving
Position
160
Driver 1 Driver 2
11/01/14 18:21:23 31TK4630_165
Inst rument s and Cont rols
2012 TL
Page 186 of 650
Here are the settings activated with
the remote:Driving position memory
(see page ).
Audio system settings
(see page ).
Climate control settings
(see page ).
Navigation system pref erences
(see the navigation system
manual).
When you unlock the door with your
remote, each remote activates the
customized settings related to that
remote. The driver’s ID (Driver 1 or
Driver 2) is shown on the back of
each remote. Customized settings
(see page ).
Avoid dropping or throwing the
remote.
Protect the remote f rom extreme
temperatures.
Do not immerse the remote in any
liquid.
If you lose a remote, the
replacement needs to be
reprogrammed by your dealer.
285
170
227 94
K eyless A ccess System
Remot e CareRecalling a
Memorized Driving Position
182
DRIVER’S ID
11/01/14 18:25:52 31TK4630_187
Inst rument s and Cont rols
2012 TL
Page 189 of 650
CONT INUED
K eyless A ccess System
Inst rument s and Cont rols
Automatic TransmissionManual Transmission
185
: Press the engine start/stop button.
: Press the engine start/stop button without the shift lever in P.
: Shift to Park, then press the engine start/stop button.
Do the following without pressing the brake pedal. VEHICLE OFF (LOCK)
Indicator in the button is off.
ACCESSORY
Indicator in the button comes on green.
Some electrical components such as the
audio system and accessory power sockets
can be operated.
ON
Indicator in the button remains green when
the engine is not running.
(If the engine is running,this indicator is off.)
All electrical components can be used.
: Press the engine start/stop buttonwithout pressing the clutch pedal.
11/01/14 18:26:19 31TK4630_190
2012 TL
Page 191 of 650

Engine is turned of f and
power is shut down.
The steering wheel is
locked.
No electrical components
can be used.
Indicator-Of fEngine is turned of f
and power is shut
down.
The steering wheel is
locked.
No electrical
components can be
used. Use this position to start
the engine.
The ignition switch
returns to the ON (II)
position when you
release the key.
Engine is turned of f .
Some electrical components
such as the audio system
and accessory power
sockets can be operated.
Indicator-Green
Engine is turned of f .
Some electrical
components such as the
audio system and
accessory power sockets
can be operated. Indicator-
Green (engine is turned off)
Of f (engine is running)
All electrical components
can be used.
Normal key position while
driving.
All electrical components
can be used.
Indicator-Of fThe mode
automatically returns
to ON after the
engine starts.
VEHICLE OFF
(LOCK) ACCESSORY
ON ST ART
Ignition Switch
Position
Power Mode LOCK (0)
ON (II)
ACCESSORY (I)
Without Keyless
Access System
With Keyless
Access System and
Engine Start/Stop
Button ST ART (III)
OFF
Green
Ignition Switch and Power Mode Comparison
K eyless A ccess System
Inst rument s and Cont rols
187
11/01/14 18:26:45 31TK4630_192
2012 TL
Page 229 of 650

The standard audio system has
many f eatures. This section
describes those f eatures and how to
use them. The climate control system in your
vehicle provides a comfortable
driving environment in all weather
conditions.
Your vehicle has an anti-theft audio
system that requires a code number
to enable it.
The security system helps to dis-
courage vandalism and thef t of your
vehicle................
Climate Control System . 226
Using Automatic Climate ...................................
Control .228 Dual Temperature and Mode
...................................
Control .232
..........
Climate Control Sensors . 234
................................
Audio System .235
................................
Audio System .236
..........
Playing the AM/FM Radio . 237
................
Playing the XM
Radio . 246
.................................
Playing Discs .253
...
Disc Changer Error Messages . 263
............................
PlayinganiPod
. 264
.................
iPod
Error Messages . 271
Playing a USB Flash Memory ........................................
Device .272
USB Flash Memory Device ........................
Error Messages .280
.............
Audio System . 281
................................
Audio System .285
..........
Playing the AM/FM Radio . 286
................
Playing the XM
Radio . 299
................................
Playing a Disc .307
.......
Disc Player Error Messages . 319
Playing Hard Disc Drive (HDD) ..........................................
Audio .320
............................
PlayinganiPod
. 354 .................
iPod
Error Messages . 363
Playing a USB Flash Memory ........................................
Device .364
USB Flash Memory Device ........................
Error Messages .375
.............
Audio System . 376
..................
Protecting Your Discs . 381
............
AM/FM Radio Reception . 385
................
Remote Audio Controls . 387
......................
Auxiliary Input Jack .389
.................
Radio Thef t Protection . 390
..........................
Setting the Clock .391
............................
Security System .395
.........................................
Compass .397
...............................
Cruise Control .401
HomeLink
Universal ................................
Transceiver .404
HandsFreeLink
(Models without navigation
..................................
system) .407
HandsFreeLink
(Models with navigation
..................................
system) .424
..
AcuraLink
(U.S. models only) . 449
...
Rearview Camera and Monitor . 465
Models without navigation system
BluetoothModels with navigation system Bluetooth
BluetoothBluetooth
Features
Features
225
11/01/14 18:32:53 31TK4630_230
2012 TL
Page 239 of 650
An audio system is standard on all
models. Read the appropriate pages
(as shown below) to use your
vehicle’s audio system.
For vehicles without navigation
system, see pages through .
For vehicles with navigation system,
see pages through .236 284
285 380
Audio System
Features
235
Models Without navigation system Models With navigation system
11/01/17 13:13:17 31TK4630_240
2012 TL
Page 240 of 650

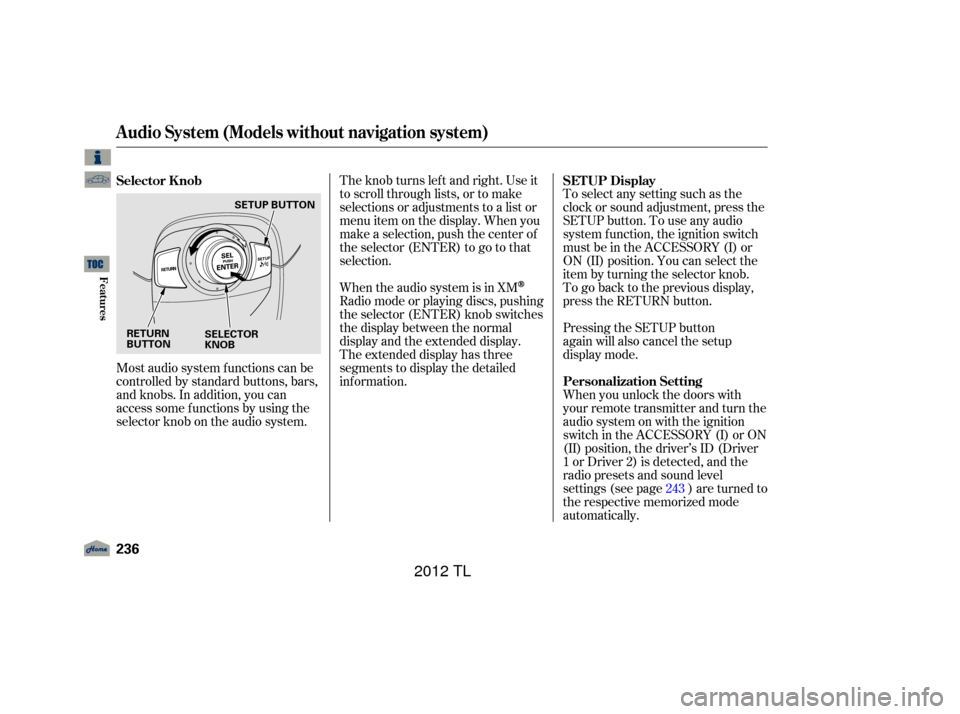
Most audio system f unctions can be
controlled by standard buttons, bars,
and knobs. In addition, you can
access some f unctions by using the
selector knob on the audio system.The knob turns lef t and right. Use it
to scroll through lists, or to make
selections or adjustments to a list or
menu item on the display. When you
make a selection, push the center of
the selector (ENTER) to go to that
selection.
When the audio system is in XM
Radio mode or playing discs, pushing
the selector (ENTER) knob switches
the display between the normal
display and the extended display.
The extended display has three
segments to display the detailed
inf ormation.
To select any setting such as the
clock or sound adjustment, press the
SETUP button. To use any audio
system f unction, the ignition switch
must be in the ACCESSORY (I) or
ON (II) position. You can select the
item by turning the selector knob.
To go back to the previous display,
press the RETURN button.
Pressing the SETUP button
again will also cancel the setup
display mode.
When you unlock the doors with
your remote transmitter and turn the
audio system on with the ignition
switch in the ACCESSORY (I) or ON
(II) position, the driver’s ID (Driver
1orDriver2)isdetected,andthe
radio presets and sound level
settings (see page ) are turned to
the respective memorized mode
automatically.
243
Selector K nob
SET UP Display
Personalization Setting
Audio System (Models without navigation system)
236
RETURN
BUTTON SELECTOR
KNOBSETUP BUTTON
11/01/14 18:34:54 31TK4630_241
Features
2012 TL
Page 244 of 650

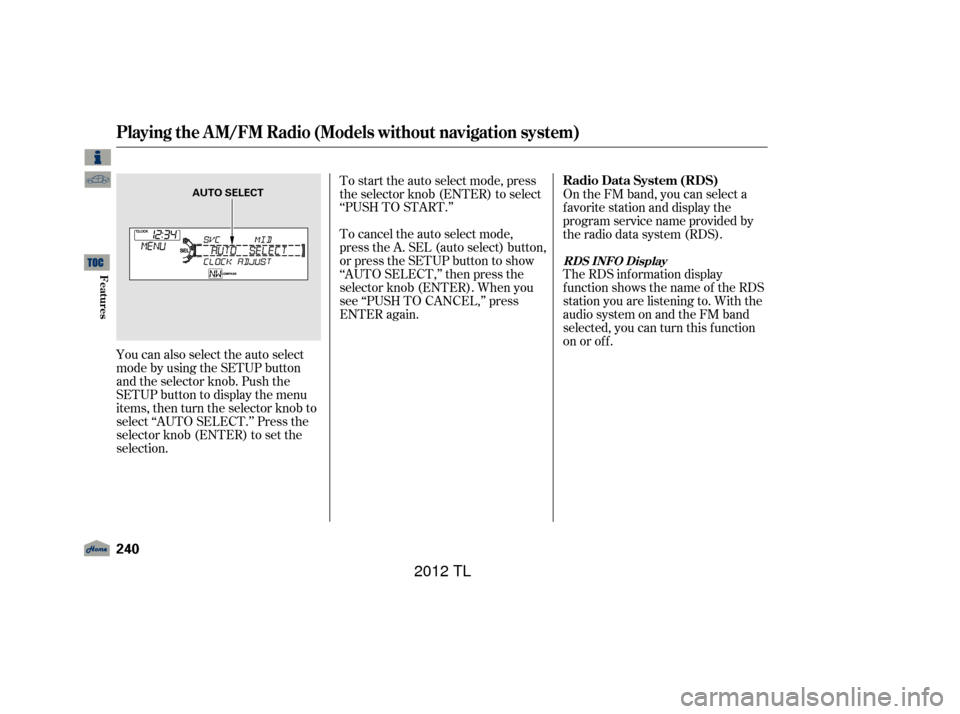
You can also select the auto select
mode by using the SETUP button
and the selector knob. Push the
SETUP button to display the menu
items, then turn the selector knob to
select ‘‘AUTO SELECT.’’ Press the
selector knob (ENTER) to set the
selection.To start the auto select mode, press
the selector knob (ENTER) to select
‘‘PUSHTOSTART.’’
To cancel the auto select mode,
press the A. SEL (auto select) button,
or press the SETUP button to show
‘‘AUTO SELECT,’’ then press the
selector knob (ENTER). When you
see ‘‘PUSH TO CANCEL,’’ press
ENTER again.
On the FM band, you can select a
favorite station and display the
program service name provided by
the radio data system (RDS).
The RDS inf ormation display
f unction shows the name of the RDS
station you are listening to. With the
audio system on and the FM band
selected, you can turn this f unction
on or of f .
Playing the A M/FM Radio (Models without navigation system)
Radio Data System (RDS)
RDS INFO Display
240
AUTO SELECT
11/01/14 18:35:38 31TK4630_245
Features
2012 TL