2011 YAMAHA TZR50 torque
[x] Cancel search: torquePage 37 of 88

EAU17241
Periodic inspection, adjustment, and
lubrication will keep your vehicle in
the safest and most efficient condi-
tion possible. Safety is an obligation
of the vehicle owner/operator. The
most important points of vehicle ins-
pection, adjustment, and lubrication
are explained on the following pages.
The intervals given in the periodic
maintenance and lubrication chart
should be simply considered as a
general guide under normal riding
conditions. However, depending on
the weather, terrain, geographical
location, and individual use, the main-
tenance intervals may need to be
shortened.
EWA10321
Failure to properly maintain the
vehicle or performing maintenance
activities incorrectly may increase
your risk of injury or death during
service or while using the vehicle. If
you are not familiar with vehicle
service, have a Yamaha dealer per-
form service.
EWA15121
Turn off the engine when perfor-
ming maintenance unless otherwi-
se specified.
●A running engine has moving
parts that can catch on body
parts or clothing and electrical
parts that can cause shocks or
fires.
●Running the engine while servi-
cing can lead to eye injury,
burns, fire, or carbon monoxide
poisoning – possibly leading to
death. See page 1-1 for more
information about carbon
monoxide.
EAU17521
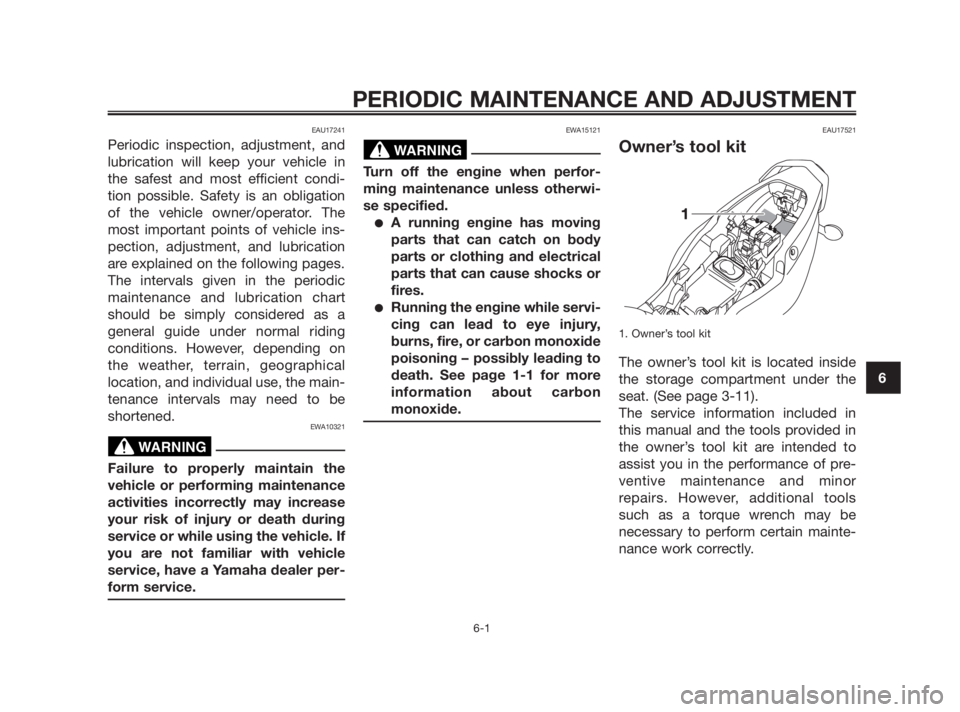
Owner’s tool kit
1. Owner’s tool kit
The owner’s tool kit is located inside
the storage compartment under the
seat. (See page 3-11).
The service information included in
this manual and the tools provided in
the owner’s tool kit are intended to
assist you in the performance of pre-
ventive maintenance and minor
repairs. However, additional tools
such as a torque wrench may be
necessary to perform certain mainte-
nance work correctly.
WARNING
WARNING
PERIODIC MAINTENANCE AND ADJUSTMENT
6-1
6
5WX-F819D-E3 15/11/08 15:27 Página 37
Page 47 of 88

Instead, have a Yamaha dealer check
the vehicle.
2. Check the spark plug for electro-
de erosion and excessive carbon
or other deposits, and replace it if
necessary.
To install the spark plug
1. Measure the spark plug gap with
a wire thickness gauge and, if
necessary, adjust the gap to spe-
cification.
1. Spark plug gap
2. Clean the surface of the spark
plug gasket and its mating surfa-
ce, and then wipe off any grime
from the spark plug threads.
3. Install the spark plug with the
spark plug wrench, and then
tighten it to the specified torque.
TIP
If a torque wrench is not available
when installing a spark plug, a good
estimate of the correct torque is
1/4–1/2 turn past finger tight. Howe-
ver, the spark plug should be tighte-
ned to the specified torque as soon
as possible.
4. Install the spark plug cap.
5. Install the panel.
EAUS1591
Transmission oil
The transmission oil level should be
checked before each ride. In addition,
the oil must be changed at the inter-
vals specified in the periodic mainte-
nance and lubrication chart.
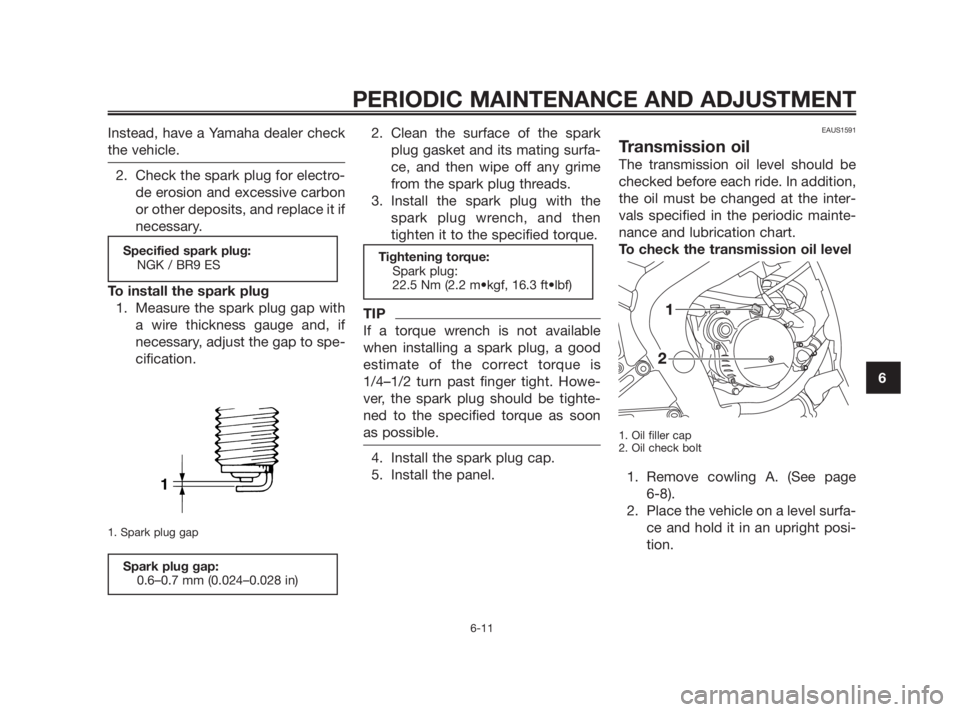
To check the transmission oil level
1. Oil filler cap
2. Oil check bolt
1. Remove cowling A. (See page
6-8).
2. Place the vehicle on a level surfa-
ce and hold it in an upright posi-
tion.
Tightening torque:
Spark plug:
22.5 Nm (2.2 m•kgf, 16.3 ft•lbf)
Spark plug gap:
0.6–0.7 mm (0.024–0.028 in)
1
Specified spark plug:
NGK / BR9 ES
PERIODIC MAINTENANCE AND ADJUSTMENT
6-11
6
5WX-F819D-E3 15/11/08 15:27 Página 47
Page 48 of 88

TIP
Make sure that the vehicle is positio-
ned straight up when checking the oil
level. A slight tilt to the side can result
in a false reading.
3. Remove the oil check bolt, and
then check the oil level.
TIP
The oil should be at the brim of the
check hole.
4. If the oil is below the brim of the
check hole, remove the oil filler
cap, add sufficient oil of the
recommended type to raise it to
the correct level, and then install
the oil filler cap.
5. Install the oil check bolt, and then
tighten it to the specified torque.To change the transmission oil
1. Oil check bolt
2. Transmission oil drain bolt
3. Washer
1. Place an oil pan under the trans-
mission oil case to collect the
used oil.
2. Remove the drain bolt and the oil
check bolt to drain the oil.
3. Install the drain bolt and the
check bolt, and then tighten them
to the specified torques.4. Remove the oil filler cap, refill
with the specified amount of the
recommended transmission oil,
and then install and tighten the oil
filler cap. NOTICE: Make sure
that no foreign material enters
the transmission case.
[ECAM1021]
5. Start the engine and let it idle for
several minutes while checking
the transmission oil case for oil
leakage. If oil is leaking, imme-
diately turn the engine off and
check for the cause.
Recommended transmission oil:
See page 8-1
Oil change quantity:
0.75 L (0.79 US qt, 0.66 Imp.qt)
Tightening torque:
Transmission oil drain bolt:
17.5 Nm (1.7 m•kgf, 12.7 ft•lbf)
Oil check bolt:
6 Nm (0.6 m•kgf, 4.3 ft•lbf)
Tightening torque:
Oil check bolt:
6 Nm (0.6 m•kgf, 4.3 ft•lbf)
PERIODIC MAINTENANCE AND ADJUSTMENT
6-12
6
5WX-F819D-E3 15/11/08 15:27 Página 48
Page 50 of 88

5. Install the panel.
EAUS1601
To change the coolant
1. Put the vehicle on a level surface
and let the engine cool if neces-
sary.
2. Remove cowling C and panel A.
(See page 6-8).
3. Place a container under the engi-
ne to collect the used coolant.
4. Remove the radiator cap retai-
ning bolt, radiator cap retainer
and radiator cap. WARNING!
Never attempt to remove the
radiator cap when the engine is
hot.
[EWA10381]
1. Radiator cap retaining bolt
2. Radiator cap
3. Radiator cap retainer
5. Remove the coolant drain bolt to
drain the cooling system.
1. Coolant drain bolt
6. Remove the coolant reservoir
cap.7. Disconnect the coolant reservoir
hose on the reservoir side and
drain the coolant from the reser-
voir.
1. Coolant reservoir
2. Coolant reservoir hose
8. After draining the coolant, tho-
roughly flush the cooling system
with clean tap water.
9. Replace the coolant drain bolt
washer if it is damaged, and then
tighten the coolant drain bolt to
the specified torque.
10. Connect the coolant reservoir
hose.
Tightening torque:
Coolant drain bolt:
9 Nm (0.9 m•kgf, 6.5 ft•lbf)
Coolant reservoir capacity (up to
the maximum level mark):
0.29 L (0.31 US qt, 0.26 Imp.qt)
PERIODIC MAINTENANCE AND ADJUSTMENT
6-14
6
5WX-F819D-E3 15/11/08 15:27 Página 50
Page 58 of 88

disappeared, have a Yamaha dealer
replace the brake pads as a set.
EAU22480
Rear brake pads
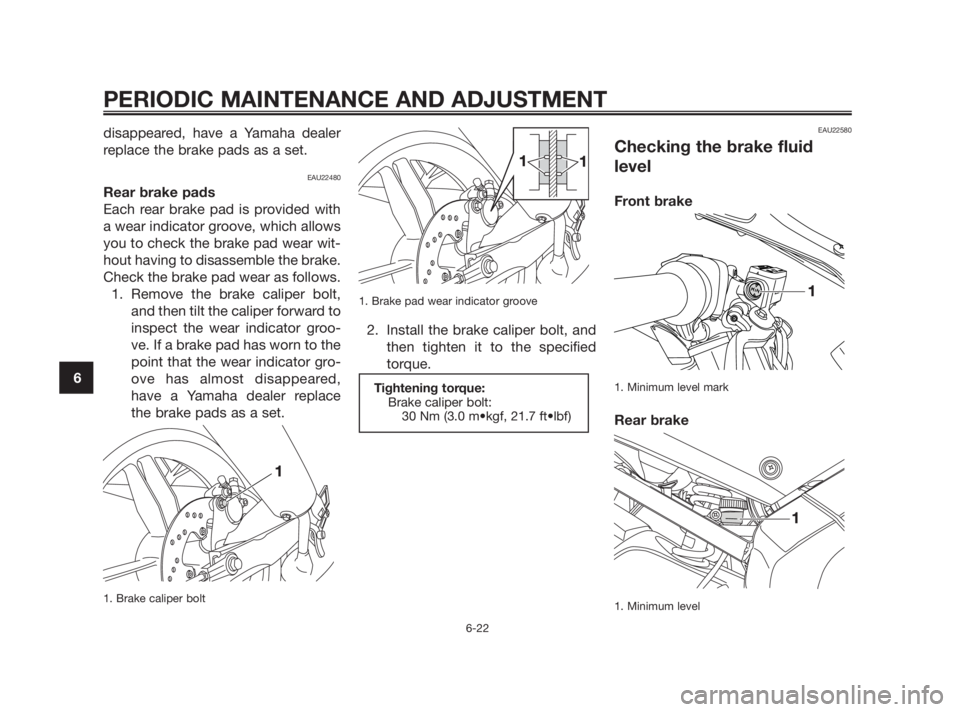
Each rear brake pad is provided with
a wear indicator groove, which allows
you to check the brake pad wear wit-
hout having to disassemble the brake.
Check the brake pad wear as follows.
1. Remove the brake caliper bolt,
and then tilt the caliper forward to
inspect the wear indicator groo-
ve. If a brake pad has worn to the
point that the wear indicator gro-
ove has almost disappeared,
have a Yamaha dealer replace
the brake pads as a set.
1. Brake caliper bolt1. Brake pad wear indicator groove
2. Install the brake caliper bolt, and
then tighten it to the specified
torque.
EAU22580
Checking the brake fluid
level
Front brake
1. Minimum level mark
Rear brake
1. Minimum level
Tightening torque:
Brake caliper bolt:
30 Nm (3.0 m•kgf, 21.7 ft•lbf)
PERIODIC MAINTENANCE AND ADJUSTMENT
6-22
6
5WX-F819D-E3 15/11/08 15:27 Página 58
Page 61 of 88

4. Tighten the locknuts, and then
tighten the axle nut to the speci-
fied torque.
5. Insert a new cotter pin into the
axle nut, and then bend its ends
as shown. WARNING! Always
use a new cotter pin for the
axle nut.
[EWA10701]
1. Cotter pin
2. Axle nut
3. Chain puller locknut
4. Drive chain slack adjusting bolt
5. Alignment marks
TIP
Make sure that two notches in the
axle nut are aligned with the hole
through the wheel axle, otherwise
further tighten the axle nut until they
are.EAU23023
Cleaning and lubricating the
drive chain
The drive chain must be cleaned and
lubricated at the intervals specified in
the periodic maintenance and lubrica-
tion chart, otherwise it will quickly
wear out, especially when riding in
dusty or wet areas. Service the drive
chain as follows.
ECA10581
The drive chain must be lubricated
after washing the motorcycle and
riding in the rain.
1. To prevent damaging the O-rings,
do not clean the drive chain with
steam cleaners, high-pressure
washers or inappropriate sol-
vents. NOTICE: To prevent
damaging the O-rings, do not
clean the drive chain with ste-
am cleaners, high-pressure
washers or inappropriate sol-
vents.
[ECA11121]
2. Wipe the drive chain dry.
NOTICE
Tightening torque:
Axle nut:
90 Nm (9.0 m•kgf, 65.1 ft•lbf)
PERIODIC MAINTENANCE AND ADJUSTMENT
6-25
6
5WX-F819D-E3 15/11/08 15:27 Página 61