Page 89 of 108

If a fuse is blown, replace it")
PERIODIC MAINTENANCE AND ADJUSTMENT
6-31
6
EAU23659
Replacing the fuses The main fuse, the fuse boxes and the
ABS motor fuse are located under pan-
el A. (See page 6-8.)
If a fuse is blown, replace it as follows.
1. Turn the key to “OFF” and turn off
the electrical circuit in question.2. Remove the blown fuse, and then
install a new fuse of the specified
amperage. WARNING! Do not
use a fuse of a higher amperage
rating than recommended to
avoid causing extensive dam-
age to the electrical system and
possibly a fire.
[EWA15131]
1. Main fuse
2. Fuse box
3. ABS motor fuse
4. ABS motor spare fuse
1. Fuse box
2. Right radiator fan fuse
3. Left radiator fan fuse
4. Hazard fuse
5. Backup fuse (for clock and immobilizer sys-
tem)
6. ABS solenoid fuse
7. Fuel injection system fuse
8. Headlight fuse
9. Signaling system fuse
10.ABS control unit fuse
11.Ignition fuse
12.Auxiliary DC jack fuse
13.YCC-S motor control fuse
14.Spare fuse
20
0
2
714
8 9
10 11
12 13
U1DAE1E0.book Page 31 Tuesday, August 24, 2010 5:28 PM
Page 90 of 108
PERIODIC MAINTENANCE AND ADJUSTMENT
6-32
6
3. Turn the key to “ON” and turn on
the electrical circuit in question to
check if the device operates.4. If the fuse immediately blows
again, have a Yamaha dealer
check the electrical system.
EAU40361
Headlight bulb If a headlight does not come on, have a
Yamaha dealer check its electrical cir-
cuit or replace the bulb.NOTICE
ECA16580
Do not affix any type of tinted film or
stickers to the headlight lens.
Specified fuses:
Main fuse:
50.0 A
Headlight fuse:
25.0 A
Signaling system fuse:
15.0 A
Ignition fuse:
10.0 A
Radiator fan fuse:
15.0 A × 2
Backup fuse:
10.0 A
Hazard fuse:
10.0 A
Fuel injection system fuse:
15.0 A
ABS solenoid fuse:
20.0 A
ABS control unit fuse:
10.0 A
Auxiliary DC jack fuse:
3.0 A
ABS motor fuse:
30.0 A
YCC-S motor control fuse:
30.0 A
U1DAE1E0.book Page 32 Tuesday, August 24, 2010 5:28 PM
Page 91 of 108
PERIODIC MAINTENANCE AND ADJUSTMENT
6-33
6
EAU39880
Front turn signal light If a front turn signal light does not come
on, have a Yamaha dealer check its
electrical circuit or replace the bulb.
EAU27003
Replacing a rear turn signal
light bulb or a tail/brake light
bulb 1. Remove the passenger seat. (See
page 3-22.)
2. Remove the socket (together with
the bulb) by turning it counter-
clockwise.
3. Remove the burnt-out bulb by
pushing it in and turning it counter-
clockwise.
4. Insert a new bulb into the socket,
push it in, and then turn it clock-
wise until it stops.
5. Install the socket (together with the
bulb) by turning it clockwise.6. Install the passenger seat.1. Turn signal light bulb socket
2. Tail/brake light bulb socket
U1DAE1E0.book Page 33 Tuesday, August 24, 2010 5:28 PM
Page 92 of 108
PERIODIC MAINTENANCE AND ADJUSTMENT
6-34
6
EAU24313
Replacing the license plate
light bulb 1. Remove the license plate light unit
by removing the screws.
2. Remove the license plate light bulb
socket (together with the bulb) by
pulling it out.3. Remove the burnt-out bulb by pull-
ing it out.
4. Insert a new bulb into the socket.
5. Install the socket (together with the
bulb) by pushing it in.
6. Install the license plate light unit by
installing the screws.
EAU39020
Auxiliary light bulb If the auxiliary light does not come on,
have a Yamaha dealer check the elec-
trical circuit or replace the bulb.
1. Screw
2. License plate light unit
1. License plate light bulb
2. License plate light bulb socket
1
2
U1DAE1E0.book Page 34 Tuesday, August 24, 2010 5:28 PM
Page 93 of 108

PERIODIC MAINTENANCE AND ADJUSTMENT
6-35
6
EAU25871
Troubleshooting Although Yamaha motorcycles receive
a thorough inspection before shipment
from the factory, trouble may occur dur-
ing operation. Any problem in the fuel,
compression, or ignition systems, for
example, can cause poor starting and
loss of power.
The following troubleshooting charts
represent quick and easy procedures
for checking these vital systems your-
self. However, should your motorcycle
require any repair, take it to a Yamaha
dealer, whose skilled technicians have
the necessary tools, experience, and
know-how to service the motorcycle
properly.
Use only genuine Yamaha replace-
ment parts. Imitation parts may look like
Yamaha parts, but they are often inferi-
or, have a shorter service life and can
lead to expensive repair bills.
WARNING
EWA15141
When checking the fuel system, do
not smoke, and make sure there are
no open flames or sparks in the ar-
ea, including pilot lights from waterheaters or furnaces. Gasoline or
gasoline vapors can ignite or ex-
plode, causing severe injury or
property damage.
U1DAE1E0.book Page 35 Tuesday, August 24, 2010 5:28 PM
Page 94 of 108

PERIODIC MAINTENANCE AND ADJUSTMENT
6-36
6
EAU42502
Troubleshooting charts Starting problems or poor engine performance
Check the fuel level in
the fuel tank.1. Fuel
There is enough fuel.
There is no fuel.
Check the compression.
Supply fuel.
The engine does not start.
Check the compression.
Operate the electric starter.2. Compression
There is compression.
There is no compression.
Check the ignition.
Have a Yamaha dealer
check the vehicle.
Remove the spark plugs
and check the electrodes.3. Ignition
Wipe off with a dry cloth and correct the
spark plug gaps, or replace the spark plugs.
Have a Yamaha dealer check the vehicle.
The engine does not start.
Have a Yamaha dealer
check the vehicle.
The engine does not start.
Check the battery.
Operate the electric starter.4. Battery
The engine turns over
quickly.
The engine turns over
slowly.
The battery is good.Check the battery lead connections,
and have a Yamaha dealer charge
the battery if necessary.
DryWet
Operate the electric starter.
U1DAE1E0.book Page 36 Tuesday, August 24, 2010 5:28 PM
Page 95 of 108

PERIODIC MAINTENANCE AND ADJUSTMENT
6-37
6 Engine overheating
WARNING
EWAT1040
�
Do not remove the radiator cap when the engine and radiator are hot. Scalding hot fluid and steam may be
blown out under pressure, which could cause serious injury. Be sure to wait until the engine has cooled.
�
Place a thick rag, like a towel, over the radiator cap, and then slowly rotate the cap counterclockwise to the de-
tent to allow any residual pressure to escape. When the hissing sound has stopped, press down on the cap
while turning it counterclockwise, and then remove the cap.
TIPIf coolant is not available, tap water can be temporarily used instead, provided that it is changed to the recommended coolant
as soon as possible.
Wait until the
engine has cooled.
Check the coolant level in the
reservoir and radiator.
The coolant level
is OK.The coolant level is low.
Check the cooling system
for leakage.
Have a Yamaha dealer checkand repair the cooling system.Add coolant. (See TIP.)
Start the engine. If the engine overheats again,
have a
Yamaha dealer check
and repair the cooling system.
There is
leakage.
There is
no leakage.
U1DAE1E0.book Page 37 Tuesday, August 24, 2010 5:28 PM
Page 96 of 108

MOTORCYCLE CARE AND STORAGE
7-1
7
EAU37833
Matte color caution NOTICE
ECA15192
Some models are equipped with
matte colored finished parts. Be
sure to consult a Yamaha dealer for
advice on what products to use be-
fore cleaning the vehicle. Using a
brush, harsh chemical products or
cleaning compounds when cleaning
these parts will scratch or damage
their surface. Wax also should not
be applied to any matte colored fin-
ished parts.
EAU26063
Care While the open design of a motorcycle
reveals the attractiveness of the tech-
nology, it also makes it more vulnera-
ble. Rust and corrosion can develop
even if high-quality components are
used. A rusty exhaust pipe may go un-
noticed on a car, however, it detracts
from the overall appearance of a motor-
cycle. Frequent and proper care does
not only comply with the terms of the
warranty, but it will also keep your mo-
torcycle looking good, extend its life
and optimize its performance.
Before cleaning
1. Cover the muffler outlets with plas-
tic bags after the engine has
cooled down.
2. Make sure that all caps and covers
as well as all electrical couplers
and connectors, including the
spark plug caps, are tightly in-
stalled.
3. Remove extremely stubborn dirt,
like oil burnt onto the crankcase,
with a degreasing agent and a
brush, but never apply such prod-ucts onto seals, gaskets and wheel
axles. Always rinse the dirt and de-
greaser off with water.
Cleaning
NOTICE
ECA10772
�
Avoid using strong acidic wheel
cleaners, especially on spoked
wheels. If such products are
used on hard-to-remove dirt, do
not leave the cleaner on the af-
fected area any longer than in-
structed. Also, thoroughly rinse
the area off with water, immedi-
ately dry it, and then apply a cor-
rosion protection spray.
�
Improper cleaning can damage
plastic parts (such as cowlings,
panels, windshields, headlight
lenses, meter lenses, etc.) and
the mufflers. Use only a soft,
clean cloth or sponge with wa-
ter to clean plastic. However, if
the plastic parts cannot be thor-
oughly cleaned with water, di-
luted mild detergent with water
may be used. Be sure to rinse
U1DAE1E0.book Page 1 Tuesday, August 24, 2010 5:28 PM
 1
1 2
2 3
3 4
4 5
5 6
6 7
7 8
8 9
9 10
10 11
11 12
12 13
13 14
14 15
15 16
16 17
17 18
18 19
19 20
20 21
21 22
22 23
23 24
24 25
25 26
26 27
27 28
28 29
29 30
30 31
31 32
32 33
33 34
34 35
35 36
36 37
37 38
38 39
39 40
40 41
41 42
42 43
43 44
44 45
45 46
46 47
47 48
48 49
49 50
50 51
51 52
52 53
53 54
54 55
55 56
56 57
57 58
58 59
59 60
60 61
61 62
62 63
63 64
64 65
65 66
66 67
67 68
68 69
69 70
70 71
71 72
72 73
73 74
74 75
75 76
76 77
77 78
78 79
79 80
80 81
81 82
82 83
83 84
84 85
85 86
86 87
87 88
88 89
89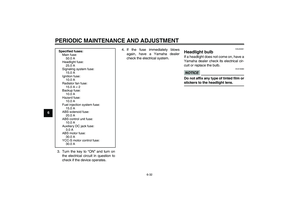 90
90 91
91 92
92 93
93 94
94 95
95 96
96 97
97 98
98 99
99 100
100 101
101 102
102 103
103 104
104 105
105 106
106 107
107

