Page 110 of 148

8-32
1
2
3
4
5
6
78
9
10
11
5. Move the throttle lever a few times and re-
check the position.
6. Install the fuel tank, side cover, radiator cover
and air filter case cover.
7. Connect the fuel hose to the fuel cock.
8. Install the seat.
EBU24020
Adjusting the engine idling speed
The engine idling speed must be checked and, if
necessary, adjusted as follows at the intervals
specified in the periodic maintenance and lubrica-tion chart.
TIP
�
A diagnostic tachometer is needed to make this
adjustment.
�
The carburetor synchronization and the throttle
cable free play must be checked, and adjusted if
necessary, before adjusting the engine idling
speed.
1. Start the engine and warm it up.
TIP
The engine is warm when it quickly responds to the
throttle.
2. Attach the tachometer to the spark plug lead.
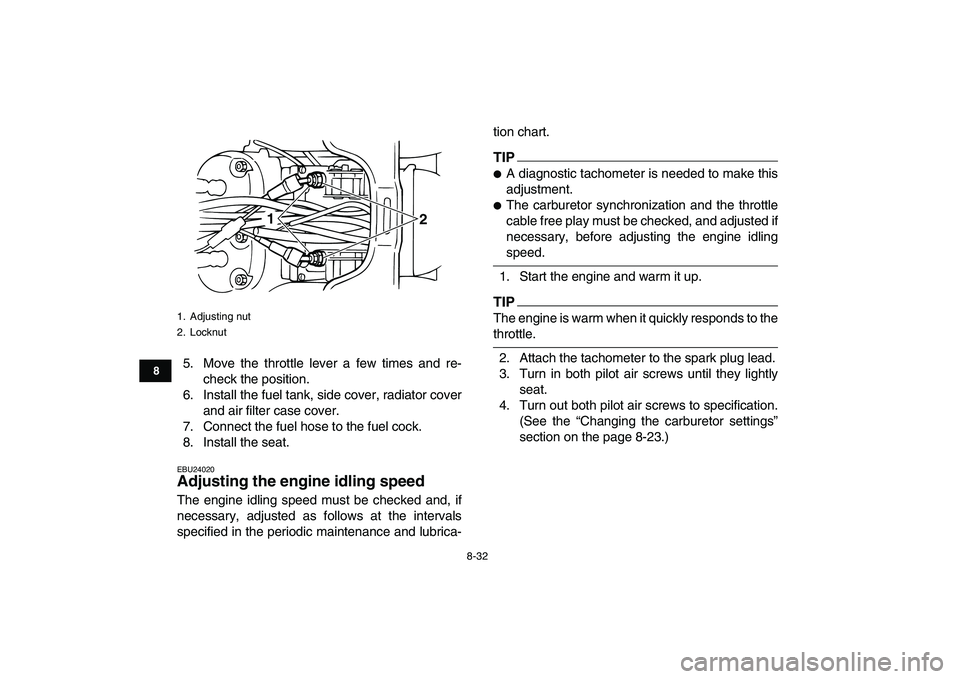
3. Turn in both pilot air screws until they lightly
seat.
4. Turn out both pilot air screws to specification.
(See the “Changing the carburetor settings”
section on the page 8-23.)
1. Adjusting nut
2. Locknut
1
2
Page 111 of 148
8-33
1
2
3
4
5
6
78
9
10
11
5. Remove the seat. (See page 4-11.)
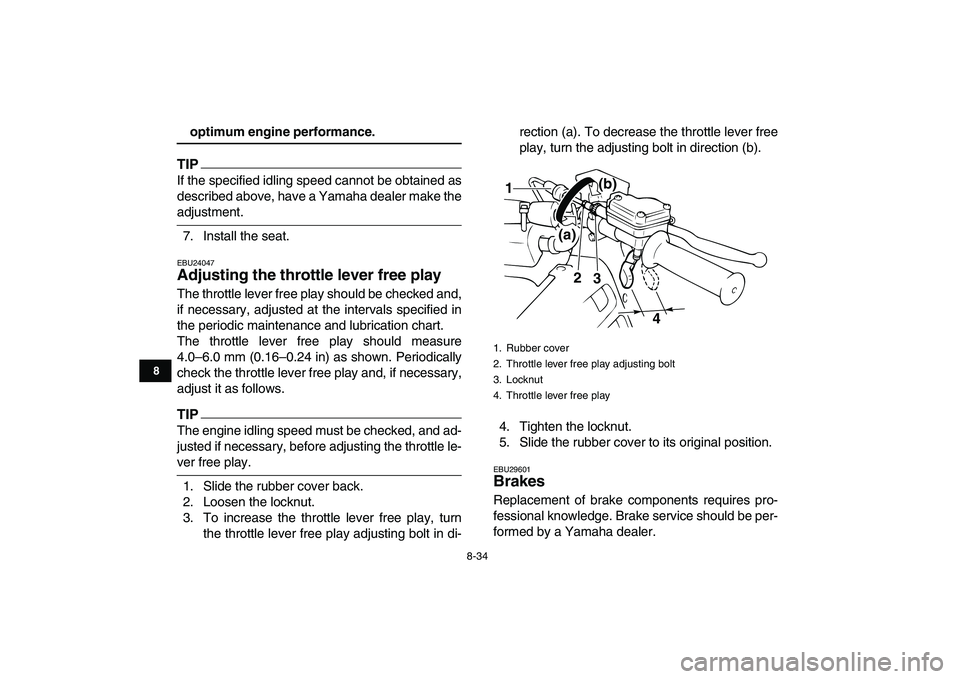
6. Check the engine idling speed and, if neces-
sary, adjust it to specification by turning the
throttle stop screws at the carburetors. To in-
crease the engine idling speed, turn the throt-
tle stop screws in direction (a), and to
decrease it, turn the screws in direction (b).NOTICE
ECB00510
�
The throttle stop screws were preset at the
factory. When adjusting the idling speed,
turn both throttle stop screws the same
amount, otherwise the carburetor synchroni-
zation will be incorrect.
�
Adjusting the pilot air screws and the idling
speed are separate procedures, but they
must be adjusted at the same time to achieve
1. Pilot air screw
1
1. Throttle stop screw
Engine idling speed:
1450–1550 r/min
1
(b)
(a)
(a)
(b)
Page 112 of 148

8-34
1
2
3
4
5
6
78
9
10
11
optimum engine performance.
TIP
If the specified idling speed cannot be obtained as
described above, have a Yamaha dealer make the
adjustment.
7. Install the seat.
EBU24047
Adjusting the throttle lever free play
The throttle lever free play should be checked and,
if necessary, adjusted at the intervals specified in
the periodic maintenance and lubrication chart.
The throttle lever free play should measure
4.0–6.0 mm (0.16–0.24 in) as shown. Periodically
check the throttle lever free play and, if necessary,
adjust it as follows.
TIP
The engine idling speed must be checked, and ad-
justed if necessary, before adjusting the throttle le-
ver free play.
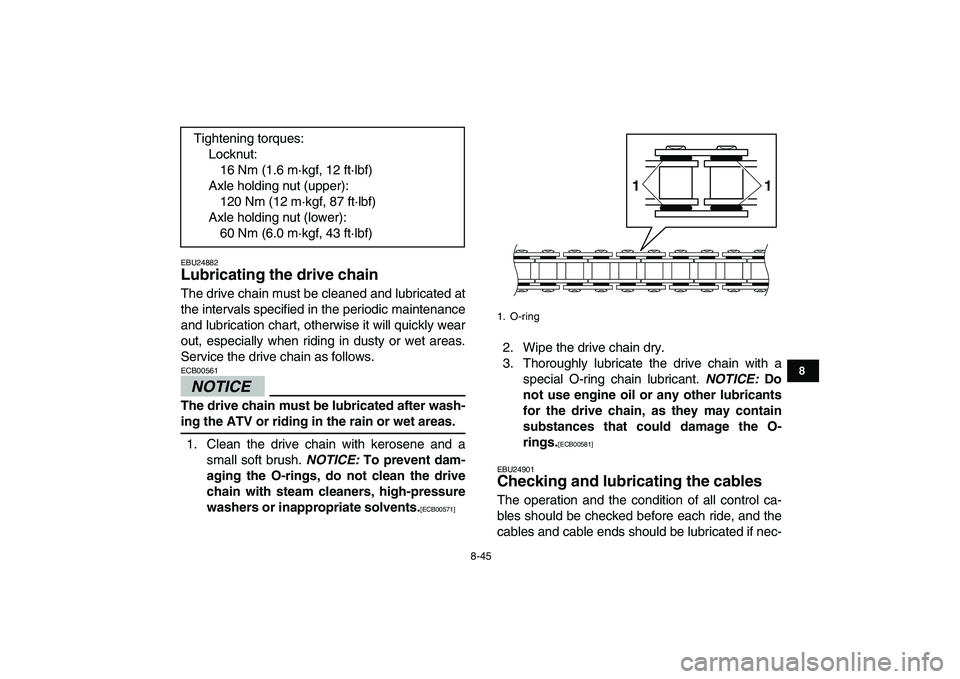
1. Slide the rubber cover back.
2. Loosen the locknut.
3. To increase the throttle lever free play, turn
the throttle lever free play adjusting bolt in di-rection (a). To decrease the throttle lever free
play, turn the adjusting bolt in direction (b).
4. Tighten the locknut.
5. Slide the rubber cover to its original position.
EBU29601
Brakes
Replacement of brake components requires pro-
fessional knowledge. Brake service should be per-
formed by a Yamaha dealer.
1. Rubber cover
2. Throttle lever free play adjusting bolt
3. Locknut
4. Throttle lever free play
2
3
4
(a)(b)
1
Page 122 of 148
8-44
1
2
3
4
5
6
78
9
10
11
3. Loosen the locknut on each side of the swing-
arm. To tighten the drive chain, turn the ad-
justing bolts in direction (a). To loosen the
drive chain, turn the adjusting bolts in direction
(b) and push the wheels forward. Turn each
adjusting bolt exactly the same amount to
maintain correct axle alignment.
NOTICE:
Im-
proper drive chain slack will overload the
engine as well as other vital parts of the
ATV and can lead to drive chain slippage
or breakage. To prevent this from occur-
ring, keep the drive chain slack within thespecified limits.
[ECB00542]
TIP
There are alignment marks on each side of the
swingarm and on the wheel hubs. Use them to
check for proper wheel axle alignment.
4. Tighten the locknuts and the axle holding nuts
to the specified torques.
1. Axle holding nut (upper)
2. Axle holding nut (lower)
1
2
1. Drive chain slack adjusting bolt
2. Locknut
3. Alignment marks
3
12(a)
(b)
Page 123 of 148

8-45
1
2
3
4
5
6
78
9
10
11
EBU24882
Lubricating the drive chain
The drive chain must be cleaned and lubricated at
the intervals specified in the periodic maintenance
and lubrication chart, otherwise it will quickly wear
out, especially when riding in dusty or wet areas.
Service the drive chain as follows.
NOTICE
ECB00561
The drive chain must be lubricated after wash-
ing the ATV or riding in the rain or wet areas.
1. Clean the drive chain with kerosene and a
small soft brush.
NOTICE:
To prevent dam-
aging the O-rings, do not clean the drive
chain with steam cleaners, high-pressure
washers or inappropriate solvents.
[ECB00571]
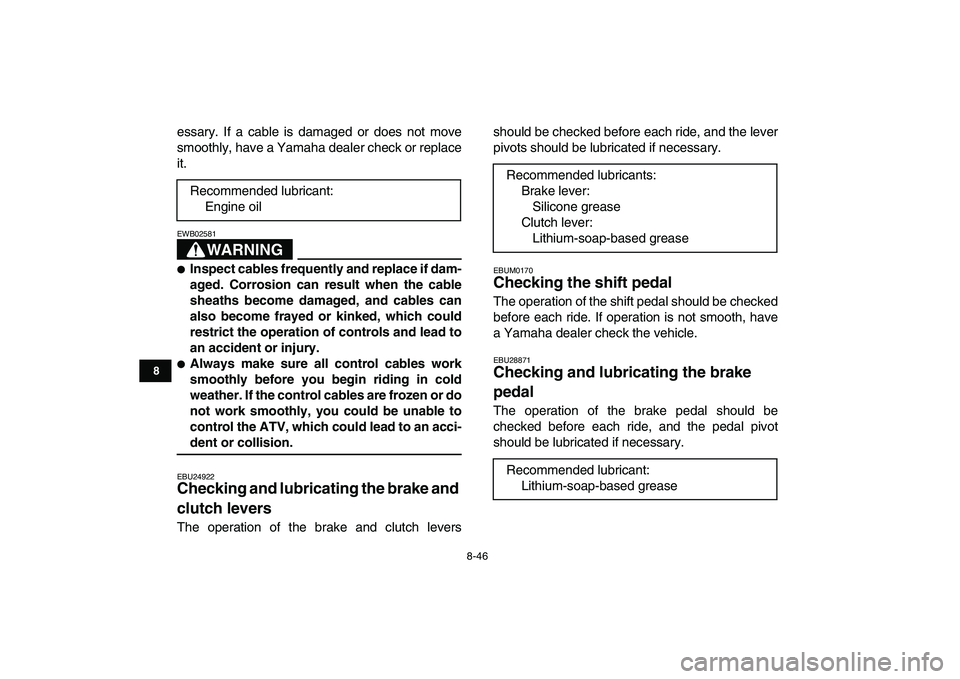
2. Wipe the drive chain dry.
3. Thoroughly lubricate the drive chain with a
special O-ring chain lubricant.
NOTICE:
Do
not use engine oil or any other lubricants
for the drive chain, as they may contain
substances that could damage the O-
rings.
[ECB00581]
EBU24901
Checking and lubricating the cables
The operation and the condition of all control ca-
bles should be checked before each ride, and the
cables and cable ends should be lubricated if nec- Tightening torques:
Locknut:
16 Nm (1.6 m·kgf, 12 ft·lbf)
Axle holding nut (upper):
120 Nm (12 m·kgf, 87 ft·lbf)
Axle holding nut (lower):
60 Nm (6.0 m·kgf, 43 ft·lbf)
1. O-ring
1 1
Page 124 of 148

8-46
1
2
3
4
5
6
78
9
10
11
essary. If a cable is damaged or does not move
smoothly, have a Yamaha dealer check or replace
it.
WARNING
EWB02581
�
Inspect cables frequently and replace if dam-
aged. Corrosion can result when the cable
sheaths become damaged, and cables can
also become frayed or kinked, which could
restrict the operation of controls and lead to
an accident or injury.
�
Always make sure all control cables work
smoothly before you begin riding in cold
weather. If the control cables are frozen or do
not work smoothly, you could be unable to
control the ATV, which could lead to an acci-
dent or collision.
EBU24922
Checking and lubricating the brake and
clutch levers
The operation of the brake and clutch leversshould be checked before each ride, and the lever
pivots should be lubricated if necessary.
EBUM0170
Checking the shift pedal
The operation of the shift pedal should be checked
before each ride. If operation is not smooth, have
a Yamaha dealer check the vehicle.
EBU28871
Checking and lubricating the brake
pedal
The operation of the brake pedal should be
checked before each ride, and the pedal pivot
should be lubricated if necessary. Recommended lubricant:
Engine oil
Recommended lubricants:
Brake lever:
Silicone grease
Clutch lever:
Lithium-soap-based grease
Recommended lubricant:
Lithium-soap-based grease
Page 134 of 148
8-56
1
2
3
4
5
6
78
9
10
11
EBU25841
Troubleshooting charts
Starting problems or poor engine performance
Check the fuel level in
the fuel tank.1. Fuel
There is
enough fuel.
There is
no fuel.
Supply fuel.
Operate the kickstarter.2. Compression
There is compression.
There is
no compression.Check the ignition.
Have a Yamaha dealer
check the ATV.
Remove the spark plugs
and check the electrodes.3. Ignition
Wet
DryWipe off with a dry cloth and correct the
spark plug gaps, or replace the spark plugs.
Have a Yamaha dealer check the ATV.The engine does not start.
Have a Yamaha dealer check the ATV.
Open the throttle halfway and operate
the kickstarter.
Check the compression.
The engine does not start.
Check the compression.
Page 135 of 148
8-57
1
2
3
4
5
6
78
9
10
11
Engine overheating
WARNING
EWB02290
Wait for the engine and radiator to cool before removing the radiator cap. You could be burned by
hot fluid and steam blown out under pressure. Always put a thick rag over the cap when opening.
Allow any remaining pressure to escape before completely removing the cap.
TIP
If coolant is not available, tap water can be temporarily used instead, provided that it is changed to the rec-
ommended coolant as soon as possible.
Wait until the
engine has cooled.
Check the coolant level in the
reservoir and radiator.
The coolant level
is OK.The coolant level is low.
Check the cooling system
for leakage.
Have a Yamaha dealer check
and repair the cooling system.Add coolant. (See TIP.)
Start the engine. If the engine overheats again, have a
Yamaha dealer check and repair the cooling system.
There is
leakage.
There is
no leakage.