2011 VOLKSWAGEN TRANSPORTER information
[x] Cancel search: informationPage 117 of 486
A WARNING
Worn or dirty wiper blades reduce visibility and increase the risk of accidents and severe injuries.
• Wiper blades should therefore always be changed if they are damaged or worn and no longer clean the windscreen properly.
Indicator lamp
Q)
In icy conditions, always check that the wiper blades are not frozen to the glass before using the wipers. When parking the vehicle in cold weather, it may be helpful to leave the front windscreen wipers in the service position 119.
Lit up Possible cause
Windscreen washer fluid level too low.
Several warning and indicator lamps will light up briefly as a functional check when the ignition is switched on. They will go out after a few seconds.
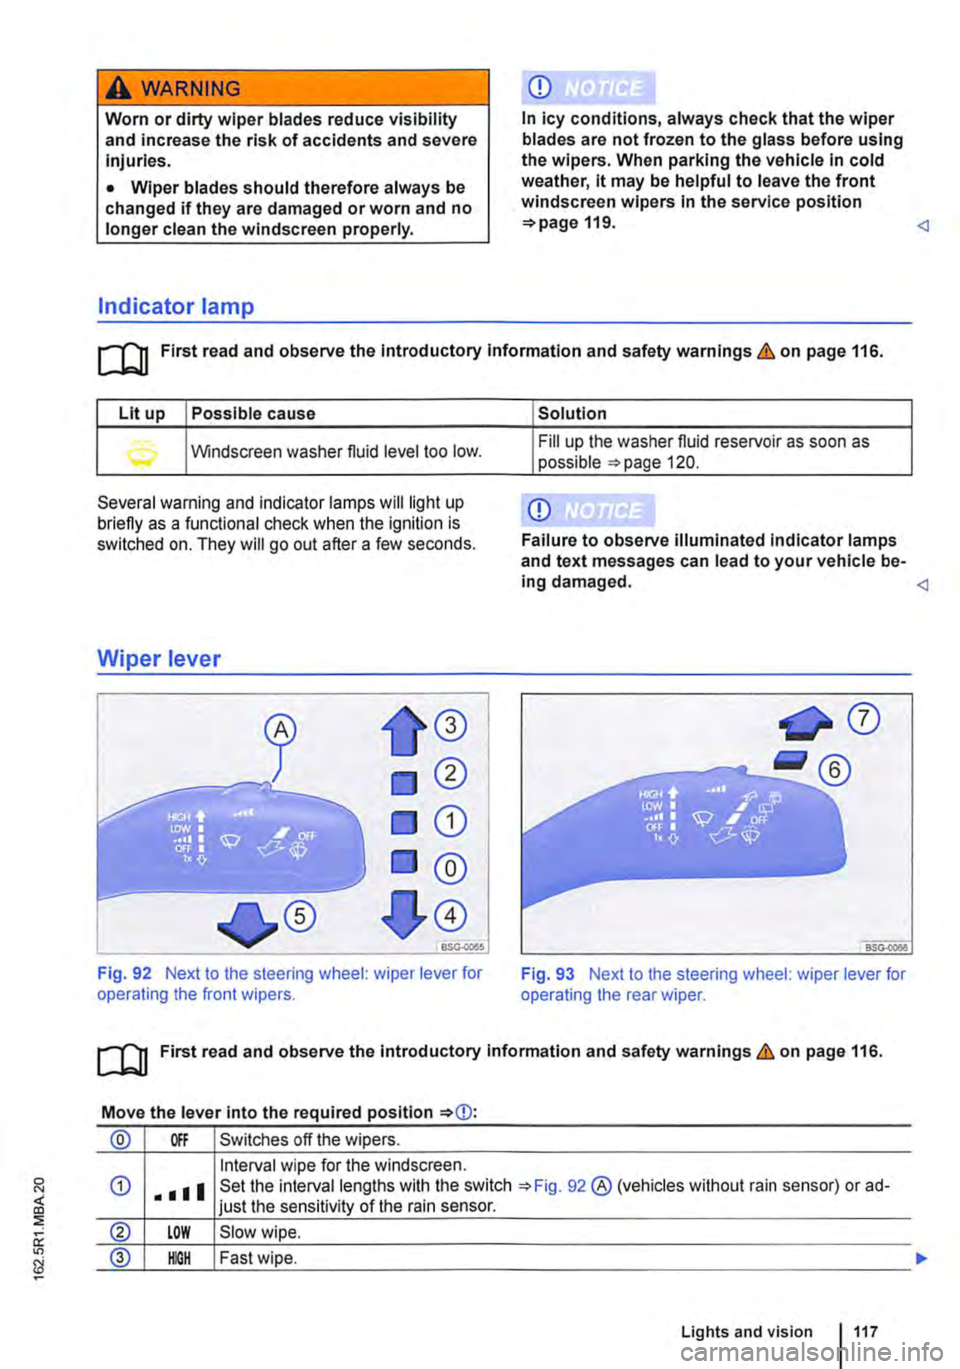
Wiper lever
Fig. 92 Next to the steering wheel: wiper lever for operating the front wipers.
Solution
Fill up the washer fluid reservoir as soon as possible =>page 120.
Q)
Failure to observe illuminated indicator lamps and text messages can lead to your vehicle be-ing damaged.
[QJ First read and observe the introductory information and safety warnings & on page 116.
Move the lever into the required position
® Off Switches off the wipers.
Interval wipe for the windscreen.
® LOW Slow wipe.
@ IOOH Fast wipe.
Lights and vision 117
Page 118 of 486
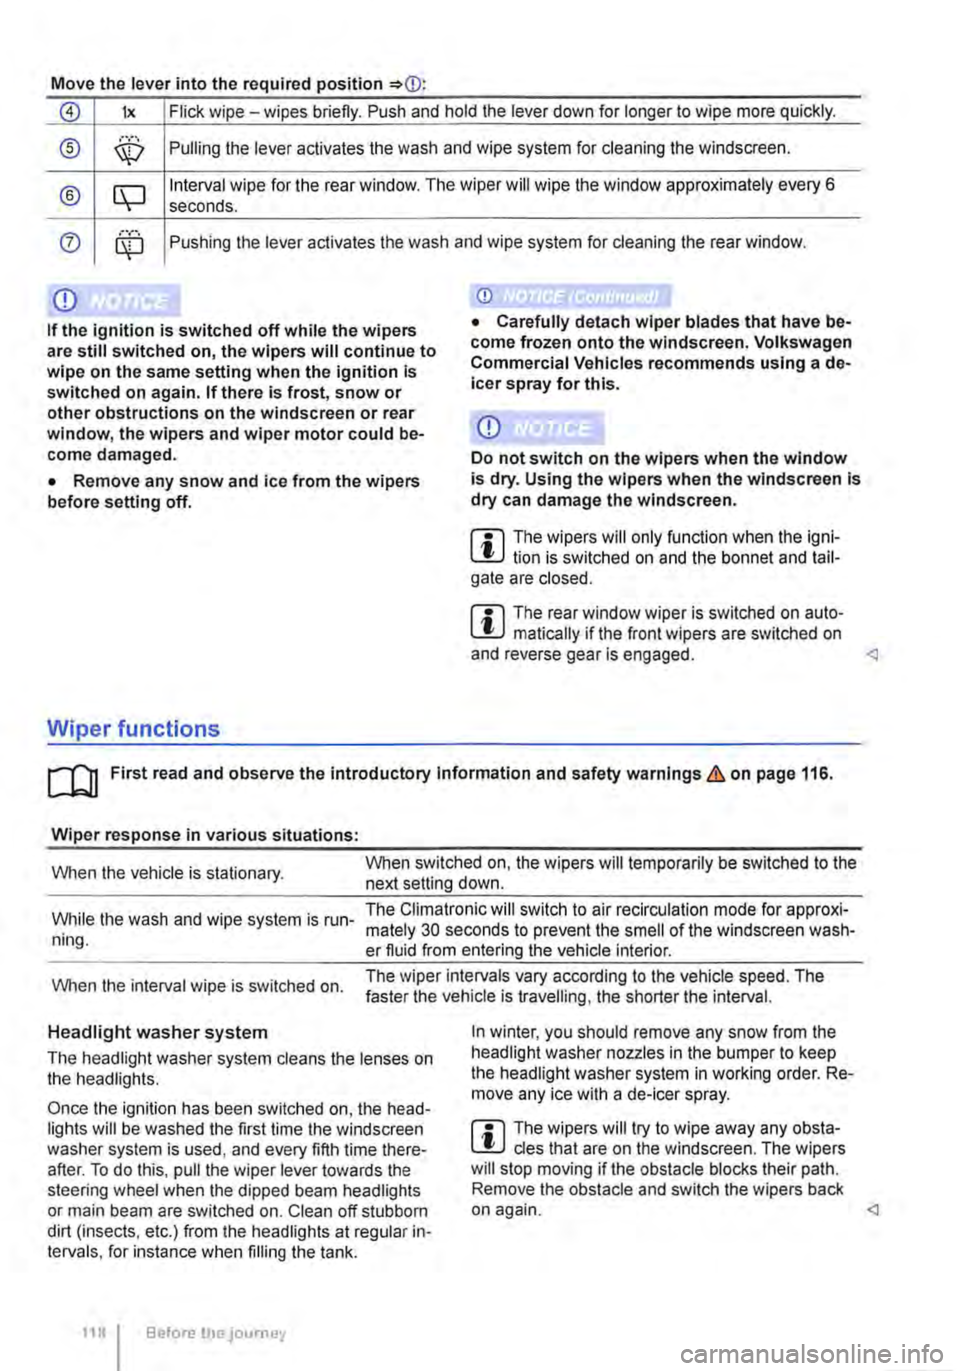
Move the lever into the required position
0 lx Flick wipe -wipes briefly. Push and hold the lever down for longer to wipe more quickly.
® ,··.··· \X:) Pulling the lever aclivates the wash and wipe system for cleaning the windscreen.
® CQ Interval wipe for the rear window. The wiper will wipe the window approximately every 6 seconds .
0 ........ Pushing the lever activates the wash and wipe system for cleaning the rear window.
Q)
If the ignition is switched off while the wipers are still switched on, the wipers will continue to wipe on the same setting when the ignition Is switched on again. If there Is frost, snow or other obstructions on the windscreen or rear window, the wipers and wiper motor could be-come damaged.
• Remove any snow and ice from the wipers before setting off.
Wiper functions
Q)
Do not switch on the wipers when the window is dry. Using the wipers when the windscreen Is dry can damage the windscreen.
m The wipers will only function when the igni-W lion is switched on and the bonnet and tail-gate are closed.
m The rear window wiper is switched on auto-W matically if the front wipers are switched on and reverse gear is engaged.
Wiper response in various situations:
When the vehicle is stationary. When switched on, the wipers will temporarily be switched to the next setting down.
While the wash and wipe system is run-ning.
The Climatronic will switch to air recirculation mode for approxi-mately 30 seconds to prevent the smell of the windscreen wash-er fluid from entering the vehicle interior.
When the interval wipe is switched on. The wiper intervals vary according to the vehicle speed. The faster the vehicle is travelling, the shorter the interval.
Headlight washer system
The headlight washer system cleans the lenses on the headlights.
Once the ignition has been switched on, the head-lights will be washed the first time the windscreen washer system is used, and every fifth time there-after. To do this, pull the wiper lever towards the steering wheel when the dipped beam headlights or main beam are switched on. Clean off stubborn dirt (insects, etc.) from the headlights at regular in-tervals, for instance when filling the tank.
118 Before the journey
In winter, you should remove any snow from the headlight washer nozzles in the bumper to keep the headlight washer system in working order. Re-move any ice with a de-icer spray.
m The wipers will try to wipe away any obsta-W cles that are on the windscreen. The wipers will stop moving if the obstacle blocks their path. Remove the obstacle and switch the wipers back on again.
Page 119 of 486

Service position for the front wipers
Fig. 94 Wiper blades in service position.
r--('n First read and observe the introductory L-J,::.IJ information and safety warnings & on page 116.
The wiper arms can be lifted off the windscreen when in the service position 94. Carry out the following steps to move the wipers to the serv-ice position:
Rain sensor
CD
®
Fig. 95 Next to the steering wheel: adjusting rain sensor® in wiper lever.
r--('n First read and observe the introductory L-J,::.U information and safety warnings & on page 116.
When the rain sensor is activated, it automatically controls the frequency of the wiper intervals, de-pending on the amount of rain &. The sensitivity of the rain sensor can be adjusted manually. Man-ual wipe 117.
• The bonnet must be closed 350.
• Switch the ignition on and then off again.
• Briefly press down the wiper lever 92 @).
Place the wiper arms back onto the windscreen before driving away. Briefly press the wiper lever down to bring the wiper arms back to the original position.
Lifting the front wipers
• Move the wiper arms to the service position be-fore lifting
• When lifting the wiper arm hold it only by the wiper blade mounting.
CD
• In order to prevent damage to the bonnet and the wiper arms, the wiper arms should only be lifted when in the service position.
• Always return the wiper arms to the wind-screen before starting your journey.
Push the lever to the desired position 95:
@ Deactivates the rain sensor.
CD Rain sensor is active -automatic wipe when necessary.
® Adjusting the sensitivity of the rain sensor:
-Switch to the right-high sensitivity.
-Switch to the left -low sensitivity.
Lights and vision 119
Page 120 of 486
The rain sensor will remain active after the ignition is switched off and back on again and will function again if the wiper lever is in position G) and if the vehicle is travelling at speeds higher than approxi-mately 16 km/h (10 mph).
Changes to the functioning of the rain sensor
Possible causes for faults and misinterpretations concerning the sensitive surface 96 of the rain sensor include:
• Damaged wiper blades: a film of water or smears caused by damaged wiper blades can in-crease the time the wipers are switched on, can shorten the length of the intervals between wipes or cause the wipers to run continuously.
• Insects: insects hitting the surface can cause the wipers to be activated.
• Salt deposits: in winter, salt deposits can cause the wipers to continue to wipe the windscreen when it is almost dry.
• Soiling: dry dust, wax, windscreen coatings (lo-tus effect) or detergent deposits (automatic car wash) can cause the rain sensor to become less sensitive and react too slowly or even not at all.
• Crack in the windscreen: when the windscreen is impacted by a stone, a wash cycle is triggered if the rain sensor is on. The rain sensor will then reg-
ister the reduction in sensitivity of the surface and adjust accordingly. The size of the crack could af-fect the way in which the sensor activates the wip-ers.
A WARNING
The rain sensor will not always detect every rain shower and activate the wipers.
• If necessary, switch on the wipers manual-ly if the water on the windscreen restricts the field of vision.
m At regular intervals, clean the sensitive sur-L!...J face of the rain sensor and check the wiper blades for damage 96 (arrow).
m We recommend that you use an alcohoi-W based glass cleaner to remove wax and pol-ish.
Checking and refilling the windscreen washer fluid level
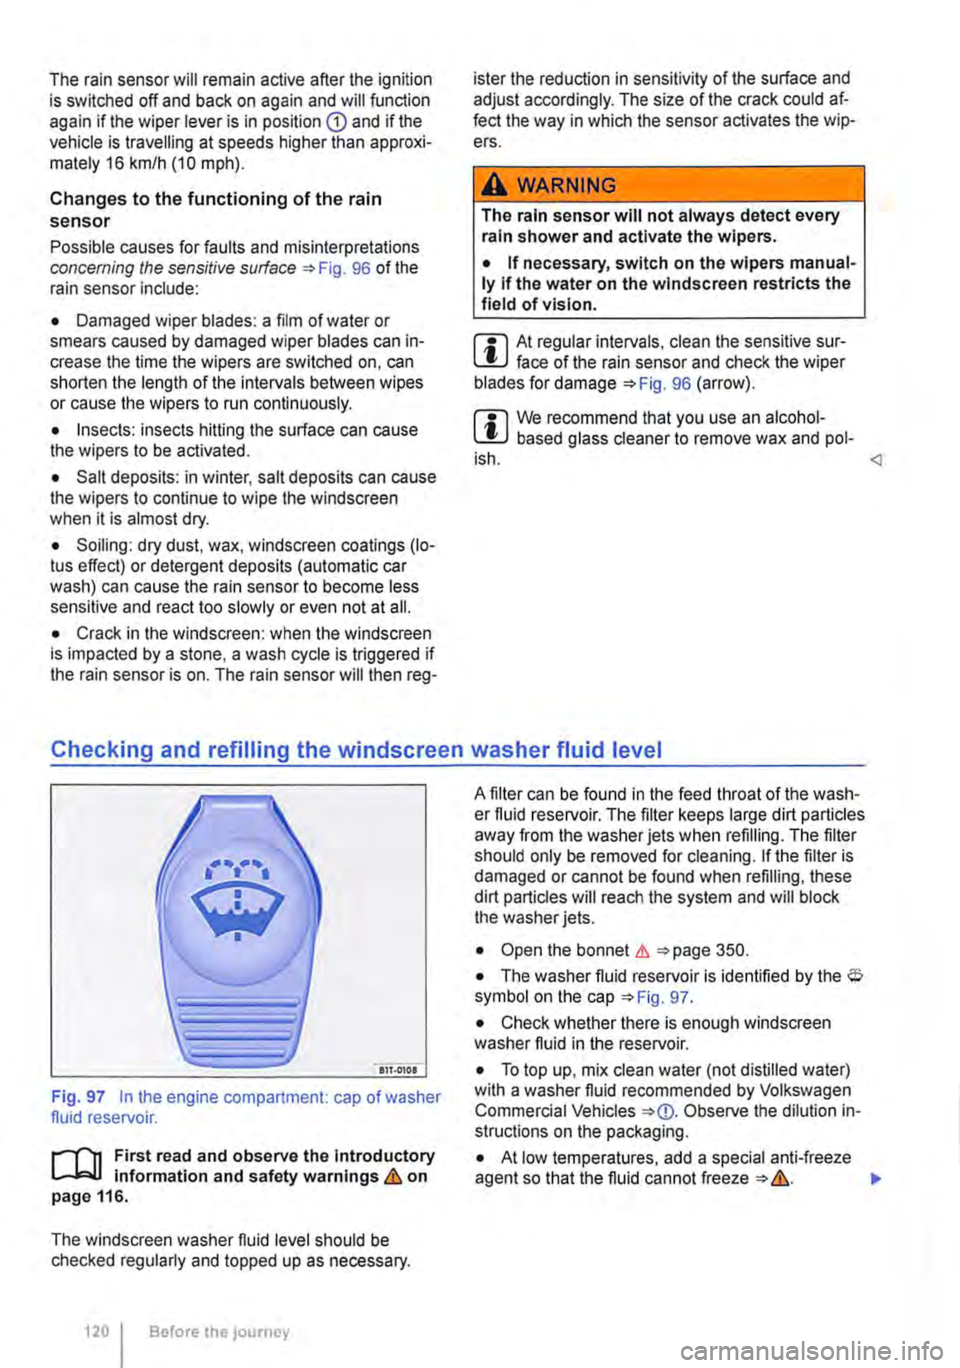
Fig. 97 In the engine compartment: cap of washer fluid reservoir.
r--T'n First read and observe the introductory L-J,:,JJ information and safety warnings & on page 116.
The windscreen washer fluid level should be checked regularly and topped up as necessary.
120 I Before the journey
A filter can be found in the feed throat of the wash-er fluid reservoir. The filter keeps large dirt particles away from the washer jets when refilling. The filter should only be removed for cleaning. if the filter is damaged or cannot be found when refilling, these dirt particles will reach the system and will block the washer jets.
• Open the bonnet & 350.
• The washer fluid reservoir is identified by the $ symbol on the cap 97.
• Check whether there is enough windscreen washer fluid in the reservoir.
• To top up, mix clean water (not distilled water) with a washer fluid recommended by Volkswagen Commercial Vehicles Observe the dilution in-structions on the packaging.
• At low temperatures, add a special anti-freeze agent so that the fluid cannot freeze &.
Page 121 of 486
Recommended windscreen washer fluid
• For warm weather: summer windscreen wash G 052 184 A 1. Dilution 1:100 (1 part concen-trate, 100 parts water) in the washer fluid reservoir.
• All-year washer fluid G 052 164 A2. Dilution in winter to -18°C (0°F) approx. 1 :2 (1 part concen-trate, 2 parts water), otherwise dilute one part con-centrate to four parts water (1 :4) in the washer fluid reservoir.
Capacities
The capacity of the washer fluid reservoir is ap-proximately 3. 7 litres or approximately 5.0 litres in vehicles with a headlight washer system.
A WARNING
Never mix coolant additive or other unsuita-ble additives into the windscreen washer flu-id. An oily film may otherwise be left on the windscreen or rear window which will restrict the field of vision.
Mirrors
o:n Introduction
This chapter contains information on the following subjects:
Interior mirror .............. . 122
Exterior mirrors ............ . . .... 123
For safety reasons it is important that the driver po-sitions the exterior and interior mirrors correctly be-fore starting a journey '* &.
You can use the exterior mirrors and the interior mirror to observe traffic behind you and adjust driv-ing style accordingly. Looking in the exterior mir-rors and the interior mirror does not allow the driver to see the entre side and rear area of the vehicle. The area that cannot be seen is known as the blind spot. There may be objects and other road users in the blind spot.
Additional information and warnings:
• Exterior views '* page 5
• Changing gear '*page 260
• Braking, stopping and parking '*page 269
A WARNING (Continued)
• Use clean, clear water (not distilled water) with a washer fluid recommended by Volks-wagen Commercial Vehicles.
• A suitable anti-freeze agent should be added to the windscreen washer fluid If nec-essary.
CD
• Never mix other cleaning agents with the cleaning agents recommended by Volkswagen Commercial Vehicles. This can cause the ingre-dients to separate and block the windscreen washer jets.
• When refilling or changing service fluids, please ensure that the correct fluids are added through the correct openings. Incorrect service fluids can cause serious functional problems and engine damage.
Adjusting the exterior and interior mirrors while driving may cause the driver to become distracted. This can lead to accidents and se-rious Injuries.
• Exterior and interior mirrors should only be adjusted when the vehicle is stationary.
• When parking, changing lane, or perform-ing an overtaking or turning manoeuvre, al-ways pay careful attention to the area around the vehicle as objects and other road users may be located In the blind spot.
• Always ensure that the mirrors are posi-tioned correctly and that the rear view Is not restricted by ice, snow, condensation or any other objects.
A WARNING
Automatic anti-dazzle mirrors contain an electrolyte fluid which could leak If the mirror is broken.
• The leaking electrolyte fluid can cause lrri-tation to the skin, eyes and respiratory or-gans, especially In people who suffer from
Lights and vision 121
Page 122 of 486
A WARNING (Continued)
asthma or similar illnesses. Immediately en-sure that there is a sufficient supply of fresh air and get out of the vehicle. If this is not possible, open all of the windows and doors.
• If the electrolyte fluid gets into the eyes or onto the skin, immediately wash the area with plenty of water for at least 15 minutes and consult a doctor.
• If the electrolyte fluid gets onto shoes or clothing, wash immediately with plenty of wa-ter for at least 15 minutes. Clean shoes and clothes thoroughly before wearing them again.
Interior mirror
A WARNING (Continued)
• If the electrolyte fluid is swallowed, imme-diately rinse the mouth with plenty of water for at least 15 minutes. Do not induce vomit-ing unless instructed to do so by a doctor. Seek medical assistance immediately.
CD
If the glass of an automatic anti-dazzle mirror is broken, electrolyte fluid can leak from the mir-ror. This fluid corrodes plastic surfaces. Re-move the fluid as soon as possible, e.g. using a wet sponge.
BSG-0101.
Fig. 99 On the windscreen: manual anti-dazzle in-terior mirror.
1"'111 First read and observe the introductory L-lo::JJ information and safety warnings & on page 121.
The driver must adjust the interior mirror so that they can see clearly through the rear window.
1221 Before the journey
The driver's rear view may be restricted or com-pletely obscured by objects such as a sun blind on the rear window, items of clothing stowed on the luggage compartment cover, or a rear window that is covered in ice, snow or dirt.
Automatic anti-dazzle interior mirror
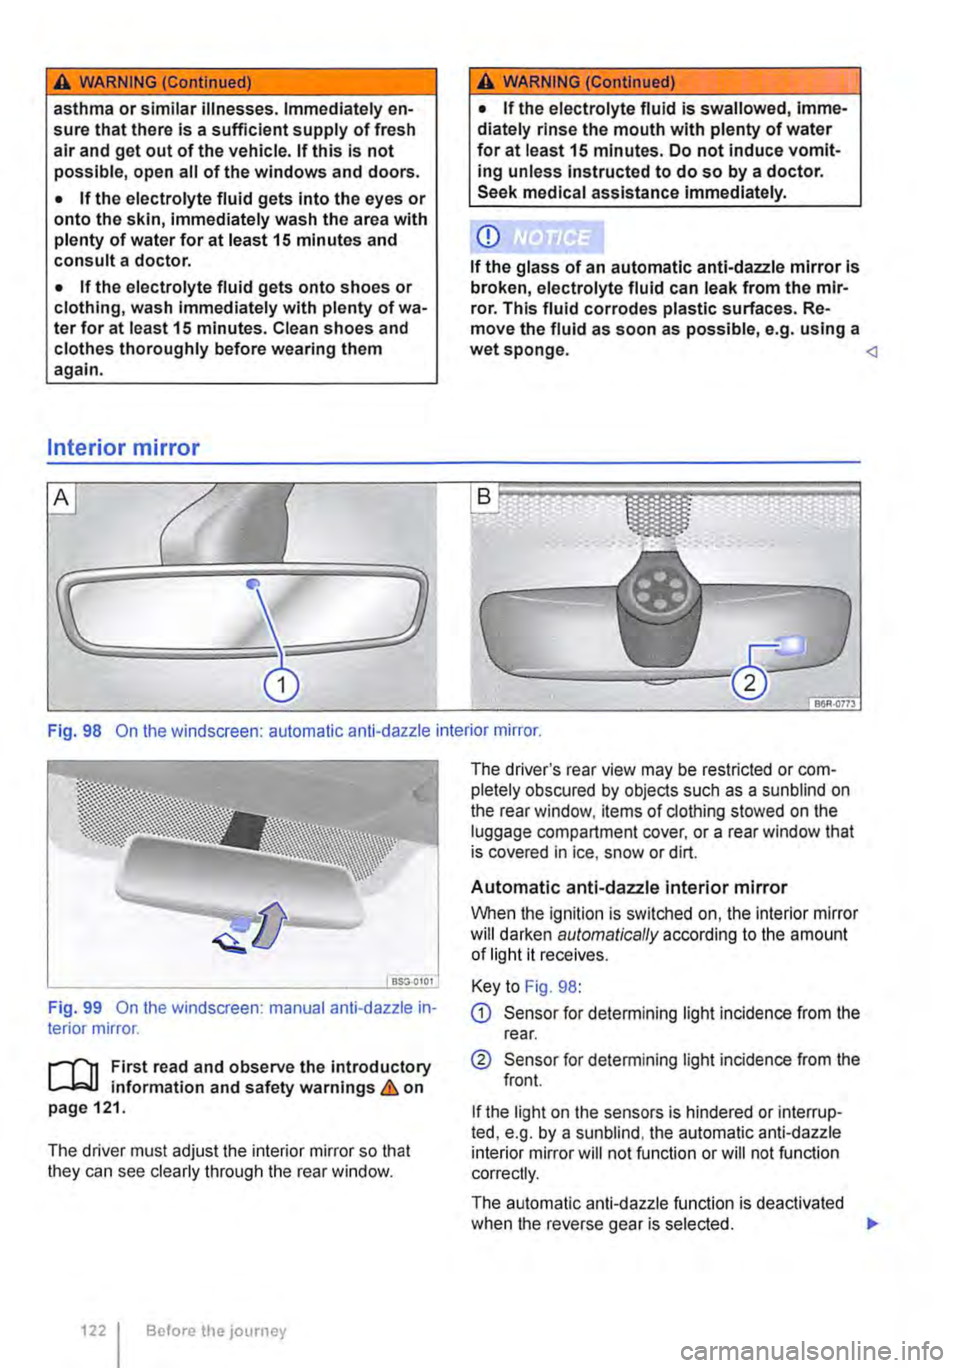
When the ignition is switched on, the interior mirror will darken automatically according to the amount of light it receives.
Key to Fig. 98:
G) Sensor for detemnining light incidence from the rear.
® Sensor for detemnining light incidence from the front.
If the light on the sensors is hindered or interrup-ted, e.g. by a sunblind, the automatic anti-dazzle interior mirror will not function or will not function correctly.
The automatic anti-dazzle function is deactivated when the reverse gear is selected. .,..
Page 123 of 486
Do not attach external navigation devices to the windscreen or near interior automatic anti-dazzle
Manual anti-dazzle interior mirror
• Basic position: the lever on the lower part of the mirror is pointing towards the windscreen.
• Pull the lever to the back to select the anti-daz-zle function 99.
Exterior mirrors
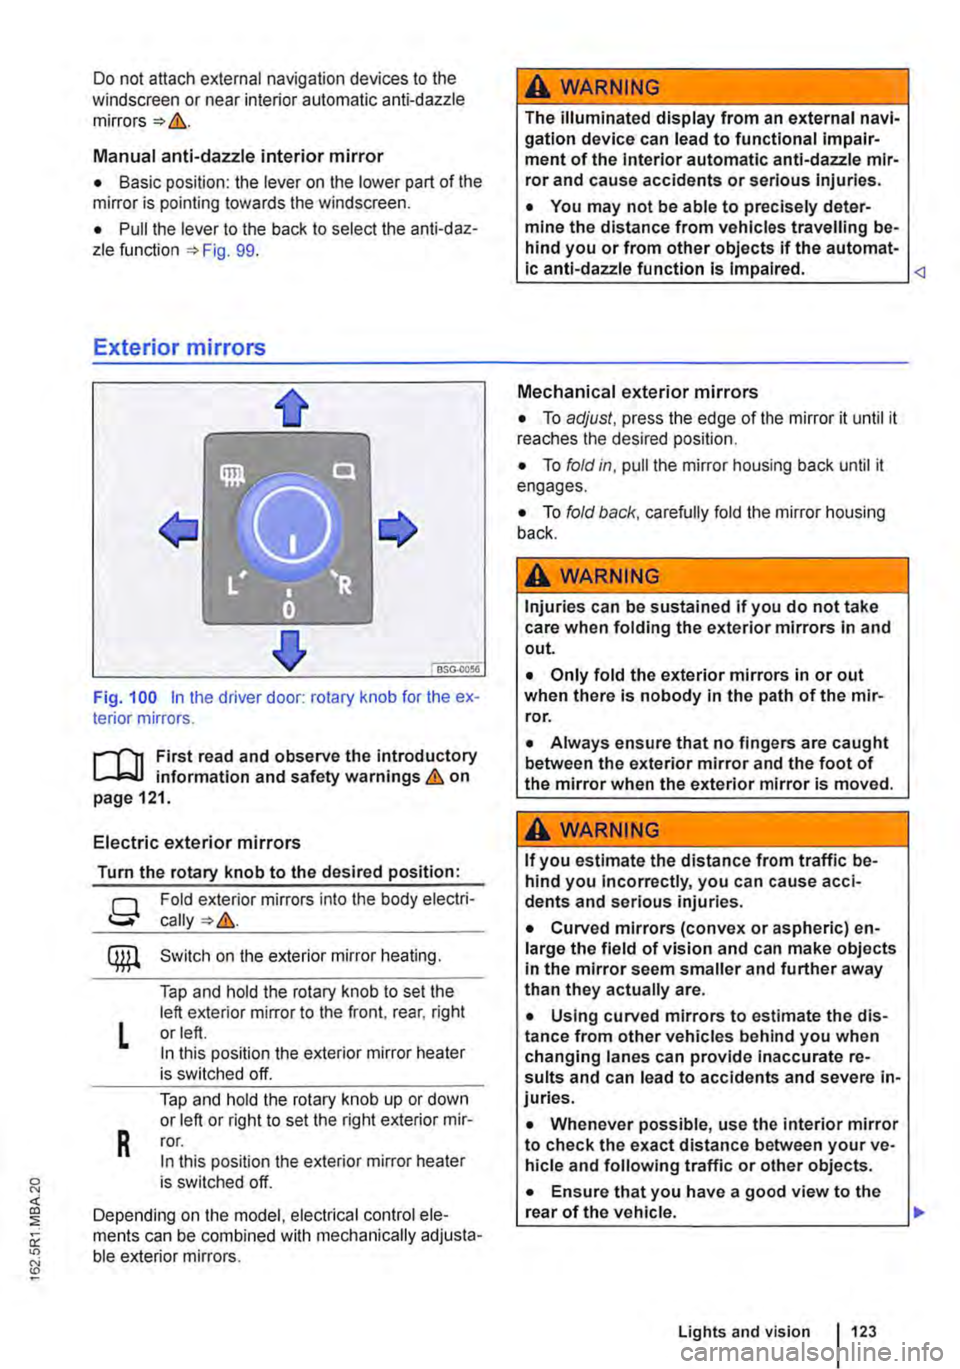
Fig. 100 in the driver door: rotary knob for the ex-terior mirrors.
First read and observe the introductory L..-Jr:.U information and safety warnings & on page 121.
Electric exterior mirrors
Turn the rotary knob to the desired position:
g
L
R
Fold exterior mirrors into the body electri-
Switch on the exterior mirror heating.
Tap and hold the rotary knob to set the left exterior mirror to the front, rear, right or left. In this position the exterior mirror heater is switched off.
Tap and hold the rotary knob up or down or left or right to set the right exterior mir-ror. In this position the exterior mirror heater is switched off.
Depending on the model, electrical control ele-ments can be combined with mechanically adjusta-ble exterior mirrors.
A WARNING
The illuminated display from an external navi-gation device can lead to functional impair-ment of the Interior automatic anti-dazzle mir-ror and cause accidents or serious injuries.
• You may not be able to precisely deter-mine the distance from vehicles travelling be-hind you or from other objects if the automat-ic anti-dazzle function is Impaired.
• To adjust, press the edge of the mirror it until it reaches the desired position.
• To fold in, pull the mirror housing back until it engages.
• To fold back, carefully fold the mirror housing back.
A WARNING
Injuries can be sustained if you do not take care when folding the exterior mirrors in and out.
• Only fold the exterior mirrors in or out when there is nobody in the path of the mir-ror.
• Always ensure that no fingers are caught between the exterior mirror and the foot of the mirror when the exterior mirror is moved.
A WARNING
If you estimate the distance from traffic be-hind you Incorrectly, you can cause acci-dents and serious injuries.
• Curved mirrors (convex or aspheric) en-large the field of vision and can make objects in the mirror seem smaller and further away than they actually are.
• Using curved mirrors to estimate the dis-tance from other vehicles behind you when changing lanes can provide inaccurate re-sults and can lead to accidents and severe in-juries.
• Whenever possible, use the interior mirror to check the exact distance between your ve-hicle and following traffic or other objects.
• Ensure that you have a good view to the rear of the vehicle. .,..
Lights and vision 123
Page 125 of 486
Transporting items
Driving notes
ClJl Introduction
This chapter contains information on the following subjects:
Stowing items of luggage . . . . . . . . . . . . . . . . . 126
Stowing cargo . . . . . . . . . . . . . . . . . . 127
Buckle straps . . . . . . . . . . . . . . . . . . . . . . . . . . . 128
Ratchet straps . . . . . . . . . . . . . . . . . . . 128 Driving with an open tailgate or open wing doors . . . . . . . . . . . . . . . . . . . . . 129
Driving a loaded vehicle .... 130
Always secure the load transported in the luggage compartment or load compartment, on the roof car-rier, on the load surface or trailer. Always use suita-ble securing straps with the fastening rings to se-cure heavy items. Never exceed the vehicle's max-imum payload. Both the payload and the distribu-tion of the load in the vehicle will have an effect on the driving response and braking distance &.
Using securing straps
• Follow the instructions for the securing straps.
• Observe specifications for maximum load rat-ing.
• The securing straps must be long enough for the item you wish to secure.
Damaged securing straps
Never use the securing straps if:
• Damage to the warp and weft of the webbing (cuts or fraying) accounts for more than 10% of the webbing.
• The seams are damaged.
• The webbing is deformed by friction or heat.
• The securing straps are cracked, especially if cracked across the strap, or if the straps have notches.
• The securing straps have splits or corrosion damage.
• There is damage to the tightening device and connection elements.
Additional information and warnings:
• Tailgate 49
• Wing doors 52
• Lights 106
• Luggage compartment 130
• Roof carrier 137
• Towing a trailer 139
• Wheels and tyres 367
• Vehicle weight and axle weight rating 450
A WARNING
Objects that are not secured, or are secured incorrectly, can cause serious injuries in the event of a sudden driving or braking manoeu-vre or accident. This applies particularly if objects are struck by the airbag when activa-ted and then flung through the vehicle interi-or. To reduce the risk of accidents, please ob-serve the following guidelines:
• Always stow all objects in the vehicle se· curely.
• Always use suitable straps to prevent ob-jects entering the deployment zones of the curtain alrbag, the combined curtain and side airbag or the front airbag during a sudden driving or braking manoeuvre.
• Objects should be stowed in the vehicle interior In such a way that they can never en-ter the alrbag deployment zones while the ve-hicle is In motion.
• Always keep stowage compartments closed while the vehicle is In motion.
• The front airbag must be switched off and the indicator lamp PASSENGER AIR BAG OFF 'Ji; must light up for as long as the front passenger seat backrest is folded forwards.
• Stowed objects must never cause passen-gers to assume an incorrect sitting position.
• If an item is being stowed on a seat, this seat must not be used by any passengers.
A WARNING
Transporting heavy objects changes the vehi-cle driving characteristics and increases the braking distance. Heavy loads which are not properly stowed or secured in the vehicle can lead to a loss of vehicle control and cause se-rious injury. .,..
Transporting items 125