2011 SUBARU TRIBECA window
[x] Cancel search: windowPage 104 of 422

Immobilizer
CAUTION
FCC WARNING
Changes or modifications not ex-
pressly approved by the party re-
sponsible for compliance could void
the user ’s authority to operate the
equipment.
The immobilizer system is designed to
prevent an unauthorized person from
starting the engine. Only keys registered
with your vehicle ’s immobilizer system can
be used to operate your vehicle. Even if
an unregistered key fits into the ignition
switch and can be turned to the “START ”
position, the engine will automatically stop
after several seconds.
Each immobilizer key contains a trans-
ponder in which the key ’s ID code is
stored. When a key is inserted into the
ignition switch and turned to the “ON ”
position, the transponder transmits thekey ’s ID code to the immobilizer system ’s
receiver. If the transmitted ID code
matches the ID code registered in the
immobilizer system, the system allows the
engine to be started. Since the ID code is
transmitted and acted upon almost in- stantly, the immobilizer system does not
impede normal starting of the engine.
If the engine does not start, pull out the
key once before trying again. Refer to“
Ignition switch ”F 3-3.
This device complies with Part 15 of
the FCC Rules and RSS-Gen of IC
Rules. Operation is subject to the
following two conditions: (1) this de-
vice may not cause harmful interfer-
ence, and (2) this device must accept
any interference received, including
interference that may cause undesiredoperation.
CAUTION
. Do not place the key under direct
sunlight or anywhere it may
become hot.
. Do not get the key wet. If the key
gets wet, wipe it dry with a cloth
immediately.
NOTE
To protect your vehicle from theft,
please pay close attention to the fol-
lowing security precautions. . Never leave your vehicle unattended
with its keys inside. . Before leaving your vehicle, close all windows and lock the doors and reargate..
Do not leave spare keys or any
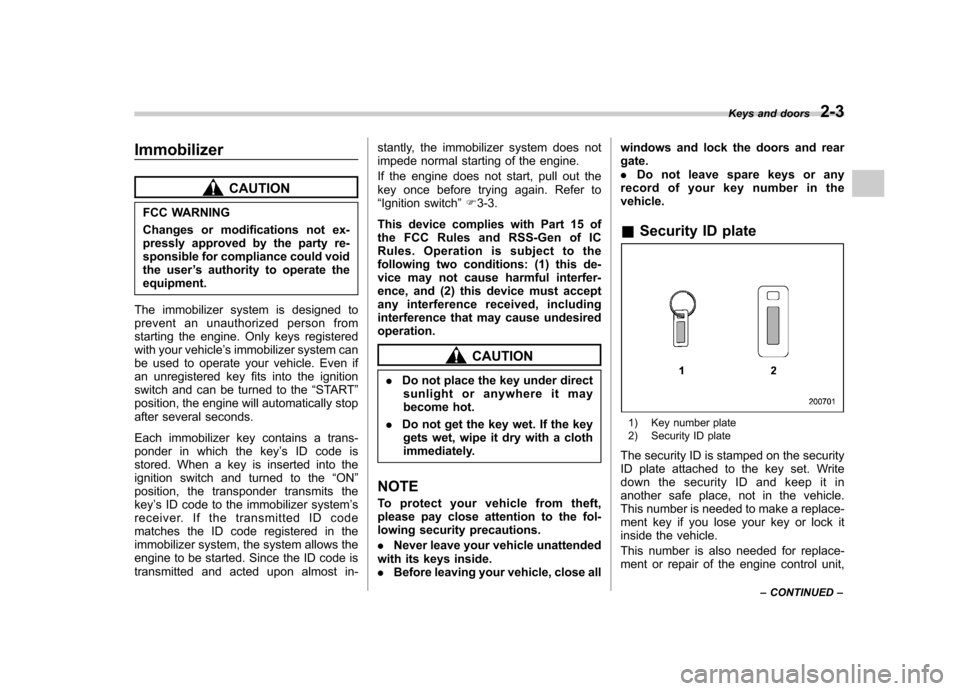
record of your key number in thevehicle. & Security ID plate
1) Key number plate
2) Security ID plate
The security ID is stamped on the security
ID plate attached to the key set. Write
down the security ID and keep it in
another safe place, not in the vehicle.
This number is needed to make a replace-
ment key if you lose your key or lock it
inside the vehicle.
This number is also needed for replace-
ment or repair of the engine control unit, Keys and doors
2-3
– CONTINUED –
Page 118 of 422

&If you have accidentally trig-
gered the alarm system
! To stop the alarm
Do any of the following operations. . Press any button on the remote trans-
mitter.. Turn the ignition switch to the “ON ”
position. & Arming the system
! To arm the system using remote transmitter
1. Close all windows and the moonroof.
2. Remove the key from the ignition switch.
3. Open the doors and get out of the vehicle.
4. Make sure that the engine hood is locked.
5. Close all doors and the rear gate.
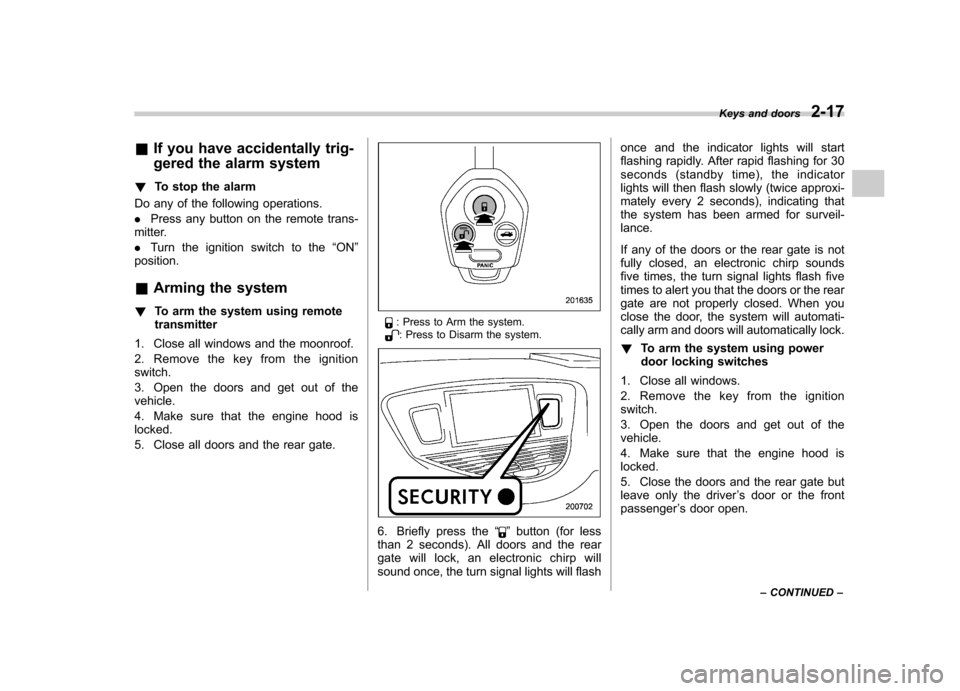
: Press to Arm the system.: Press to Disarm the system.
6. Briefly press the “”button (for less
than 2 seconds). All doors and the rear
gate will lock, an electronic chirp will
sound once, the turn signal lights will flash once and the indicator lights will start
flashing rapidly. After rapid flashing for 30
seconds (standby time), the indicator
lights will then flash slowly (twice approxi-
mately every 2 seconds), indicating that
the system has been armed for surveil-lance.
If any of the doors or the rear gate is not
fully closed, an electronic chirp sounds
five times, the turn signal lights flash five
times to alert you that the doors or the rear
gate are not properly closed. When you
close the door, the system will automati-
cally arm and doors will automatically lock. !
To arm the system using power
door locking switches
1. Close all windows.
2. Remove the key from the ignition switch.
3. Open the doors and get out of the vehicle.
4. Make sure that the engine hood is locked.
5. Close the doors and the rear gate but
leave only the driver ’s door or the front
passenger ’s door open. Keys and doors
2-17
– CONTINUED –
Page 119 of 422

2-18Keys and doors
6. Push the front side ( “LOCK ”side) of
the power door locking switch to set the
door locks.
7. Close the door. An electronic chirp will
sound once, the turn signal lights will flash
once and the indicator lights will start
flashing rapidly. After rapid flashing for 30
seconds (standby time), the indicator
lights will then flash slowly (twice approxi-
mately every 2 seconds), indicating that
the system has been armed for surveil-lance. NOTE . The system can be armed even if the
engine hood, the windows and/or
moonroof are opened. Always make
sure that they are fully closed before
arming the system. .
The 30-second standby time can be
eliminated if you prefer. Have it per-
formed by your SUBARU dealer.. The system is in the standby mode
for a 30-second period after locking the
doors with the remote transmitter. The
security indicator light will flash at
short intervals during this period.. If any of the following actions is
done during the standby period, the
system will not switch to the surveil-
lance state.
–Doors are unlocked using the
remote transmitter. – Any of the doors or the rear gate
is opened. – Ignition switch is turned to the
“ ON ”position.
& Disarming the system
Briefly press the “
”button (for less than
2 seconds) on the remote transmitter. The driver ’s door will unlock, an electronic
chirp will sound twice and the turn signal
lights will flash twice. The flashing of the
security indicator light will then change
slowly (once approximately every 3 sec-
onds from twice approximately every 2
seconds), indicating that the alarm system
has been disarmed.
To unlock all other doors and the rear
gate, briefly press the “
”button a second time within 5 seconds. NOTE
If the interval between the first and
second presses of the
“
”button (for
unlocking of all of the doors and the
rear gate) is extremely short, the sys-
tem may not respond. ! Emergency disarming
If you cannot disarm the system using the
transmitter (i.e. the transmitter is lost,
broken or the transmitter battery is too
weak), you can disarm the system without
using the transmitter.
The system can be disarmed if you turn
the ignition switch from the “LOCK ”to the
“ ON ”position with a registered key.
& Valet mode
When you choose the valet mode, the
alarm system does not operate. In valet
mode, the remote transmitter is used only
for locking and unlocking the doors and
rear gate and panic activation.
To enter the valet mode, change the
setting of your vehicle ’s alarm system for
deactivation mode. Refer to “Activating
and deactivating the alarm system ”F 2-
16. The security indicator light will con-
tinue to flash once every 3 seconds
indicating that the system is in the valet
Page 122 of 422

Child safety locks
WARNING
Always use the child safety lock
whenever a child rides in the rear.
Serious injury could result if a child
accidentally opened the door and
fell out.
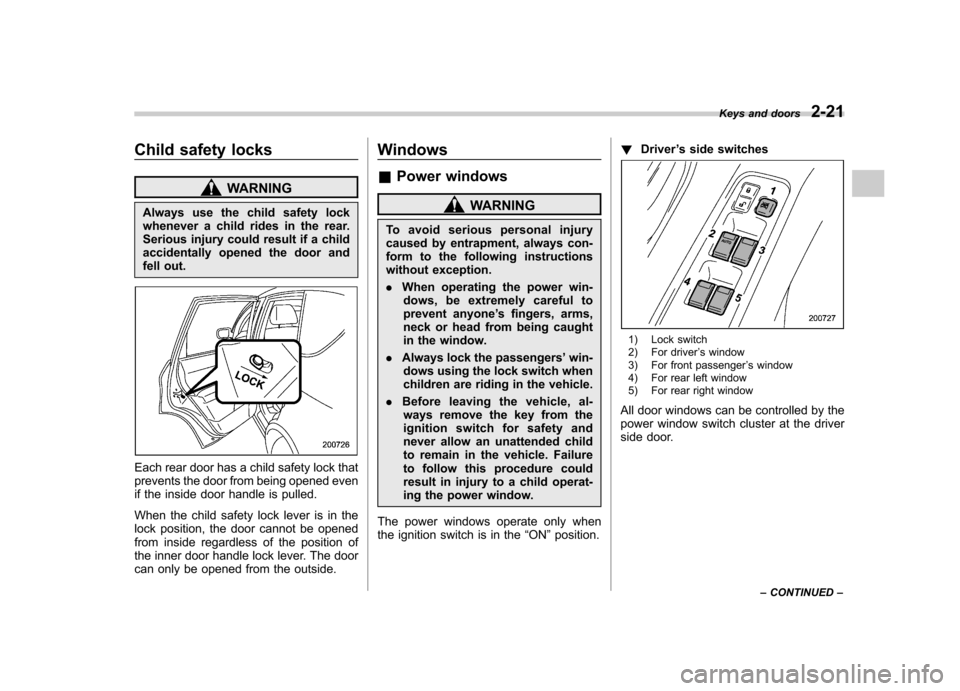
Each rear door has a child safety lock that
prevents the door from being opened even
if the inside door handle is pulled.
When the child safety lock lever is in the
lock position, the door cannot be opened
from inside regardless of the position of
the inner door handle lock lever. The door
can only be opened from the outside. Windows &
Power windows
WARNING
To avoid serious personal injury
caused by entrapment, always con-
form to the following instructions
without exception. . When operating the power win-
dows, be extremely careful to
prevent anyone ’s fingers, arms,
neck or head from being caught
in the window.
. Always lock the passengers ’win-
dows using the lock switch when
children are riding in the vehicle.
. Before leaving the vehicle, al-
ways remove the key from the
ignition switch for safety and
never allow an unattended child
to remain in the vehicle. Failure
to follow this procedure could
result in injury to a child operat-
ing the power window.
The power windows operate only when
the ignition switch is in the “ON ”position. !
Driver ’s side switches
1) Lock switch
2) For driver ’s window
3) For front passenger ’s window
4) For rear left window
5) For rear right window
All door windows can be controlled by the
power window switch cluster at the driver
side door. Keys and doors
2-21
– CONTINUED –
Page 123 of 422

2-22Keys and doors
! Operating the driver ’s window
1) Open
2) Automatically open
To open:
Push the switch down lightly and hold it.
The window will open as long as the
switch is held.
This switch also has a one-touch auto
down feature that allows the window to be
opened fully without holding the switch.
Push the switch down until it clicks and
release it, and the window will fully open.
To stop the window halfway, pull the
switch up lightly.
To close:
Pull the switch up lightly and hold it. The
window will close as long as the switch isheld. ! Operating the passengers ’windows
To open:
Push the appropriate switch down and
hold it until the window reaches the
desired position.
To close:
Pull the switch up and hold it until the
window reaches the desired position.
Page 124 of 422

!Locking the passengers ’windows
Push the lock switch. When the lock
switch is in the “LOCK ”position, the
passengers ’windows cannot be opened
or closed.
Press the switch again to cancel the passengers ’window locking.
NOTE
When the lock switch is pushed to the “ LOCK ”position, the indicator lights in
the passenger ’s window switches (in-
cluded in the power window switch
cluster on the driver ’s door) all turn off. !
Passengers ’side switchesFront passenger ’s window switch
1) Open
2) Close
Rear passengers ’window switches
1) Open
2) Close
To open:
Push the switch down and hold it until the
window reaches the desired position.
To close:
Pull the switch up and hold it until the
window reaches the desired position.
When the lock switch on the power
window switch cluster, located on thedriver ’s side door, is in the “LOCK ”
position, the passengers ’windows cannot
be operated with the passengers ’
switches. Keys and doors
2-23
Page 131 of 422

Instruments and controlsLight control switch ........................................... 3-26
Headlights. ......................................................... 3-26
High/low beam change (dimmer) ......................... 3-27
Headlight flasher ................................................ 3-27
Daytime running light system ............................. 3-27
Turn signal lever ................................................ 3-28
Illumination brightness control ......................... 3-28
Headlight beam leveler (if equipped) ................ 3-29
Parking light switch ........................................... 3-31
Front fog light switch ......................................... 3-31 Wiper and washer
.............................................. 3-32
Windshield wiper and washer switches .............. 3-33
Rear window wiper and washer switch ............... 3-34
Windshield wiper deicer .................................... 3-35
Rear window defogger button .......................... 3-36
Mirrors ................................................................ 3-37
Type A inside mirror (if equipped) . ..................... 3-37
Type B inside mirror (if equipped) . ..................... 3-37
Type C inside mirror (if equipped) . ..................... 3-40
Outside mirrors ................................................. 3-41
Tilt steering wheel ............................................. 3-43
Horn .................................................................... 3-43
Page 132 of 422

Ignition switch
WARNING
. Never turn the ignition switch to
“ LOCK ”while the vehicle is
being driven or towed because
that will lock the steering wheel,
preventing steering control. And
when the engine is turned off, it
takes a much greater effort than
usual to steer.
. Before leaving the vehicle, al-
ways remove the key from the
ignition switch for safety and
never allow an unattended child
to remain in the vehicle. Failure
to follow this procedure could
result in injury to a child or
others. Children could operate
the power windows, the moon-
roof or other controls or even
make the vehicle move.
CAUTION
Do not attach a large key holder or
key case to either key. If it banged
against your knees or hands while
you were driving, it could turn the
ignition switch from the “ON ”posi- tion to the
“Acc ”or “LOCK ”posi-
tion, thereby stopping the engine.
Also, if the key is attached to a
keyholder or to a large bunch of
other keys, centrifugal force may act
on it as the vehicle moves, resulting
in unwanted turning of the ignitionswitch.
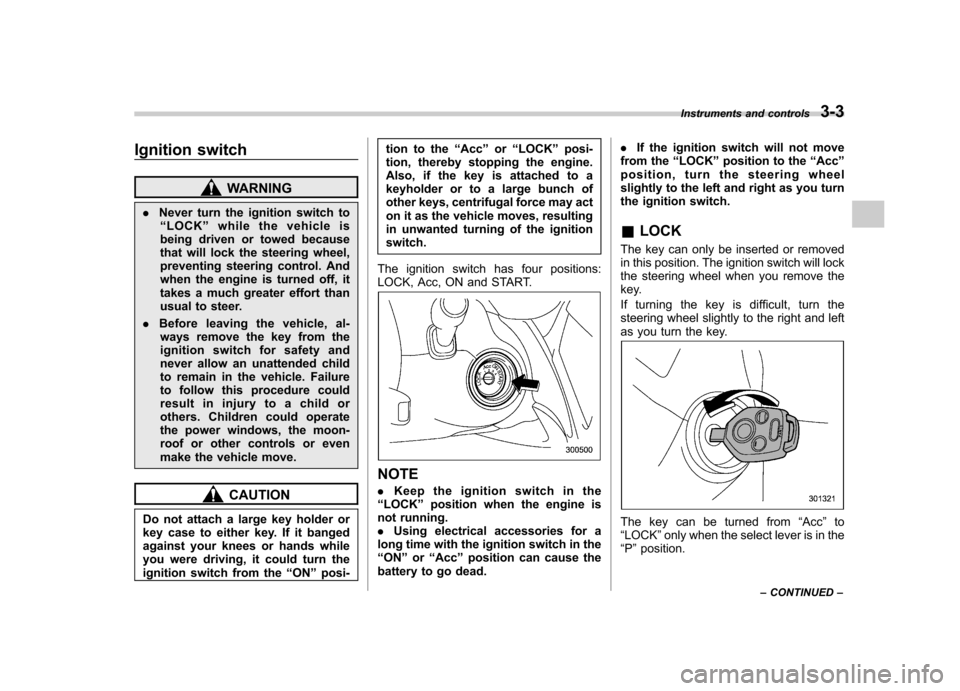
The ignition switch has four positions:
LOCK, Acc, ON and START.
NOTE . Keep the ignition switch in the
“ LOCK ”position when the engine is
not running. . Using electrical accessories for a
long time with the ignition switch in the“ ON ”or “Acc ”position can cause the
battery to go dead. .
If the ignition switch will not move
from the “LOCK ”position to the “Acc ”
position, turn the steering wheel
slightly to the left and right as you turn
the ignition switch. & LOCK
The key can only be inserted or removed
in this position. The ignition switch will lock
the steering wheel when you remove the
key.
If turning the key is difficult, turn the
steering wheel slightly to the right and left
as you turn the key.
The key can be turned from “Acc ”to
“ LOCK ”only when the select lever is in the
“ P ”position. Instruments and controls
3-3
– CONTINUED –