2011 SUBARU TRIBECA tow
[x] Cancel search: towPage 132 of 422
Ignition switch
WARNING
. Never turn the ignition switch to
“ LOCK ”while the vehicle is
being driven or towed because
that will lock the steering wheel,
preventing steering control. And
when the engine is turned off, it
takes a much greater effort than
usual to steer.
. Before leaving the vehicle, al-
ways remove the key from the
ignition switch for safety and
never allow an unattended child
to remain in the vehicle. Failure
to follow this procedure could
result in injury to a child or
others. Children could operate
the power windows, the moon-
roof or other controls or even
make the vehicle move.
CAUTION
Do not attach a large key holder or
key case to either key. If it banged
against your knees or hands while
you were driving, it could turn the
ignition switch from the “ON ”posi- tion to the
“Acc ”or “LOCK ”posi-
tion, thereby stopping the engine.
Also, if the key is attached to a
keyholder or to a large bunch of
other keys, centrifugal force may act
on it as the vehicle moves, resulting
in unwanted turning of the ignitionswitch.
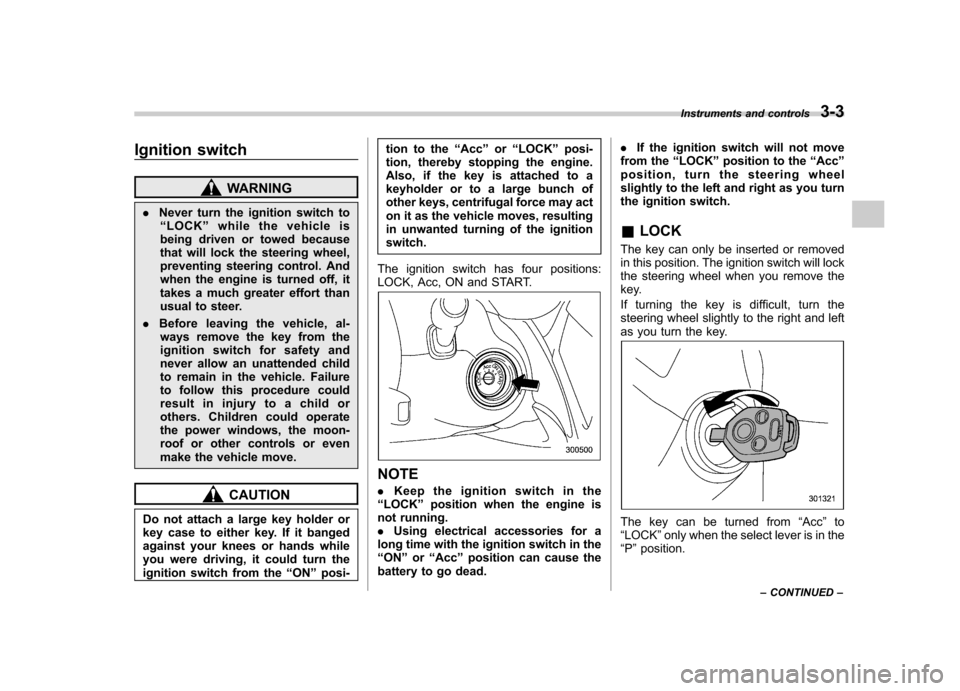
The ignition switch has four positions:
LOCK, Acc, ON and START.
NOTE . Keep the ignition switch in the
“ LOCK ”position when the engine is
not running. . Using electrical accessories for a
long time with the ignition switch in the“ ON ”or “Acc ”position can cause the
battery to go dead. .
If the ignition switch will not move
from the “LOCK ”position to the “Acc ”
position, turn the steering wheel
slightly to the left and right as you turn
the ignition switch. & LOCK
The key can only be inserted or removed
in this position. The ignition switch will lock
the steering wheel when you remove the
key.
If turning the key is difficult, turn the
steering wheel slightly to the right and left
as you turn the key.
The key can be turned from “Acc ”to
“ LOCK ”only when the select lever is in the
“ P ”position. Instruments and controls
3-3
– CONTINUED –
Page 142 of 422

NOTE
This light also illuminates when the fuel
filler cap is not tightened until it clicks.
If you have recently refueled your vehicle,
the cause of the CHECK ENGINE warning
light/malfunction indicator lamp illuminat-
ing could be a loose or missing fuel filler
cap. Remove the cap and retighten it until
it clicks. Make sure nothing is interfering
with the sealing of the cap. Tightening the
cap will not make the CHECK ENGINE
warning light turn off immediately. It may
take several driving trips. If the light does
not turn off, take your vehicle to your
authorized SUBARU dealer immediately. !If the light is blinking
If the light is blinking while driving, an
engine misfire condition has been de-
tected which may damage the emission
control system.
To prevent serious damage to the emis-
sion control system, you should do thefollowing. . Reduce vehicle speed.
. Avoid hard acceleration.
. Avoid steep uphill grades.
. Reduce the amount of cargo, if possi-
ble.. Stop towing a trailer as soon as
possible. The CHECK ENGINE warning light may
stop blinking and illuminate steadily after
several driving trips. You should have your
vehicle checked by an authorized
SUBARU dealer immediately.
& Charge warning light
If this light illuminates when the engine is
running, it may indicate that the charging
system is not working properly.
If the light illuminates while driving or does
not turn off after the engine starts, stop the
engine at the first safe opportunity and
check the alternator belt. If the belt is
loose, broken or if the belt is in good
condition but the light remains illuminated,
contact your nearest SUBARU dealer
immediately. &Oil pressure warning light
CAUTION
Do not operate the engine with the
oil pressure warning light illumi-
nated. This may cause serious en-
gine damage.
If this light illuminates when the engine is
running, it may indicate that the engine oil
pressure is low and the lubricating system is not working properly.
If the light illuminates while driving or does
not turn off after the engine starts, stop the
engine at the first safe opportunity and
check the engine oil level. If the oil level is
low, add oil immediately. If the engine oil is
at the proper level but the light remains
illuminated, contact your nearest
SUBARU dealer immediately. &
AT OIL TEMP warning light
The AT oil temperature warning light “AT
OIL TEMP ”illuminates when the ignition
switch is turned to the “ON ”position and
turns off after approximately 2 seconds.
If this light illuminates when the engine is
running, it may indicate that the automatic
transmission fluid temperature is too hot.
If the light illuminates while driving, im-
mediately stop the vehicle in a safe place
and let the engine idle until the warning
light turns off. ! Automatic transmission control
system warning
If the light flashes after the engine starts, it
may indicate that the automatic transmis-
sion control system is not working prop-
erly. Contact your nearest SUBARU deal-
er for service immediately. Instruments and controls
3-13
– CONTINUED –
Page 145 of 422

3-16Instruments and controls
work properly.
When the warning light illuminates,
the ABS function shuts down; how-
ever, the conventional brake system
continues to operate normally. .The warning light does not illu-
minate when the ignition switch
is turned to the “ON ”position.
. The warning light illuminates
when the ignition switch is
turned to the “ON ”position, but
it does not turn off even when the
vehicle speed exceeds approxi-
mately 8 mph (12 km/h).
. The warning light illuminates dur-
ing driving.
If any of these conditions occur,
have the ABS system repaired at
the first available opportunity by
your SUBARU dealer.
The ABS warning light illuminates to-
gether with the brake system warning light
if the EBD system becomes malfunction-
ing. For further details of the EBD system
malfunction warning, refer to “Brake sys-
tem warning light ”F 3-16.
NOTE
If the warning light behavior is as
described in the following, the ABS system may be considered normal. .
The warning light illuminates right
after the engine is started but turns off
immediately, remaining off.. The warning light remains illumi-
nated after the engine has been started,
but it turns off when the vehicle speed
reaches approximately 8 mph (12km/h).. The warning light illuminates during
driving, but it turns off immediately and
remains off.
When driving with an insufficient battery
voltage such as when the engine is jump
started, the ABS warning light may illumi-
nate. This is due to the low battery voltage
and does not indicate a malfunction.
When the battery becomes fully charged,
the light will turn off.
& Brake system
warning light
WARNING
. Driving with the brake system
warning light illuminated is dan-
gerous. This indicates your brake
system may not be working
properly. If the light remains
illuminated, have the brakes in-
spected by a SUBARU dealer immediately.
. If at all in doubt about whether
the brakes are operating prop-
erly, do not drive the vehicle.
Have your vehicle towed to the
nearest SUBARU dealer for re-
pair.
This light has the following three functions. ! Parking brake warning
The light illuminates with the parking
brake applied while the ignition switch is
in the “ON ”position. It turns off when the
parking brake is fully released. ! Brake fluid level warning
This light illuminates when the brake fluid
level has dropped to near the “MIN ”level
of the brake fluid reservoir with the ignition
switch in the “ON ”position and with the
parking brake fully released.
If the brake system warning light should
illuminate while driving (with the parking
brake fully released and with the ignition
switch positioned in “ON ”), it could be an
indication of leaking of brake fluid or worn
brake pads. If this occurs, immediately
stop the vehicle at the nearest safe place
and check the brake fluid level. If the fluid
level is below the “MIN ”mark in the
reservoir, do not drive the vehicle. Have
Page 146 of 422
the vehicle towed to the nearest SUBARU
dealer for repair. !Electronic Brake Force Distribution
(EBD) system warning
The brake system warning light also
illuminates if a malfunction occurs in the
EBD system. In that event, it illuminates
together with the ABS warning light.
The EBD system may be malfunctioning if
the brake system warning light and ABS
warning light illuminate simultaneously
during driving.
Even if the EBD system fails, the conven-
tional braking system will still function.
However, the rear wheels will be more
prone to locking when the brakes are
applied harder than usual and the vehi-cle ’s motion may therefore become some-
what harder to control.
If the brake system warning light and ABS
warning light illuminate simultaneously,
take the following steps.
1. Stop the vehicle in the nearest safe,
flat place.
2. Shut down the engine, apply the
parking brake, and then restart it.
3. Release the parking brake. If both
warning lights turn off, the EBD system
may be malfunctioning.
Drive carefully to the nearest SUBARU
dealer and have the system inspected. 4. If both warning lights illuminate again
and remain illuminated after the engine
has been restarted, shut down the engine
again, apply the parking brake, and check
the brake fluid level.
5. If the brake fluid level is not below the “
MIN ”mark, the EBD system may be
malfunctioning. Drive carefully to the
nearest SUBARU dealer and have the
system inspected.
6. If the brake fluid level is below the “ MIN ”mark, DO NOT drive the vehicle.
Instead, have the vehicle towed to the
nearest SUBARU dealer for repair.
& Low fuel warning light
CAUTION
Immediately put fuel in the tank
whenever the low fuel warning light
illuminates. Engine misfires as a
result of an empty tank could cause
damage to the engine.
The low fuel warning light illuminates
when the tank is nearly empty approxi-
mately 2.6 US gal (10 liters, or 2.2 Imp
gal). It only operates when the ignition
switch is in the “ON ”position. When this
light illuminates, fill the fuel tank immedi-
ately. NOTE
This light does not turn off unless the
tank is replenished up to an internal
fuel quantity of approximately 4.0 US
gal (15 liters, 3.3 Imp gal). &
Door open warning light
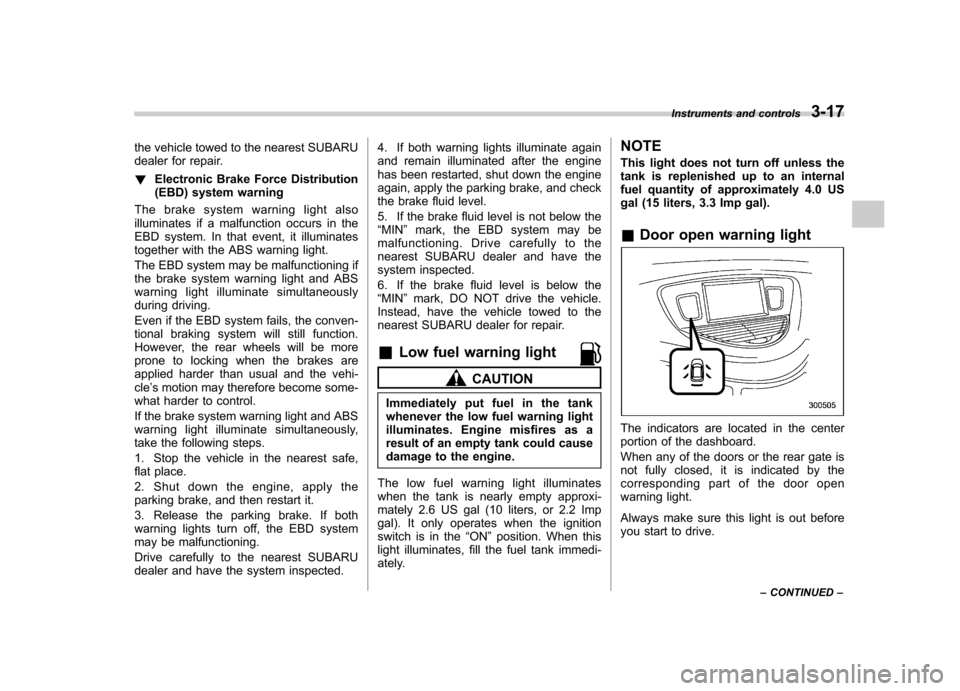
The indicators are located in the center
portion of the dashboard.
When any of the doors or the rear gate is
not fully closed, it is indicated by the
corresponding part of the door open
warning light.
Always make sure this light is out before
you start to drive. Instruments and controls
3-17
– CONTINUED –
Page 156 of 422
&High/low beam change (dim- mer)
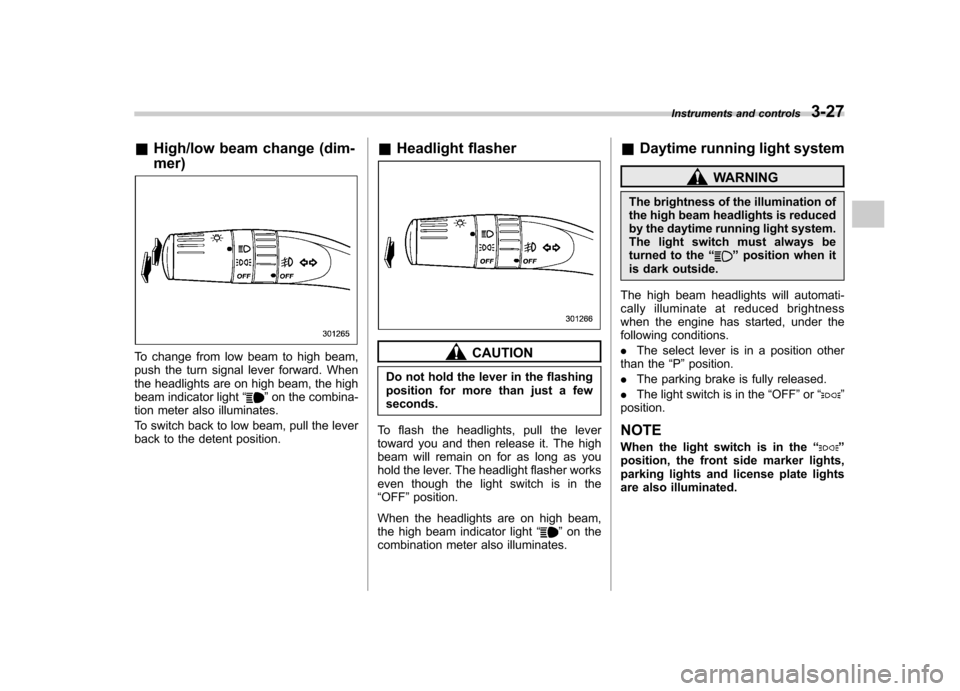
To change from low beam to high beam,
push the turn signal lever forward. When
the headlights are on high beam, the high
beam indicator light “
”on the combina-
tion meter also illuminates.
To switch back to low beam, pull the lever
back to the detent position. &
Headlight flasher
CAUTION
Do not hold the lever in the flashing
position for more than just a fewseconds.
To flash the headlights, pull the lever
toward you and then release it. The high
beam will remain on for as long as you
hold the lever. The headlight flasher works
even though the light switch is in the“ OFF ”position.
When the headlights are on high beam,
the high beam indicator light “
”on the
combination meter also illuminates. &
Daytime running light system
WARNING
The brightness of the illumination of
the high beam headlights is reduced
by the daytime running light system.
The light switch must always be
turned to the “
”position when it
is dark outside.
The high beam headlights will automati-
cally illuminate at reduced brightness
when the engine has started, under the
following conditions. . The select lever is in a position other
than the “P ”position.
. The parking brake is fully released.
. The light switch is in the “OFF ”or “
”
position.
NOTE
When the light switch is in the “
”
position, the front side marker lights,
parking lights and license plate lights
are also illuminated. Instruments and controls
3-27
Page 159 of 422

3-30Instruments and controls
Dial position Number of front seat
occupantsNumber of 2nd seat
occupants Number of 3rd seat
occupants Load in the luggage
compartment area Trailer towing
0 1 or 2 0 0 No load No 1 2 0 2 No load No
2 2 3 2 No load No
3 2 3 2 Full load No
2 3 2 Full load Yes
4 1 0 0 Full load No
1 0 0 Full load Yes
5 Not applicable Not applicable Not applicable Not applicable Not applicable
Page 162 of 422
.Grease, wax, insects or other mate-
rial on the windshield or the wiper
blades results in jerky wiper operation
and streaking on the glass. If you
cannot remove those streaks after
operating the washer or if the wiper
operation is jerky, clean the outer sur-
face of the windshield or rear window
and the wiper blades using a sponge or
soft cloth with a neutral detergent or
mild abrasive cleaner. After cleaning,
rinse the window glass and wiper
blades with clean water. The glass is
clean if no beads form on the glass
when you rinse with water.. If you cannot eliminate the streaking
even after following this procedure,
replace the wiper blades with new
ones. For replacement instructions,
refer to “Replacement of wiper blades ”
F 11-30.
& Windshield wiper and washer switches
The wiper operates only when the ignition
switch is in the “ON ”or “Acc ”position. !
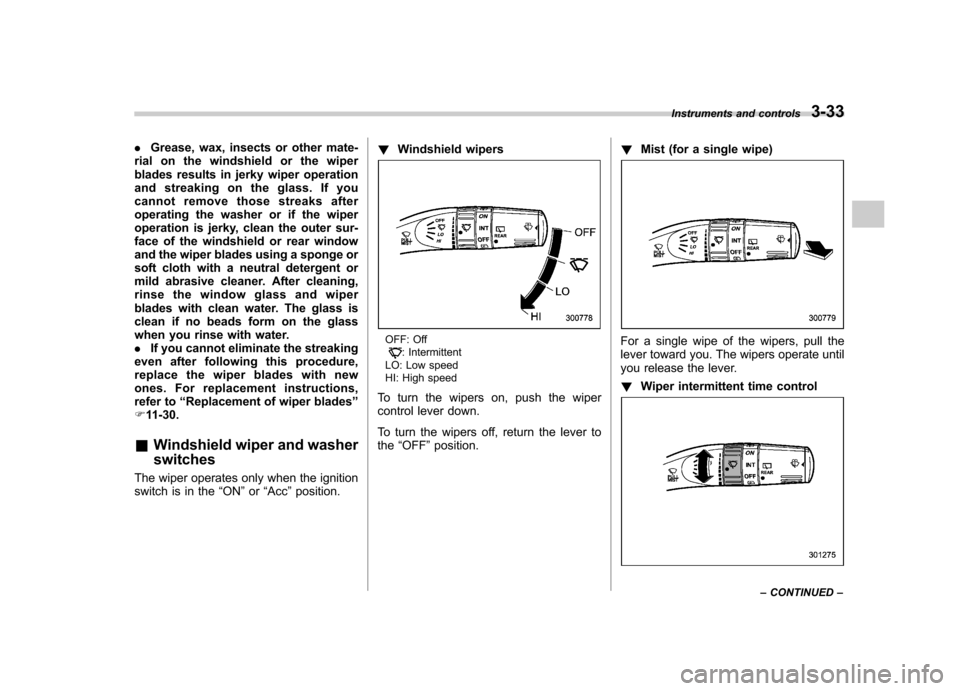
Windshield wipers
OFF: Off: Intermittent
LO: Low speed
HI: High speed
To turn the wipers on, push the wiper
control lever down.
To turn the wipers off, return the lever to the “OFF ”position. !
Mist (for a single wipe)For a single wipe of the wipers, pull the
lever toward you. The wipers operate until
you release the lever. !Wiper intermittent time control
Instruments and controls 3-33
– CONTINUED –
Page 166 of 422
NOTE
The outside mirror defogger also oper-
ates while the rear window defogger isoperating.Mirrors
Always check that the inside and outside
mirrors are properly adjusted before you
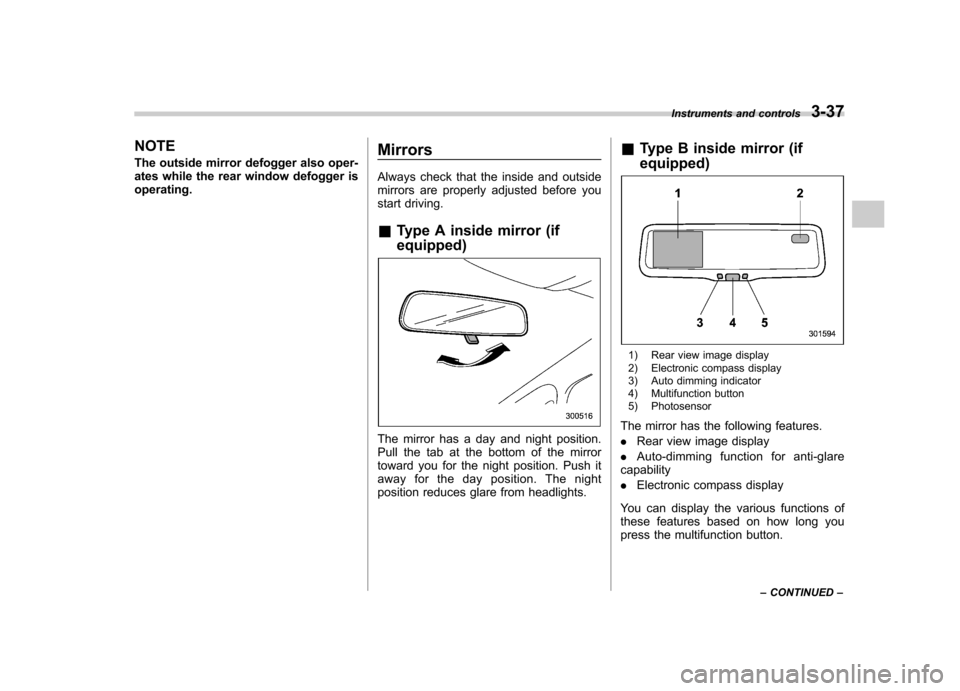
start driving. &
Type A inside mirror (if equipped)
The mirror has a day and night position.
Pull the tab at the bottom of the mirror
toward you for the night position. Push it
away for the day position. The night
position reduces glare from headlights. &
Type B inside mirror (if equipped)
1) Rear view image display
2) Electronic compass display
3) Auto dimming indicator
4) Multifunction button
5) Photosensor
The mirror has the following features. . Rear view image display
. Auto-dimming function for anti-glare
capability. Electronic compass display
You can display the various functions of
these features based on how long you
press the multifunction button. Instruments and controls
3-37
– CONTINUED –