2011 SUBARU IMPREZA WRX STI roof rack
[x] Cancel search: roof rackPage 89 of 459
Black plate (87,1)
北米Model "A1110BE-C" EDITED: 2010/ 12/ 17
& SRS airbag system servicing
WARNING
. When discarding an airbag mod-
ule or scrapping the entire vehi-
cle damaged by a collision, con-
sult your SUBARU dealer.
. The SRS airbag has no user-
serviceable parts. Do not use
electrical test equipment on any
circuit related to the SRS airbag
system. For required servicing of
the SRS airbag, consult your
nearest SUBARU dealer. Tamper-
ing with or disconnecting the
system ’s wiring could result in
accidental inflation of the SRS
airbag or could make the system
inoperative, which may result in
serious injury.
CAUTION
If you need service or repair in areas
indicated in the following list, have
the work performed by an author-
ized SUBARU dealer. The SRS air-
bag control module, impact sensors
and airbag modules are stored in
these areas. .
Under the center console
. On both the right and left sides at
the front of the vehicle
. Steering wheel and column and
nearby areas
. Top of the dashboard on front
passenger ’s side and nearby
areas
. Each front seat and nearby area
. Inside each center pillar
. In each roof side (from the front
pillar to a point over the rear seat)
. Between the rear seat cushion
and rear wheel house on each
side
. Under the rear center seat
In the event that the SRS airbag is
deployed, replacement of the system
should be performed only by an author-
ized SUBARU dealer. When the compo-
nents of the SRS airbag system are
replaced, use only genuine SUBARU
parts.
NOTEIn the following cases, contact your
SUBARU dealer as soon as possible.
. The front part of the vehicle was
involved in an accident in which only the driver
’s SRS frontal airbag or both
driver ’s and front passenger ’sSRS
frontal airbags did not deploy.
. The pad of the steering wheel, the
cover over the front passenger ’s SRS
frontal airbag, or either roof side (from
the front pillar to a point over the rear
seat) is scratched, cracked, or other-
wise damaged.
. Center pillar, rear wheel house or
rear sub frame, or an area near these
parts, was involved in an accident in
which the SRS side airbag and SRS
curtain airbag did not deploy.
. The fabric or leather of either front
seatback is cut, frayed, or otherwise
damaged.
. The rear part of the vehicle was
involved in an accident in which no
SRS airbag was deployed.
& Precautions against vehicle
modification
WARNING
To avoid accidental activation of the
system or rendering the system
inoperative, which may result in
serious injury, no modifications
should be made to any components
or wiring of the SRS airbag system.Seat, seatbelt and SRS airbags
1-57
–CONTINUED –
1
Page 189 of 459
Black plate (9,1)
北米Model "A1110BE-C" EDITED: 2010/ 11/ 17
Antenna system .................................................. 5-3
Roof antenna...................................................... 5-3
FM reception ....................................................... 5-3
Installation of accessories .................................. 5-4
Audio set ............................................................. 5-4
Type A audio set (if equipped) ............................. 5-5
Type B audio set (if equipped) ............................. 5-6
Type C audio set (if equipped) ............................. 5-7
Power and sound controls................................. 5-8
Power switch and volume control ........................ 5-8
Sound control ..................................................... 5-8
Adjustable level of each mode ............................ 5-11
FM/AM radio operation...................................... 5-12
FM/AM selection................................................. 5-12
Tuning ............................................................... 5-12
Displaying radio PS (Program Service Name) and RT (Radio Text) ................................................ 5-15
Station preset .................................................... 5-16
Satellite radio operation (if equipped) .............. 5-17
XM
TM
satellite radio (U.S.A. only)........................ 5-17
Sirius satellite radio ........................................... 5-17
Satellite radio reception ...................................... 5-17
Displaying satellite radio ID of tuner ................... 5-18
Band selection ................................................... 5-19
Channel and category selection .......................... 5-19
Channel preset ................................................... 5-21
Display selection ................................................ 5-22
CD player operation ........................................... 5-23
Play file.............................................................. 5-23
How to insert a CD (type A and C) ...................... 5-23How to insert a CD(s) (type B) ..
.......................... 5-23
How to play back a CD ...................................... 5-24
To select a track from its beginning. ................... 5-26
Fast-forwarding and fast-reversing ..................... 5-27
Repeating .......................................................... 5-28
Random playback .............................................. 5-29
Scan ................................................................. 5-30
Display selection ............................................... 5-30
Folder selection ................................................. 5-31
How to eject a CD from the player (type A and C).................................................................... 5-32
How to eject CDs from the player (type B) ..... ..... 5-32
When the following messages are displayed. . ..... 5-33
Auxiliary input jack (if equipped)...................... 5-34
Precautions to observe when handling a compact disc ................................................... 5-35
USB storage device / iPod
®operations
(type C audio) ................................................. 5-37
Play file............................................................. 5-37
Connectable USB storage device ....................... 5-37
Connectable iPod
®models ................................. 5-38
Connecting USB storage device / iPod
®............. 5-38
How to play back ............................................... 5-39
To select a track/index from its beginning ..... ..... 5-40
To select a chapter from its beginning when connecting iPod
®............................................. 5-40
Fast-forwarding and fast-reversing ..................... 5-40
Repeating .......................................................... 5-40
Random playback .............................................. 5-41
SCAN (only when connecting USB storage device) ............................................................ 5-41
Audio
5
Page 325 of 459
Black plate (329,1)
北米Model "A1110BE-C" EDITED: 2010/ 12/ 17
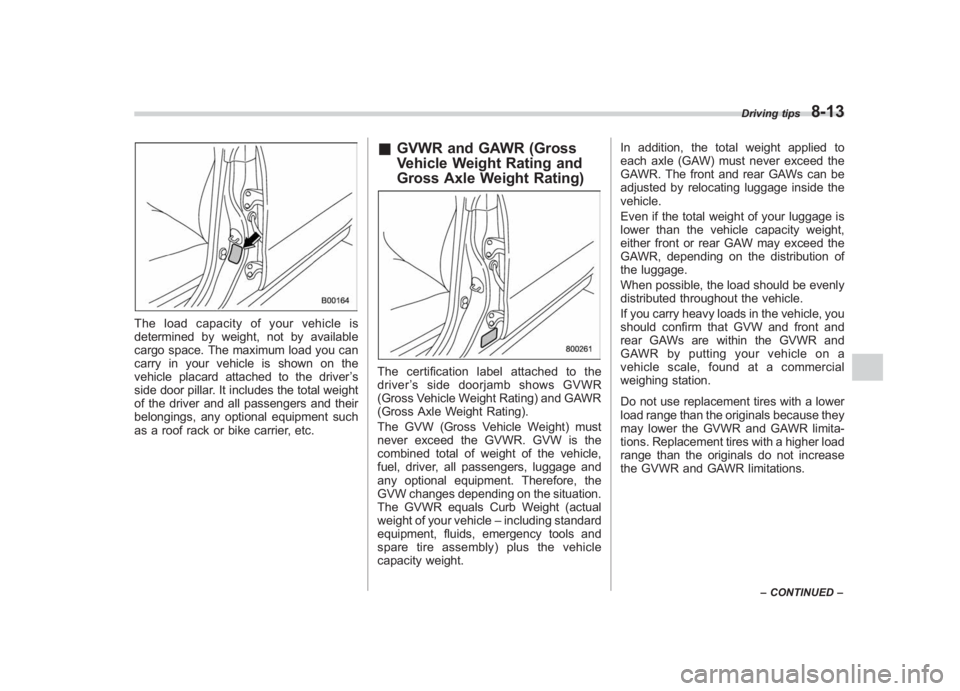
The load capacity of your vehicle is
determined by weight, not by available
cargo space. The maximum load you can
carry in your vehicle is shown on the
vehicle placard attached to the driver ’s
side door pillar. It includes the total weight
of the driver and all passengers and their
belongings, any optional equipment such
as a roof rack or bike carrier, etc.
& GVWR and GAWR (Gross
Vehicle Weight Rating and
Gross Axle Weight Rating)The certification label attached to the
driver ’s side doorjamb shows GVWR
(Gross Vehicle Weight Rating) and GAWR
(Gross Axle Weight Rating).
The GVW (Gross Vehicle Weight) must
never exceed the GVWR. GVW is the
combined total of weight of the vehicle,
fuel, driver, all passengers, luggage and
any optional equipment. Therefore, the
GVW changes depending on the situation.
The GVWR equals Curb Weight (actual
weight of your vehicle –including standard
equipment, fluids, emergency tools and
spare tire assembly) plus the vehicle
capacity weight. In addition, the total weight applied to
each axle (GAW) must never exceed the
GAWR. The front and rear GAWs can be
adjusted by relocating luggage inside the
vehicle.
Even if the total weight of your luggage is
lower than the vehicle capacity weight,
either front or rear GAW may exceed the
GAWR, depending on the distribution of
the luggage.
When possible, the load should be evenly
distributed throughout the vehicle.
If you carry heavy loads in the vehicle, you
should confirm that GVW and front and
rear GAWs are within the GVWR and
GAWR by putting your vehicle on a
vehicle scale, found at a commercial
weighing station.
Do not use replacement tires with a lower
load range than the originals because they
may lower the GVWR and GAWR limita-
tions. Replacement tires with a higher load
range than the originals do not increase
the GVWR and GAWR limitations.
Driving tips
8-13
–
CONTINUED –
8
Page 437 of 459
Black plate (443,1)
北米Model "A1110BE-C" EDITED: 2010/ 12/ 17
.
Passenger car tire
A tire intended for use on passen-
ger cars, multipurpose passenger
vehicles, and trucks, that have a
gross vehicle weight rating (GVWR)
of 10,000 lbs (4,535 kg) or less..
Ply
A layer of rubber-coated parallel
cords..
Ply separation
A parting of rubber compound
between adjacent plies..
Pneumatic tire
A mechanical device made of rub-
ber, chemicals, fabric and steel or
other materials, that, when
mounted on an automotive wheel,
provides the traction and contains
the gas or fluid that sustains the
load..
Production options weight
The combined weight of those
installed regular production options
weighing over 5.1 lbs (2.3 kg) in
excess of those standard items
which they replace, not previously
considered in curb weight or acces- sory weight, including heavy duty
brakes, ride levelers, roof rack,
heavy duty battery, and special
trim.
.
Radial ply tire
A pneumatic tire in which the ply
cords that extend to the beads are
laid at substantially 90 degrees to
the centerline of the tread..
Recommended inflation pres-
sure
The cold inflation pressure recom-
mended by a vehicle manufacturer..
Reinforced tire
A tire designed to operate at higher
loads and at higher inflation pres-
sures than the corresponding stan-
dard tire..
Rim
A metal support for a tire or a tire
and tube assembly upon which the
tire beads are seated..
Rim diameter
Nominal diameter of the bead seat..
Rim size designation
Rim diameter and width.
.
Rim type designation
The industry of manufacturer ’s des-
ignation for a rim by style or code..
Rim width
Nominal distance between rim
flanges..
Section width
The linear distance between the
exteriors of the sidewalls of an
inflated tire, excluding elevations
due to labeling, decoration, or
protective bands..
Sidewall
That portion of a tire between the
tread and bead..
Sidewall separation
The parting of the rubber com-
pound from the cord material in
the sidewall..
Test rim
The rim on which a tire is fitted for
testing, and it may be any rim listed
as appropriate for use with that tire..
Tread
That portion of a tire that comes
into contact with the road.
Consumer information and Reporting safety defects
13-7
– CONTINUED –
13
Page 440 of 459
Black plate (446,1)
北米Model "A1110BE-C" EDITED: 2010/ 12/ 17
13-10
Consumer information and Reporting safety defects
& Tire care –maintenance and
safety practices.
Check on a daily basis that the
tires are free from serious damage,
nails, and stones. At the same time,
check the tires for abnormal wear.
.
Inspect the tire tread regularly
and replace the tires before their
tread wear indicators become visi-
ble. When a tire ’streadwear
indicator becomes visible, the tire
is worn beyond the acceptable limit
and must be replaced immediately.
With a tire in this condition, driving
at even low speeds in wet weather
can cause the vehicle to hydro-
plane. Possible resulting loss of
vehiclecontrolcanleadtoan
accident.
.
To maximize the life of each tire
and ensure that the tires wear
uniformly, it is best to rotate the
tires every 7,500 miles (12,000 km).
For information about the tire rota-
tion order, refer to “Tire rotation ”
F 11-36
.Replace any damaged or
unevenly worn tires at the time of rotation. After tire rotation, adjust
the tire pressures and make sure
the wheel nuts are correctly tigh-
tened. For information about the
tightening torque and tightening
sequence for the wheel nuts, refer
to
“Flat tires” F9-6
.
& Vehicle load limit –how to
determineThe load capacity of your vehicle is
determined by weight, not by avail-
able cargo space. The load limit of
your vehicle is shown on the
vehicle placard attached to the
driver ’s side B-pillar. Locate the
statement “The combined weight
of occupants and cargo should
never exceed XXX kg or XXX lbs ”
on your vehicle ’s placard.
Thevehicleplacardalsoshows
seating capacity of your vehicle.
The total load capacity includes the
total weight of driver and all pas-
sengers and their belongings, any
cargo, any optional equipment such
as a trailer hitch, roof rack or bike carrier, etc., and the tongue load of
a trailer. Therefore cargo capacity
can be calculated by the following
method.
Cargo capacity = Load limit
�(total
weight of occupants + total weight
of optional equipment + tongue
load of a trailer (if applicable))
For information about vehicle load-
ing, refer to “Loading your vehicle ”
F 8-12
.
NOTEYour vehicle is neither designed
nor intended to be used for
trailer towing. Therefore, never
tow a trailer with your vehicle.