2011 SUBARU IMPREZA WRX STI ad blue
[x] Cancel search: ad bluePage 137 of 459
Black plate (139,1)
北米Model "A1110BE-C" EDITED: 2010/ 12/ 17
NOTEThis light also illuminates when the fuel
filler cap is not tightened until it clicks.
If you have recently refueled your vehicle,
the cause of the CHECK ENGINE warning
light/malfunction indicator lamp illuminat-
ing could be a loose or missing fuel filler
cap. Remove the cap and retighten it until
it clicks. Make sure nothing is interfering
with the sealing of the cap. Tightening the
cap will not make the CHECK ENGINE
warning light turn off immediately. It may
take several driving trips. If the light does
not turn off, take your vehicle to your
authorized SUBARU dealer immediately.
! If the light is blinking
If the light is blinking while driving, an
engine misfire condition has been de-
tected which may damage the emission
control system.
To prevent serious damage to the emis-
sion control system, you should do the
following.
. Reduce vehicle speed.
. Avoid hard acceleration.
. Avoid steep uphill grades.
. Reduce the amount of cargo, if possi-
ble. The CHECK ENGINE warning light may
stop blinking and illuminate steadily after
several driving trips. You should have your
vehicle checked by an authorized
SUBARU dealer immediately.
&
Coolant temperature
low indicator light (non-
turbo models)/Coolant
temperature high warn-
ing light (non-turbo
models)
CAUTION
.
After turning the ignition switch
to the “ON ”position, if this
indicator light/warning light be-
haves in any of the following
ways, the electrical system may
be malfunctioning. Contact your
SUBARU dealer immediately for
an inspection.
– It remains blinking in RED.
– It remains illuminated in RED
for more than 2 seconds.
– It remains blinking in RED and
BLUE alternately.
. While driving, if this indicator
light/warning light behaves in
any of the following ways, take the specified appropriate mea-
sure listed below.
–
Blinking or illuminated in
RED:
Safely stop the vehicle as
soon as possible, and refer
to the emergency steps to
take in the case of engine
overheating. After that, have
the system checked by your
nearest SUBARU dealer. Refer
to “Engine overheating ”F9-
13.
– Blinking in RED and BLUE
alternately:
The electrical system may be
malfunctioning. Contact your
SUBARU dealer for an inspec-
tion.
This coolant temperature low indicator
light/coolant temperature high warning
light has the following three functions.
. Illumination in BLUEindicates insuffi-
cient warming up of the engine
. Blinking in REDindicates that the
engine is close to overheating
. Illumination in REDindicates overheat-
ing condition of the engine
For a system check, this indicator light/
warning light illuminates in REDfor
Instruments and controls
3-17
–CONTINUED –
3
Page 138 of 459
Black plate (140,1)
北米Model "A1110BE-C" EDITED: 2010/ 12/ 17
3-18
Instruments and controls
approximately 2 seconds when the igni-
tion switch is turned to the “ON”position.
After that, this indicator light/warning light
changes to BLUEand maintains illumina-
tion in BLUE. This BLUEilluminated light
turns off when the engine is warmed up
sufficiently.
If the engine coolant temperature in-
creases over the specified range, the
indicator light/warning light blinks in
RED . At this time, the engine is close to
overheating.
If the engine coolant temperature in-
creases further, the indicator light/warning
light illuminates in REDcontinuously. At
this time, the engine may be overheating.
When the indicator light/warning light
blinks in REDor illuminates in RED, safely
stop the vehicle as soon as possible, and
refer to the emergency steps to take in the
case of engine overheating. Refer to
“Engine overheating ”F 9-13. After that,
have the system checked by your nearest
SUBARU dealer.
Also, if the indicator light/warning light
often blinks in RED, the electrical system
may be malfunctioning. Contact your
SUBARU dealer for an inspection.
NOTEIf the engine is restarted after a certain
driving condition, this indicator light/
warning light may illuminate in RED.
However, this is not a malfunction if the
indicator light/warning light turns off
after a short time.&
Charge warning light
If this light illuminates when the engine is
running, it may indicate that the charging
system is not working properly.
If the light illuminates while driving or does
not turn off after the engine starts, stop the
engine at the first safe opportunity and
check the alternator belt. If the belt is
loose, broken or if the belt is in good
condition but the light remains illuminated,
contact your nearest SUBARU dealer
immediately.&
Oil pressure warning
light
If this light illuminates when the engine is
running, it may indicate that the engine oil
pressure is low and the lubricating system
is not working properly.
If the light illuminates while driving or does
not turn off after the engine starts, stop the
engine at the first safe opportunity and check the engine oil level. If the oil level is
low, add oil immediately. If the engine oil is
at the proper level but the light remains
illuminated, contact your nearest
SUBARU dealer immediately.
For details about checking the engine oil
level or adding the engine oil, refer to
“Engine oil
”F 11-10.
CAUTION
Do not operate the engine with the
oil pressure warning light illumi-
nated. This may cause serious en-
gine damage.&
AT OIL TEMP warning
light (AT models)
If this light illuminates when the engine is
running, it may indicate that the automatic
transmission fluid temperature is too hot.
If the light illuminates while driving, im-
mediately stop the vehicle in a safe place
and let the engine idle until the warning
light turns off.
! Automatic transmission control
system warning
If the “AT OIL TEMP ”warning light flashes
after the engine starts, it may indicate that
the automatic transmission control system
Page 175 of 459
Black plate (177,1)
北米Model "A1110BE-C" EDITED: 2010/ 12/ 17
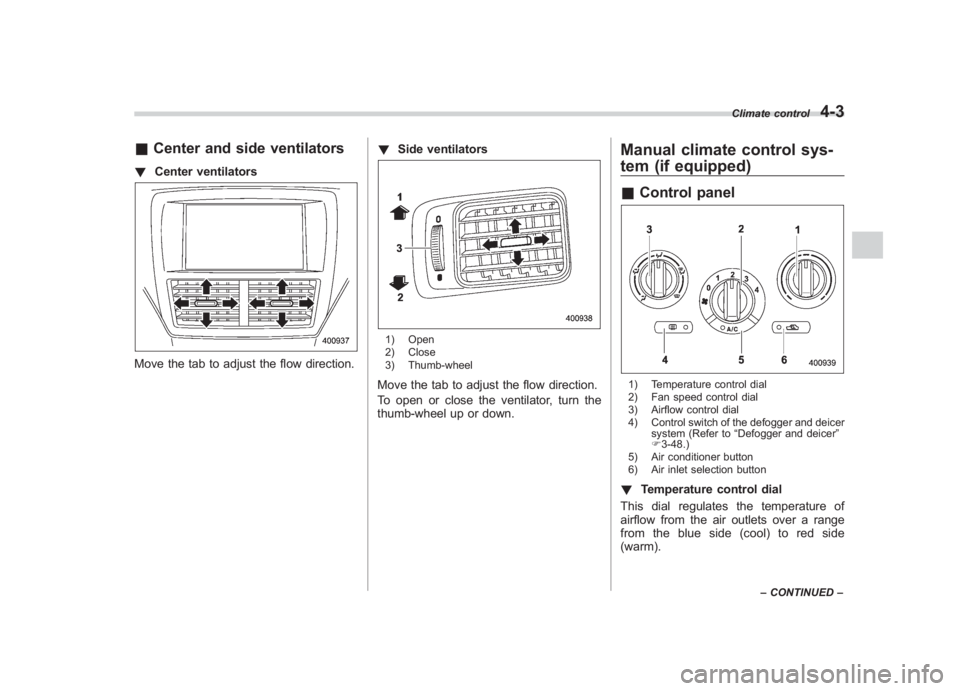
& Center and side ventilators! Center ventilatorsMove the tab to adjust the flow direction. !
Side ventilators
1) Open
2) Close
3) Thumb-wheelMove the tab to adjust the flow direction.
To open or close the ventilator, turn the
thumb-wheel up or down.
Manual climate control sys-
tem (if equipped)&Control panel1) Temperature control dial
2) Fan speed control dial
3) Airflow control dial
4) Control switch of the defogger and deicer
system (Refer to “Defogger and deicer”
F 3-48.)
5) Air conditioner button
6) Air inlet selection button! Temperature control dial
This dial regulates the temperature of
airflow from the air outlets over a range
fromtheblueside(cool)toredside
(warm).
Climate control
4-3
– CONTINUED –
4
Page 178 of 459
Black plate (180,1)
北米Model "A1110BE-C" EDITED: 2010/ 12/ 17
4-6
Climate control
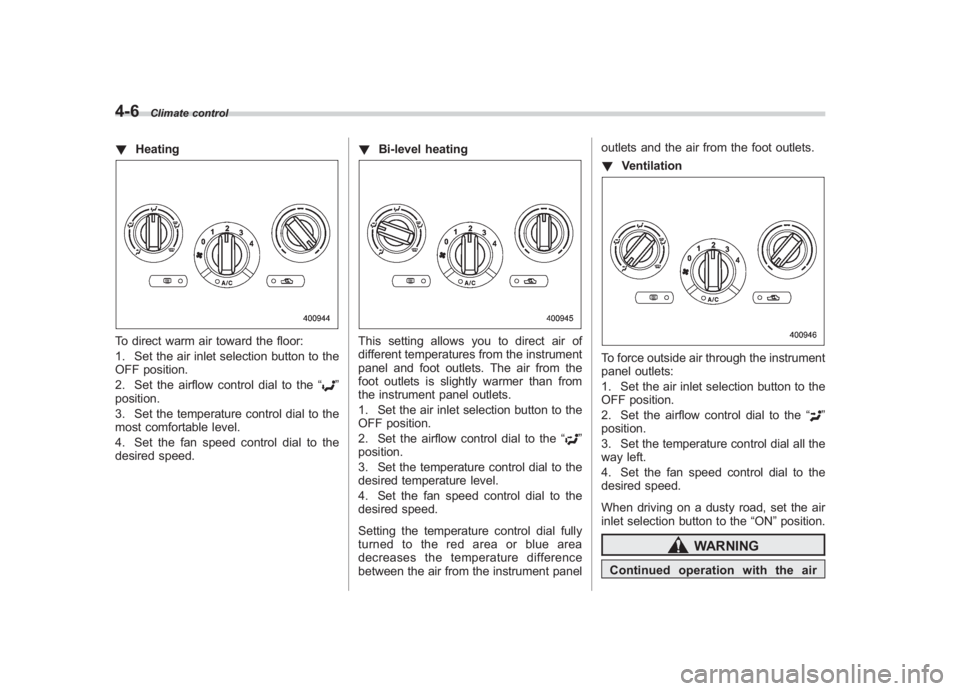
! HeatingTo direct warm air toward the floor:
1. Set the air inlet selection button to the
OFF position.
2. Set the airflow control dial to the “
”
position.
3. Set the temperature control dial to the
most comfortable level.
4. Set the fan speed control dial to the
desired speed. !
Bi-level heating
This setting allows you to direct air of
different temperatures from the instrument
panel and foot outlets. The air from the
foot outlets is slightly warmer than from
the instrument panel outlets.
1. Set the air inlet selection button to the
OFF position.
2. Set the airflow control dial to the “
”
position.
3. Set the temperature control dial to the
desired temperature level.
4. Set the fan speed control dial to the
desired speed.
Setting the temperature control dial fully
turned to the red area or blue area
decreases the temperature difference
between the air from the instrument panel outlets and the air from the foot outlets.
!
Ventilation
To force outside air through the instrument
panel outlets:
1. Set the air inlet selection button to the
OFF position.
2. Set the airflow control dial to the “
”
position.
3. Set the temperature control dial all the
way left.
4. Set the fan speed control dial to the
desired speed.
When driving on a dusty road, set the air
inlet selection button to the “ON”position.
WARNING
Continued operation with the air
Page 179 of 459
Black plate (181,1)
北米Model "A1110BE-C" EDITED: 2010/ 12/ 17
inletselectionbuttonintheON
position may fog up the windows.
Switch to the OFF position as soon
as the outside dusty condition
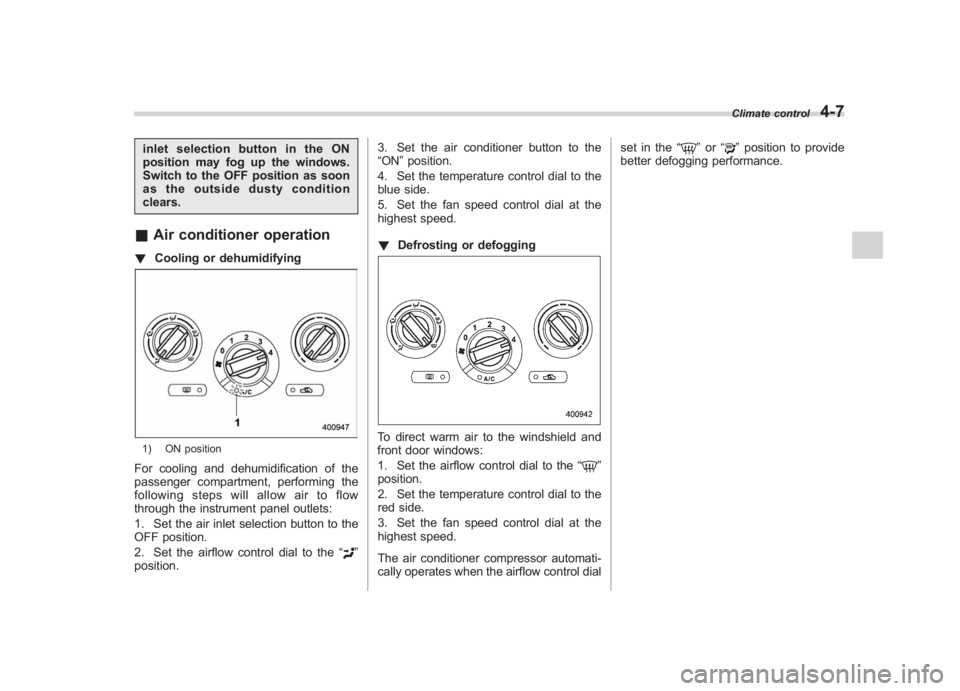
clears.& Air conditioner operation! Cooling or dehumidifying1) ON positionFor cooling and dehumidification of the
passenger compartment, performing the
following steps will allow air to flow
through the instrument panel outlets:
1. Set the air inlet selection button to the
OFF position.
2. Set the airflow control dial to the “
”
position. 3. Set the air conditioner button to the
“ON
”position.
4. Set the temperature control dial to the
blue side.
5. Set the fan speed control dial at the
highest speed.
! Defrosting or defogging
To direct warm air to the windshield and
front door windows:
1. Set the airflow control dial to the “
”
position.
2. Set the temperature control dial to the
red side.
3. Set the fan speed control dial at the
highest speed.
The air conditioner compressor automati-
cally operates when the airflow control dial set in the
“
”or “
”position to provide
better defogging performance.Climate control
4-7
4
Page 190 of 459
Black plate (10,1)
北米Model "A1110BE-C" EDITED: 2010/ 11/ 17
Audio
Selecting category (only when connecting
iPod
®) .............................................................. 5-41
Display selection ................................................ 5-42
Folder selection (only when connecting USB storage device) ................................................ 5-42
When “CHECK DEVICE ”is displayed .................. 5-42
Audio control buttons (if equipped) .................. 5-42
MODE button..................................................... 5-42
“
” and “
”buttons ......................................... 5-43
Volume control buttons ...................................... 5-44
MUTE button (models without Hands-free system) ............................................................ 5-44
Bluetooth
®audio (type C audio) ....................... 5-45
Media format..................................................... 5-45
Setting Bluetooth
®audio .................................... 5-45
Bluetooth
®audio operation ................................ 5-45
Hands-free system (if equipped) ...................... 5-46
Tips for the Hands-free system.......................... 5-47
Certification for the Hands-free system ............... 5-48
Safety precautions ............................................. 5-49
Using the Hands-free system ............................. 5-49
Bluetooth
®setting ............................................. 5-59
Page 233 of 459
Black plate (235,1)
北米Model "A1110BE-C" EDITED: 2010/ 12/ 17
Bluetooth
®
audio (type C
audio)
This function enables you to play back
audio sources recorded in Bluetooth
®
audio devices. You need to register the
Bluetooth
®audio device in the system
before using it.
& Media formatBluetooth
®
audio devices cannot be
connected if they are not compatible with
the following Bluetooth
®profiles.
. A2DP (Advanced Audio Distribution
Profile)
. AVRCP (Audio/Video Remote Control
Profile)
& Setting Bluetooth
®audio
1. Select the “BT-A SETUP”menu by
pressing the “MENU”button.
2. Perform the following procedure while
“BT-A ”is displayed.NOTEYou cannot set a Bluetooth
®
audio
while driving. !
Registering (pairing) device
1. Select the “PAIR AUDIO” menu by
operating the “TUNE/TRACK/CH ”dial. If a
device is already registered, “MEMORY
FULL ”is displayed and the mode changes
to the Bluetooth
®audio setting mode.
2. After the passkey is shown on the
display, input the passkey into the cell
phone. If you input the correct passkey,
“PAIRED ”is displayed and the registering
procedure is finished. If you input an
incorrect passkey, “FAILED”is displayed,
the registering procedure was not suc-
cessful and the mode changes to the
Bluetooth
®audio setting mode.
! Selecting device
1. Select the “SELECT AUDIO” menu by
operating the “TUNE/TRACK/CH ”dial. If
no devices are registered, “EMPTY”is
displayed and the mode changes to the
Bluetooth®audio setting mode.
2. Select the “CONFIRM”menu by oper-
ating the “TUNE/TRACK/CH ”dial. If the
device is connected, “SELECTED ”is
displayed and the selecting procedure is
finished. If the device cannot be con-
nected, “FAILED”is displayed and the
selecting procedure was not successful. !
Setting passkey
1. Select the “SET PASSKEY ”menu by
operating the “TUNE/TRACK/CH ”dial.
After the currently set passkey is dis-
played, a new passkey can be entered.
2. Input the new passkey by operating
the “TUNE/TRACK/CH ”dial.
3. Select the “CONFIRM”menu by oper-
ating the “TUNE/TRACK/CH ”dial. The
new passkey is displayed, the passkey is
changed and the mode changes to the
Bluetooth
®audio setting mode.
! Deleting device
1. Select the “DELETE AUDIO ”menu by
operating the “TUNE/TRACK/CH ”dial. If
no devices are registered, “EMPTY”is
displayed and the mode changes to the
Bluetooth®audio setting mode.
2. Select the “CONFIRM”menu by oper-
ating the “TUNE/TRACK/CH ”dial. “DE-
LETED ”is displayed and the mode
changes to the Bluetooth
®audio setting
mode.
& Bluetooth
®audio operation
NOTE
Depending on the connected device, it
may not activate as per the following
items or not work smoothly.
Audio
5-45
– CONTINUED –
5
Page 235 of 459
Black plate (237,1)
北米Model "A1110BE-C" EDITED: 2010/ 12/ 17
& Tips for the Hands-free sys-
tem! Bluetooth
®
NOTEThe Bluetooth word mark and logo are
registered trademarks of Bluetooth
SIG, Inc.
It is possible to connect a cell phone to the
in-vehicle equipment through the Blue-
tooth
®format (wireless) to make a phone
call from the in-vehicle equipment or take
an incoming phone call.
Since the Bluetooth
®format is wireless, a
connection between the in-vehicle equip-
ment and the cell phone can be made
without placing them in close proximity of
each other. The cell phone can be used with it left in the breast pocket or bag.
NOTE.
The Hands-free system may not
operate properly under the following
conditions.
–The cell phone is turned off.
– The cell phone is not in the
phone call area.
– The battery of the cell phone has
run down.
– The cell phone is not connected
to the Hands-free system.
– The cell phone is behind the seat
or in the glove box.
– A metal material covers or
touches the cell phone.
. Depending on the type of cell phone
that is used, the screen on the cell
phone may remain illuminated while
the ignition switch is in the “ON ”
position. If this occurs, turn the illumi-
nation off by adjusting the cell phone
settings.
. Depending on the setting of the cell
phone, the dial lock function may be
activated after making a call. Deacti-
vate the automatic dial lock function of
the cell phone before using the Hands-
free system.
. Depending on the type of cell phone
that is used, operation and the sound volume may be different from those of
cell phones currently used.
.
When the ignition switch is turned to
the “LOCK ”position during a call, the
call may be disconnected or continued
on the cell phone depending on the
type of cell phone that is used. Note
that operation of the cell phone may be
necessary if the call is continued on the
cell phone.
. Do not speak at the same time as the
other party during a call. If you and the
party speak at the same time, it may be
difficult for the other party to hear your
voice and vice versa. This is normal.
. The receiver sound volume should
be set as low as possible. Otherwise,
the party you are calling may notice an
undesirable echo sound.
. Speak clearly and loudly.
. Your voice may be difficult to be
heard by the party under the following
conditions.
–Driving on a rough road.
– Driving at a high speed.
– Driving with a window open.
– When air from the ventilator
blows directly towards the micro-
phone.
– When the sound coming from the
ventilator is loud.
Audio
5-47
– CONTINUED –
5