2011 SUBARU IMPREZA WRX STI fog light
[x] Cancel search: fog lightPage 161 of 459
Black plate (163,1)
北米Model "A1110BE-C" EDITED: 2010/ 12/ 17
other similar items. Periodically wipe the
sensors clean using a piece of dry soft
cotton cloth or an applicator.
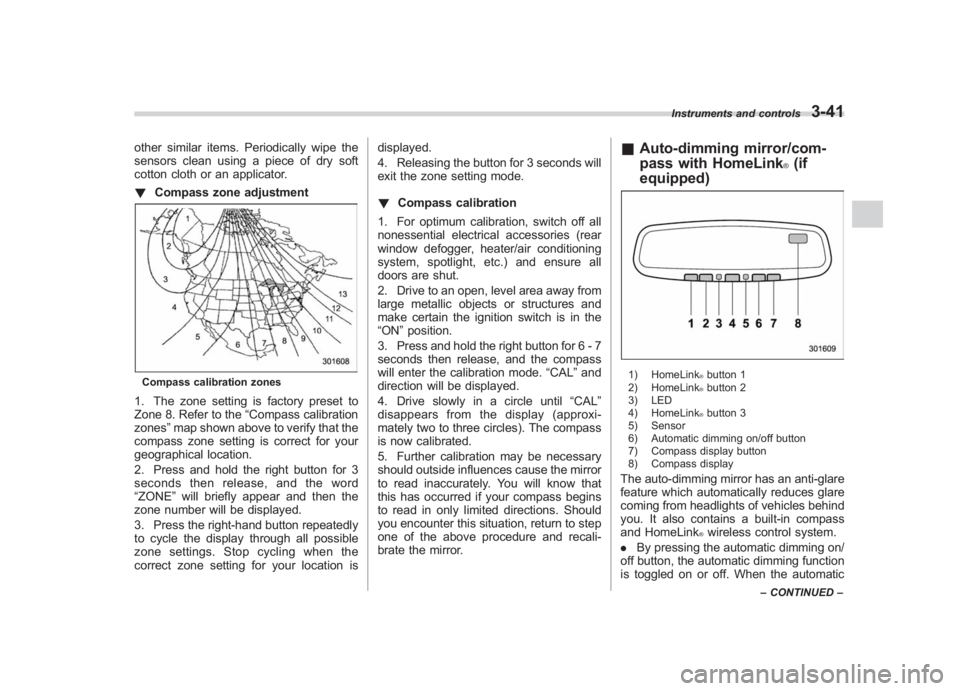
! Compass zone adjustmentCompass calibration zones1. The zone setting is factory preset to
Zone 8. Refer to the “Compass calibration
zones” map shown above to verify that the
compass zone setting is correct for your
geographical location.
2. Press and hold the right button for 3
seconds then release, and the word
“ZONE ”will briefly appear and then the
zone number will be displayed.
3. Press the right-hand button repeatedly
to cycle the display through all possible
zone settings. Stop cycling when the
correct zone setting for your location is displayed.
4. Releasing the button for 3 seconds will
exit the zone setting mode.
!
Compass calibration
1. For optimum calibration, switch off all
nonessential electrical accessories (rear
window defogger, heater/air conditioning
system, spotlight, etc.) and ensure all
doors are shut.
2. Drive to an open, level area away from
large metallic objects or structures and
make certain the ignition switch is in the
“ON ”position.
3. Press and hold the right button for 6 - 7
seconds then release, and the compass
will enter the calibration mode. “CAL”and
direction will be displayed.
4. Drive slowly in a circle until “CAL”
disappears from the display (approxi-
mately two to three circles). The compass
is now calibrated.
5. Further calibration may be necessary
should outside influences cause the mirror
to read inaccurately. You will know that
this has occurred if your compass begins
to read in only limited directions. Should
you encounter this situation, return to step
one of the above procedure and recali-
brate the mirror.
& Auto-dimming mirror/com-
pass with HomeLink
®(if
equipped)
1) HomeLink
®button 1
2) HomeLink®button 2
3) LED
4) HomeLink®button 3
5) Sensor
6) Automatic dimming on/off button
7) Compass display button
8) Compass display
The auto-dimming mirror has an anti-glare
feature which automatically reduces glare
coming from headlights of vehicles behind
you. It also contains a built-in compass
and HomeLink
®wireless control system.
. By pressing the automatic dimming on/
off button, the automatic dimming function
is toggled on or off. When the automatic
Instruments and controls
3-41
– CONTINUED –
3
Page 169 of 459
Black plate (171,1)
北米Model "A1110BE-C" EDITED: 2010/ 12/ 17
window defogger. Some models are also
equipped with an outside mirror defogger
and/or windshield wiper deicer. The de-
fogger and deicer system is activated only
when the ignition switch is in the “ON”
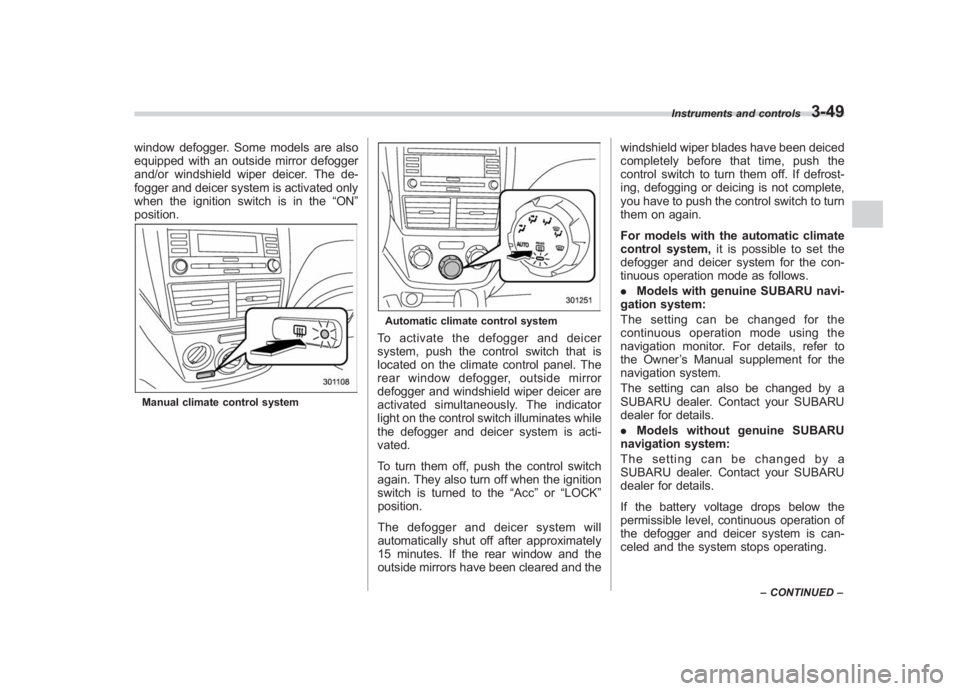
position.Manual climate control system
Automatic climate control systemTo activate the defogger and deicer
system, push the control switch that is
located on the climate control panel. The
rear window defogger, outside mirror
defogger and windshield wiper deicer are
activated simultaneously. The indicator
light on the control switch illuminates while
the defogger and deicer system is acti-
vated.
To turn them off, push the control switch
again. They also turn off when the ignition
switch is turned to the “Acc”or “LOCK”
position.
The defogger and deicer system will
automatically shut off after approximately
15 minutes. If the rear window and the
outside mirrors have been cleared and the windshield wiper blades have been deiced
completely before that time, push the
control switch to turn them off. If defrost-
ing, defogging or deicing is not complete,
you have to push the control switch to turn
them on again.
For models with the automatic climate
control system,
it is possible to set the
defogger and deicer system for the con-
tinuous operation mode as follows.
. Models with genuine SUBARU navi-
gation system:
The setting can be changed for the
continuous operation mode using the
navigation monitor. For details, refer to
the Owner ’s Manual supplement for the
navigation system.
The setting can also be changed by a
SUBARU dealer. Contact your SUBARU
dealer for details.
. Models without genuine SUBARU
navigation system:
The setting can be changed by a
SUBARU dealer. Contact your SUBARU
dealer for details.
If the battery voltage drops below the
permissible level, continuous operation of
the defogger and deicer system is can-
celed and the system stops operating.
Instruments and controls
3-49
– CONTINUED –
3
Page 176 of 459
Black plate (178,1)
北米Model "A1110BE-C" EDITED: 2010/ 12/ 17
4-4
Climate control
! Fan speed control dial
The fan operates only when the ignition
switch is turned to the “ON”position. The
fan speed control dial is used to select
four fan speeds.
! Airflow control dial
Each dial position activates the following
air outlets.
(Ventilation): Instrument panel outlets(Bi-level): Instrument panel outlets and
foot outlets(Heat): Foot outlets, both side outlets of
the instrument panel and some through
windshield defroster outlets (A small
amount of air flows to the windshield and
both side windows to prevent fogging.)(Heat-def): Windshield defroster out-
lets, foot outlets and both side outlets of
the instrument panel: Windshield defroster outlets and both
side outlets of the instrument panel
For details, refer to “Airflow selection”F 4-
2.
NOTEWhen the dial is placed in the “
”or
“
” position, the air conditioner com-
pressor operates automatically regard- less of the position of the air condi-
tioner button to defog the windshield
more quickly. However the indicator on
the air conditioner button will not
illuminate. At the same time, the air
inlet selection is automatically set to
“
outside air ”mode.
In this state, you cannot select “recir-
culation ”mode by manually pressing
the air inlet selection button.
Also, you cannot stop the air condi-
tioner compressor by pressing the air
conditioner button.
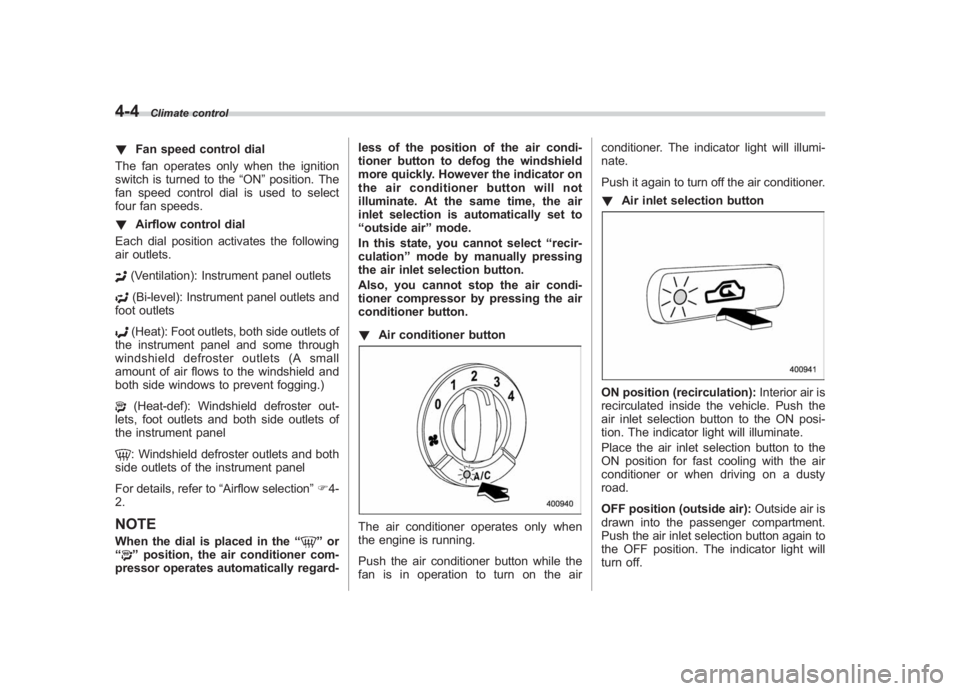
! Air conditioner button
The air conditioner operates only when
the engine is running.
Push the air conditioner button while the
fan is in operation to turn on the air conditioner. The indicator light will illumi-
nate.
Push it again to turn off the air conditioner.
!
Air inlet selection button
ON position (recirculation): Interior air is
recirculated inside the vehicle. Push the
air inlet selection button to the ON posi-
tion. The indicator light will illuminate.
Place the air inlet selection button to the
ON position for fast cooling with the air
conditioner or when driving on a dusty
road.
OFF position (outside air): Outside air is
drawn into the passenger compartment.
Push the air inlet selection button again to
the OFF position. The indicator light will
turn off.
Page 177 of 459
Black plate (179,1)
北米Model "A1110BE-C" EDITED: 2010/ 12/ 17
Place the air inlet selection button to the
OFF position when the interior has cooled
to a comfortable temperature and the road
is no longer dusty.
WARNING
Continued operation with the air
inletselectionbuttonintheON
position may fog up the windows.
Switch to the OFF position as soon
as the outside dusty condition
clears.& Heater operation
NOTE. When the “
”or “
”position is
selected, the air conditioner compres-
sor automatically operates regardless
of the position of the air conditioner
button to defog the windshield more
quickly. At the same time, the air inlet
selection is automatically switched to
the OFF position (outside air). How-
ever, the air conditioner indicator light
does not illuminate at this time.
. When defrosting, defogging or heat-
ing, warm air is also emitted from the
right and left air outlets. To stop warm
airflow from these outlets, turn the
corresponding thumb wheel down. !
Defrosting or defogging the wind-
shield
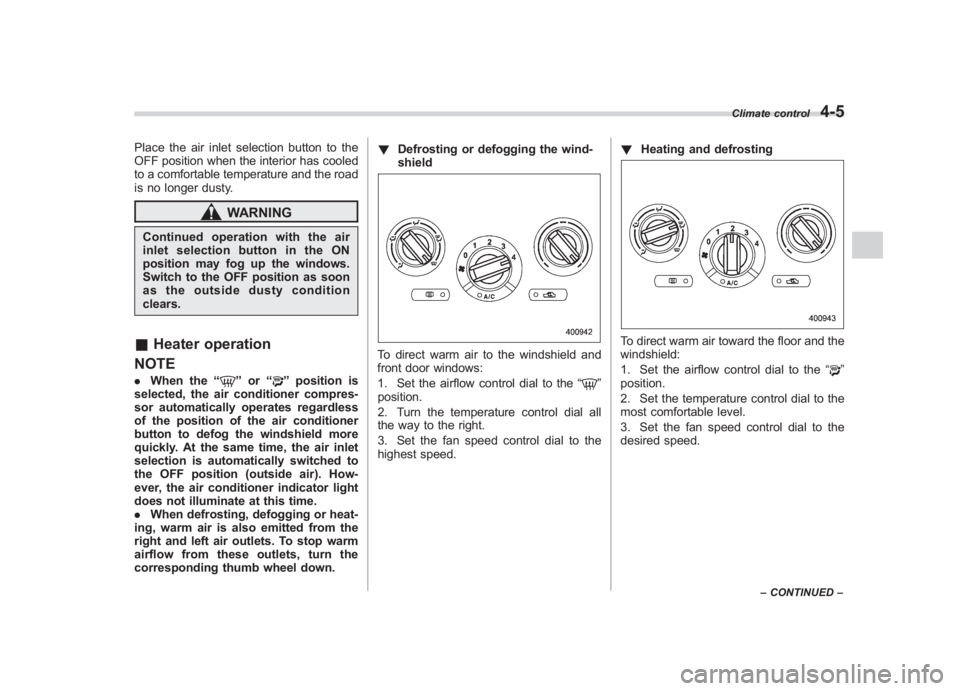
To direct warm air to the windshield and
front door windows:
1. Set the airflow control dial to the “
”
position.
2. Turn the temperature control dial all
the way to the right.
3. Set the fan speed control dial to the
highest speed. !
Heating and defrosting
To direct warm air toward the floor and the
windshield:
1. Set the airflow control dial to the “
”
position.
2. Set the temperature control dial to the
most comfortable level.
3. Set the fan speed control dial to the
desired speed.
Climate control
4-5
– CONTINUED –
4
Page 182 of 459
Black plate (184,1)
北米Model "A1110BE-C" EDITED: 2010/ 12/ 17
4-10
Climate control
the instrument panel and some through
windshield defroster outlets (A small
amount of air flows to the windshield and
both side windows to prevent fogging.)
(Heat-def): Windshield defroster out-
lets, foot outlets and both side outlets of
the instrument panel: Windshield defroster outlets and both
side outlets of the instrument panel
For details, refer to “Airflow selection”F 4-
2.
NOTEWhen the dial is placed in the “
”or
“
” position, the air inlet selection is
automatically set to “outside air ”
mode.
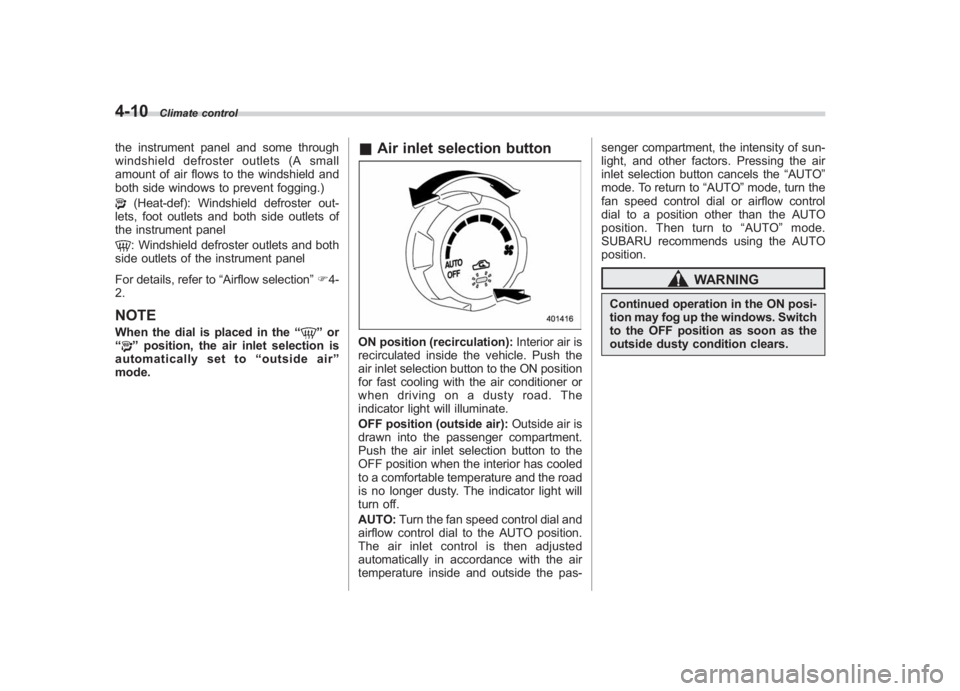
& Air inlet selection buttonON position (recirculation): Interior air is
recirculated inside the vehicle. Push the
air inlet selection button to the ON position
for fast cooling with the air conditioner or
when driving on a dusty road. The
indicator light will illuminate.
OFF position (outside air): Outside air is
drawn into the passenger compartment.
Push the air inlet selection button to the
OFF position when the interior has cooled
to a comfortable temperature and the road
is no longer dusty. The indicator light will
turn off.
AUTO: Turn the fan speed control dial and
airflow control dial to the AUTO position.
The air inlet control is then adjusted
automatically in accordance with the air
temperature inside and outside the pas- senger compartment, the intensity of sun-
light, and other factors. Pressing the air
inlet selection button cancels the
“AUTO”
mode. To return to “AUTO”mode, turn the
fan speed control dial or airflow control
dial to a position other than the AUTO
position. Then turn to “AUTO ”mode.
SUBARU recommends using the AUTO
position.
WARNING
Continued operation in the ON posi-
tion may fog up the windows. Switch
to the OFF position as soon as the
outside dusty condition clears.
Page 356 of 459
Black plate (22,1)
北米Model "A1110BE-C" EDITED: 2010/ 11/ 17
Maintenance and serviceTires and wheels .............................................. 11-31
Types of tires................................................... 11-31
Tire pressure monitoring system (TPMS) (if equipped) ................................................... 11-31
Tire inspection ................................................. 11-33
Tire pressures and wear ................................... 11-33
Wheel balance .................................................. 11-35
Wear indicators ................................................ 11-35
Tire rotation direction mark .............................. 11-36
Tire rotation ..................................................... 11-36
Tire replacement .............................................. 11-37
Wheel replacement ........................................... 11-37
Aluminum wheels............................................. 11-38
Windshield washer fluid .................................. 11-38
Replacement of wiper blades .......................... 11-39
Windshield wiper blade assembly ..................... 11-40
Windshield wiper blade rubber (type A and type B) ........................................................... 11-41
Rear window wiper blade assembly .................. 11-42
Rear window wiper blade rubber ....................... 11-42
Battery.............................................................. 11-44
Fuses ................................................................ 11-45
Main fuse .......................................................... 11-46
Installation of accessories .............................. 11-46
Replacing bulbs ............................................... 11-47
Headlights (models with HID headlights) ........... 11-47
Headlights (models without HID headlights) ...... 11-47
Front turn signal light ...................................... 11-50
Front fog light (if equipped) .............................. 11-50
Rear combination lights ................................... 11-51
Back-up light (5-door) ...................................... 11-52
License plate light ........................................... 11-53
Map light ......................................................... 11-53
Dome light and cargo area light ....................... 11-54
Trunk light ....................................................... 11-55
High mount stop light (4-door) (except LED [Light Emitting Diode] type) ............................ 11-55
Other bulbs ..................................................... 11-55
Page 400 of 459
Black plate (406,1)
北米Model "A1110BE-C" EDITED: 2010/ 12/ 17
11-46
Maintenance and service
corresponding fuse. If a fuse has blown,
replace it.
1. Turn the ignition switch to the “LOCK”
position and turn off all electrical acces-
sories.
2. Remove the cover.
3. Determine which fuse may be blown.
Look at the back side of each fuse box
cover and refer to “Fuses and circuits”
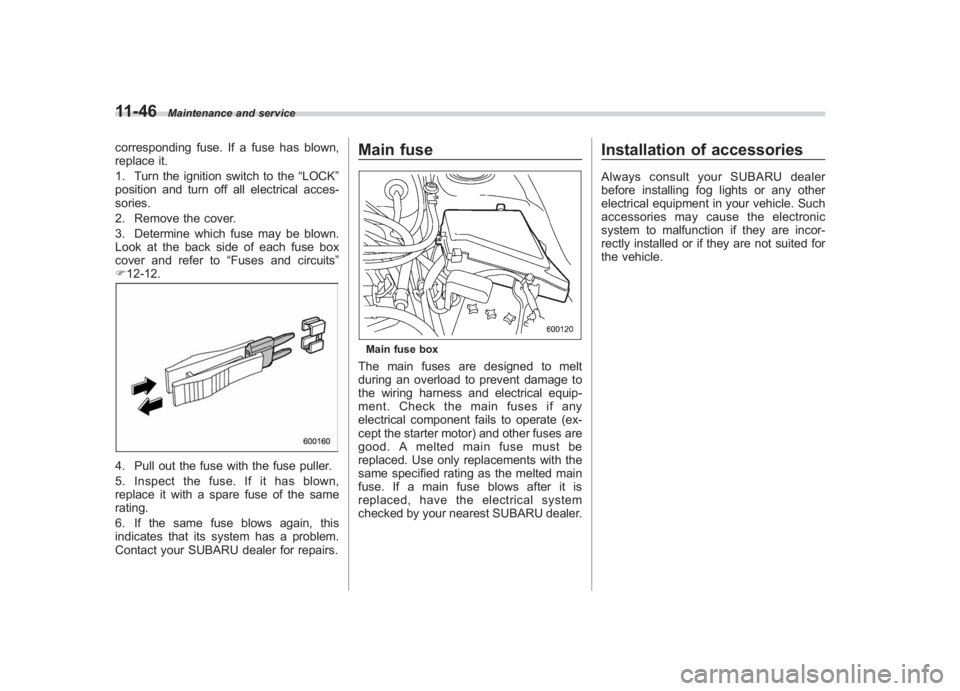
F 12-12.4. Pull out the fuse with the fuse puller.
5. Inspect the fuse. If it has blown,
replace it with a spare fuse of the same
rating.
6. If the same fuse blows again, this
indicates that its system has a problem.
Contact your SUBARU dealer for repairs.
Main fuseMain fuse boxThe main fuses are designed to melt
during an overload to prevent damage to
the wiring harness and electrical equip-
ment. Check the main fuses if any
electrical component fails to operate (ex-
cept the starter motor) and other fuses are
good. A melted main fuse must be
replaced. Use only replacements with the
same specified rating as the melted main
fuse. If a main fuse blows after it is
replaced, have the electrical system
checked by your nearest SUBARU dealer.
Installation of accessoriesAlways consult your SUBARU dealer
before installing fog lights or any other
electrical equipment in your vehicle. Such
accessories may cause the electronic
system to malfunction if they are incor-
rectly installed or if they are not suited for
the vehicle.
Page 404 of 459
Black plate (410,1)
北米Model "A1110BE-C" EDITED: 2010/ 12/ 17
11-50
Maintenance and service
& Front turn signal lightIt may be difficult to replace the bulbs.
Have the bulbs replaced by your SUBARU
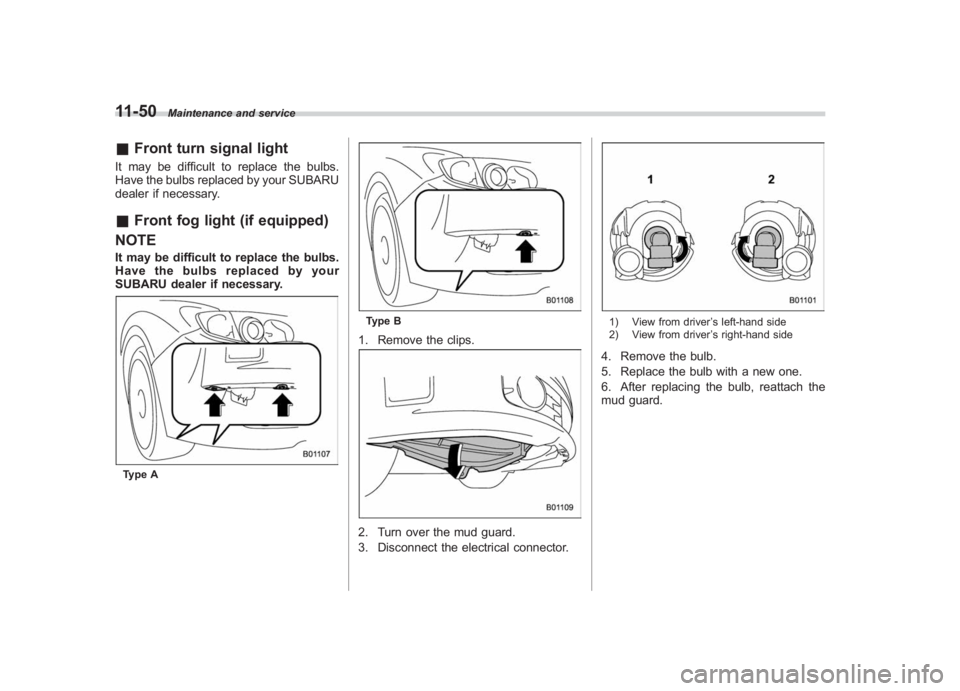
dealer if necessary.&Front fog light (if equipped)
NOTEIt may be difficult to replace the bulbs.
Have the bulbs replaced by your
SUBARU dealer if necessary.Type A
Type B1. Remove the clips.2. Turn over the mud guard.
3. Disconnect the electrical connector.
1) View from driver ’s left-hand side
2) View from driver ’s right-hand side4. Remove the bulb.
5. Replace the bulb with a new one.
6. After replacing the bulb, reattach the
mud guard.