2011 SUBARU IMPREZA WRX STI alarm
[x] Cancel search: alarmPage 109 of 459
Black plate (109,1)
北米Model "A1110BE-C" EDITED: 2010/ 12/ 17
& Disarming the systemBriefly press the “
”button (for less than
2 seconds) on the remote transmitter. The
driver ’s door will unlock, an electronic
chirp will sound twice, the turn signal
lights will flash twice. The flashing of the
security indicator light will then change
slowly (once approximately every 3 sec-
onds from twice approximately every 2
seconds), indicating that the alarm system
has been disarmed.
NOTEAfter disarming the alarm system,
briefly press the “
”button a second
time within 5 seconds to unlock all
other doors and the rear gate (5-door).
! Emergency disarming
If you cannot disarm the system using the
transmitter (i.e. the transmitter is lost,
broken or the transmitter battery is too
weak), you can disarm the system without
using the transmitter as follows.
. Turn the ignition switch from the
“ LOCK ”to the “ON ”position with a
registered key.
& Valet modeWhen you choose the valet mode, the
alarm system does not operate. In valet
mode, the remote transmitter is used only for locking and unlocking the doors and
rear gate (5-door) and panic activation.
To enter the valet mode, change the
setting of your vehicle’
s alarm system for
deactivation mode. Refer to “Activating
and deactivating the alarm system ”F 2-
16. The security indicator light will con-
tinue to flash once every 3 seconds
indicating that the system is in the valet
mode.
To exit valet mode, change the setting of
your vehicle ’s alarm system for activation
mode. Refer to “Activating and deactivat-
ing the alarm system ”F 2-16.
& Passive armingWhen passive arming mode has been
programmed by the dealer, arming of the
system is automatically accomplished
without using the remote transmitter. Note
that in this mode, DOORS MUST BE
MANUALLY LOCKED.
! To enter the passive mode
If you wish to program the passive arming
mode, have it done by your SUBARU
dealer. !
Arming the system
CAUTION
In passive mode, the system will
automatically activate the alarm but
WILL NOT automatically lock the
doors. In order to lock the doors
you must either lock them as in-
dicated in step 4 below or with the
key once they have been closed.
Failure to lock the doors manually
will result in a higher security risk.
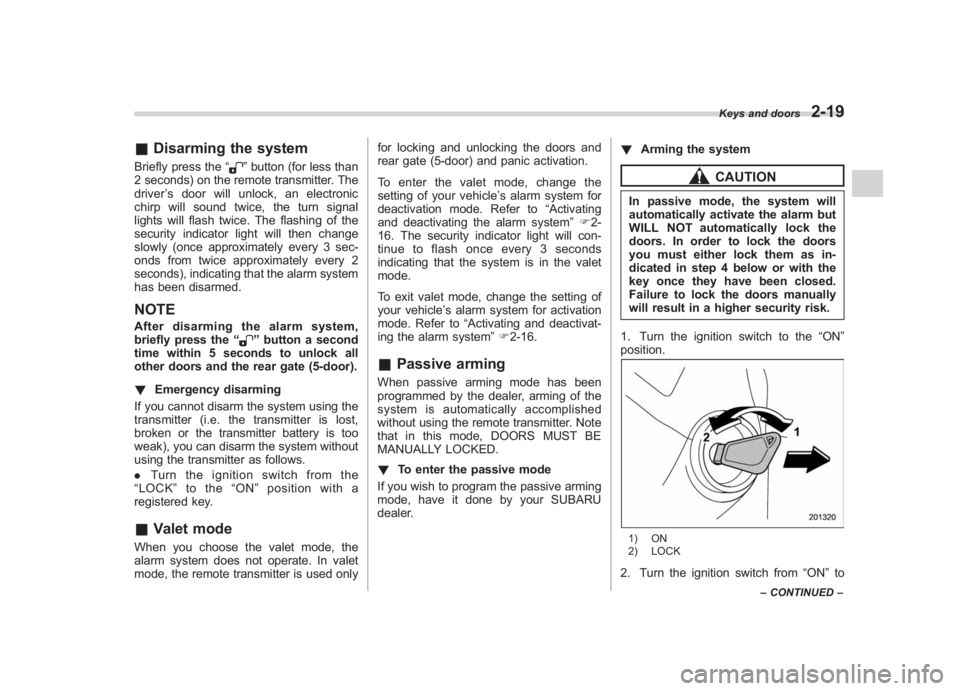
1. Turn the ignition switch to the “ON”
position.1) ON
2) LOCK2. Turn the ignition switch from “ON”to
Keys and doors
2-19
– CONTINUED –
2
Page 110 of 459
Black plate (110,1)
北米Model "A1110BE-C" EDITED: 2010/ 12/ 17
2-20
Keys and doors
“LOCK” position and remove the key from
the ignition switch.
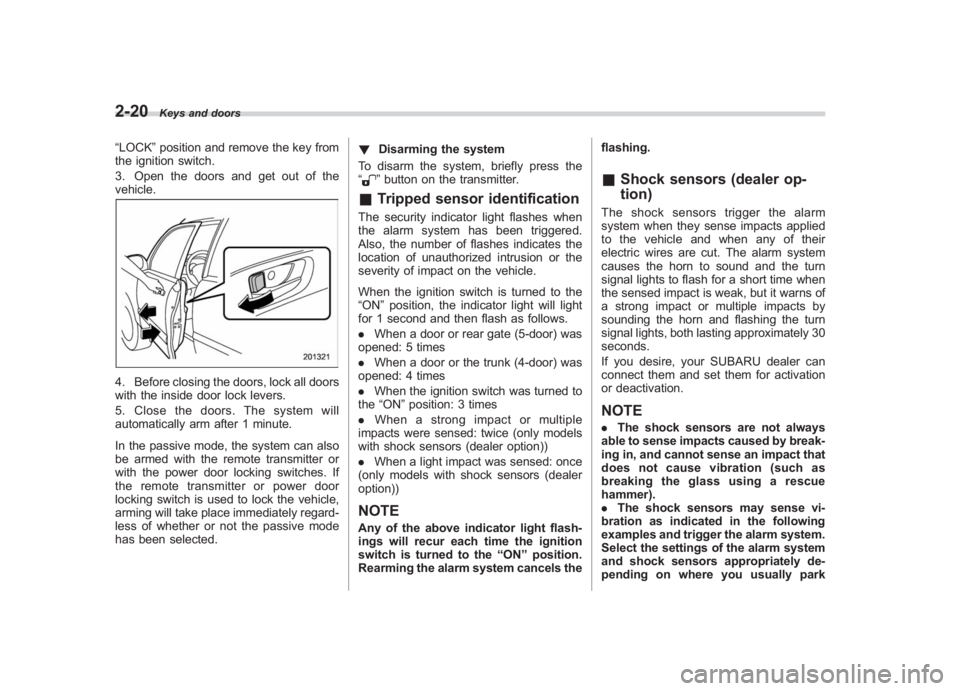
3. Open the doors and get out of the
vehicle.4. Before closing the doors, lock all doors
with the inside door lock levers.
5. Close the doors. The system will
automatically arm after 1 minute.
In the passive mode, the system can also
be armed with the remote transmitter or
with the power door locking switches. If
the remote transmitter or power door
locking switch is used to lock the vehicle,
arming will take place immediately regard-
less of whether or not the passive mode
has been selected. !
Disarming the system
To disarm the system, briefly press the
“
” button on the transmitter.
& Tripped sensor identificationThe security indicator light flashes when
the alarm system has been triggered.
Also, the number of flashes indicates the
location of unauthorized intrusion or the
severity of impact on the vehicle.
When the ignition switch is turned to the
“ON ”position, the indicator light will light
for 1 second and then flash as follows.
. When a door or rear gate (5-door) was
opened: 5 times
. When a door or the trunk (4-door) was
opened: 4 times
. When the ignition switch was turned to
the “ON ”position: 3 times
. When a strong impact or multiple
impacts were sensed: twice (only models
with shock sensors (dealer option))
. When a light impact was sensed: once
(only models with shock sensors (dealer
option))NOTEAny of the above indicator light flash-
ings will recur each time the ignition
switch is turned to the “ON ”position.
Rearming the alarm system cancels the flashing.
&
Shock sensors (dealer op-
tion)The shock sensors trigger the alarm
system when they sense impacts applied
to the vehicle and when any of their
electric wires are cut. The alarm system
causes the horn to sound and the turn
signal lights to flash for a short time when
the sensed impact is weak, but it warns of
a strong impact or multiple impacts by
sounding the horn and flashing the turn
signal lights, both lasting approximately 30
seconds.
If you desire, your SUBARU dealer can
connect them and set them for activation
or deactivation.NOTE. The shock sensors are not always
able to sense impacts caused by break-
ing in, and cannot sense an impact that
does not cause vibration (such as
breaking the glass using a rescue
hammer).
. The shock sensors may sense vi-
bration as indicated in the following
examples and trigger the alarm system.
Select the settings of the alarm system
and shock sensors appropriately de-
pending on where you usually park
Page 121 of 459
Black plate (5,1)
北米Model "A1110BE-C" EDITED: 2010/ 11/ 17
Ignition switch ..................................................... 3-3
LOCK.................................................................. 3-3
Acc..................................................................... 3-4
ON...................................................................... 3-4
START ................................................................ 3-4
Key reminder chime ............................................ 3-5
Ignition switch light ............................................. 3-5
Hazard warning flasher ....................................... 3-5
Meters and gauges. ............................................. 3-6
Combination meter illumination ........................... 3-6
Canceling the function for meter/gauge needle movement upon turning on the ignition
switch ............................................................... 3-6
Meter/Gauge needle illumination setting (turbo models except STI) ............................................ 3-7
Speedometer ....................................................... 3-8
Odometer/Trip meter ............................................ 3-8
Tachometer ......................................................... 3-9
Fuel gauge ......................................................... 3-10
Temperature gauge (turbo models) ..................... 3-11
REV indicator light and buzzer (STI). ................ 3-11
Setting the alarm-level engine speed ................... 3-12
Deactivating the REV alarm system ..................... 3-13
Warning and indicator lights............................. 3-13
Seatbelt warning light and chime ........................ 3-14
SRS airbag system warning light ........................ 3-15
Front passenger ’s frontal airbag ON and OFF
indicators ......................................................... 3-16
CHECK ENGINE warning light/Malfunction indicator lamp .................................................. 3-16 Coolant temperature low indicator light (non-
turbo models)/Coolant temperature high
warning light (non-turbo models) ...................... 3-17
Charge warning light .......................................... 3-18
Oil pressure warning light .................................. 3-18
AT OIL TEMP warning light (AT models) .............. 3-18
Rear differential oil temperature warning light (STI) ................................................................ 3-19
Low tire pressure warning light (U.S.-spec. models) ........................................................... 3-19
ABS warning light .............................................. 3-21
Brake system warning light ................................ 3-21
Low fuel warning light ....................................... 3-22
Hill start assist warning light (MT models –if
equipped)/Hill start assist OFF indicator light
(STI) ................................................................ 3-22
Door open warning light .................................... 3-23
All-Wheel Drive warning light (AT models) ..... ..... 3-23
Vehicle Dynamics Control operation indicator light ................................................................ 3-23
Vehicle Dynamics Control warning light/Vehicle Dynamics Control OFF indicator light/Traction
Control OFF indicator light (STI) ....................... 3-23
Security indicator light ....................................... 3-25
SPORT mode indicator light (AT models) ............ 3-25
SI-DRIVE indicator light (STI) .............................. 3-26
Shift-up indicator light (STI) ............................... 3-26
Select lever/gear position indicator (AT models) ..................................................... 3-26
Turn signal indicator lights ................................. 3-26
High beam indicator light ................................... 3-26
Cruise control indicator light .............................. 3-26
Instruments and controls
3
Page 131 of 459
Black plate (133,1)
北米Model "A1110BE-C" EDITED: 2010/ 12/ 17
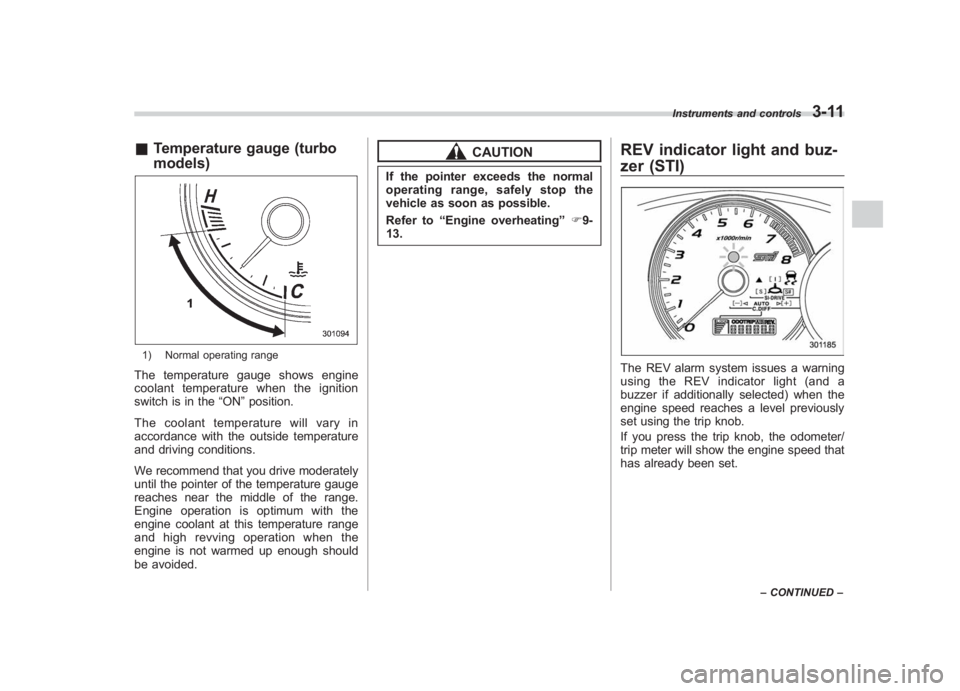
& Temperature gauge (turbo
models)1) Normal operating rangeThe temperature gauge shows engine
coolant temperature when the ignition
switch is in the “ON”position.
The coolant temperature will vary in
accordance with the outside temperature
and driving conditions.
We recommend that you drive moderately
until the pointer of the temperature gauge
reaches near the middle of the range.
Engine operation is optimum with the
engine coolant at this temperature range
and high revving operation when the
engine is not warmed up enough should
be avoided.
CAUTION
If the pointer exceeds the normal
operating range, safely stop the
vehicle as soon as possible.
Refer to “Engine overheating ”F9-
13.
REV indicator light and buz-
zer (STI)The REV alarm system issues a warning
using the REV indicator light (and a
buzzer if additionally selected) when the
engine speed reaches a level previously
set using the trip knob.
If you press the trip knob, the odometer/
trip meter will show the engine speed that
has already been set.
Instruments and controls
3-11
– CONTINUED –
3
Page 132 of 459
Black plate (134,1)
北米Model "A1110BE-C" EDITED: 2010/ 12/ 17
3-12
Instruments and controls
NOTEEven if the REV alarm system is not set,
the REV indicator light will illuminate
whenever the engine speed enters the
tachometer ’s red zone.& Setting the alarm-level en-
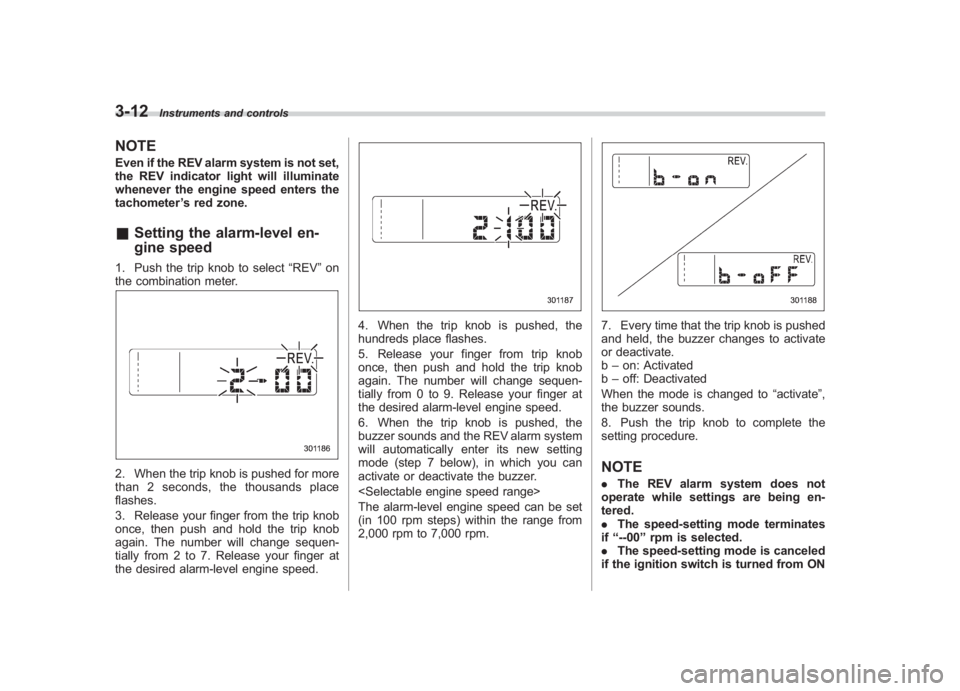
gine speed1. Push the trip knob to select “REV ”on
the combination meter.2. When the trip knob is pushed for more
than 2 seconds, the thousands place
flashes.
3. Release your finger from the trip knob
once, then push and hold the trip knob
again. The number will change sequen-
tially from 2 to 7. Release your finger at
the desired alarm-level engine speed.
4. When the trip knob is pushed, the
hundreds place flashes.
5. Release your finger from trip knob
once, then push and hold the trip knob
again. The number will change sequen-
tially from 0 to 9. Release your finger at
the desired alarm-level engine speed.
6. When the trip knob is pushed, the
buzzer sounds and the REV alarm system
will automatically enter its new setting
mode (step 7 below), in which you can
activate or deactivate the buzzer.
The alarm-level engine speed can be set
(in 100 rpm steps) within the range from
2,000 rpm to 7,000 rpm.
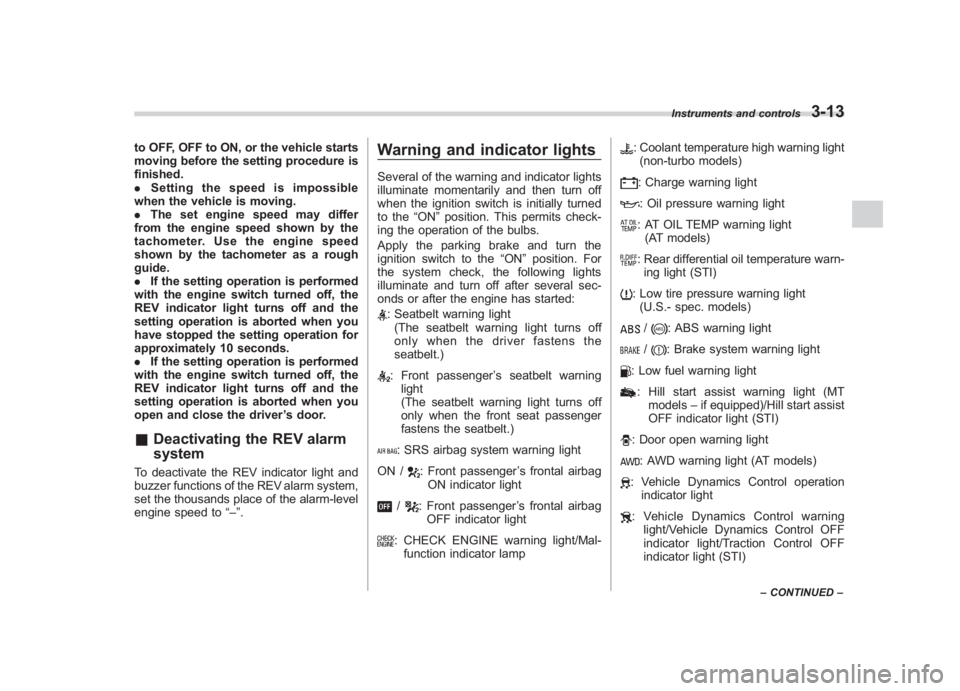
7. Every time that the trip knob is pushed
and held, the buzzer changes to activate
or deactivate.
b –on: Activated
b –off: Deactivated
When the mode is changed to “activate”,
the buzzer sounds.
8. Push the trip knob to complete the
setting procedure.NOTE. The REV alarm system does not
operate while settings are being en-
tered.
. The speed-setting mode terminates
if “--00 ”rpm is selected.
. The speed-setting mode is canceled
if the ignition switch is turned from ON
Page 133 of 459
Black plate (135,1)
北米Model "A1110BE-C" EDITED: 2010/ 12/ 17
to OFF, OFF to ON, or the vehicle starts
moving before the setting procedure is
finished.
. Setting the speed is impossible
when the vehicle is moving.
. The set engine speed may differ
from the engine speed shown by the
tachometer. Use the engine speed
shown by the tachometer as a rough
guide.
. If the setting operation is performed
with the engine switch turned off, the
REV indicator light turns off and the
setting operation is aborted when you
have stopped the setting operation for
approximately 10 seconds.
. If the setting operation is performed
with the engine switch turned off, the
REV indicator light turns off and the
setting operation is aborted when you
open and close the driver ’s door.& Deactivating the REV alarm
systemTo deactivate the REV indicator light and
buzzer functions of the REV alarm system,
set the thousands place of the alarm-level
engine speed to “–”.
Warning and indicator lightsSeveral of the warning and indicator lights
illuminate momentarily and then turn off
when the ignition switch is initially turned
to the “ON”position. This permits check-
ing the operation of the bulbs.
Apply the parking brake and turn the
ignition switch to the “ON”position. For
the system check, the following lights
illuminate and turn off after several sec-
onds or after the engine has started:: Seatbelt warning light (The seatbelt warning light turns off
only when the driver fastens the
seatbelt.): Front passenger ’s seatbelt warning
light
(The seatbelt warning light turns off
only when the front seat passenger
fastens the seatbelt.): SRS airbag system warning light
ON /
: Front passenger ’s frontal airbag
ON indicator light
/
: Front passenger ’s frontal airbag
OFF indicator light
: CHECK ENGINE warning light/Mal- function indicator lamp
: Coolant temperature high warning light(non-turbo models): Charge warning light: Oil pressure warning light: AT OIL TEMP warning light (AT models): Rear differential oil temperature warn-ing light (STI): Low tire pressure warning light (U.S.- spec. models)/
: ABS warning light
/
: Brake system warning light
: Low fuel warning light: Hill start assist warning light (MT models –if equipped)/Hill start assist
OFF indicator light (STI): Door open warning light: AWD warning light (AT models): Vehicle Dynamics Control operation indicator light: Vehicle Dynamics Control warning light/Vehicle Dynamics Control OFF
indicator light/Traction Control OFF
indicator light (STI)
Instruments and controls
3-13
–CONTINUED –
3
Page 145 of 459
Black plate (147,1)
北米Model "A1110BE-C" EDITED: 2010/ 12/ 17
! Traction Control OFF indicator light
(green –STI)
The light illuminates when the Vehicle
Dynamics Control mode switch is pressed
briefly. For details, refer to “Traction mode”
F 7-36.&
Security indicator light
Turbo models
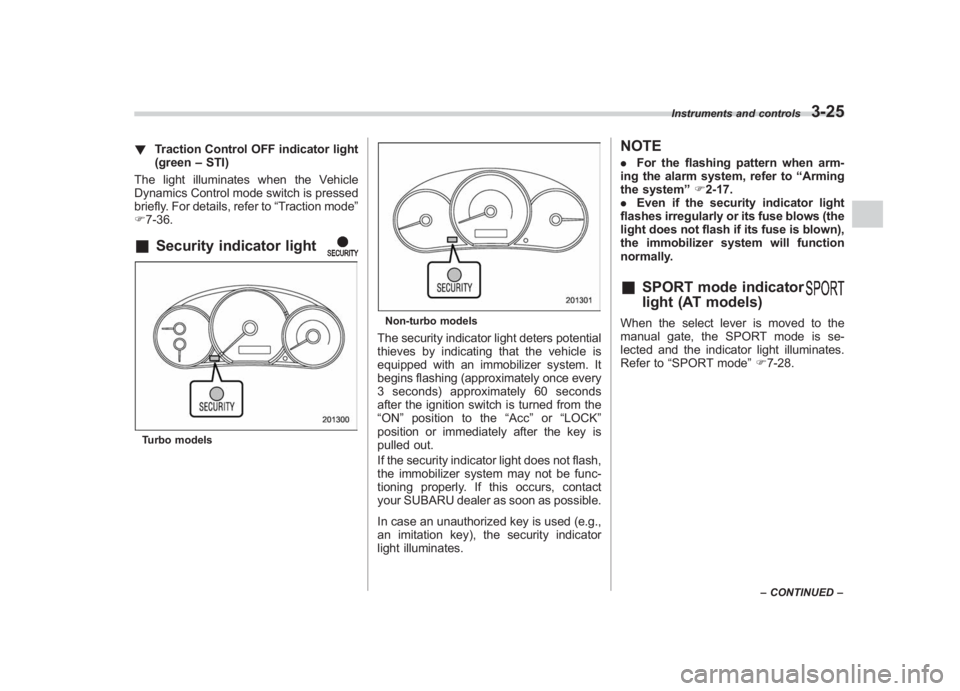
Non-turbo modelsThe security indicator light deters potential
thieves by indicating that the vehicle is
equipped with an immobilizer system. It
begins flashing (approximately once every
3 seconds) approximately 60 seconds
after the ignition switch is turned from the
“ON ”position to the “Acc ”or “LOCK ”
position or immediately after the key is
pulled out.
If the security indicator light does not flash,
the immobilizer system may not be func-
tioning properly. If this occurs, contact
your SUBARU dealer as soon as possible.
In case an unauthorized key is used (e.g.,
an imitation key), the security indicator
light illuminates.
NOTE. For the flashing pattern when arm-
ing the alarm system, refer to “Arming
the system ”F 2-17.
. Even if the security indicator light
flashes irregularly or its fuse blows (the
light does not flash if its fuse is blown),
the immobilizer system will function
normally.&
SPORT mode indicator
light (AT models)
When the select lever is moved to the
manual gate, the SPORT mode is se-
lected and the indicator light illuminates.
Refer to “SPORT mode ”F 7-28.
Instruments and controls
3-25
–CONTINUED –
3
Page 275 of 459
Black plate (279,1)
北米Model "A1110BE-C" EDITED: 2010/ 12/ 17
Remote engine start system
(dealer option)
WARNING
. Do not start the engine using the
remote start system in an en-
closed environment (e.g., in a
closed garage). Prolonged opera-
tion of a motor vehicle in an
enclosed environment can cause
a harmful build-up of Carbon
Monoxide. Carbon Monoxide is
harmful to your health. Exposure
to high levels of Carbon Monox-
ide can cause headaches, dizzi-
ness or in extreme cases uncon-
sciousness and/or death.
. Before performing any servicing
of the vehicle, temporarily place
the remote engine start system in
service mode to prevent the
system from unexpectedly start-
ing the engine.
& Starting your vehicleThe remote engine start system is acti-
vated by pressing the “
”button twice
within 3 seconds on your remote engine
start transmitter. The system will check
certain pre-conditions before starting, and
if all safety parameters are correct, the
engine will start within 5 seconds. While
the vehicle is operating via remote engine
start, the vehicle’ s power window features
will be disabled. Also, the system has a
timer and will shut down after 15 minutes if
you do not operate the vehicle. Press and
hold the “
”button for 2 seconds again to
turn the vehicle off. If the vehicle’ s starter
cranks but does not start or starts and
stalls, the remote engine start system will
power off then attempt to start the vehicle an additional four times. If the vehicle fails
to start after the additional attempts, the
remote engine start system will abort and
return to a non-activated state.
&
Remote start safety featuresFor safety and security reasons, the
system will fail to start and beep the horn
twice or shut down the engine during
remote start operation if any of the
following conditions occur.
. The brake pedal is depressed before
the vehicle ignition switch is turned “on”.
. The key was already in the ignition
switch.
. The engine hood is opened.
. The vehicle’ s engine idle speed has
reached a level over 3,000 rpm.
. The alarm is triggered by opening a
door or the rear gate.NOTE. The security indicator light on the
combination meter will stop flashing
while under remote engine start opera-
tion, but the vehicle is still protected.
. If the vehicle is entered during
remote engine star t operation, the
system will not record entry in the
alarm history.
Starting and operating
7-11
– CONTINUED –
7